Overview
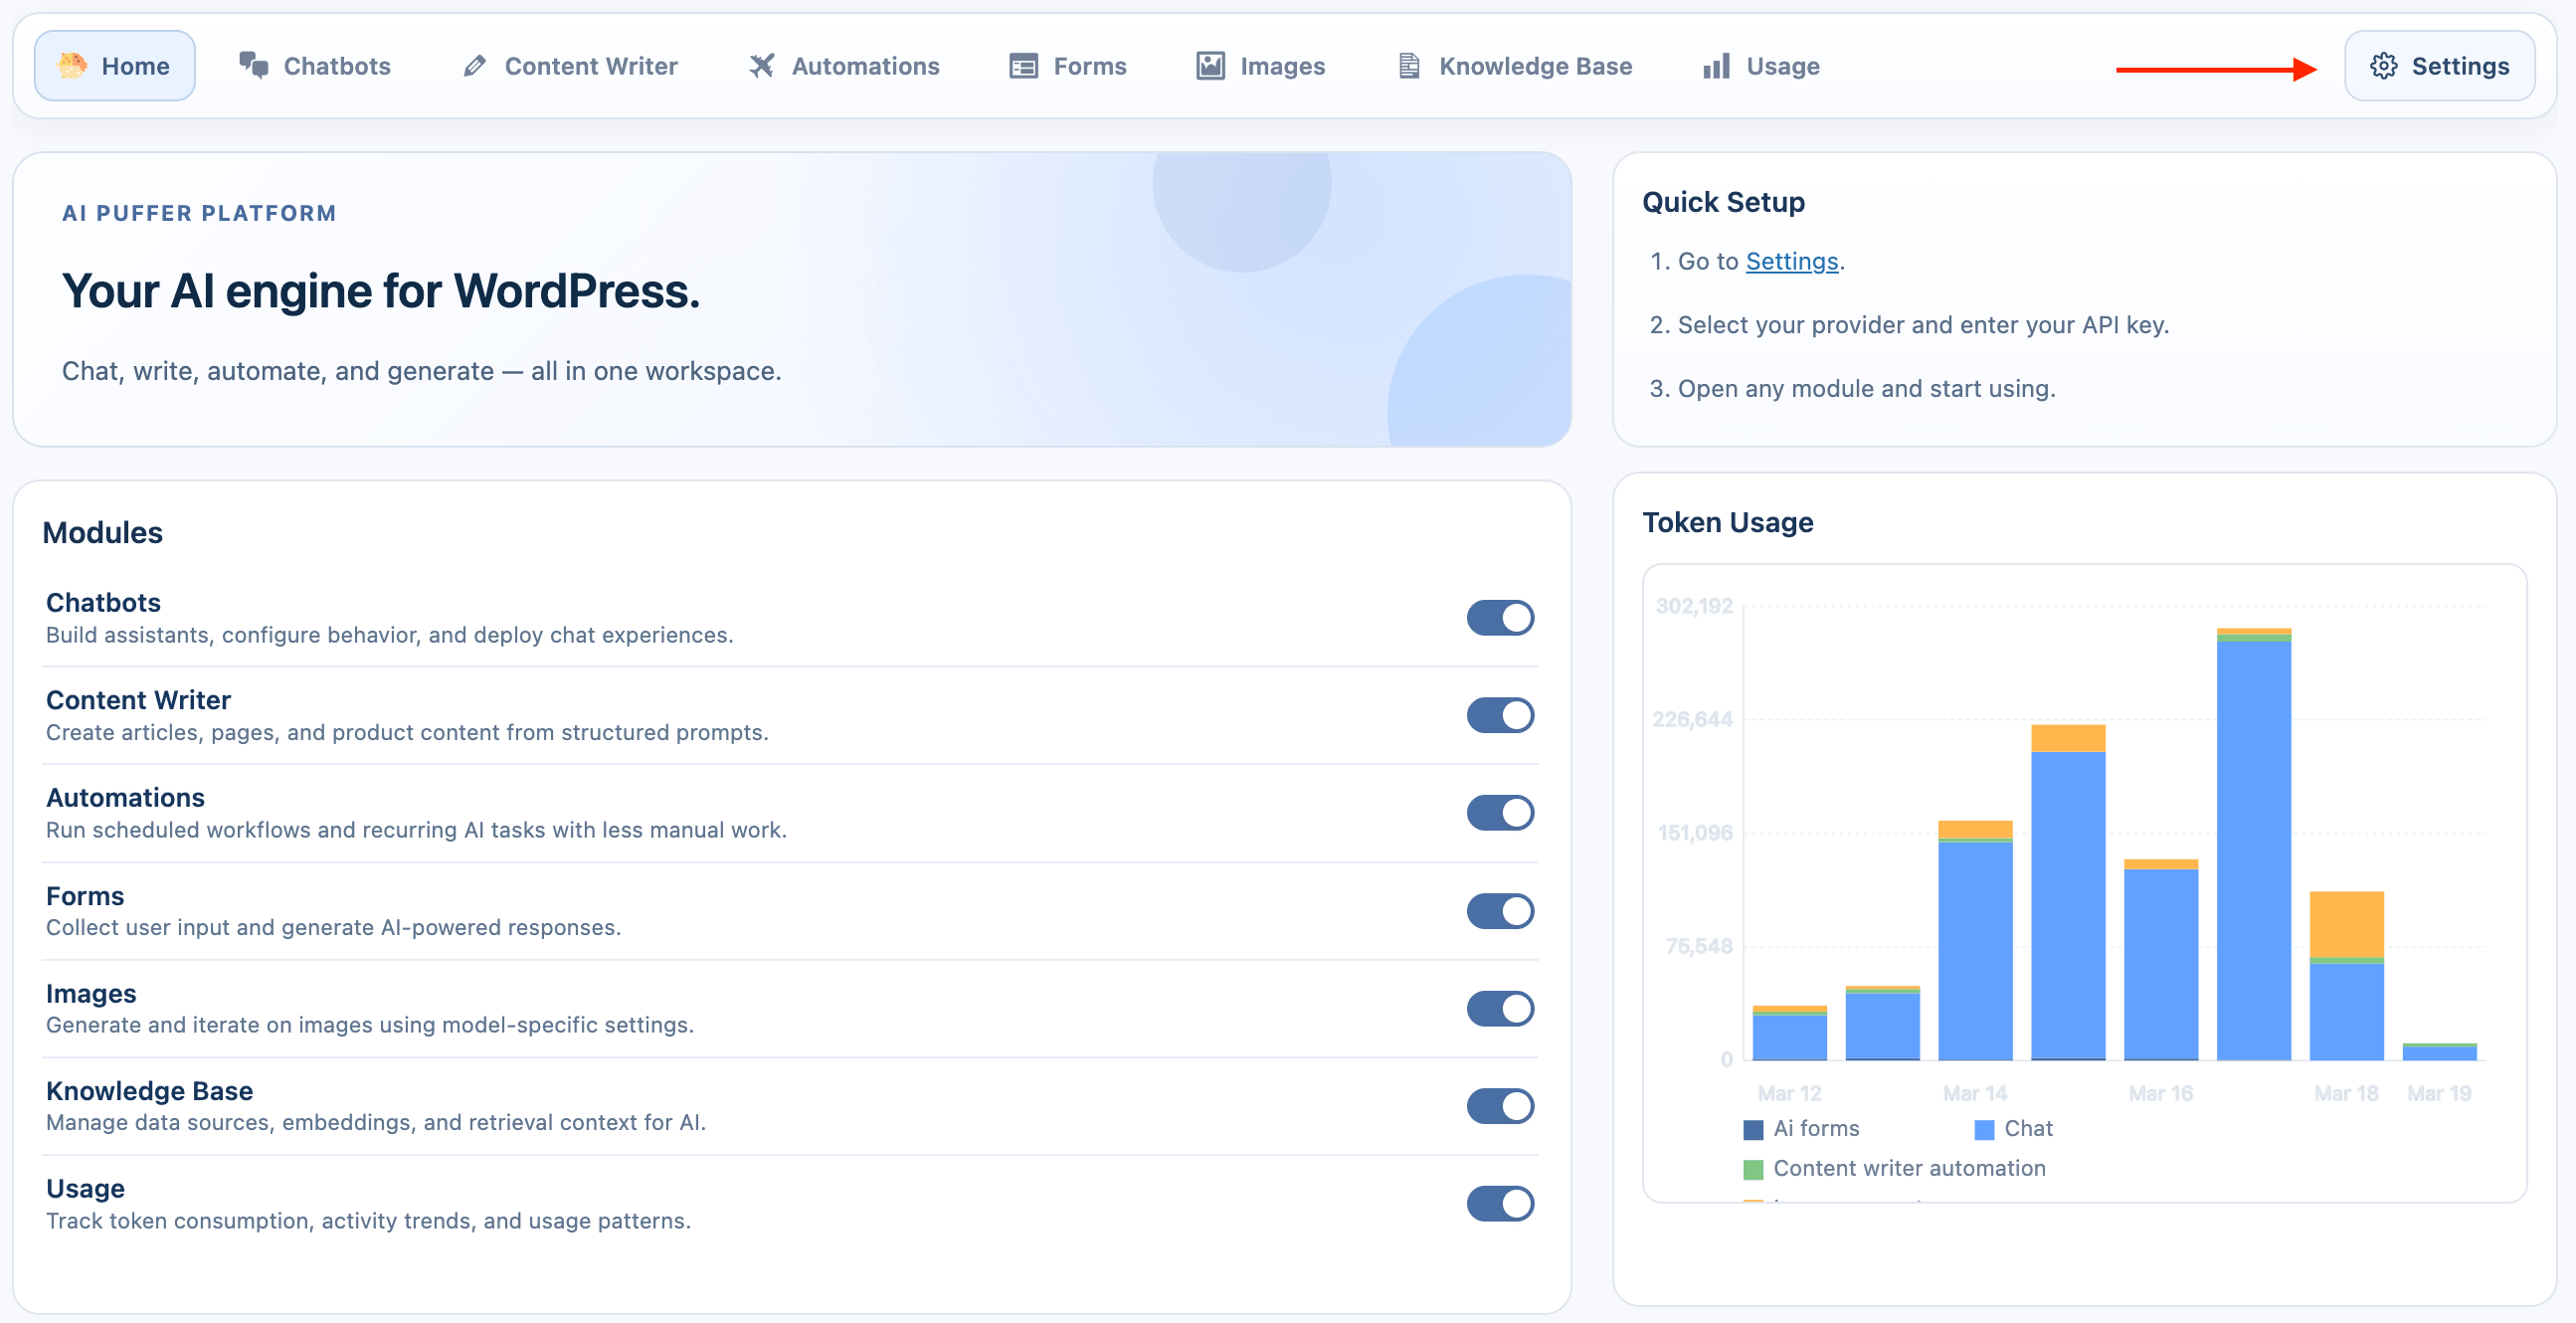
AI Puffer > Settings is the central area for managing your connections to different AI services and setting the default behavior for all of AI Puffer's modules.
To use the plugin, you must have a valid API key from your preferred AI provider (e.g., OpenAI, Claude, Google, Azure). Purchasing the plugin does not include any API credits.
You must configure at least one provider here for the plugin to work.
OpenAI
OpenAI provides popular gpt and image generation models.
Configuration Steps
- Click the Settings button in the top navigation bar.
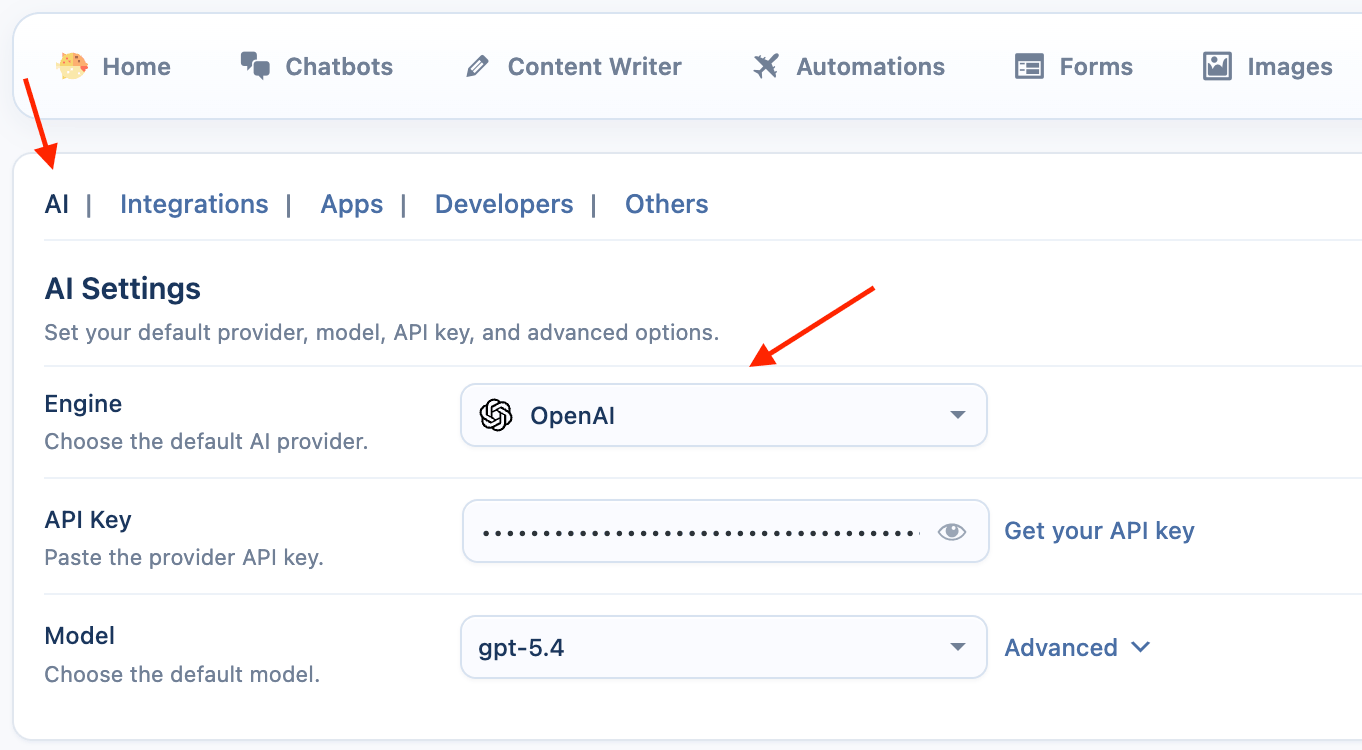
- Select the Provider: From the Engine dropdown menu, choose OpenAI. The provider selected here will also be the default for all modules.
- Enter API Key: In the API Key field, enter your secret key from OpenAI. You can click the Get Key button to go directly to the OpenAI API Keys page.
OpenAI-Specific Settings
These settings are found in the Advanced tab when OpenAI is the selected provider.
- Sync Models: Click Sync button. AI Puffer will connect to OpenAI and download a list of all AI models available to your account, including any custom fine-tuned models you have.
- Select a Default Model: Once the sync is complete, the Model dropdown will be populated. Select a default model for the plugin to use (e.g.,
gpt-4o-mini). - Base URL: This setting allows you to use a proxy service instead of the default
https://api.openai.comendpoint. - Store Conversation: When enabled, OpenAI will store conversations for 30 days. You can view them OpenAI Logs page. This must be enabled if you wish to use the stateful conversation feature in the Chatbot module.
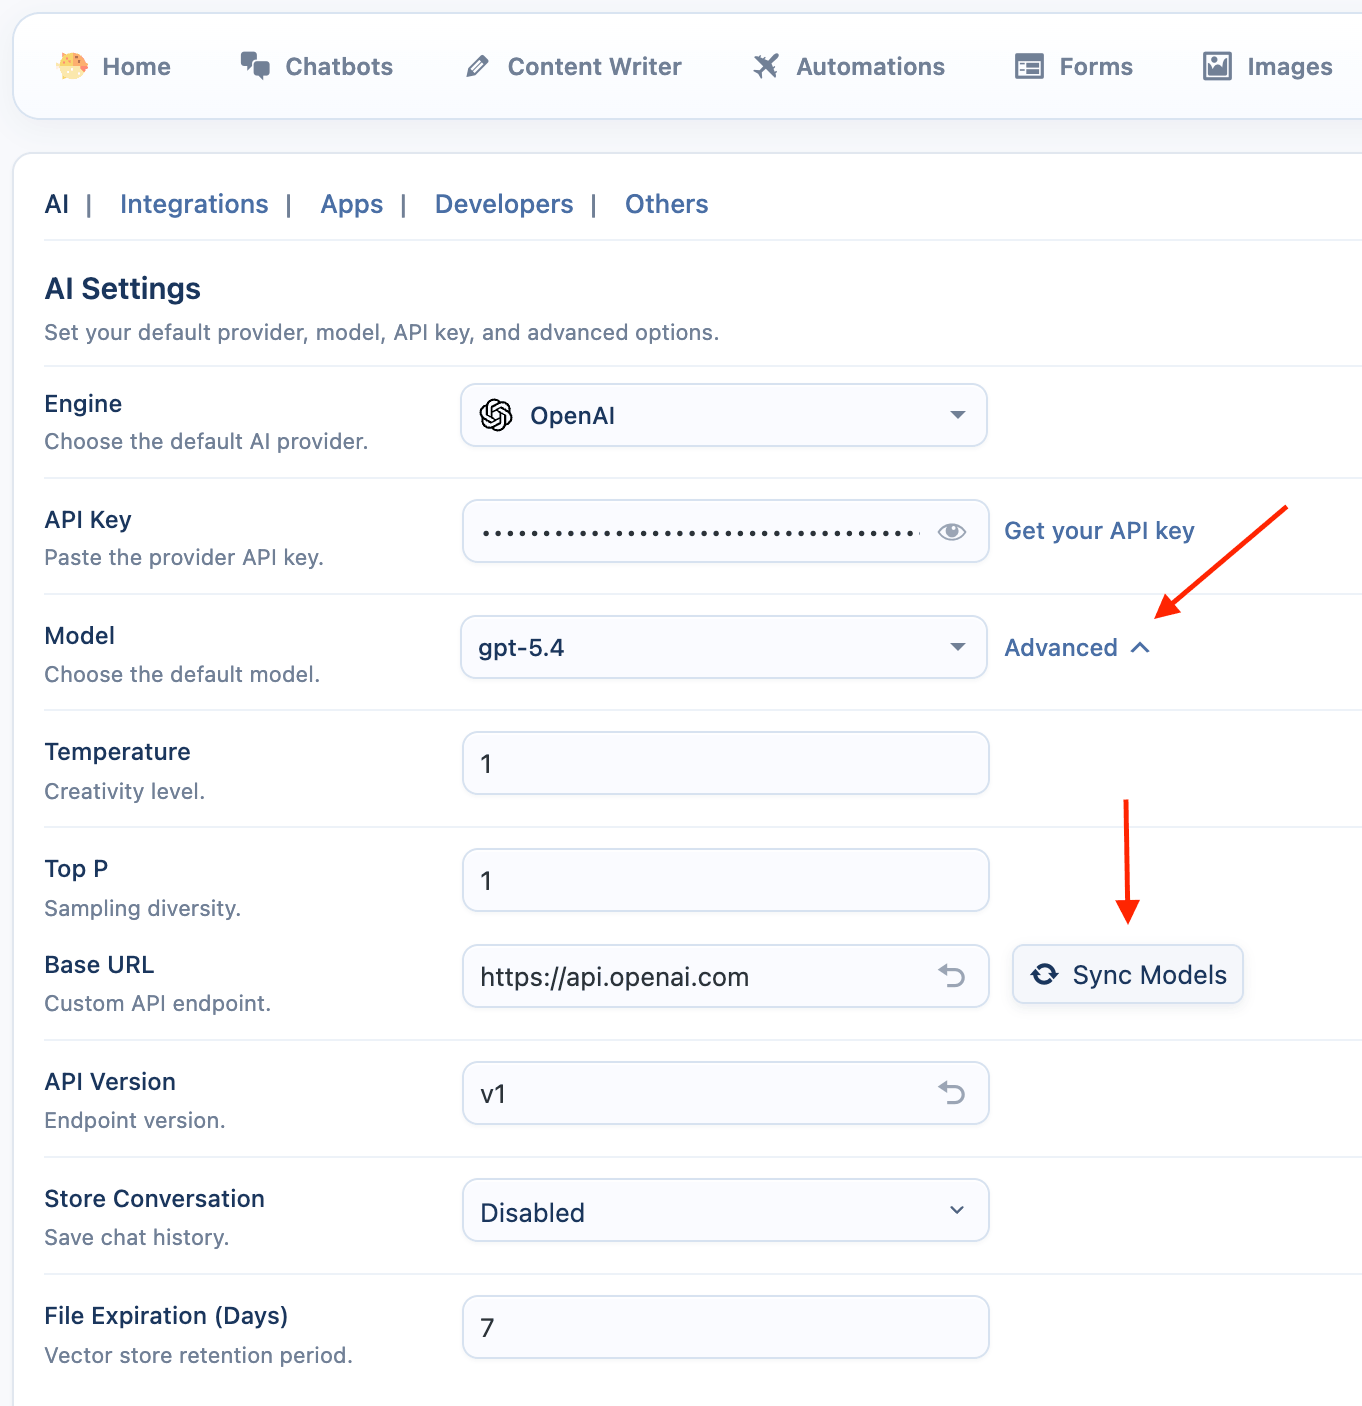
- Vector Store File Expiration: Sets the default number of days (1-365) that files uploaded to an OpenAI Vector Store will be kept before being automatically deleted. The default is 7 days. This setting only applies to files uploaded by users via the frontend Chatbot and AI Forms modules. It's a good idea to keep this value low to ensure temporary uploads are cleaned up regularly, reducing storage load and privacy risks.
Claude
Claude is Anthropic's family of AI models for chat, reasoning, and coding tasks.
Configuration Steps
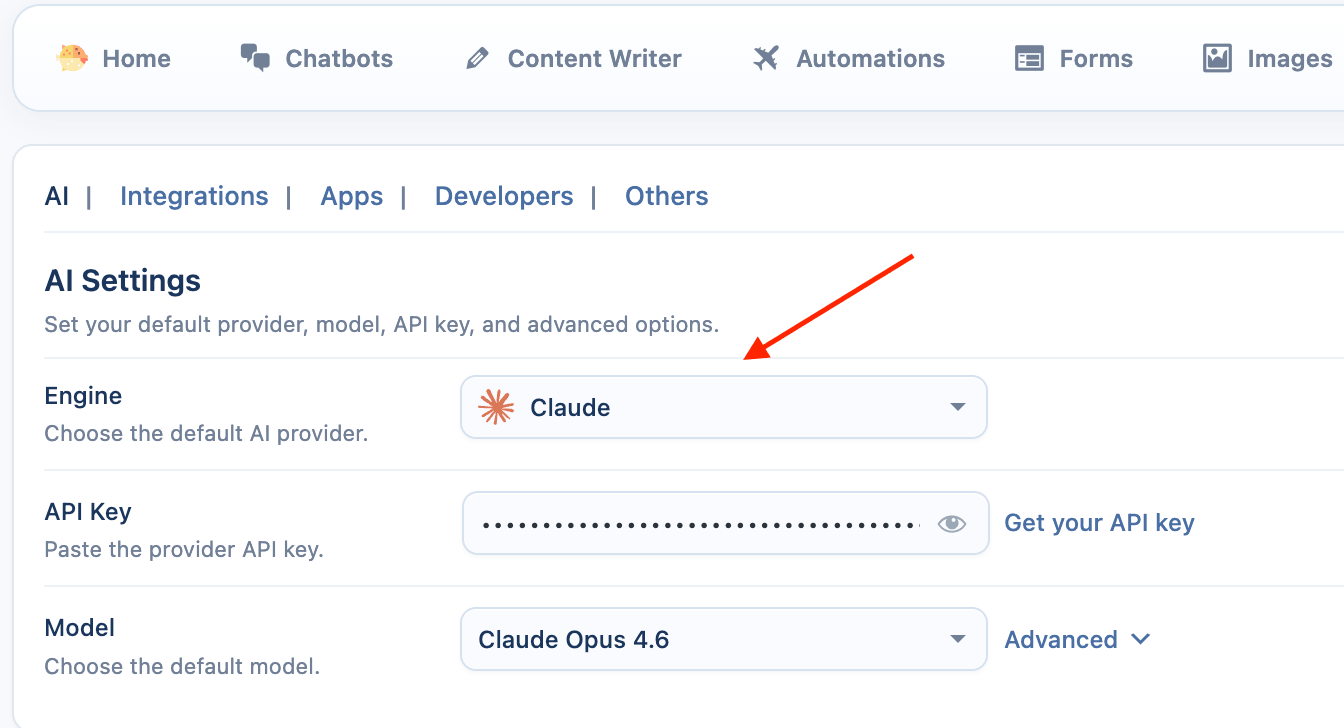
- Select the Provider: From the Engine dropdown menu, choose Claude.
- Enter API Key: Enter your API key from the Anthropic Console.
Claude-Specific Settings
These settings are found in the Advanced tab when Claude is the selected provider.
- Sync Models: Click Sync button to fetch the available Claude models from your Anthropic account.
- Select a Default Model: Choose a default model, such as
Claude Opus 4.6.
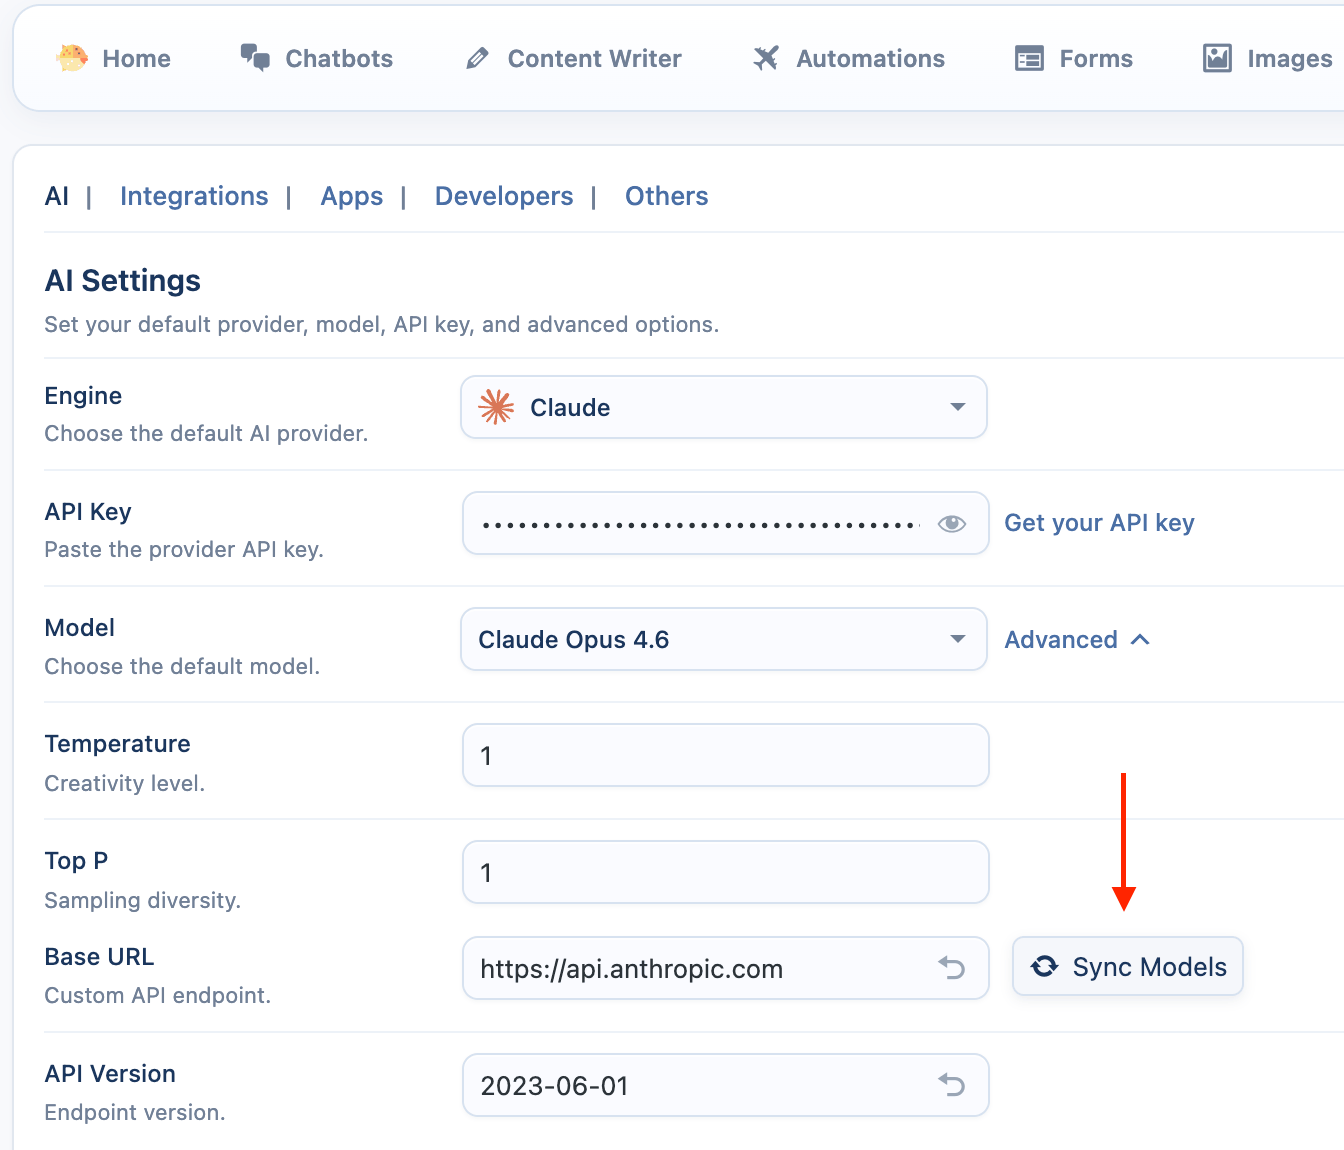
- Base URL: This setting allows you to use a proxy service instead of the default
https://api.anthropic.com/endpoint.
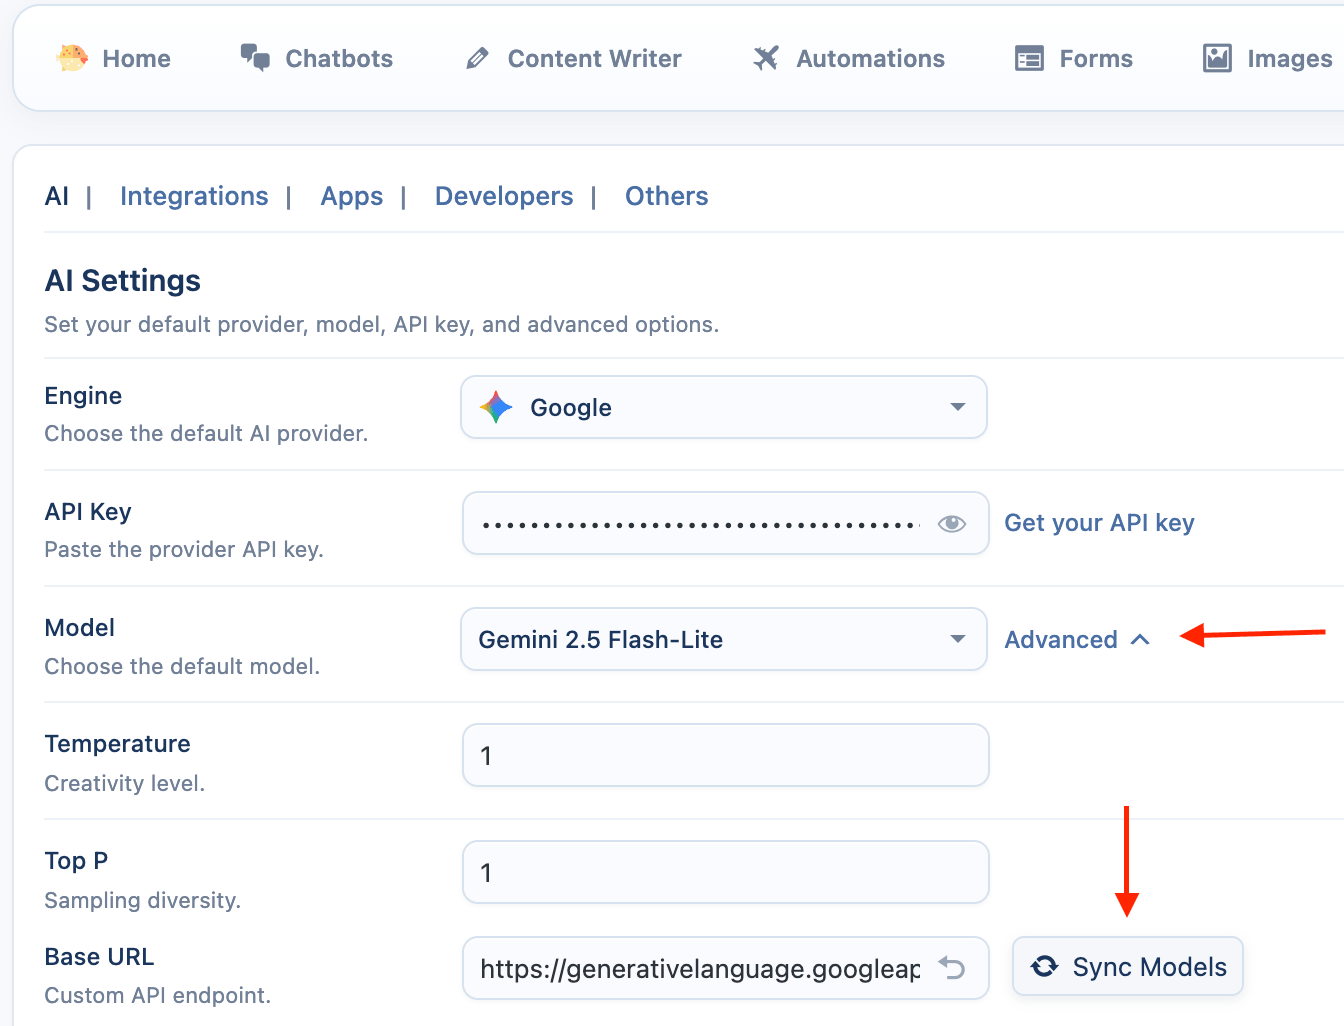
Google
Google provides the Gemini family of models.
Configuration Steps
- Select the Provider: From the Engine dropdown menu, choose Google.
- Enter API Key: Enter your API key from the Google AI Studio.

Google-Specific Settings
- Sync Models: Click Advanced and then Sync button to fetch available Gemini models.
- Select a Default Model: Choose a default model, such as
gemini-1.5-pro-latest. - Base URL: This setting allows you to use a proxy service instead of the default
https://generativelanguage.googleapis.comendpoint. - Safety Settings: Found in the Parameters accordion, this allows you to configure Google's content safety filters. You can set a blocking threshold (from Block None to Block Most) for categories like Harassment, Hate Speech, Sexually Explicit, and Dangerous Content.
Azure
Azure allows you to use ai models hosted on the Microsoft Azure platform.
Configuration Steps
- Select the Provider: From the Engine dropdown menu, choose Azure.
- Enter API Key and Endpoint: You must provide both your API Key and your unique Endpoint URL from your Azure AI Studio resource.
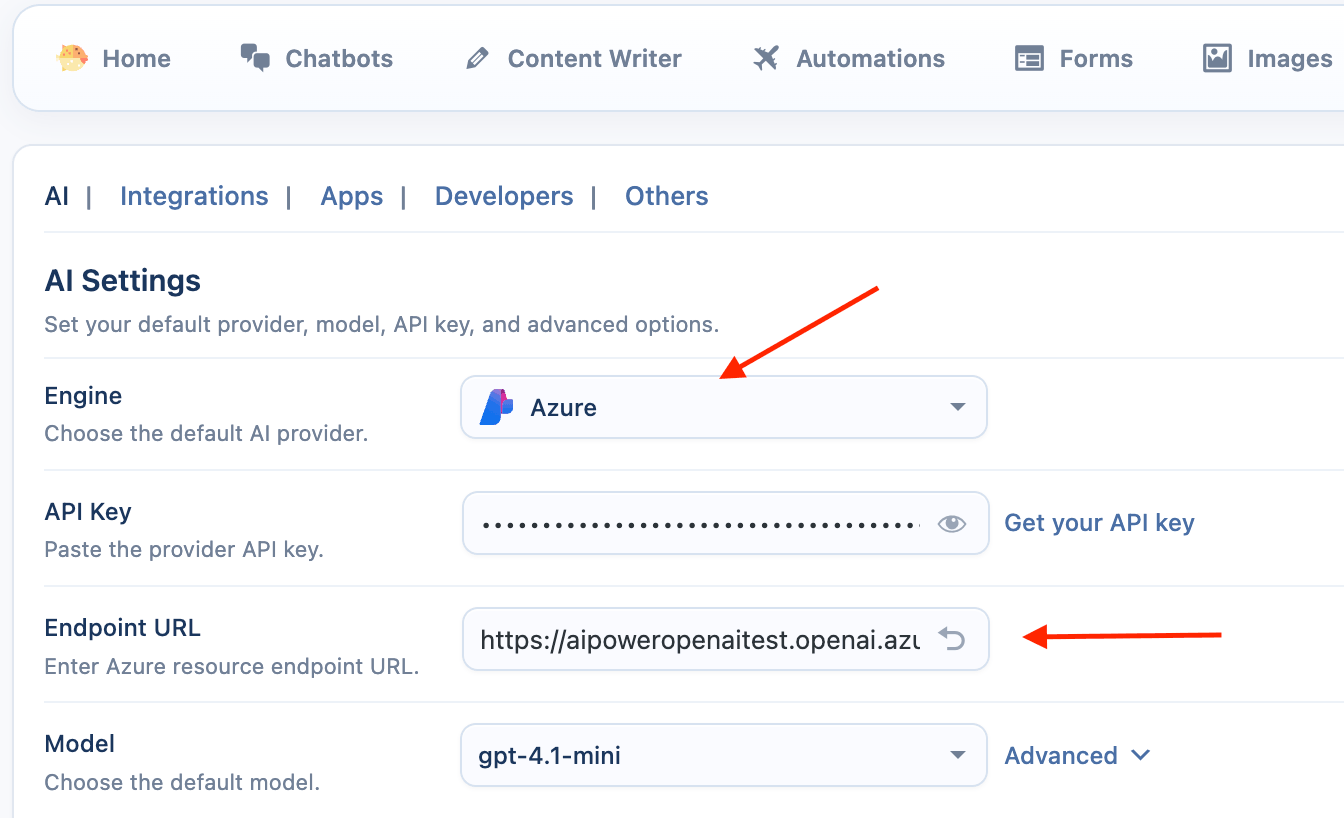
Azure-Specific Settings
- Sync Deployments: For Azure, the "Sync" button fetches your Deployments, not the base models. You must first deploy a model (e.g., gpt-4o) in Azure to have it appear in the list.
- Select a Default Deployment: Choose one of your synced deployments as the default.
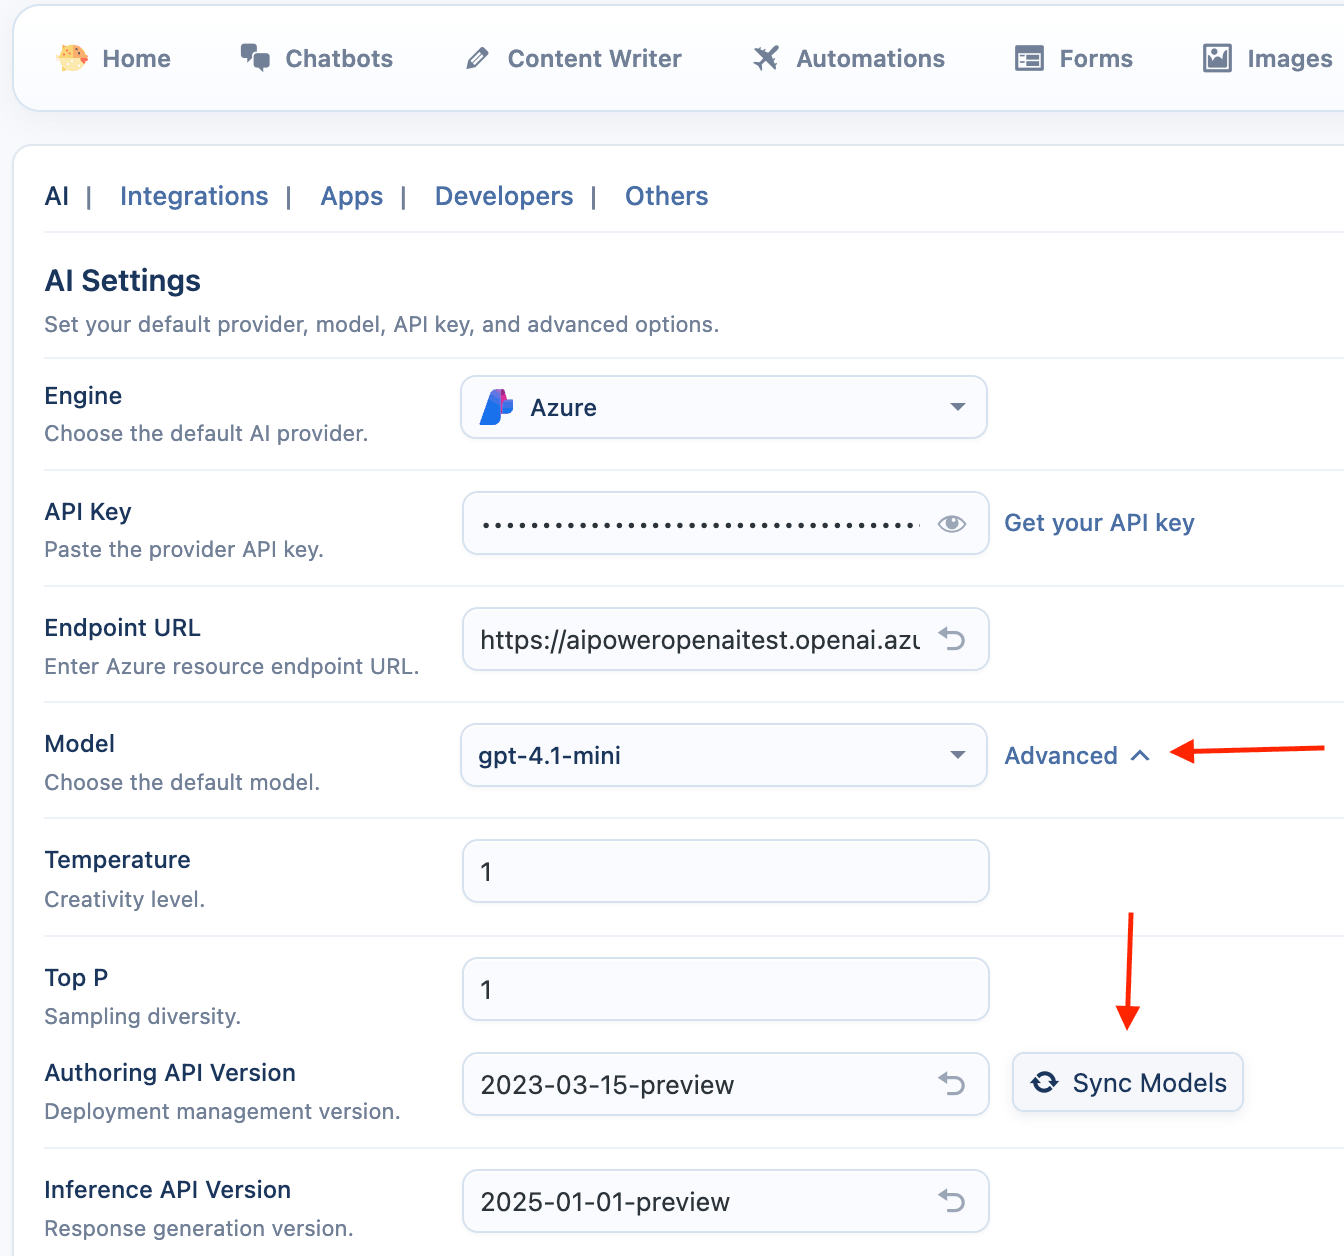
- Endpoint URL: This is the endpoint URL for your specific Azure AI resource. It is a required field.
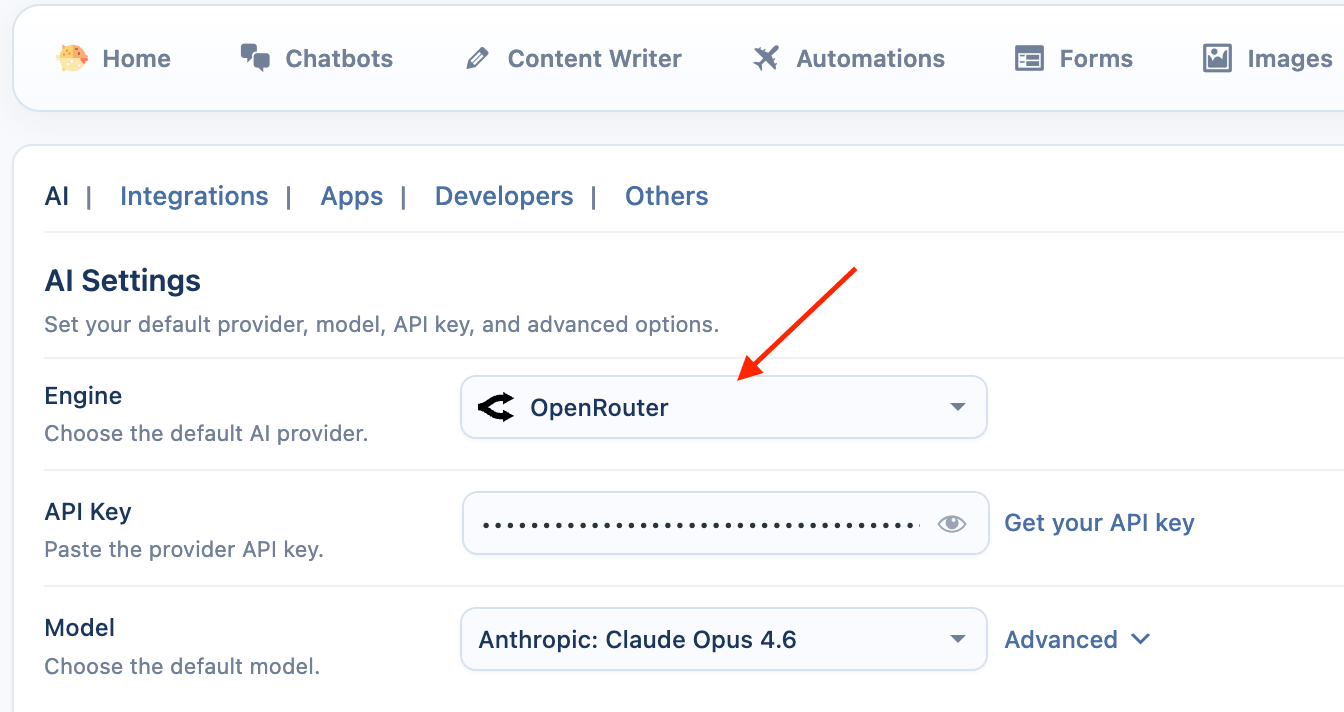
OpenRouter
OpenRouter is a service that gives you access to a wide variety of models from different companies (like Anthropic's Claude, Mistral, and Meta's Llama) using a single API key.
Configuration Steps
- Select the Provider: From the Engine dropdown menu, choose OpenRouter.
- Enter API Key: Enter your API key from OpenRouter.
OpenRouter-Specific Settings
- Sync Models: Click Sync button. This will fetch a large list of available models.
- Select a Default Model: Choose a default model from the list, such as
anthropic/claude-3.7-sonnet.
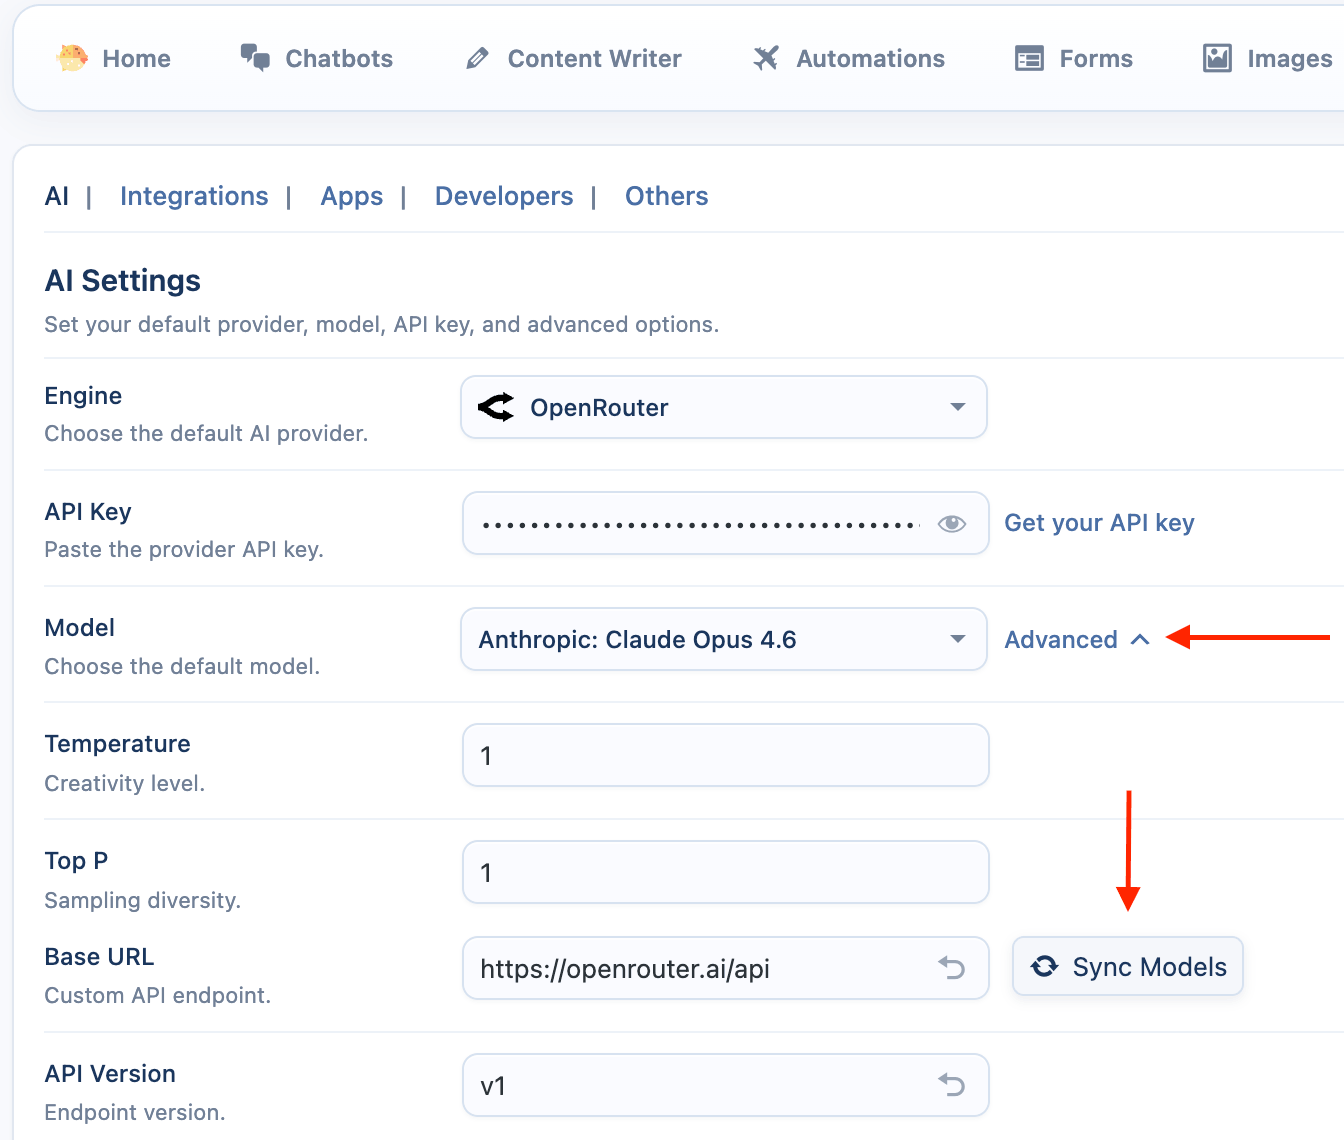
- Base URL: This setting allows you to use a proxy service instead of the default
https://openrouter.ai/apiendpoint.
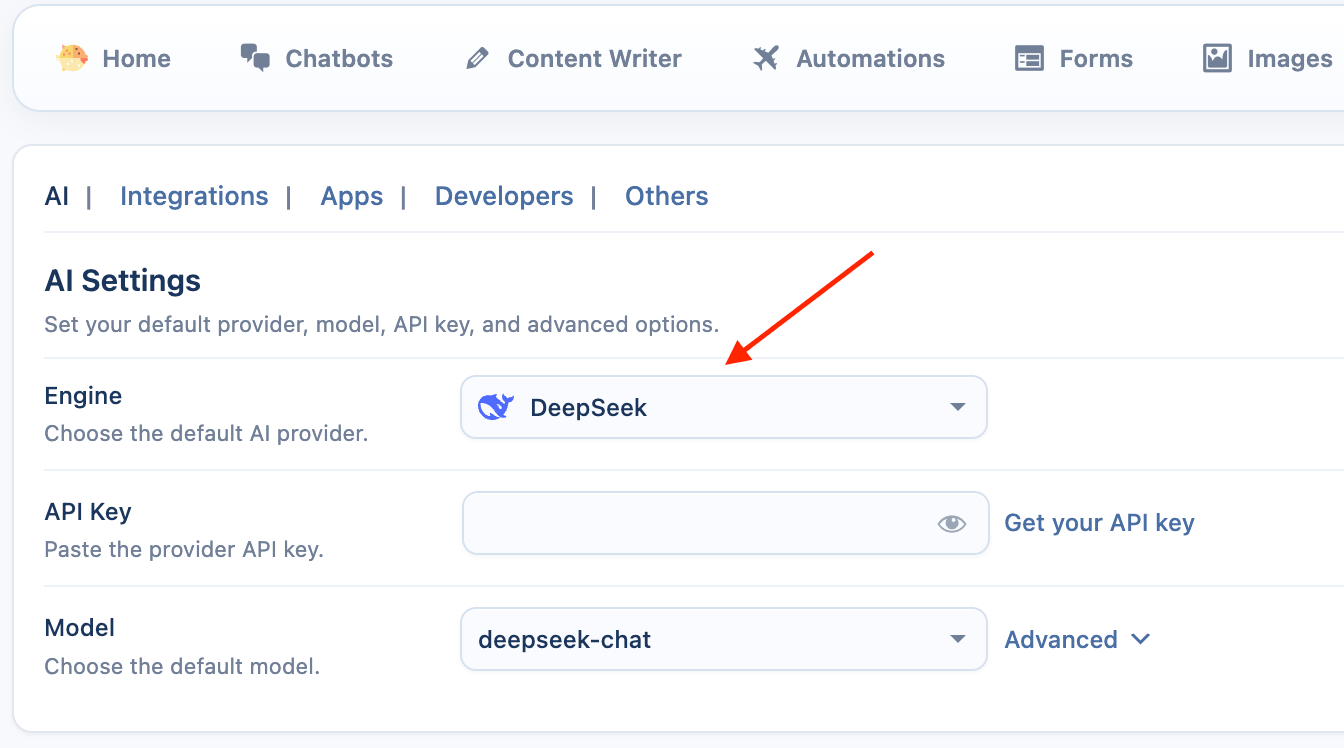
DeepSeek
DeepSeek is an AI provider known for its powerful free chat and coding models.
DeepSeek is a free add-on.
Unlike other providers, DeepSeek is not available by default. You must enable it first from Add-ons page.
Configuration Steps
- Select the Provider: Go to the Engine dropdown menu and choose DeepSeek.
- Enter API Key: Enter your API key from the DeepSeek platform.
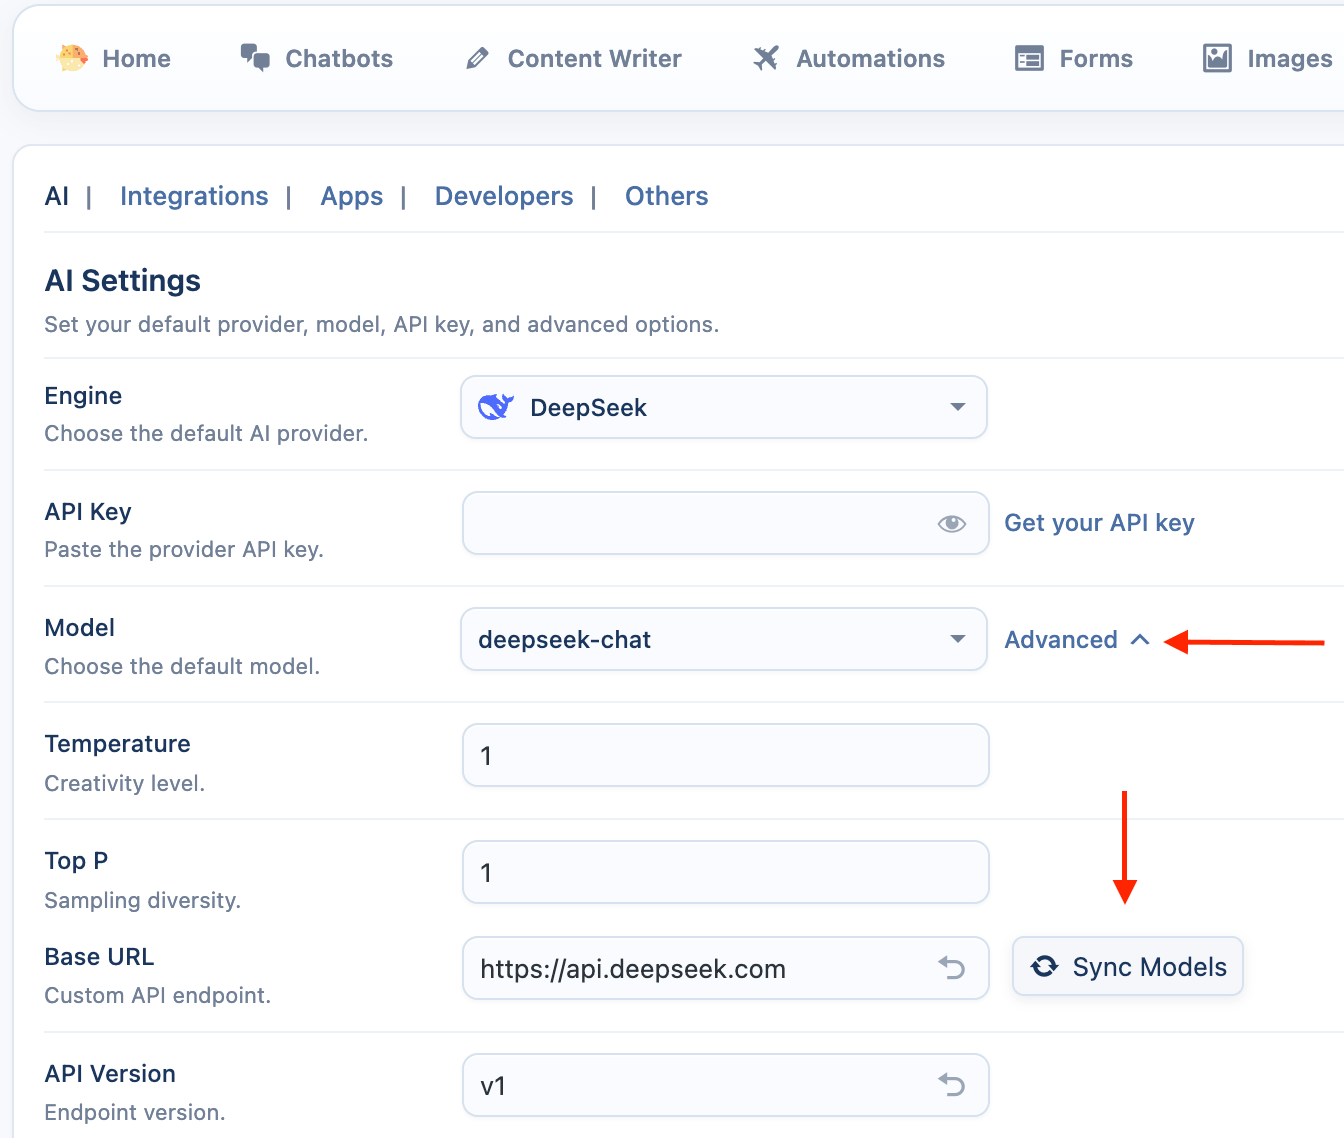
DeepSeek-Specific Settings
- Sync Models: Click Sync button to fetch the available models.
- Select a Default Model: Choose a default model, such as
deepseek-chat.
Ollama (Local AI)
Ollama allows you to run powerful, open-source large language models locally on your own computer. This is a Pro feature that offers maximum privacy and control over your AI operations.
Step 1: Install Ollama
First, you need to download and run the Ollama application on the computer you want to use as the AI server. This could be your local machine or a dedicated server.
- Go to the official download page: ollama.com/download
- Download the installer for your operating system.
On macOS
- Download the
Ollama-macOS.zipfile. - Unzip the file and move the Ollama application to your
Applicationsfolder. - Run the Ollama application. An icon will appear in your menu bar, indicating that the server is running.
On Windows
- Download and run the
OllamaSetup.exeinstaller. - Follow the on-screen instructions to complete the installation.
- Ollama will run automatically in the background. An icon will appear in your system tray.
On Linux
- Open your terminal.
- Run the official installation script with the following command:
curl -fsSL https://ollama.com/install.sh | sh - The script will set up Ollama as a
systemdservice, which will start automatically.
Step 2: Download an AI Model
With the Ollama application running, you need to download (or "pull") a model. You can find a list of available models in the Ollama Library.
- Open your terminal (on macOS/Linux) or Command Prompt (on Windows).
- Run the
ollama pullcommand followed by the model name. For example, to download Llama 3:This will download the model to your computer. You can pull as many models as you like.ollama pull llama3
Step 3: Configure AI Puffer Plugin
Now, connect your WordPress site to your running Ollama instance.
- Go to AI Puffer > Settings > AI tab and select Ollama from engine list.
- Enter the URL where your Ollama server is running. If you are running it on the same computer as your local WordPress development site, the default URL is
http://localhost:11434.
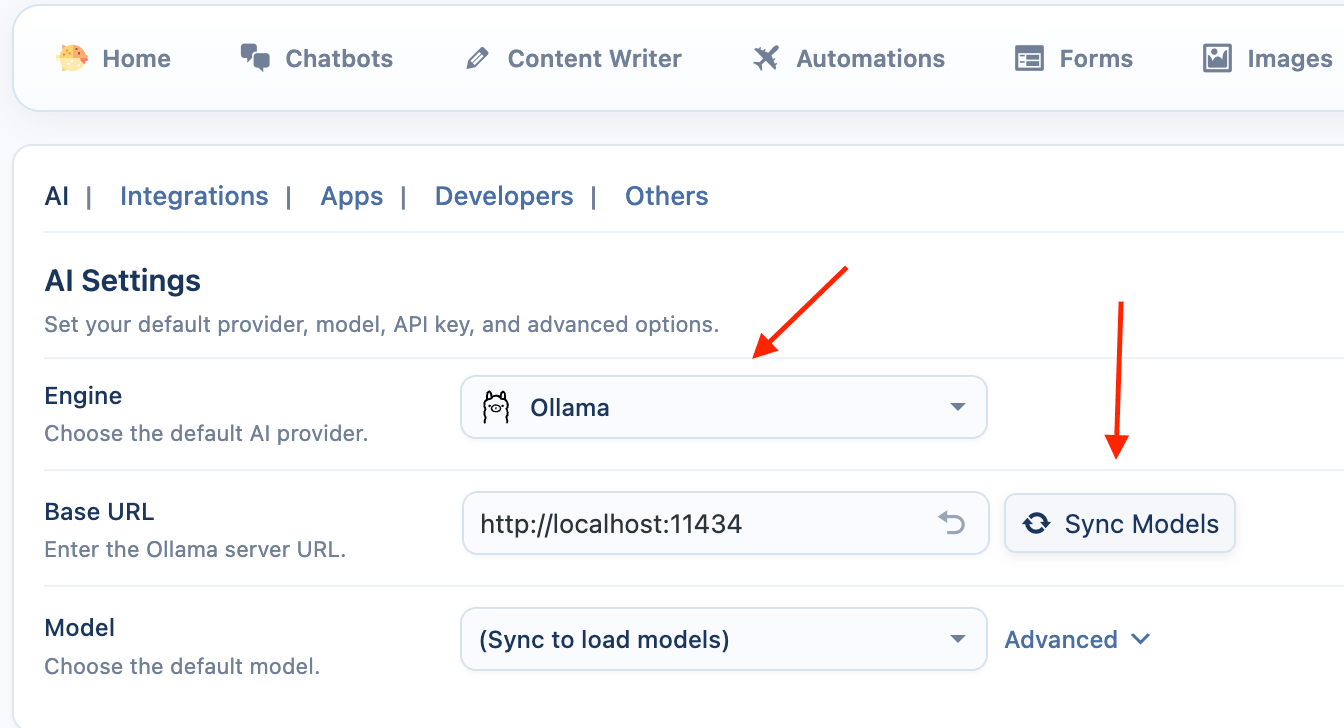
- Sync Models: Click the Sync button. AI Puffer will connect to your Ollama server and fetch the list of models you have pulled.
- Select a Default Model: Choose one of your local models as the default.
Your site is now configured to use your local Ollama models!