Knowledge Base / Training
The Train module is where you create a custom knowledge base by "training" the AI on your own content. This content can be text, files, or existing WordPress posts and pages.
The resulting knowledge base can then be used by other modules like the Chatbot or AI Forms to provide contextually-aware responses based on your data.
Provider Setup
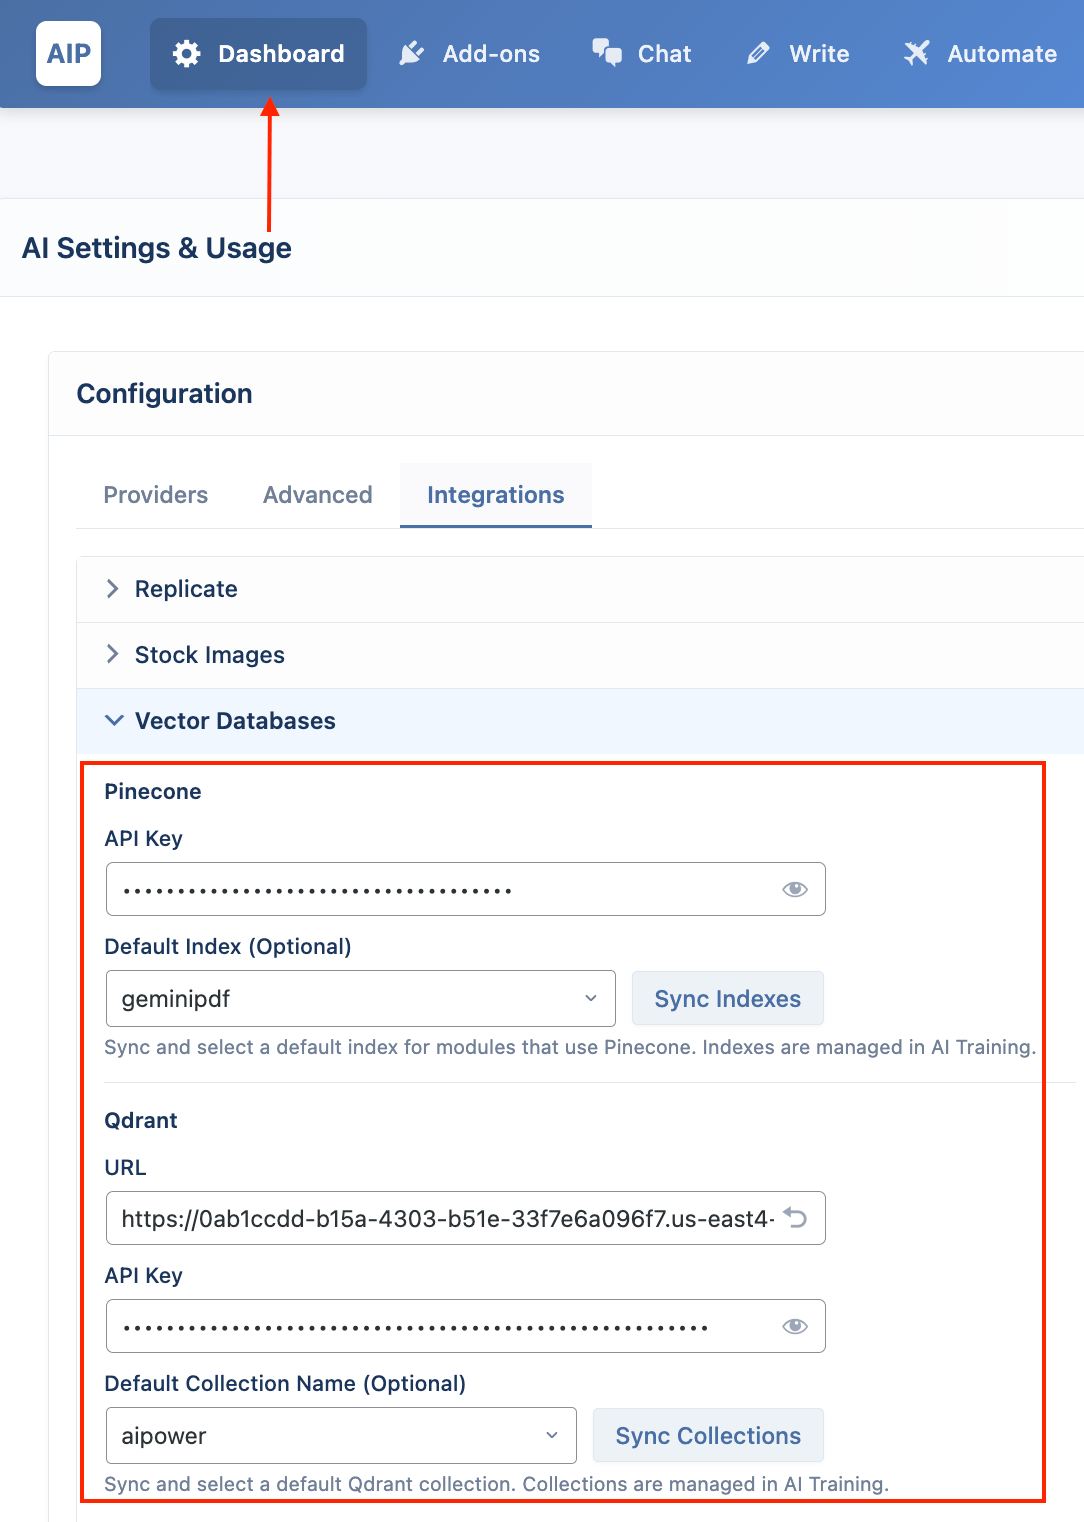
Before creating a knowledge base, you must configure your vector database provider in the main dashboard.
- OpenAI: Go to AI Puffer > Dashboard > Providers and enter your OpenAI API Key. Vector Stores are available by default.
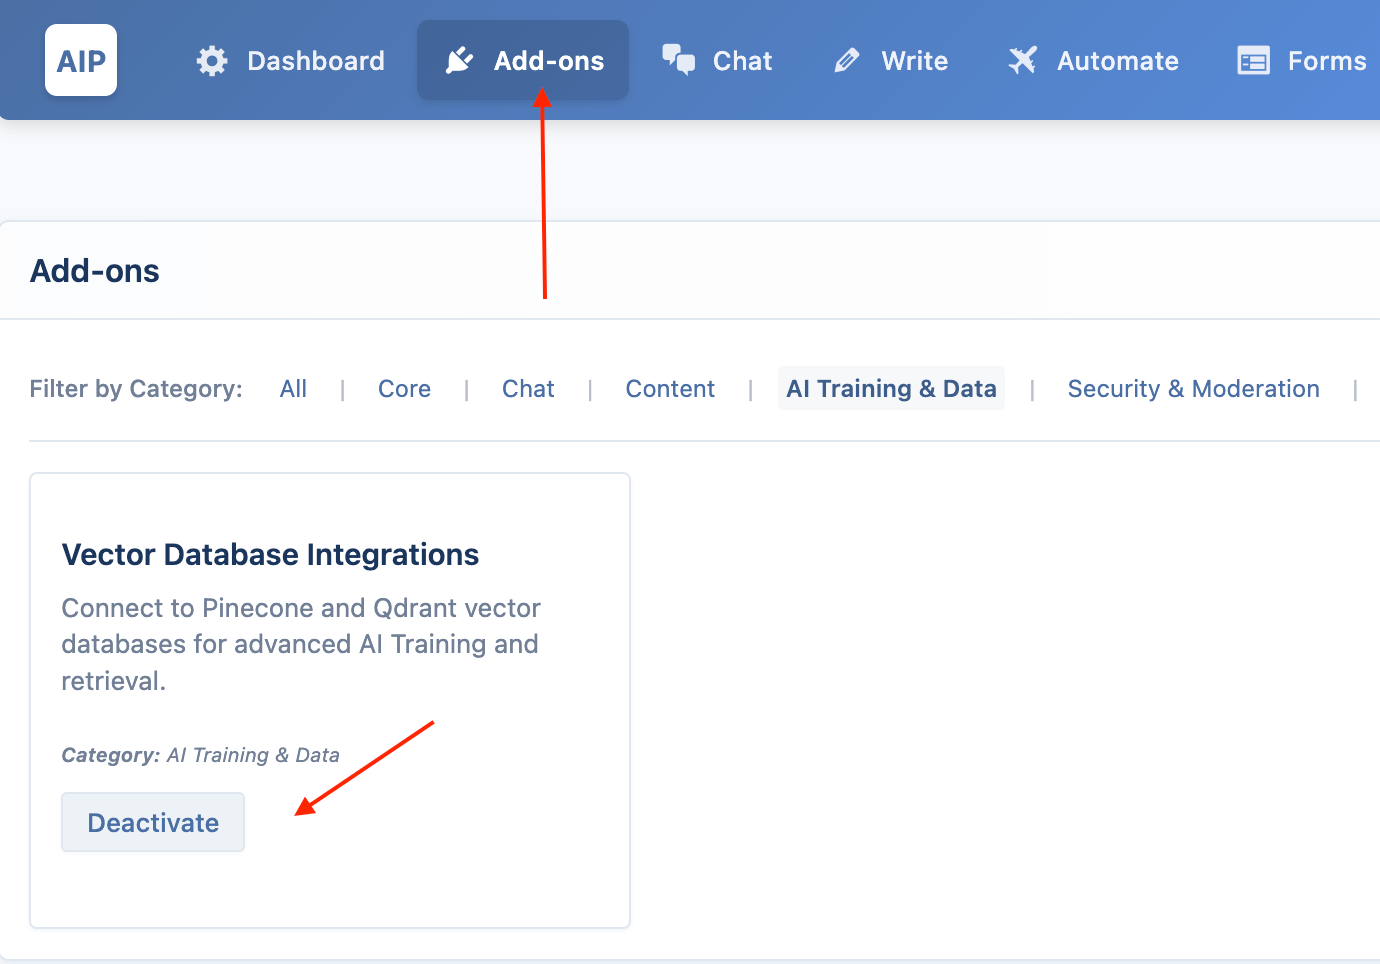
- Pinecone & Qdrant: These are available via a free add-on. First, go to AI Puffer > Add-ons and activate the Vector DB Integrations add-on.
- Then, go to AI Puffer > Dashboard > Integrations to enter your API keys and other required credentials for Pinecone or Qdrant.
The Training Interface
The training page displays all of your existing knowledge bases as a grid of cards. From here, you can add new content or manage existing knowledge bases.
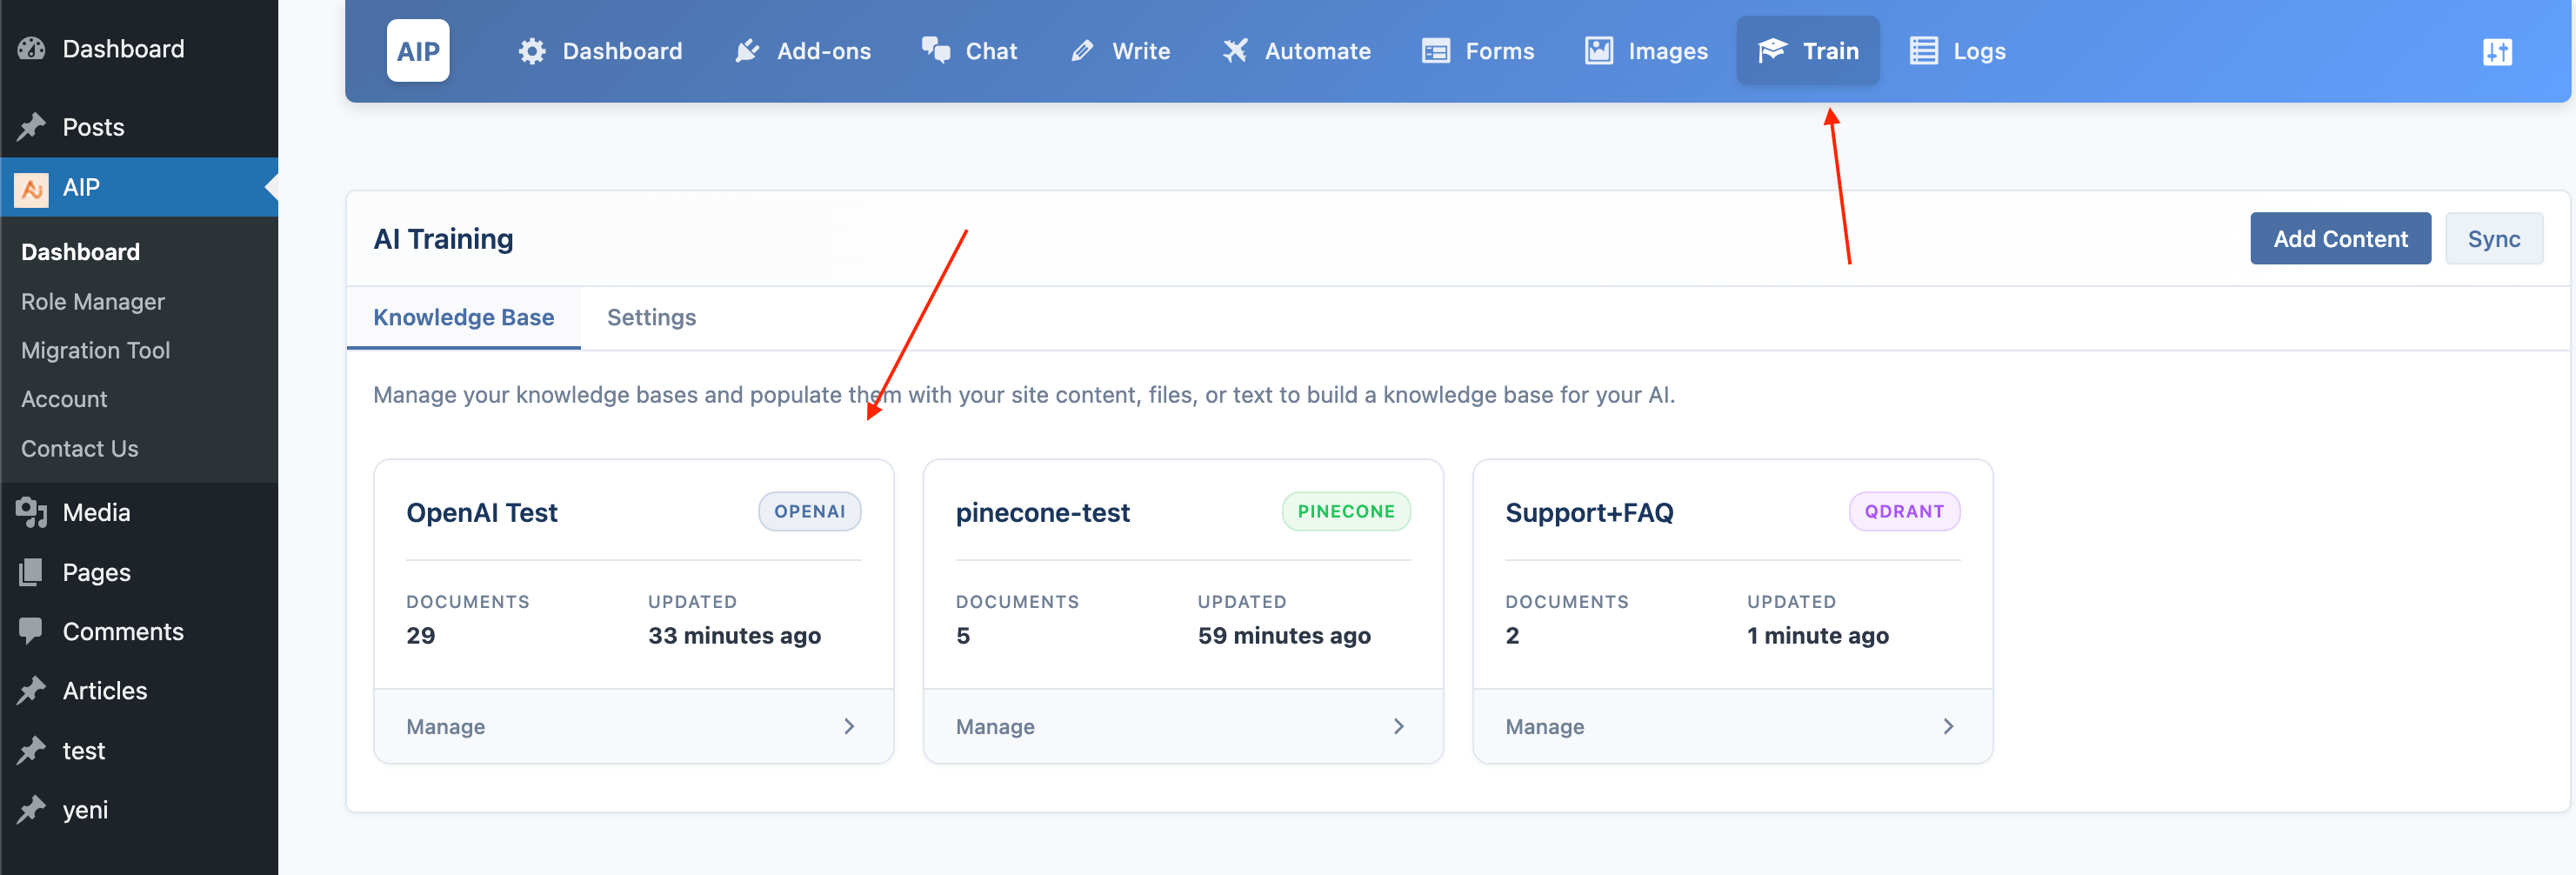
- Add Content: Opens a form where you can create a new knowledge base or add content to an existing one.
- Sync: Refreshes the list of knowledge bases from all your connected providers (OpenAI, Pinecone, and Qdrant).
Create a Knowledge Base
A knowledge base is called a "Vector Store" for OpenAI, an "Index" for Pinecone, and a "Collection" for Qdrant.
- Click the Add Content button, select the desired Vector DB provider (OpenAI, Pinecone, or Qdrant) from the dropdown.
- Click the + icon next to the "Target" dropdown.
- An inline form will appear. Enter a descriptive name for your new knowledge base.

- For Pinecone or Qdrant, you must also specify the Dimension. This should match the embedding model you plan to use (e.g., 1536 for OpenAI's
text-embedding-3-small). - Click Create. The new knowledge base will be created and automatically selected in the target dropdown.
Add Content to Your Knowledge Base
Once you have a knowledge base created and selected, you can add content to it using one of three sources.
Using Text
- Select the "Text" source card.
- Paste your content into the textarea.
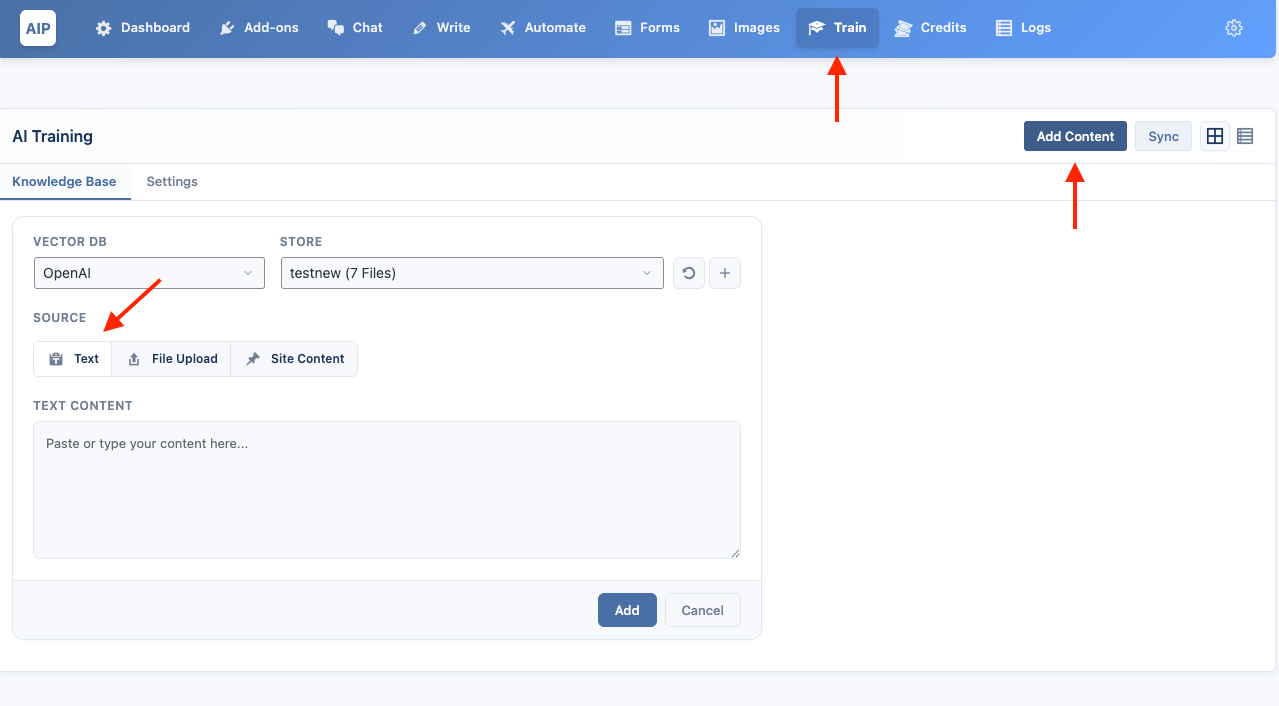
- Click Add.
Using File Upload
This is a Pro feature.
- Select the "Files" source card.
- Drag and drop your files into the upload area or click to select them. You can upload multiple files at once.
- Supported file types: PDF, DOCX, TXT, HTML.
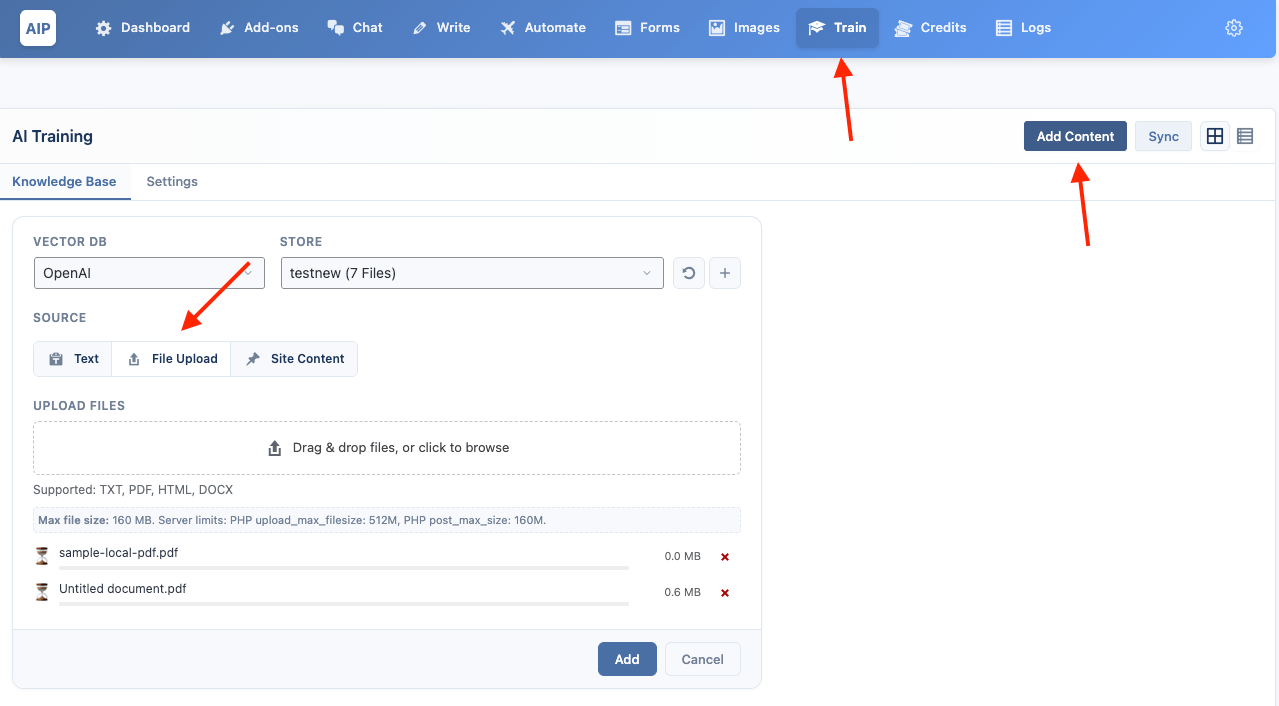
- Click Add Content. The plugin will automatically extract the text and index it.
Using Site Content
- Select the "Site Content" source card.
- Choose a mode:
- All by Post Type: This is the default. Simply check the boxes for the post types you want to index (e.g., Posts, Pages). The number of available items for each type is shown.
- Pick Specific: This allows you to search for and select individual posts, pages, or products from a paginated list.

- Click Add Content.
Embedding Model
When using Pinecone or Qdrant, you must select an Embedding Model. This model converts your text into vectors that the database can understand. The available providers are OpenAI, Google, and Azure.
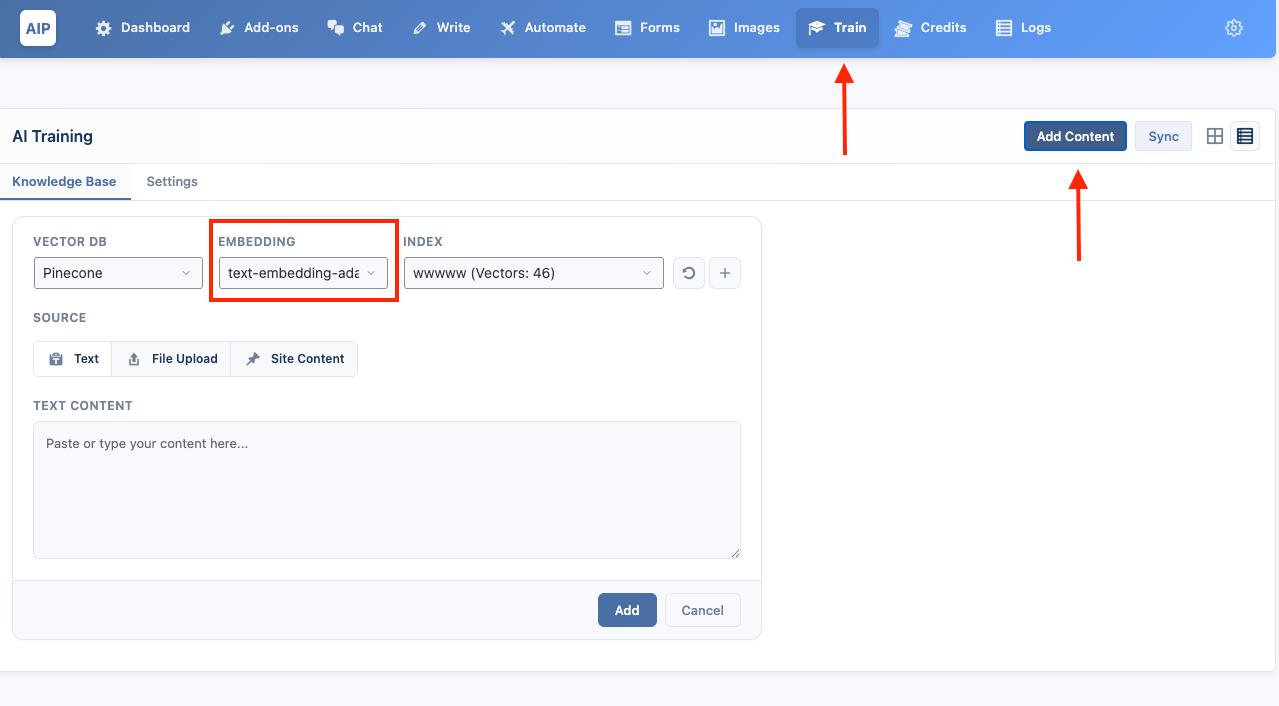
It is crucial to use the same model here as you will later in any Chatbot or AI Form that needs to search this knowledge base.
Managing a Knowledge Base
When you click on a knowledge base card from the main grid, you are taken to its detail view.
- View Content: This panel shows a log of all content that has been indexed into the knowledge base.
- Search: Click the
...icon to open a search bar and test queries against your knowledge base. - Delete Knowledge Base: Click the
...icon to permanently delete the entire knowledge base. This action cannot be undone.
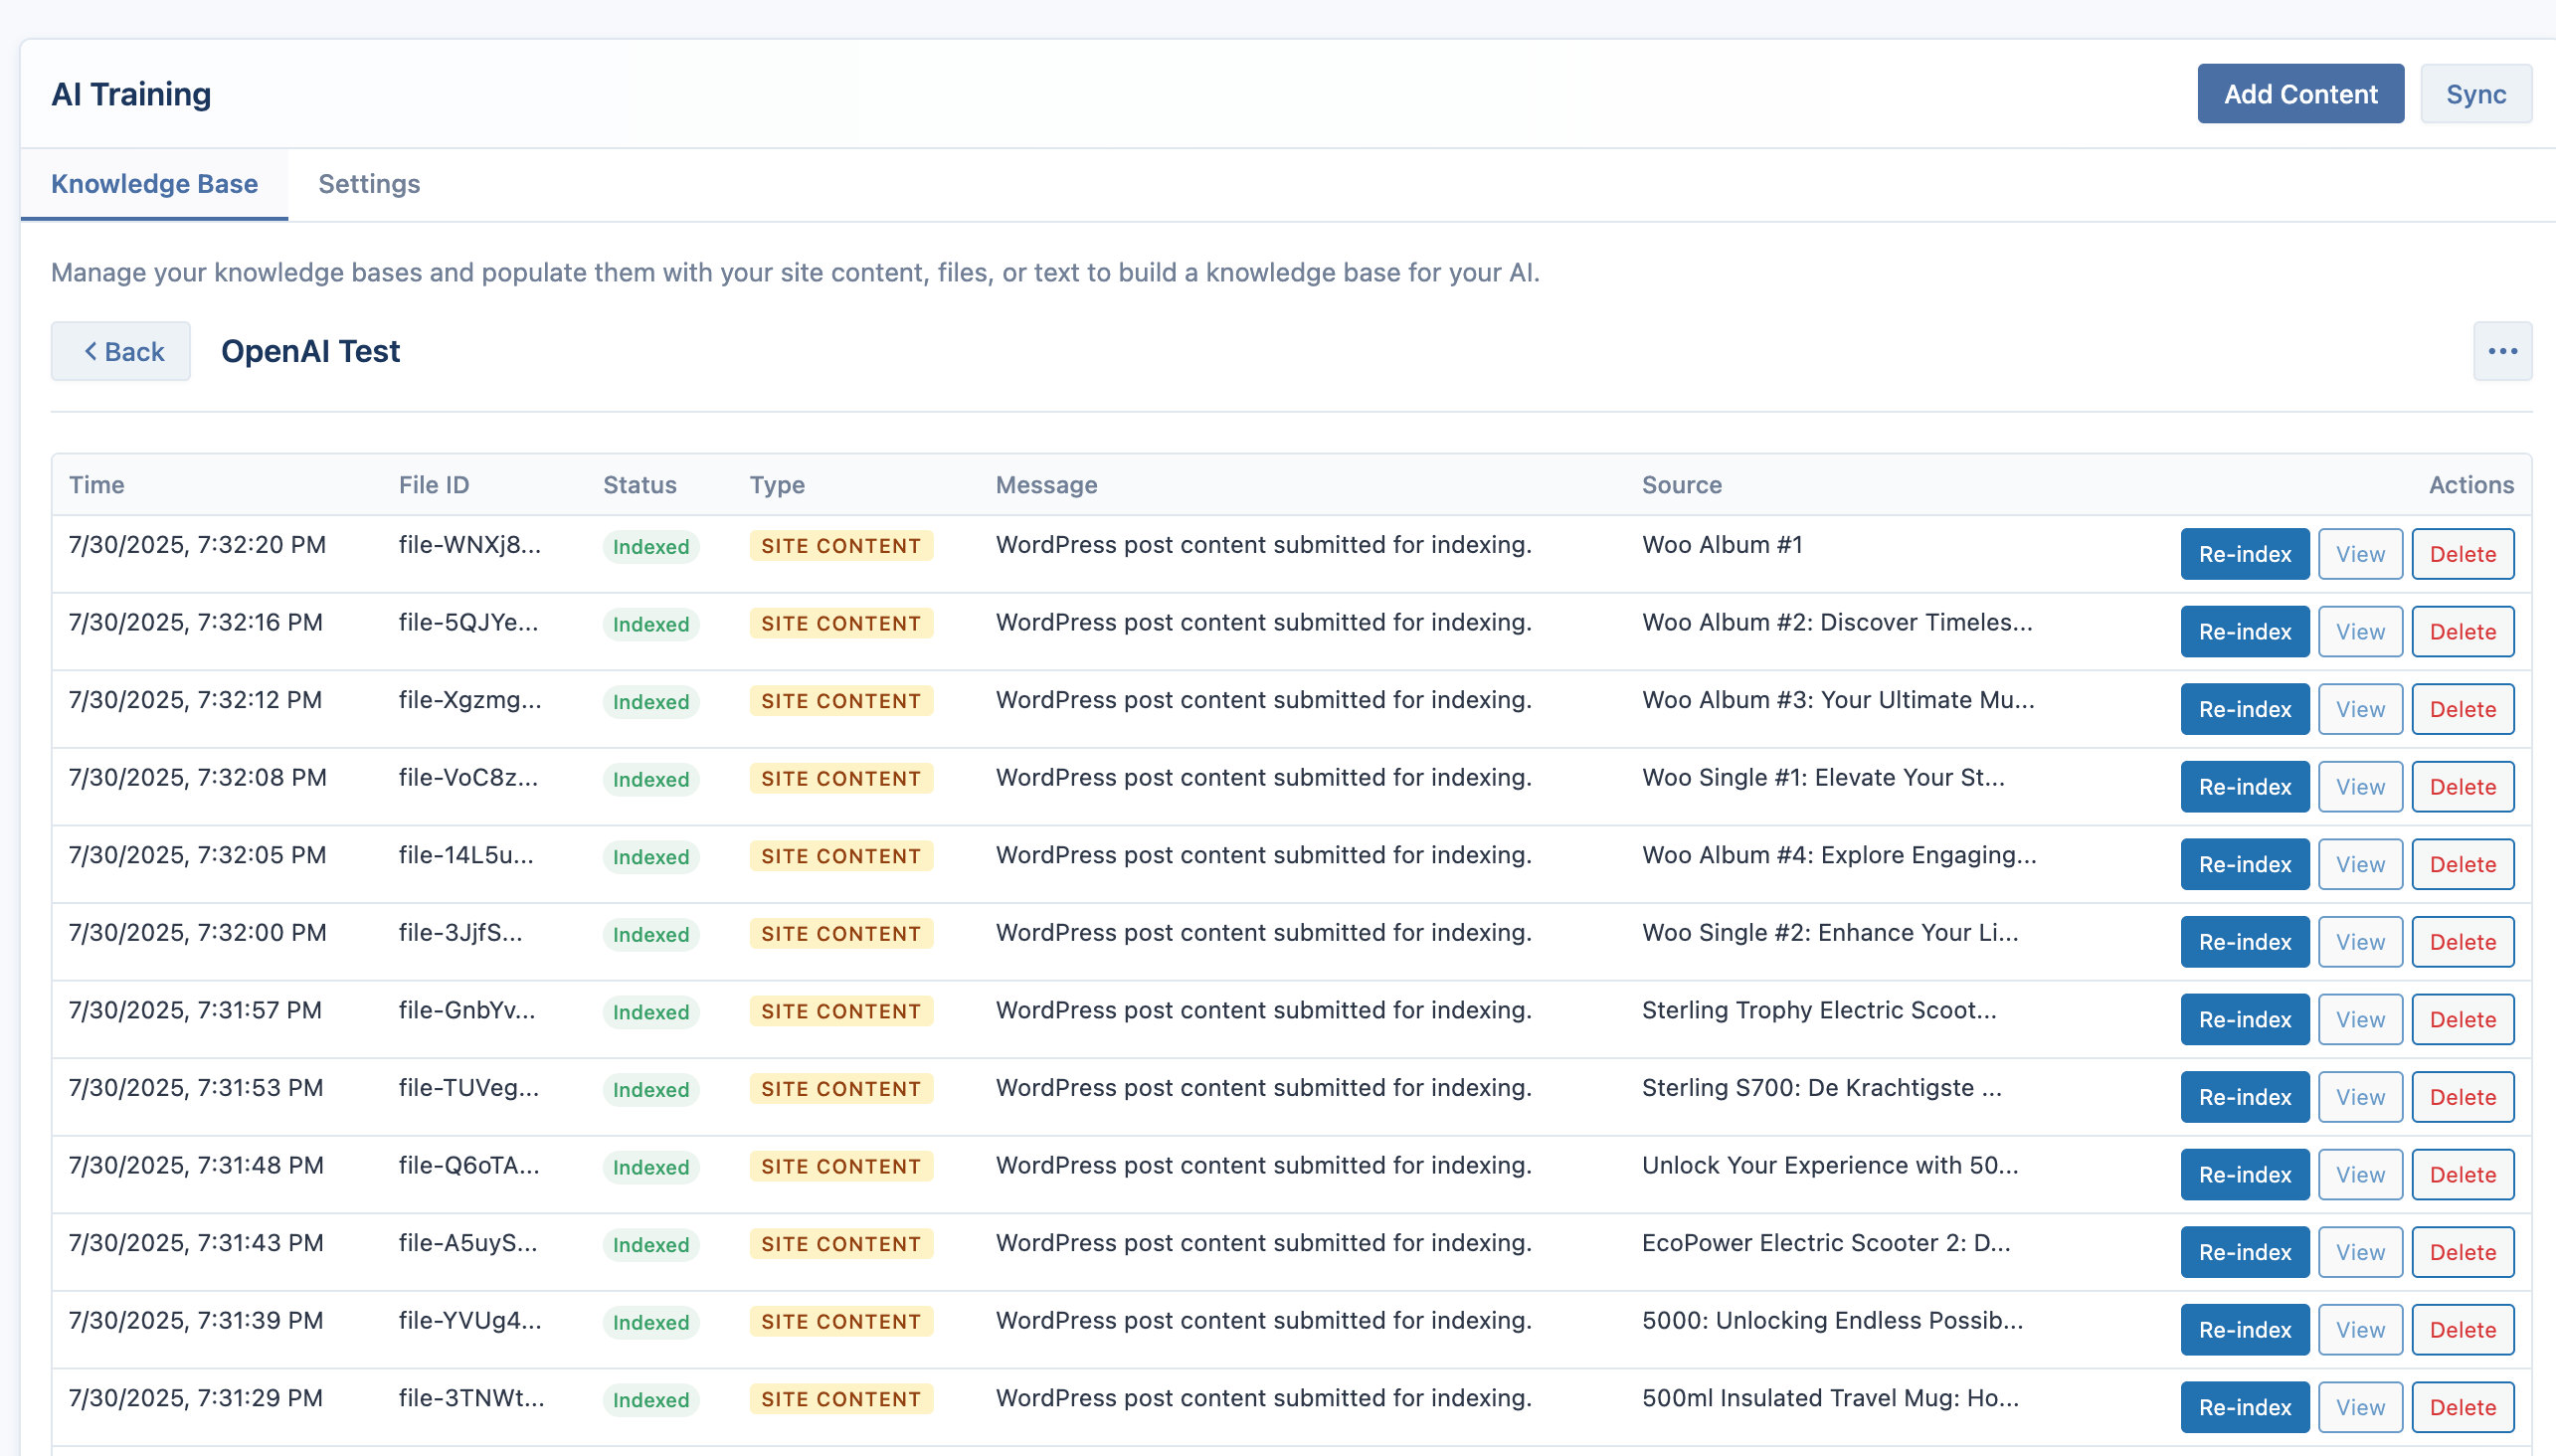
The detail view shows records of all content that has been indexed into the knowledge base.
| Column | Description |
|---|---|
| Time | The date and time the item was indexed. |
| File ID / Point ID | The unique identifier for the content within the vector database. |
| Status | The current status of the item (e.g., indexed, failed). |
| Type | The source of the content: Site Content, Text, or File Upload. For Pinecone and Qdrant, items uploaded by users from the frontend chatbot will be marked with a person icon , indicating they are stored in a unique, isolated namespace to maintain conversational context. |
| Message | A summary of the indexing operation. |
| Embedding | The provider and model used to create the vector embedding (for Pinecone and Qdrant). |
| Source | The original source of the content, such as a post title or filename. |
| Actions | - Re-index: For Site Content, this deletes the old entry and indexes the latest version of the post. - View: Opens a modal to show the exact text snippet that was indexed. - Delete: Deletes the record from both the vector database and the local logs. |
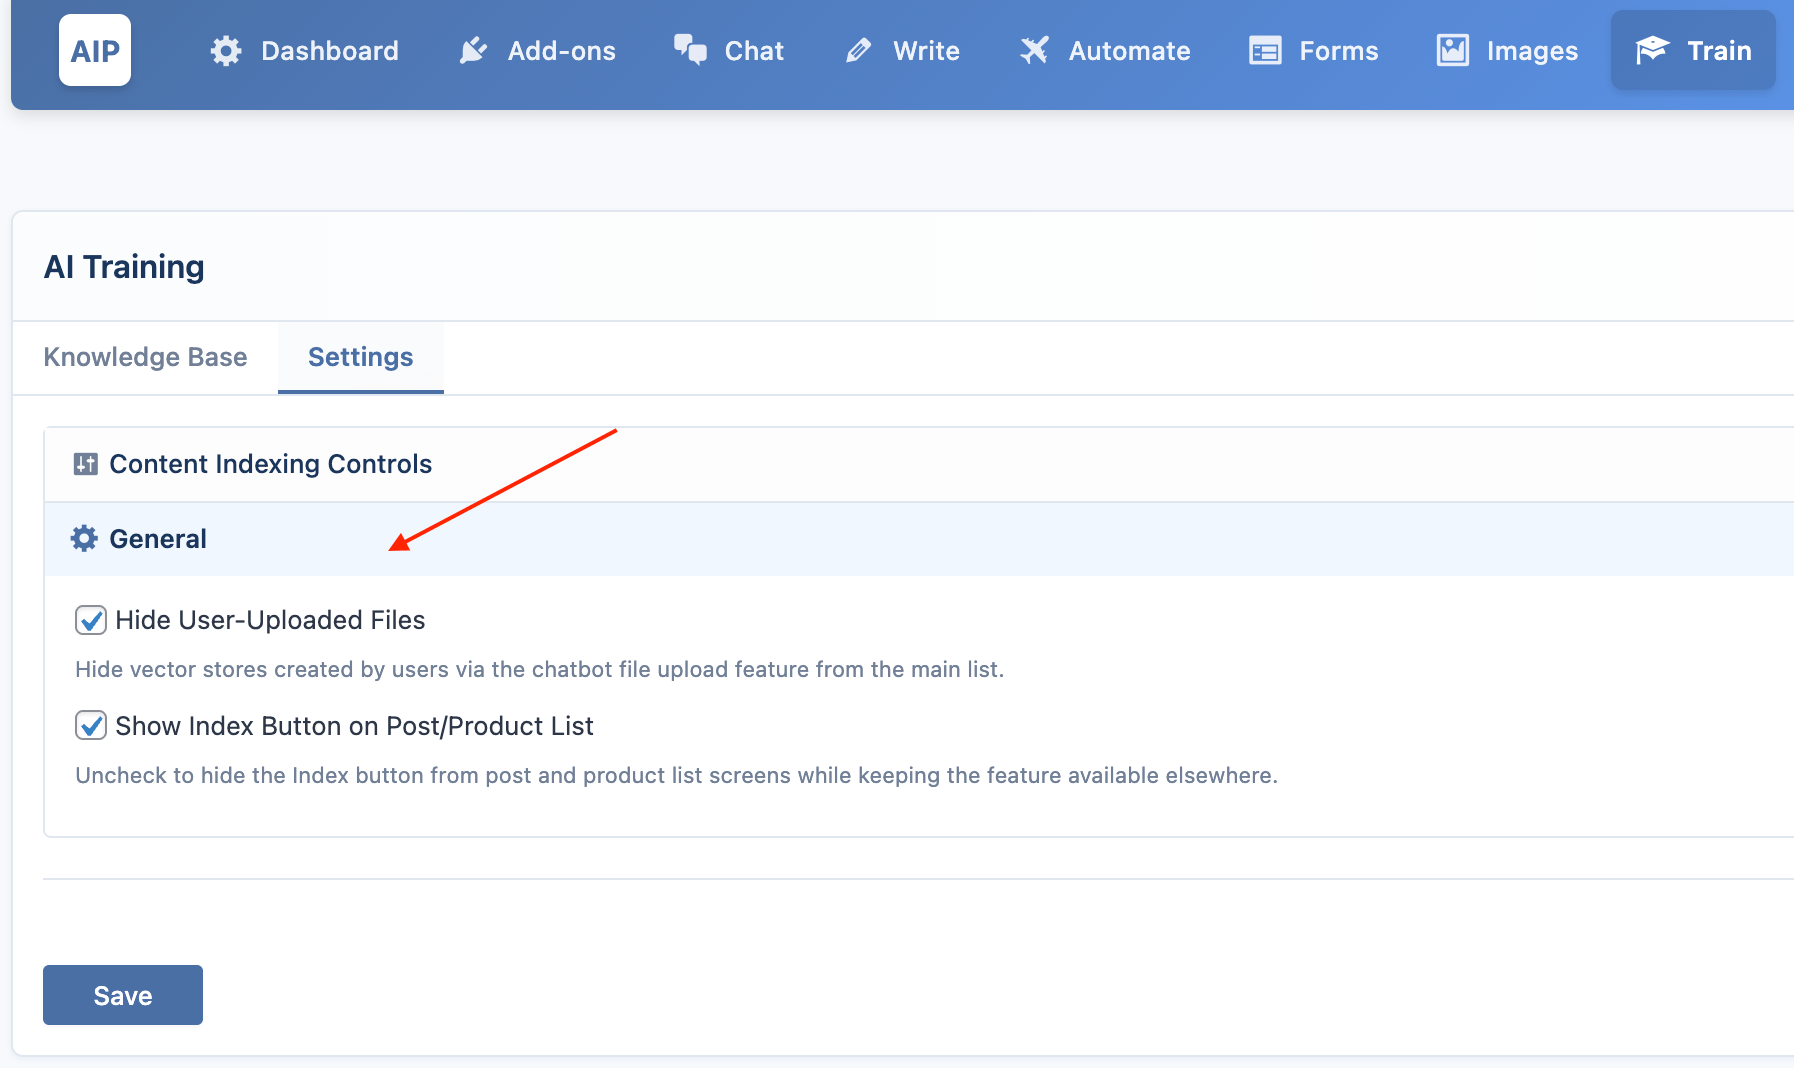
Settings
- Hide User-Uploaded Files: When enabled, Vector Stores created automatically by users via the chatbot file upload feature will be hidden from the main Knowledge Base card grid.
- Show Index Button on Post/Product List: This toggle allows you to show or hide the "Index" button that appears in the admin bar on post and product list screens.
Content Indexing Controls
This Pro feature provides granular control over how your content is processed for AI training. Instead of indexing all available data by default, you can:
- Selective Field Indexing: Choose which custom fields to include or exclude from the AI training dataset for each content type.
- Taxonomy Management: Enable or disable specific taxonomies (categories, tags, custom taxonomies) on a per-content-type basis.
- WooCommerce Product Data: For product content types, select which product attributes and data fields should be included in the training corpus.
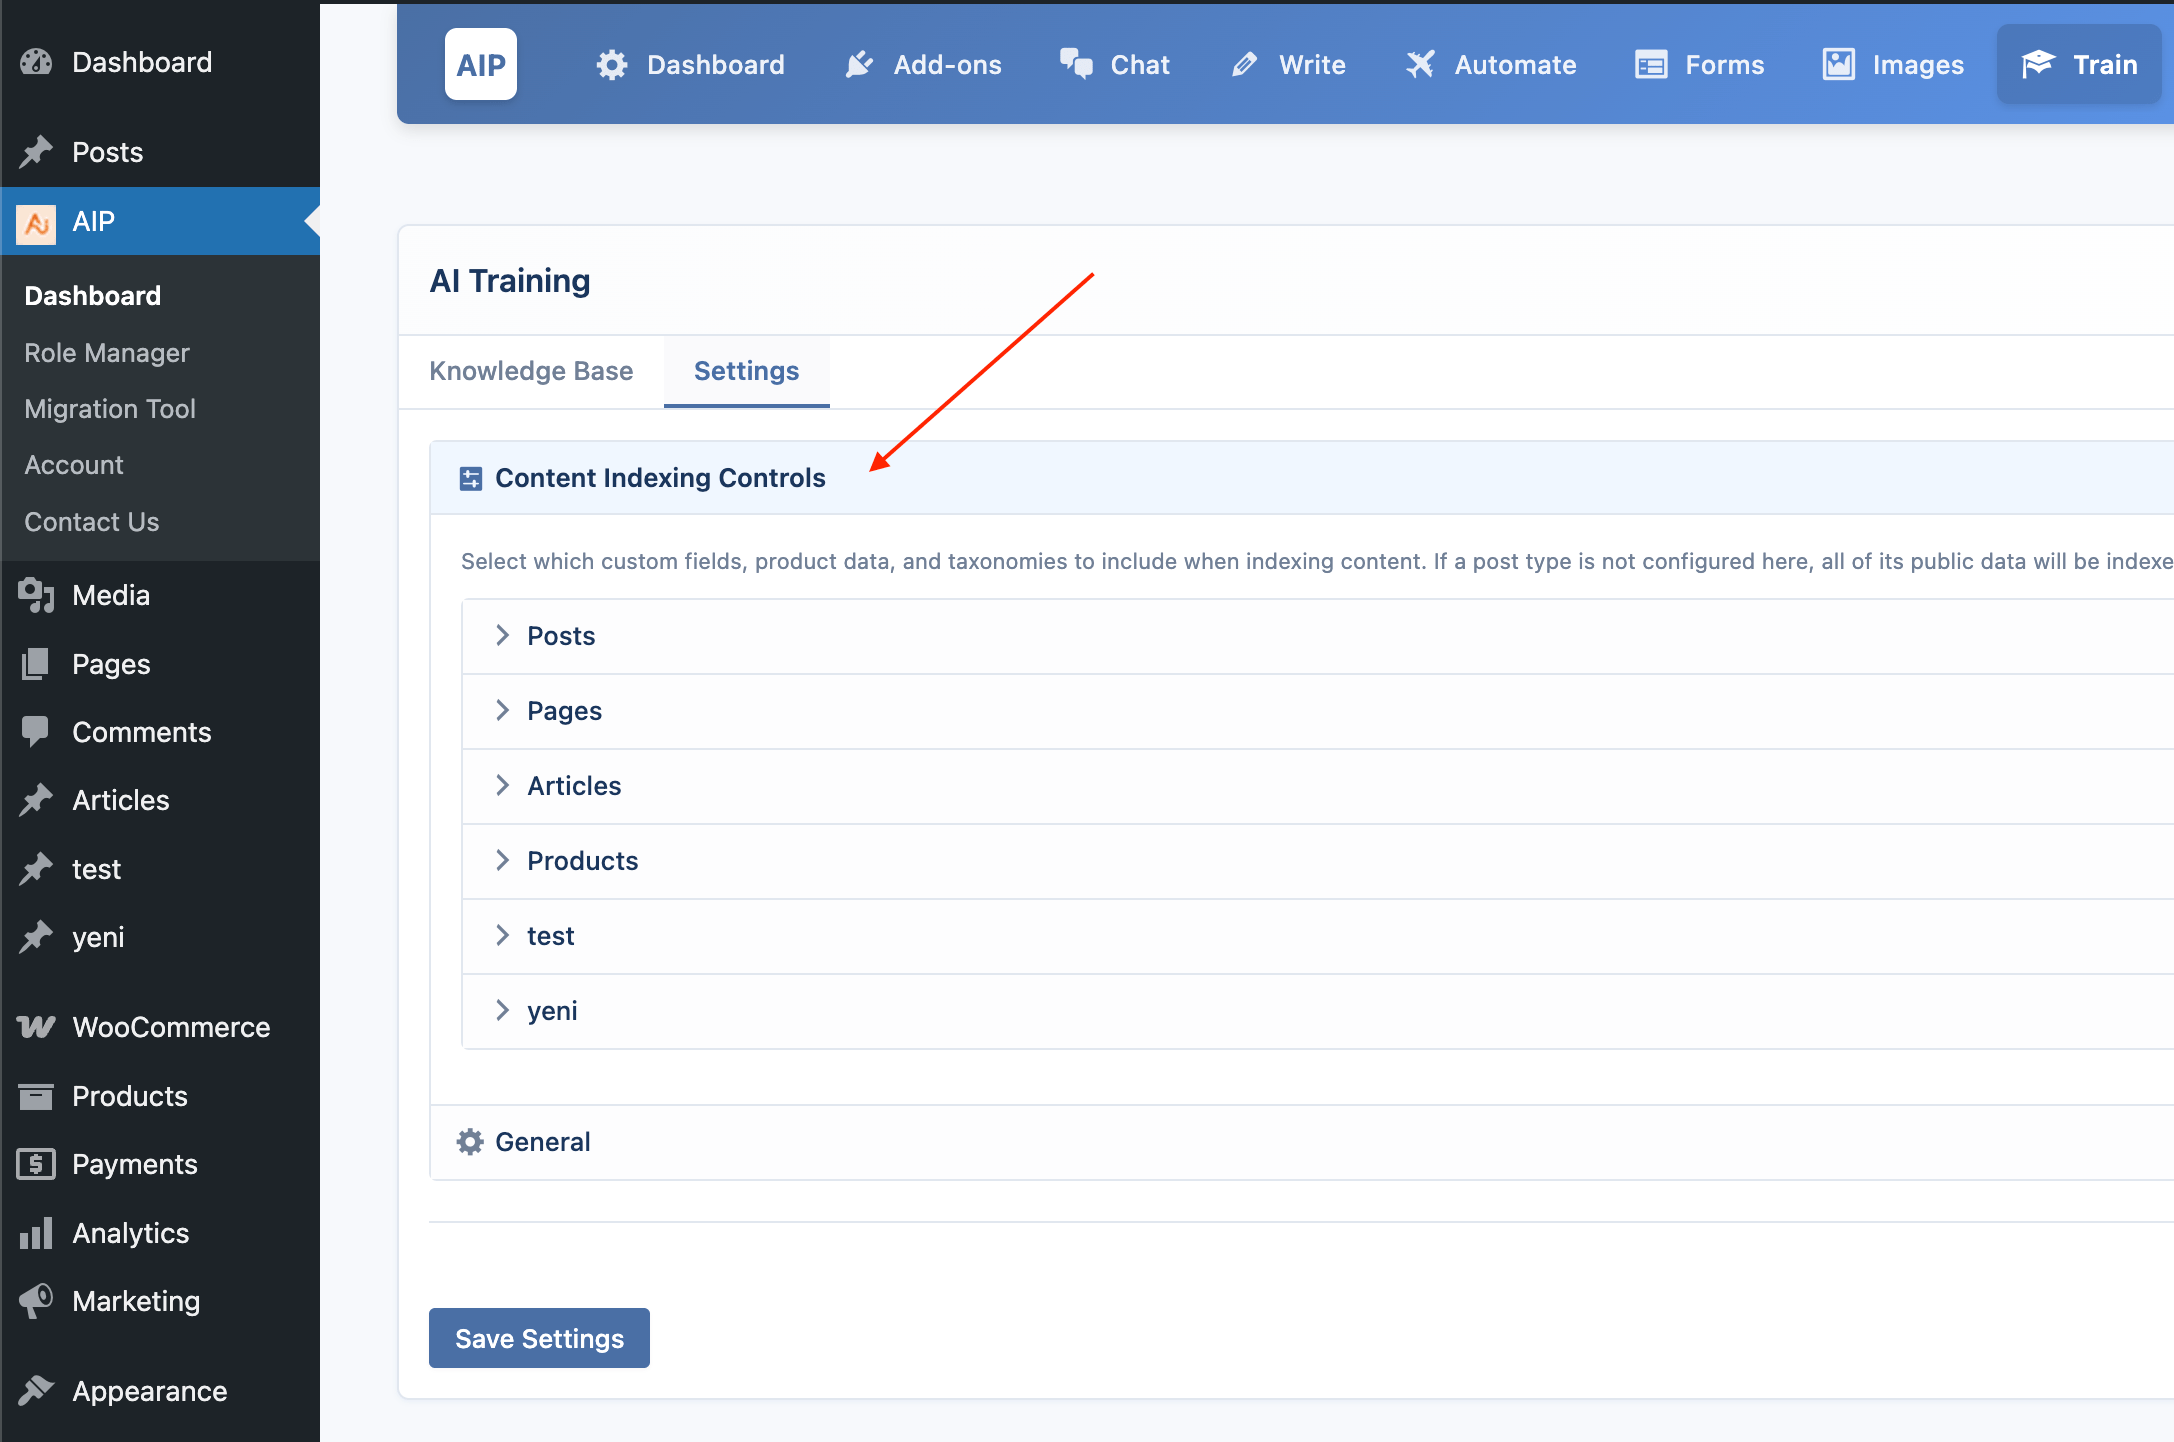
- Custom AI Context Labels: Define custom labels for each field that provide better context to the AI about what the data represents.
- Content Type Configuration: Set up different indexing rules for posts, pages, custom post types, and WooCommerce products.
- Basic Label Customization: Modify how core content elements (title, excerpt, content, source URL) are labeled for AI context.
This is particularly useful for sites with extensive custom fields where you want to train the AI only on relevant data.
Document Chunking
For Pinecone and Qdrant, you can control how large documents are split into smaller "chunks" before being indexed. This is critical for improving the accuracy of search results.
- Chunk Size: The maximum number of tokens (roughly, words) each chunk of text should contain. A smaller size provides more specific results but may miss broader context.
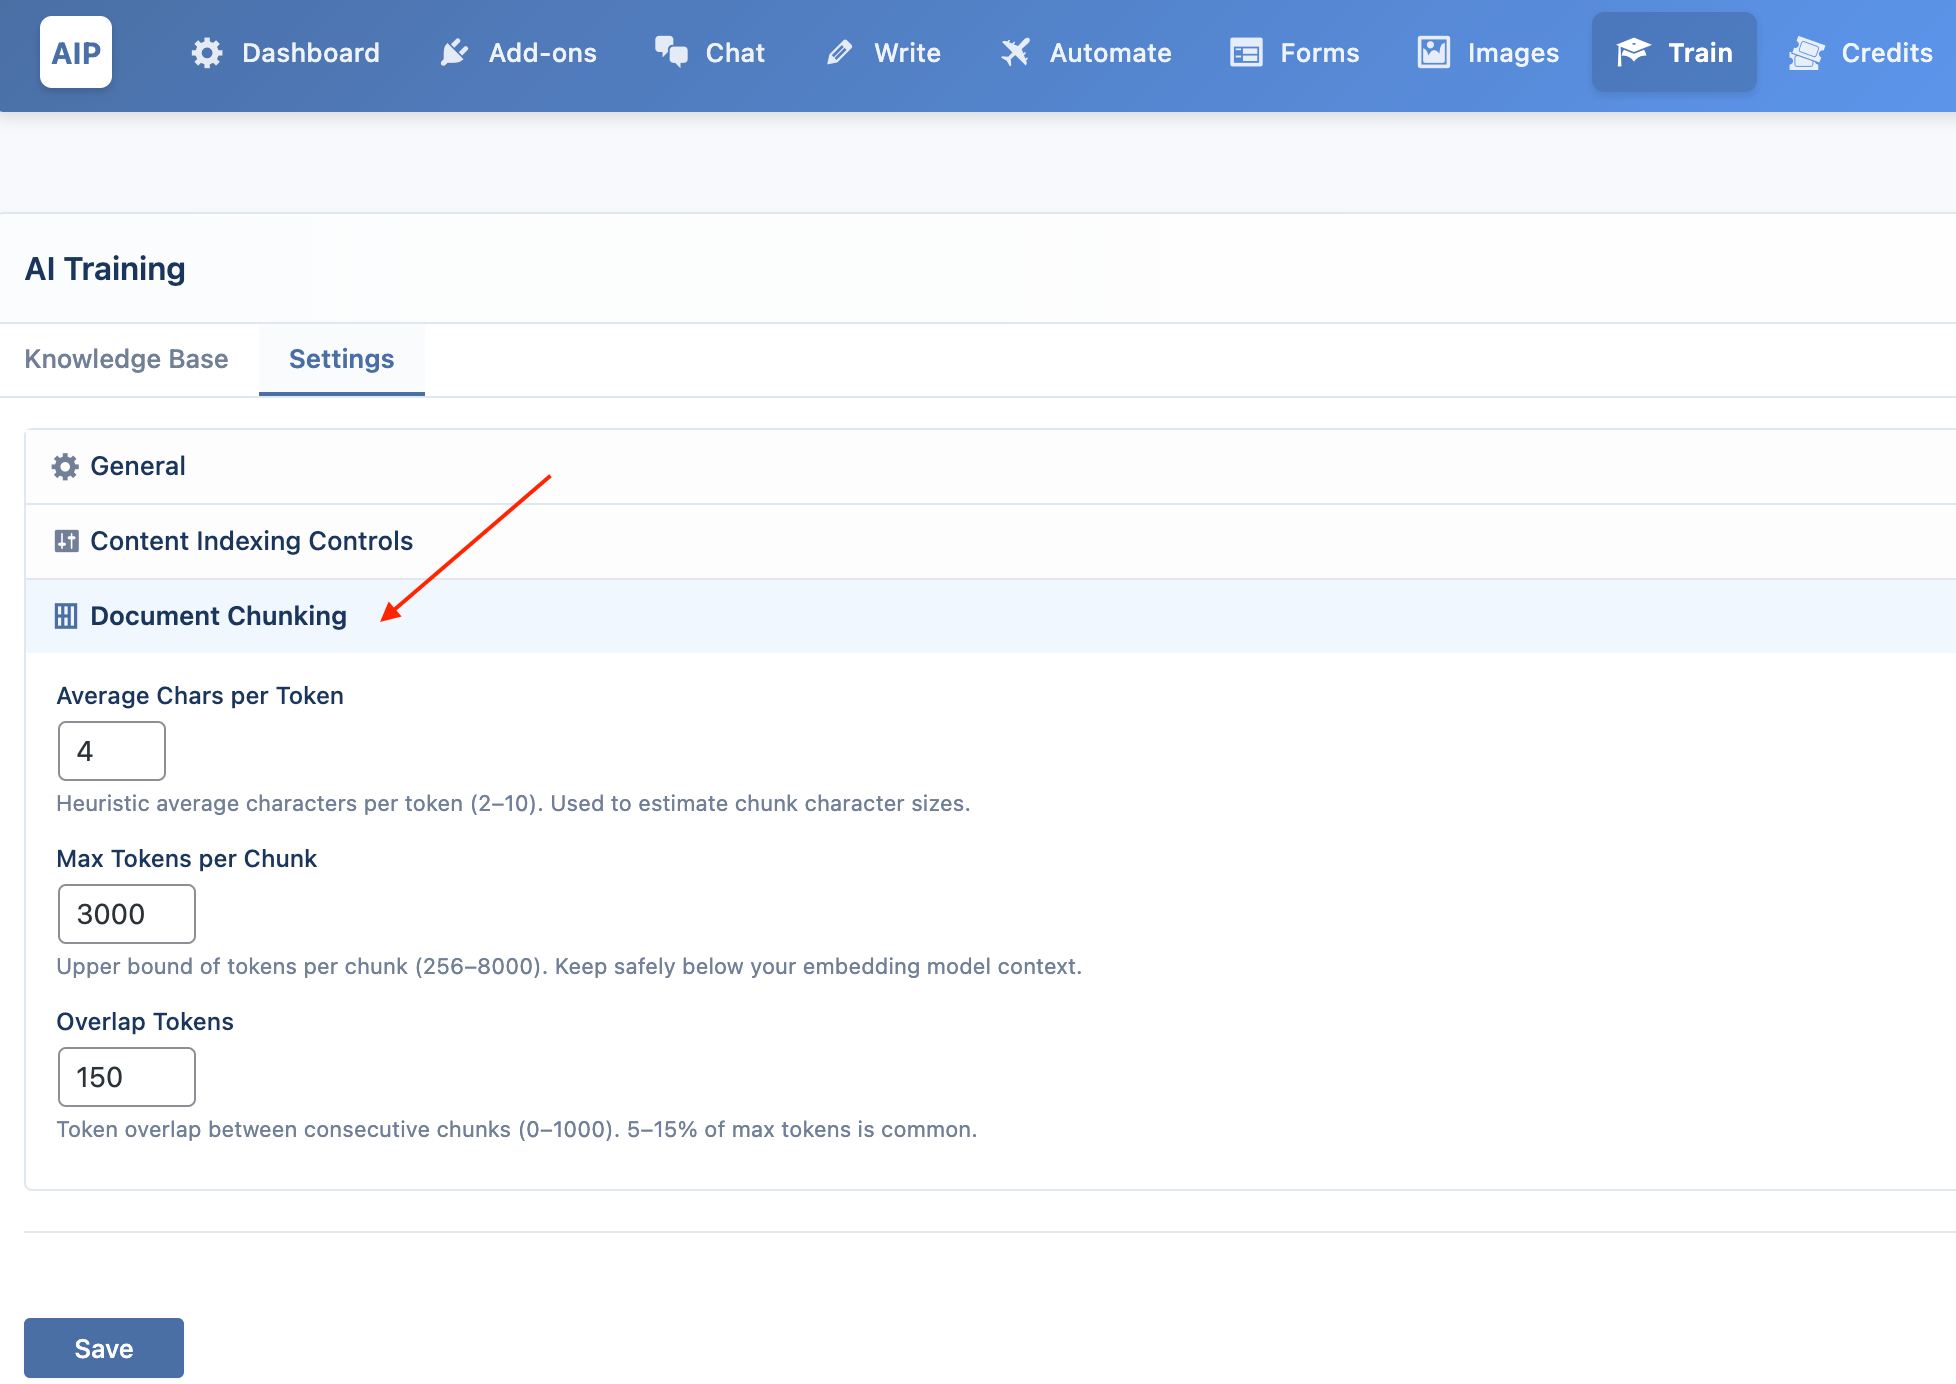
- Chunk Overlap: The number of tokens to include from the end of the preceding chunk at the beginning of the next one. This helps maintain context between chunks.