PromptBase
PromptBase is a powerful feature in our WordPress plugin that offers more than 100 ready-to-use prompts for your website.
With this feature, you can easily search, run, and embed these prompt forms on your website to provide an interactive experience for your users.
In addition to the pre-built prompt forms, you can also design and create your own prompts using a simple interface.
You can choose from a variety of GPT models and customize the forms to suit your needs.
Using Pre-built PromptBase
To use one of the pre-built forms, simply browse through the available options in the PromptBase menu.
You can search for forms by keyword, category, or author. Once you find a template you like, simply click on it to view the details.
From there, you can copy the shortcode provided and paste it into your WordPress post or page where you want the form to appear.
The shortcode will embed the form form on your page, and your users can start interacting with it right away.
Accessing PromptBase
To access the pre-built forms, follow these steps:
- Open your WordPress dashboard.
- Navigate to the AI Power plugin menu on the sidebar.
- Click on the PromptBase tab.
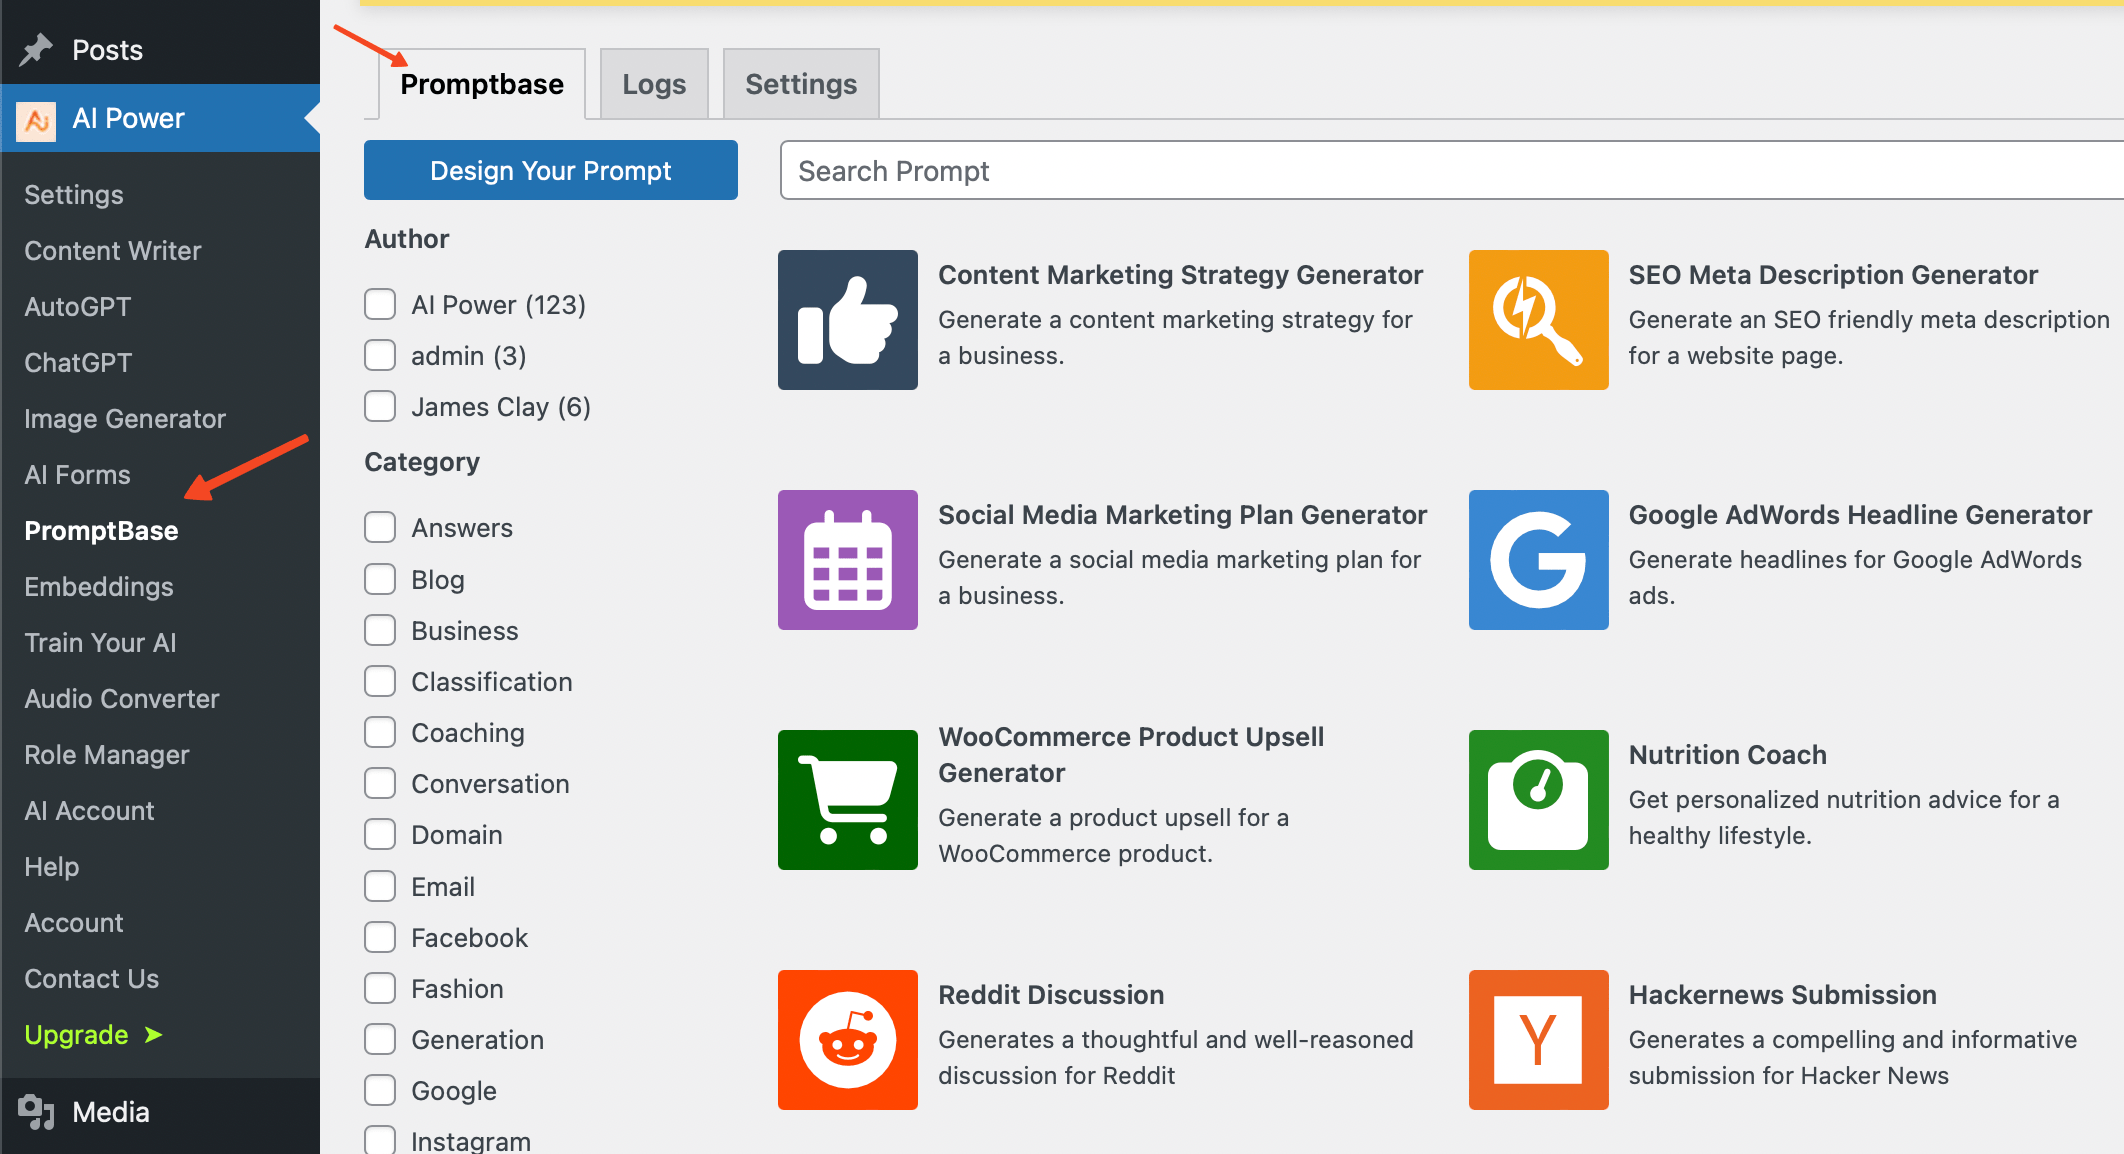
Here, you'll see a search box at the top of the page. You can use this to search for specific forms based on your needs.
Browsing and Searching for Forms
The PromptBase page displays up to 40 forms per page. You can browse through these using the page numbers at the bottom of the screen. With over 100 PromptBase available, you can easily find the right form for your needs.
On the left-hand side, you will find filtering options:
- Author: This filter allows you to view forms by specific authors. By default, you'll see "AI Power (117)" which signifies 117 forms created by the AI Power plugin. If you have created any forms, your WordPress username will also be visible here, allowing you to filter forms you've authored.
- Category: This filter lets you refine your search based on specific categories such as blog, Instagram, classification, and others. Simply put a check in the box to apply the filter.
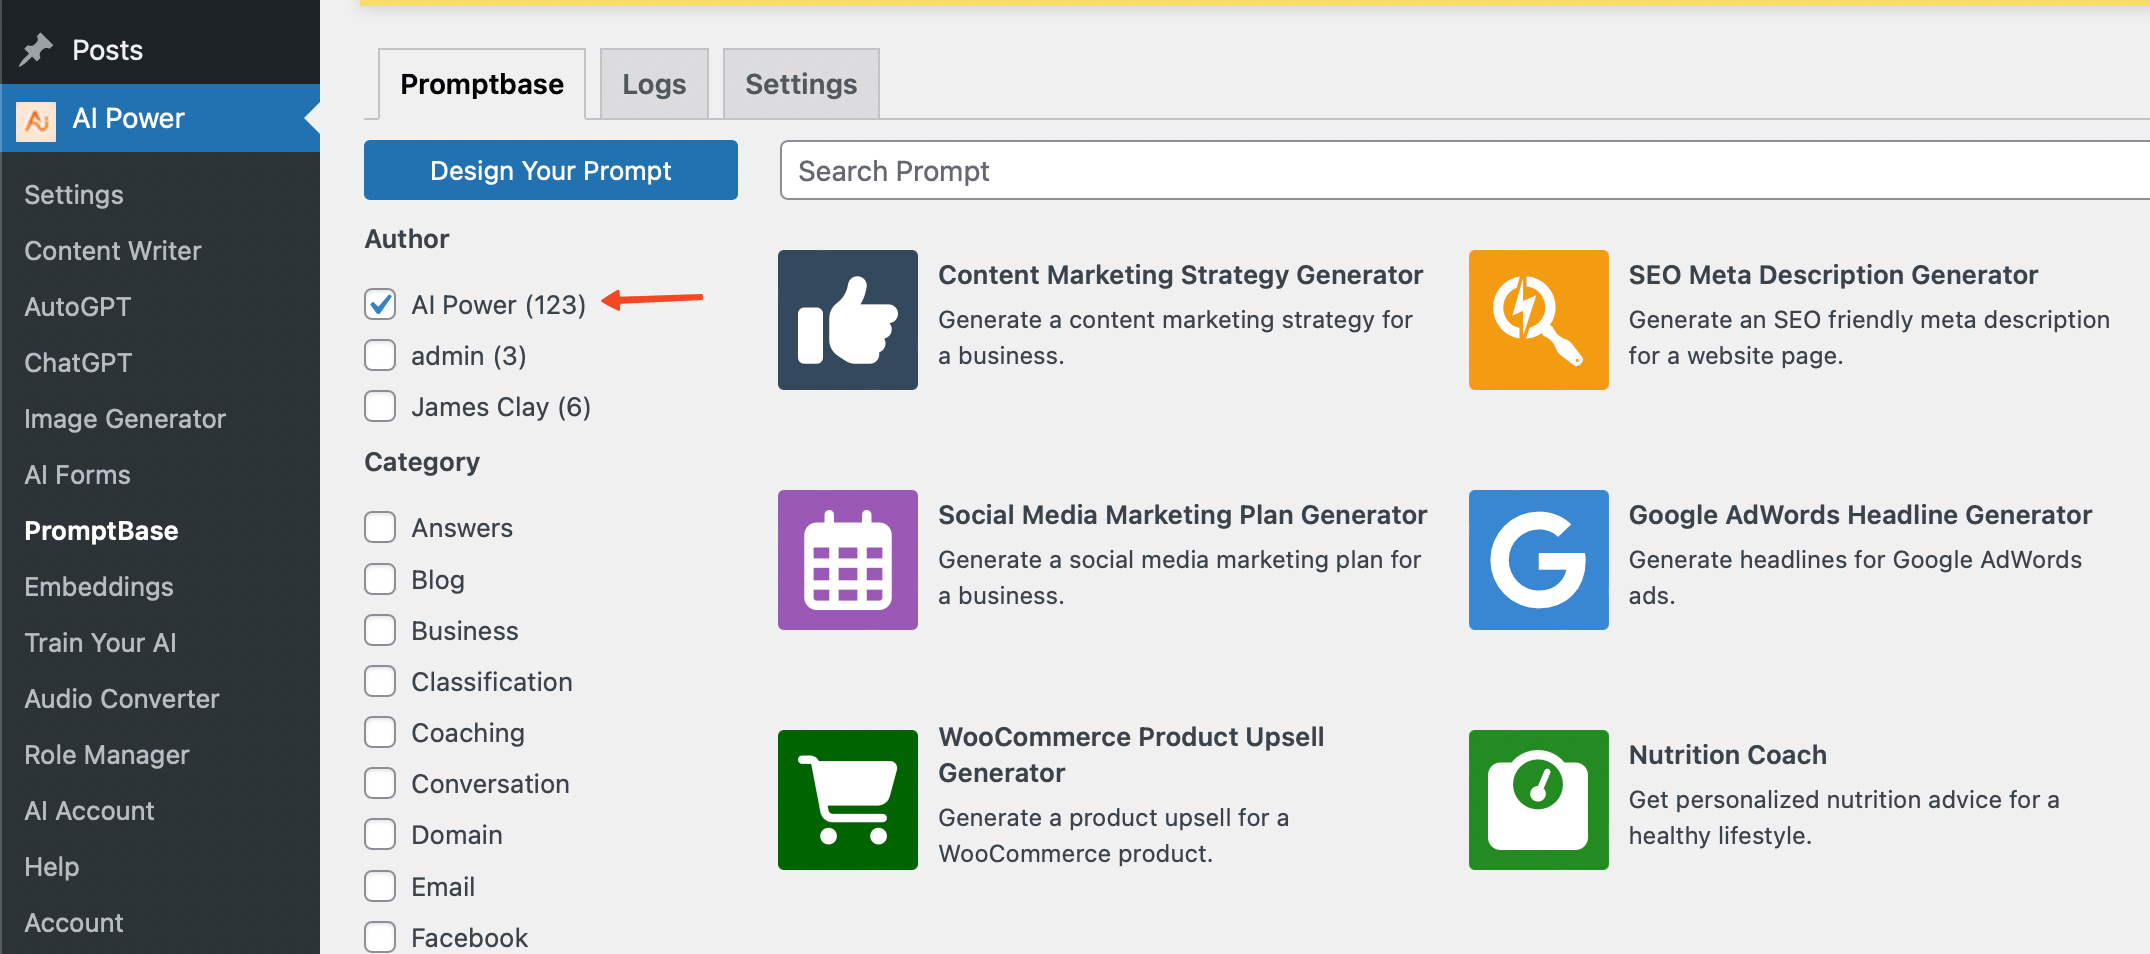
To use a form, hover over its icon and click on it to open it.
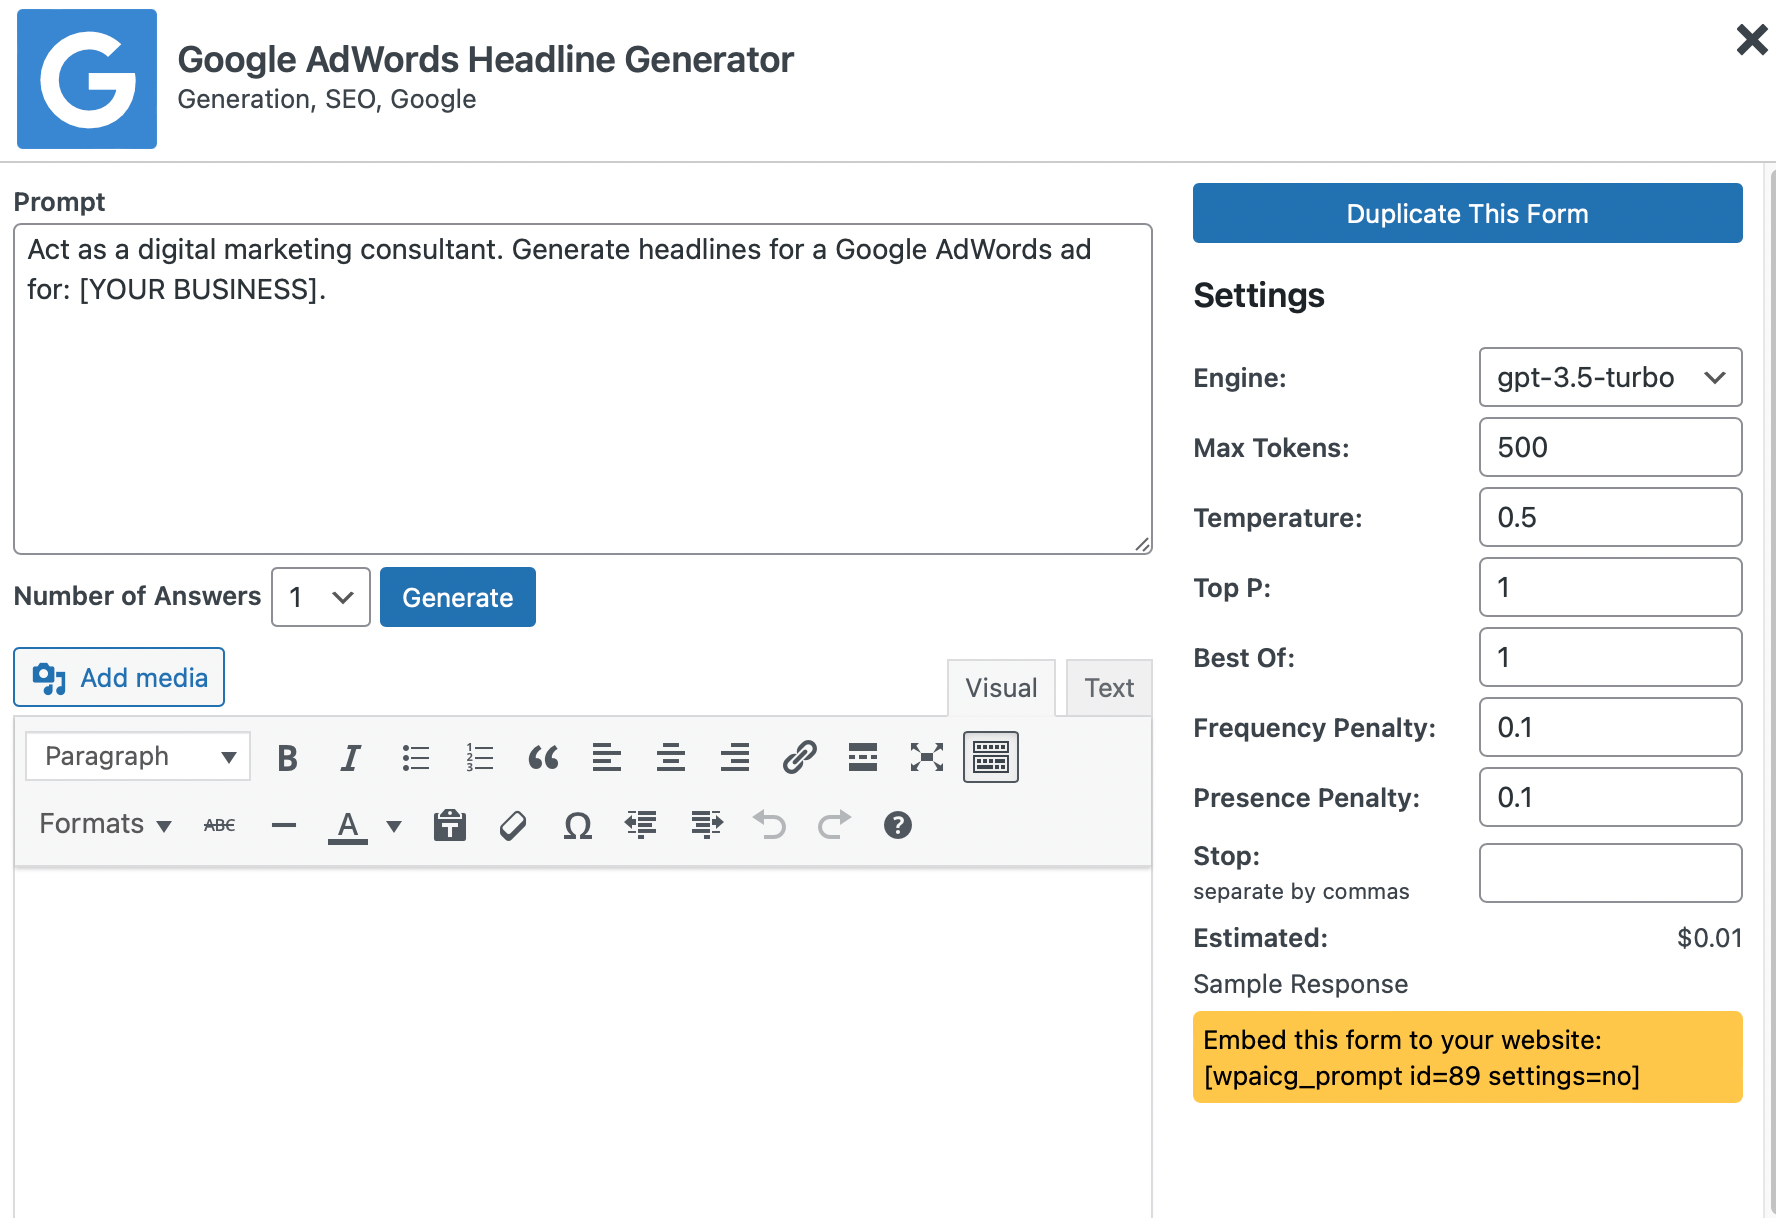
Using and Embedding a Form
Once you open a form, a window will appear where you can interact with it. Here's what you'll find in this window:
- Prompt: Here, you can enter your prompt and hit "Generate" to get the output.
- AI Parameter Settings: On the right side, you will find settings such as the GPT model, max tokens, etc.
- Shortcode: At the bottom right of the window, you'll find the shortcode for the form. This shortcode allows you to embed the form on any of your pages. Simply copy it and paste it into your WordPress post or page where you want the form to appear. Your users can start interacting with it right away.
- Duplicate Button: At the top right of the window, you'll find this button. Clicking on it will duplicate the form, enabling you to create a custom version for your needs. This will generate a new shortcode for the duplicated form.
In the next part, we'll discuss how you can design and create your own PromptBase.
Desigining Your Own Prompts
AI Power plugin allows you to not only use pre-built forms but also design your own PromptBase.
This guide will explain how you can create and customize your own forms using different settings and options.
Initiating the Prompt Design Process
To start designing your own PromptBase, you have two options:
Creating from Scratch:
- Navigate to the PromptBase tab within the AI Power plugin menu.

- Click on the Design Your Prompt button.
Using a Prebuilt Prompts as a Base:
- Open a prebuilt form that you'd like to use as a base.
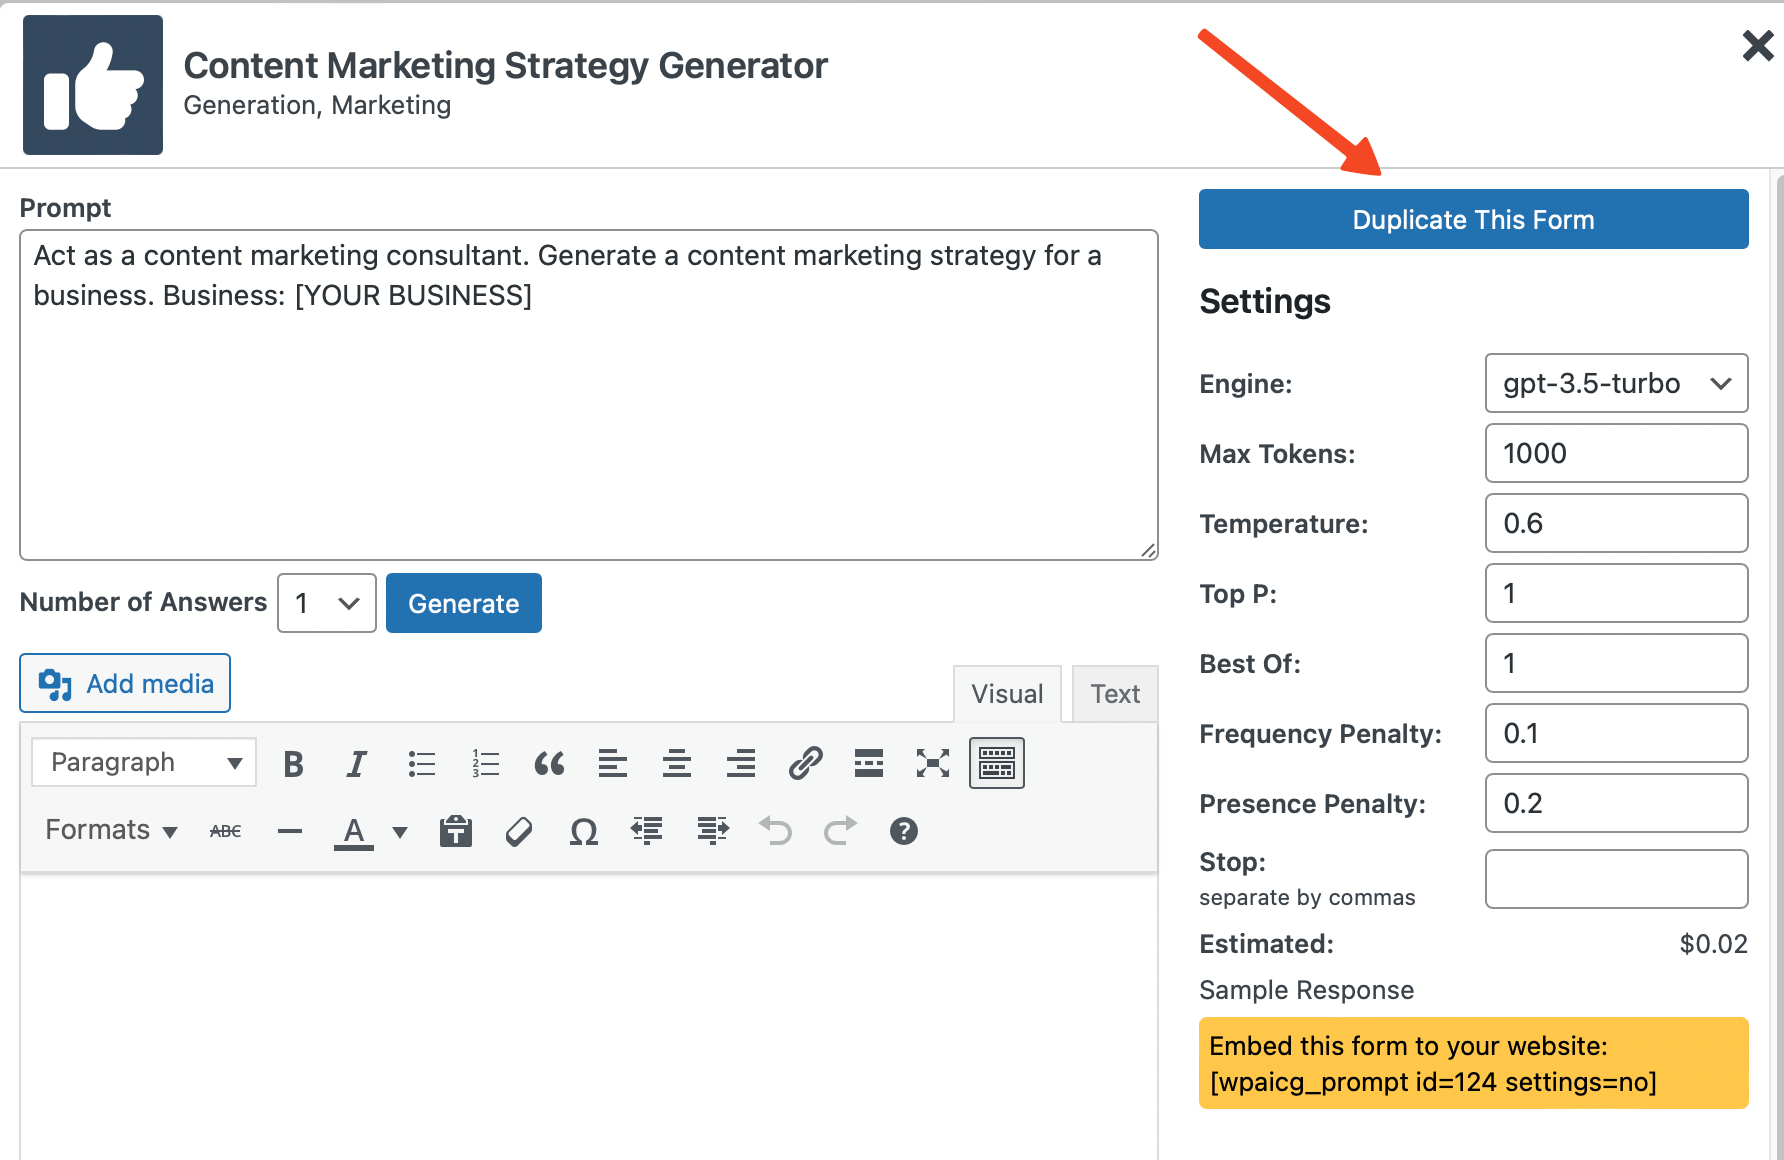
- Click the Duplicate this Form button located on the top right of the form window.
Regardless of the method you choose, a modal window will open with five different tabs for designing your form: Properties, AI Engine, Style and Frontend.
Properties
The Properties tab contains the main information about your form, including:
- Title (Mandatory): Enter a title for your form. This is used to identify your form in the PromptBase menu.
- Category (Mandatory): Select a category for your form. This helps organize your forms within the menu.

- Prompt (Mandatory): Enter the prompt to be displayed to users when they interact with your form.
- Sample Response (Optional): Enter a sample response for your prompt. This is for your reference and won't be displayed to users.
AI Parameters
The "AI Engine" tab allows you to select the AI model and adjust the parameters for your form:
- Engine (Optional): Choose the GPT model for your form. You can select from gpt-4, gpt-3.5 or any of your custom models. If not selected, the default model (gpt-3.5-turbo) will be used.

- Temperature, Top P, Frequency Penalty, Presence Penalty (Optional): These options control the creativity, diversity, and uniqueness of the output, respectively. If not specified, the default values are applied.
- Stop Sequence (Optional): This determines when the AI should stop generating text.
Form Style
Customize the appearance of your form in the "Style" tab:
- Background Color (Optional): Select a background color for your form. Default is white.
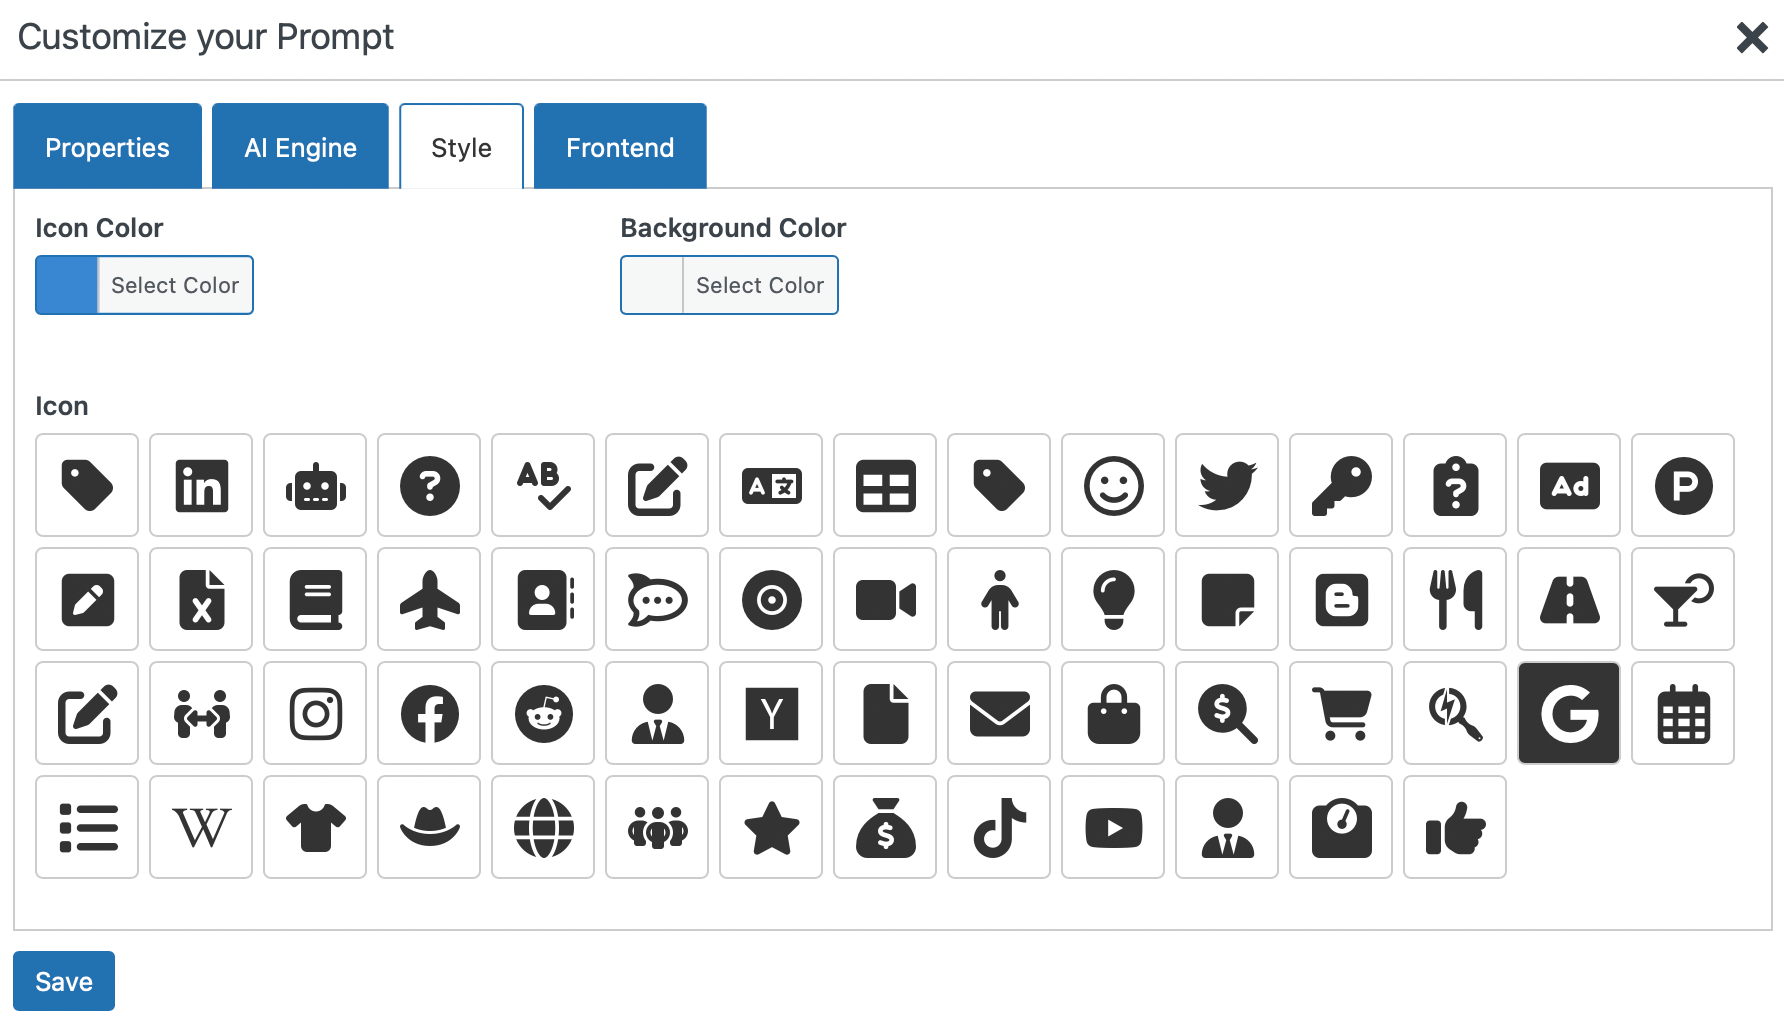
- Icon (Optional): Choose an icon for your form. If not selected, a default icon is used.
- Icon Color (Optional): Choose the color of your icon. The default color is applied if not selected.
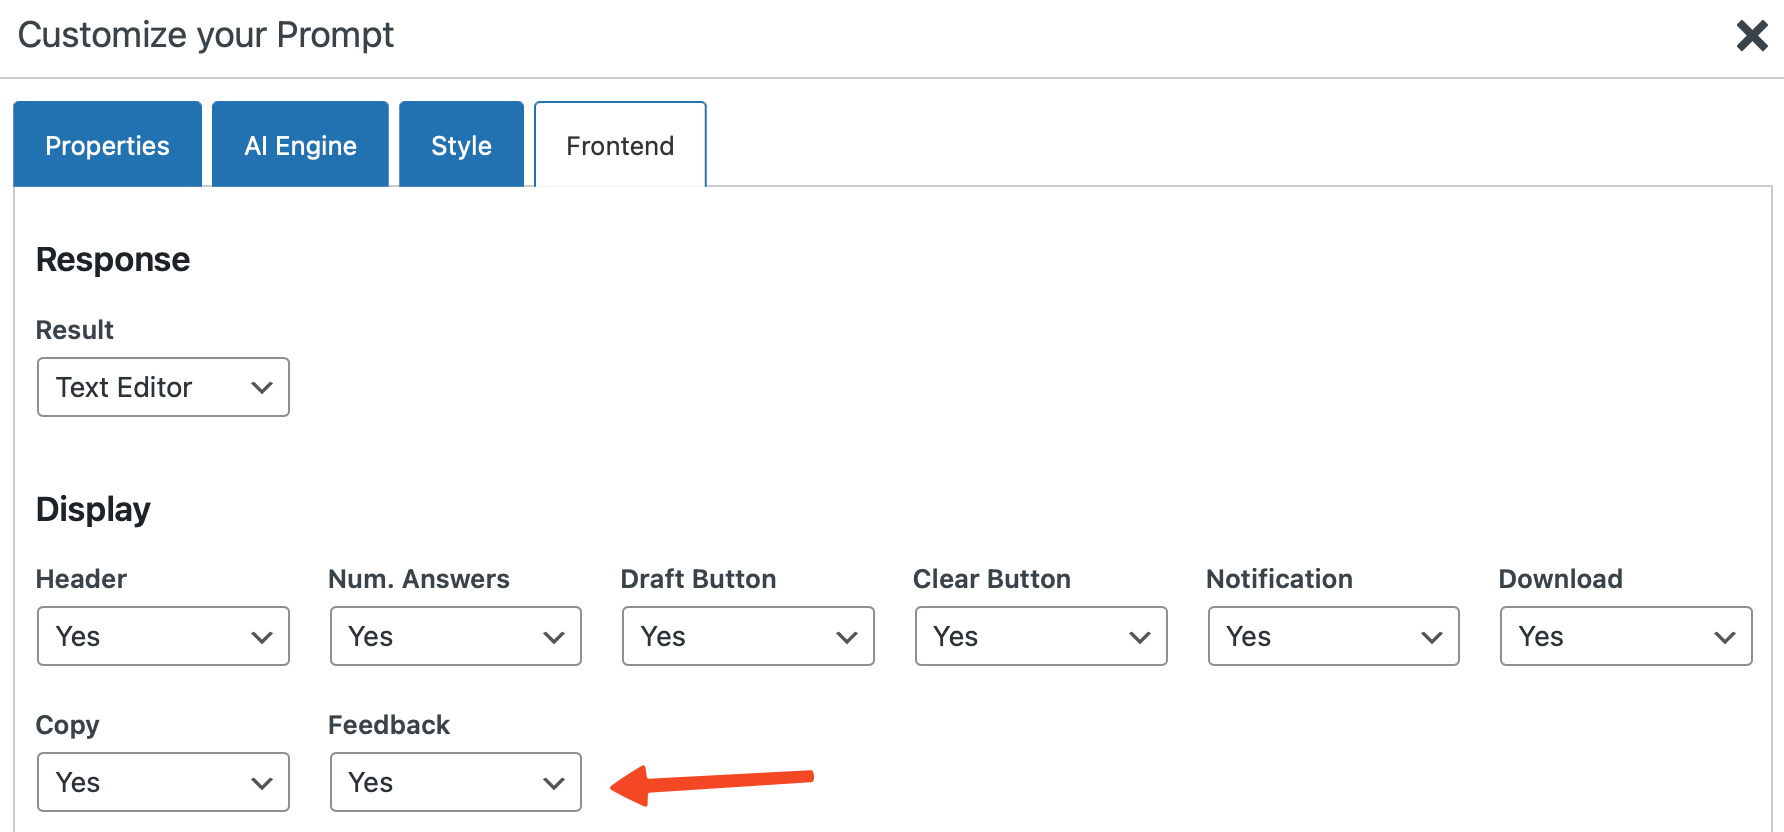
Frontend Display
The Frontend tab allows you to customize how the results are displayed and which interactive elements are available:
- Result: Choose between Text Editor or Inline display for your results.
- Header: Decide whether to display or hide the form's header.
- Number of Answers: Choose to display or hide the number of answers feature.

- Save as Draft Button: Decide whether to display or hide the Save as Draft button.
- Clear Button: Choose to display or hide the "Clear" button.
- Notification Text: Select whether to display or hide the notification text for non-registered users.
- Download button: Choose to enable or disable the button that allows users to download their results. It will save it as "response.txt".
- Copy Button: Choose to display or hide the button that enables users to copy their results to the clipboard.
In addition to these display and interaction settings, you can also customize the following text strings to better match your website's language or branding:
- Generate Button Text: The default text is Generate.
- Number of Answers Text: The default text is Number of Answers.
- Save as Draft Button Text: The default text is Save Draft.
- Clear Button Text: The default text is Clear.
- Stop Button Text: The default text is Stop.
- Notice for Non-Registered Users Text: The default text is Please register to save your result.
- Download Button Text: The default text is "Download".
- Copy Button Text: The default text is "Copy".
Edit, Duplicate, and Delete
Once you've created your own forms, there might come a time when you need to modify their content or structure, replicate them for similar uses, or remove them entirely.
The "PromptBase" interface offers these functionalities in a user-friendly way.

- Editing Forms: To edit a form, first locate the specific form in the "PromptBase" tab. Hover over the form's name, and you'll see three buttons appear: Duplicate, Edit, and Delete. Click on the Edit button to modify the form's properties, AI engine settings, style and frontend configuration. After making your changes, don't forget to save your modifications by clicking on the Save button.
- Duplicating Forms: If you need to create a similar form or want to use an existing form as a template, the Duplicate button comes in handy. Hover over the form's name and click on Duplicate. This action creates an exact copy of the form, which you can then edit as needed.
- Deleting Forms: To delete a form, hover over the form's name and click on the Delete button. A confirmation dialog will appear, asking if you're sure about deleting the form. Confirm your decision by clicking on Yes. Please note that this action is permanent and cannot be undone.
By using these options, you can manage your forms effectively and ensure they meet your evolving requirements.
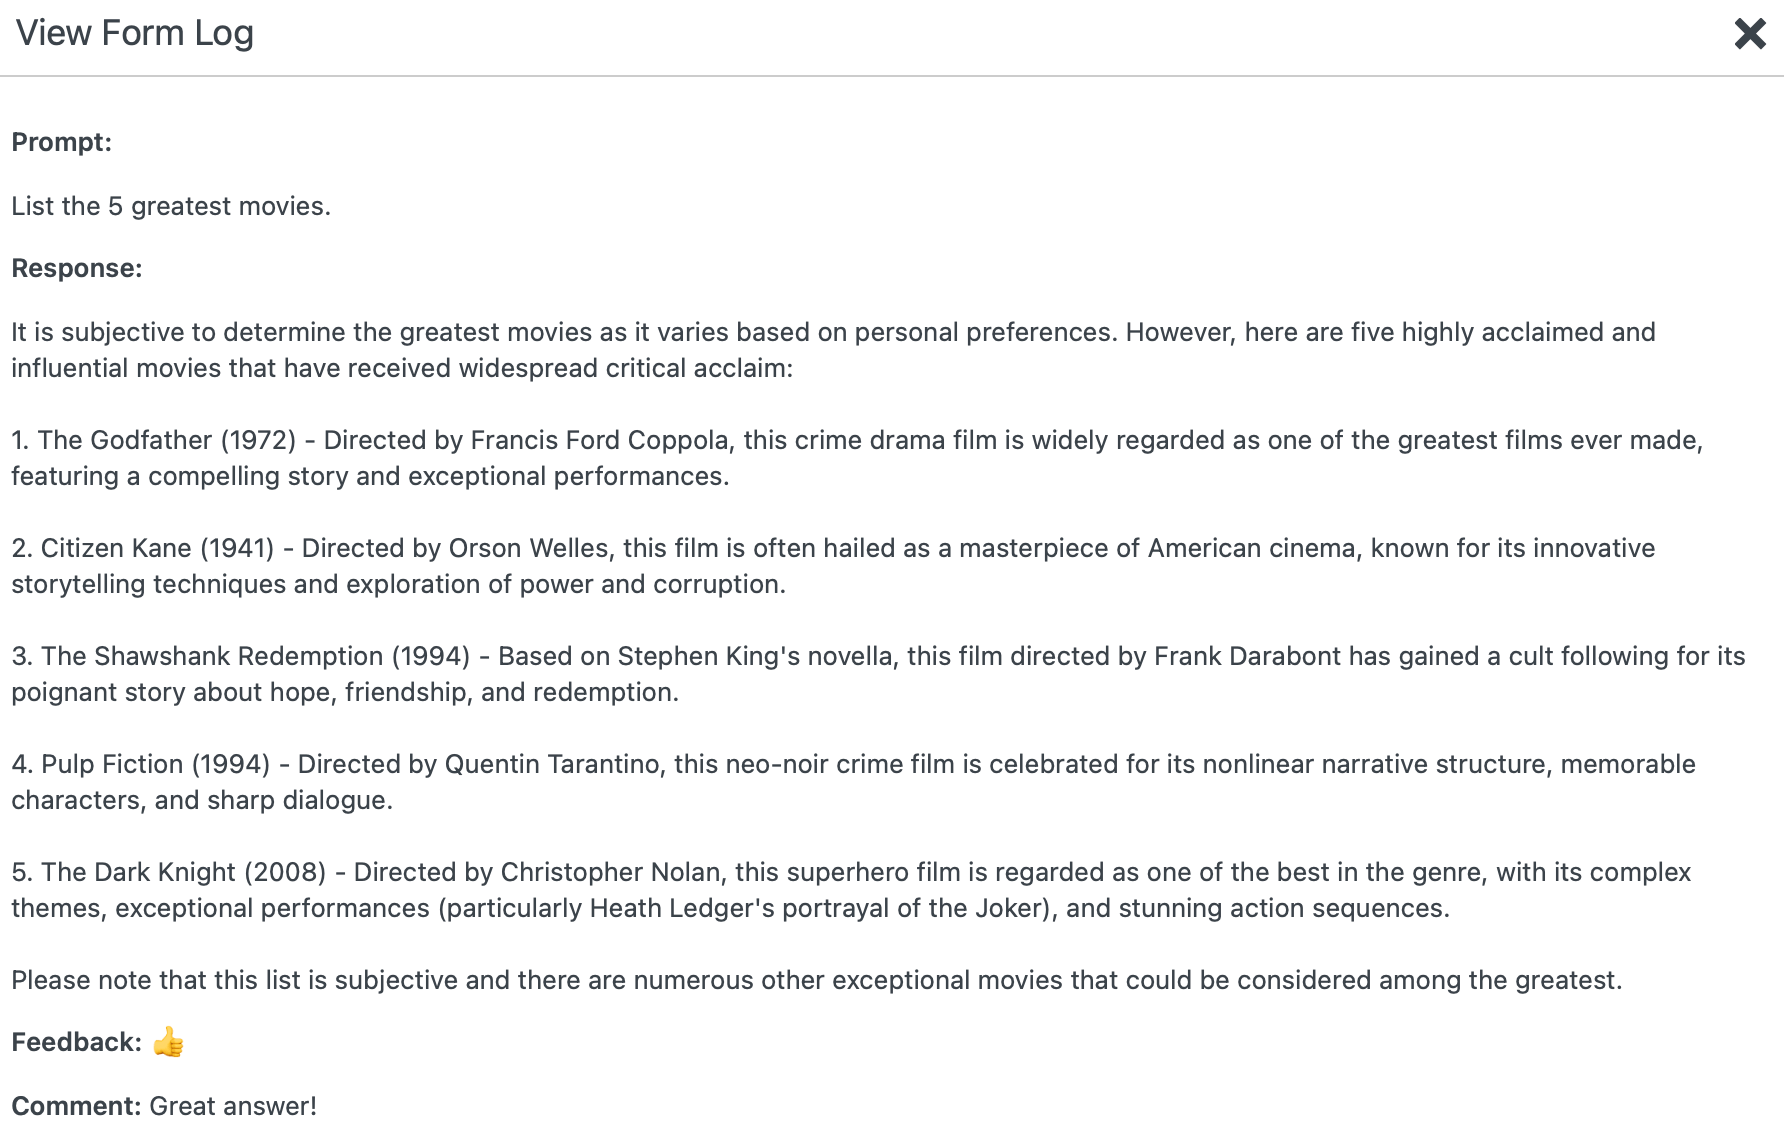
Feedback Collection
Collecting feedback is a crucial aspect of ensuring your AI Forms meet user expectations and continually evolve to serve them better. With our feedback collection feature, you can seamlessly gather user opinions on the AI Form results.
- Enabling Feedback Collection: To start collecting feedback, navigate to the form settings and look for the "Frontend" tab. Here, you'll find an option to enable feedback collection. Simply set it to "Yes".
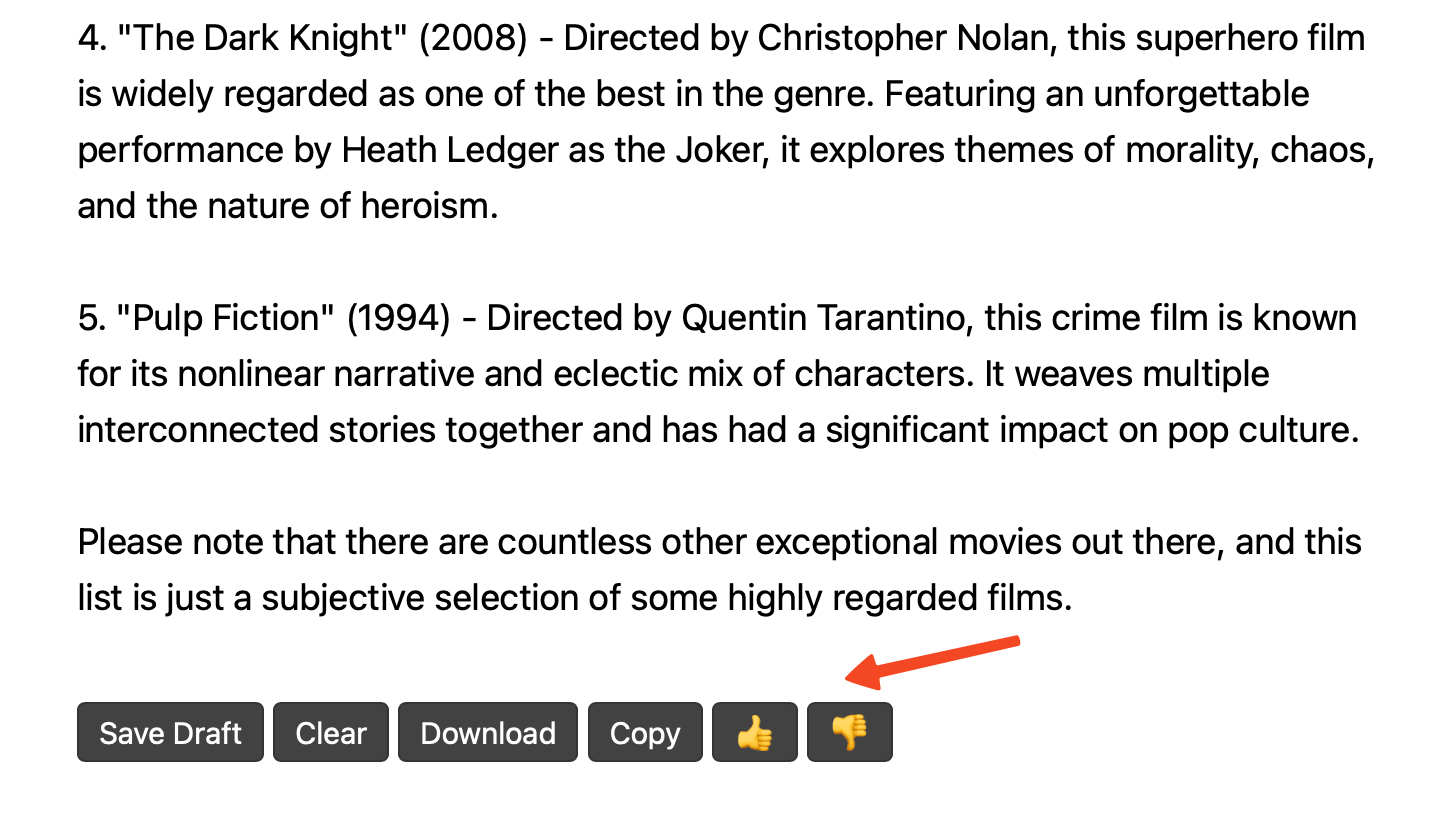
- Feedback Icons Display: Once enabled, two icons representing thumbs up 👍 (for positive feedback) and thumbs down 👎 (for negative feedback) will be displayed right below the AI Form results on the frontend.
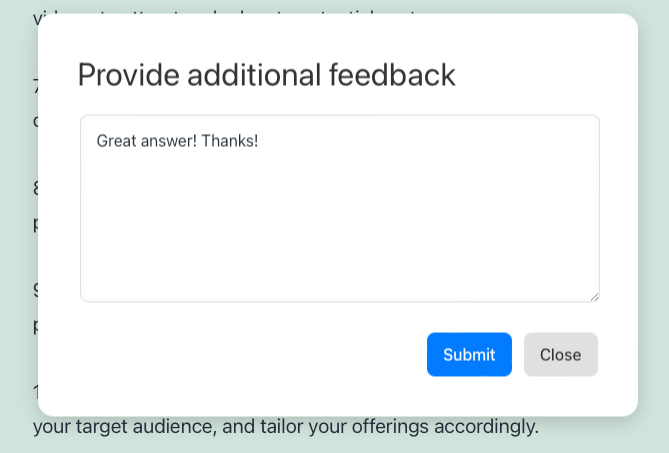
- Collecting Additional Comments: Clicking on either of these icons will open a modal window, prompting users to provide additional comments about the generated content. This feature offers an avenue for users to share more detailed insights or specific issues they might have encountered.
- One-time Feedback Submission: To ensure authenticity and prevent feedback spam, once a user submits feedback for a specific result, the feedback icons are disabled for that particular result. This means users can't provide multiple feedbacks for the same result. However, every time they generate a new response using the form, the feedback option becomes available again.
- Viewing Collected Feedback: All the collected feedback, along with any comments provided by the users, can be accessed easily. Navigate to the "AI Forms" section in your dashboard, and under it, you'll find the "Logs" menu. This section will display all the feedback received.
This feedback mechanism not only helps in gathering user insights but also in refining and improving your prompt performance over time. By understanding user preferences and issues, you can make necessary adjustments to your prompts or the AI parameters to yield better results.
Logs
The PromptBase Logs is a feature that allows you to track and monitor the usage of your PromptBase effectively.
It provides you with crucial data about your form's activity, helping you to understand better how your forms are being used and what their performance metrics look like.
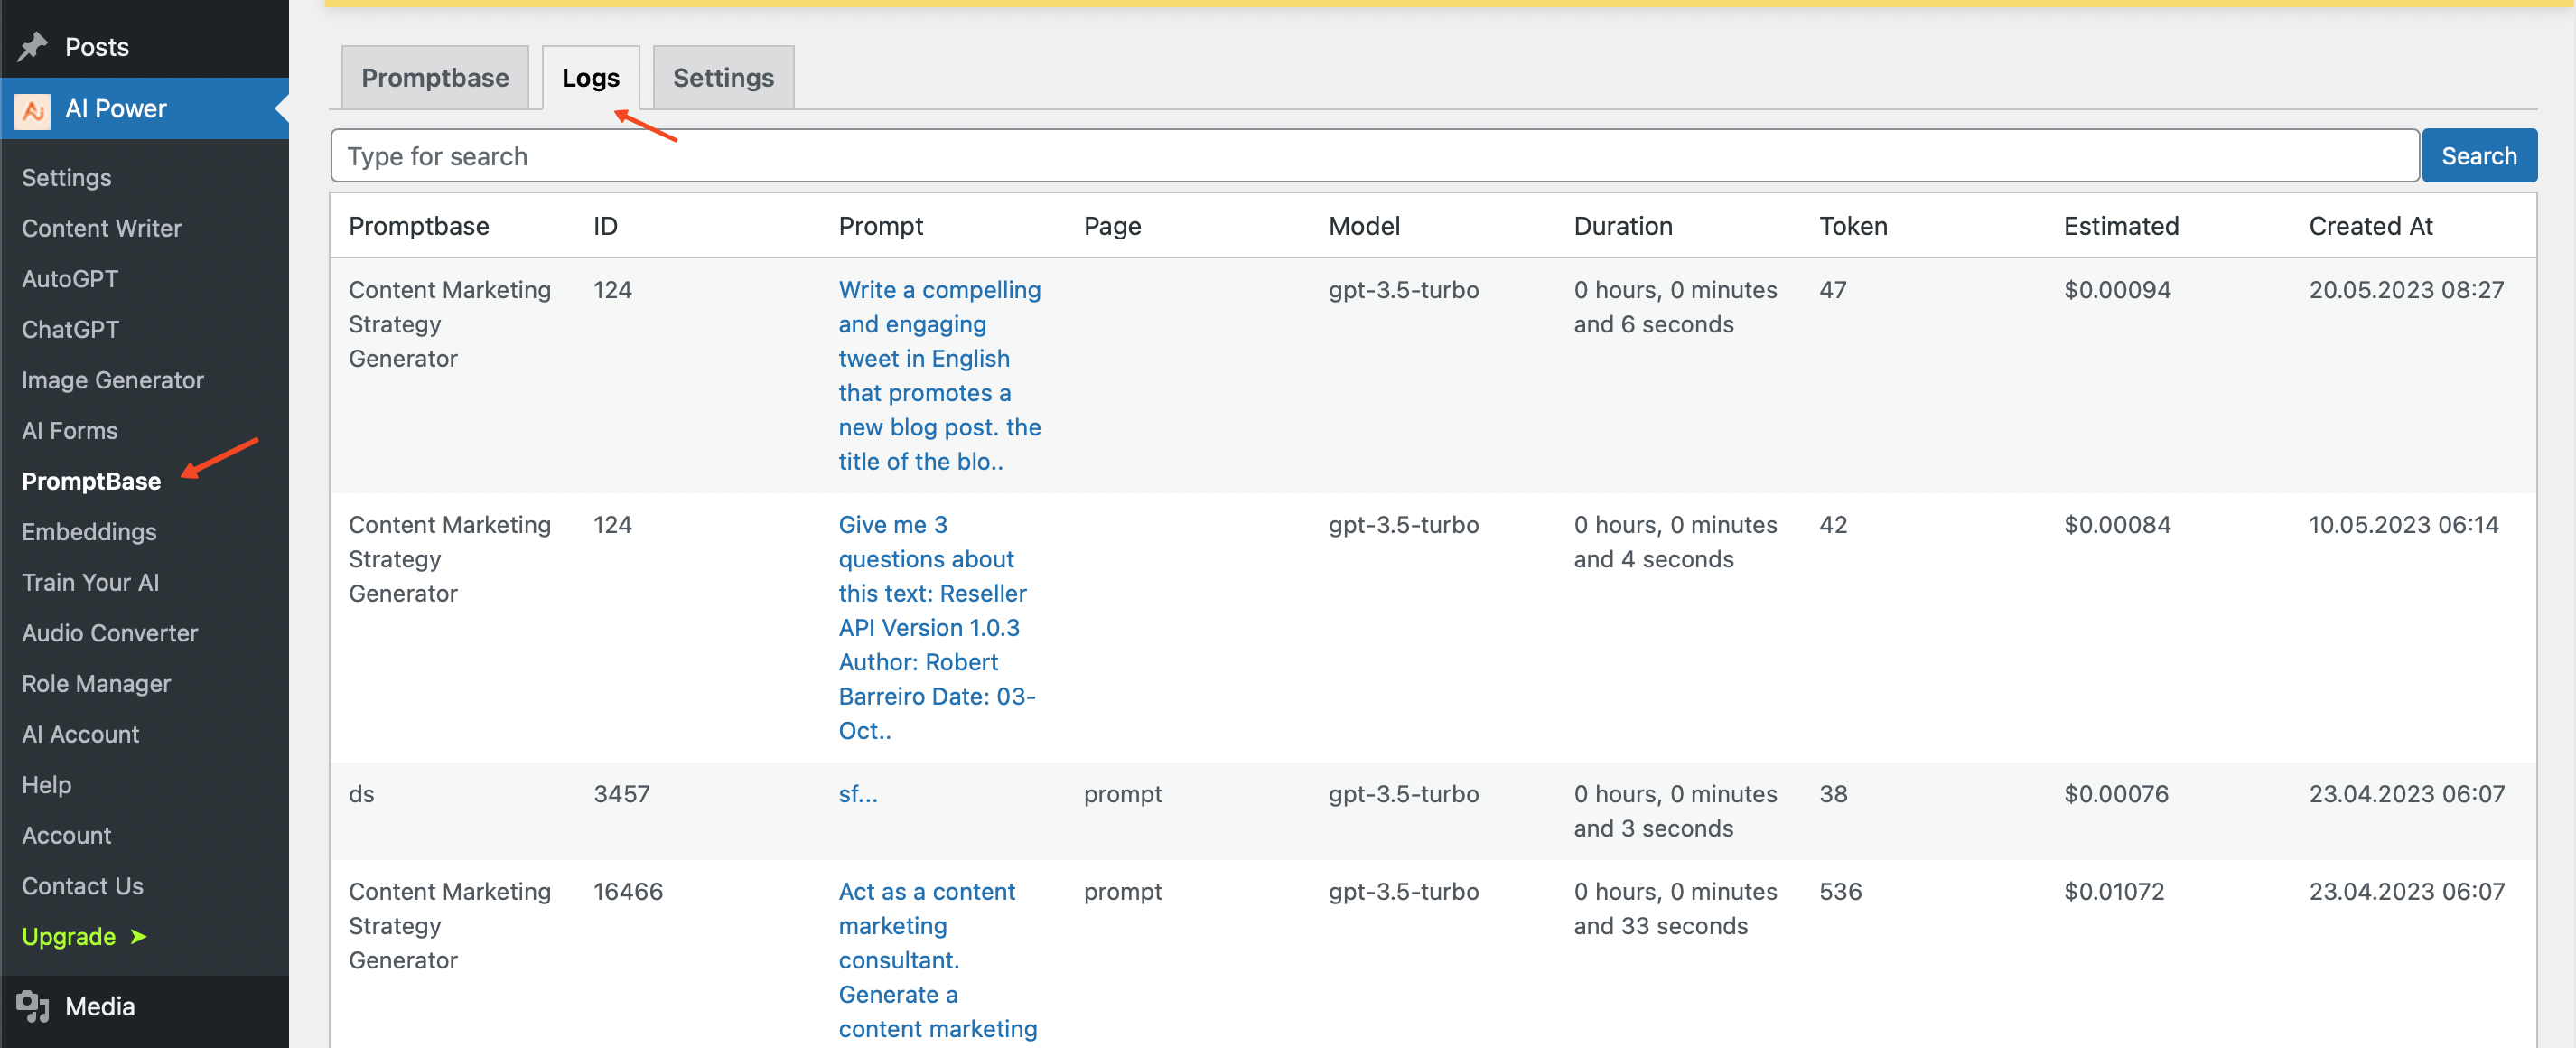
Upon navigating to the Logs section under the PromptBase tab, you'll encounter a dashboard that displays several data points for each AI form usage:
- Form: This column lists the names of the forms that have been used.
- ID: Here you'll see the unique identification number assigned to each form.
- Prompt: This column displays the prompt text that was used in each form.
- Page: This indicates the specific page or post where the form was embedded and used.
- Model: This column displays which model was used to generate the form's output.
- Duration: This reflects the amount of time it took to generate the output for each form.
- Token: This column shows how many tokens were expended to generate the content for each form.
- Estimated Cost: Based on the number of tokens used, this column provides an estimate of the cost associated with each form's usage.
- Created At: This column indicates when the form was used, providing a timestamp for each usage.
The Logs feature also provides a search box, enabling you to quickly look up specific logs using keywords.
Simply type your search term into the box and hit enter to display any matching results.
This can be extremely useful for quickly locating specific forms, pages, or prompts.
The PromptBase Logs feature gives you a comprehensive overview of your form's performance, helping you track usage, manage costs, and evaluate the effectiveness of different prompts and AI engines.
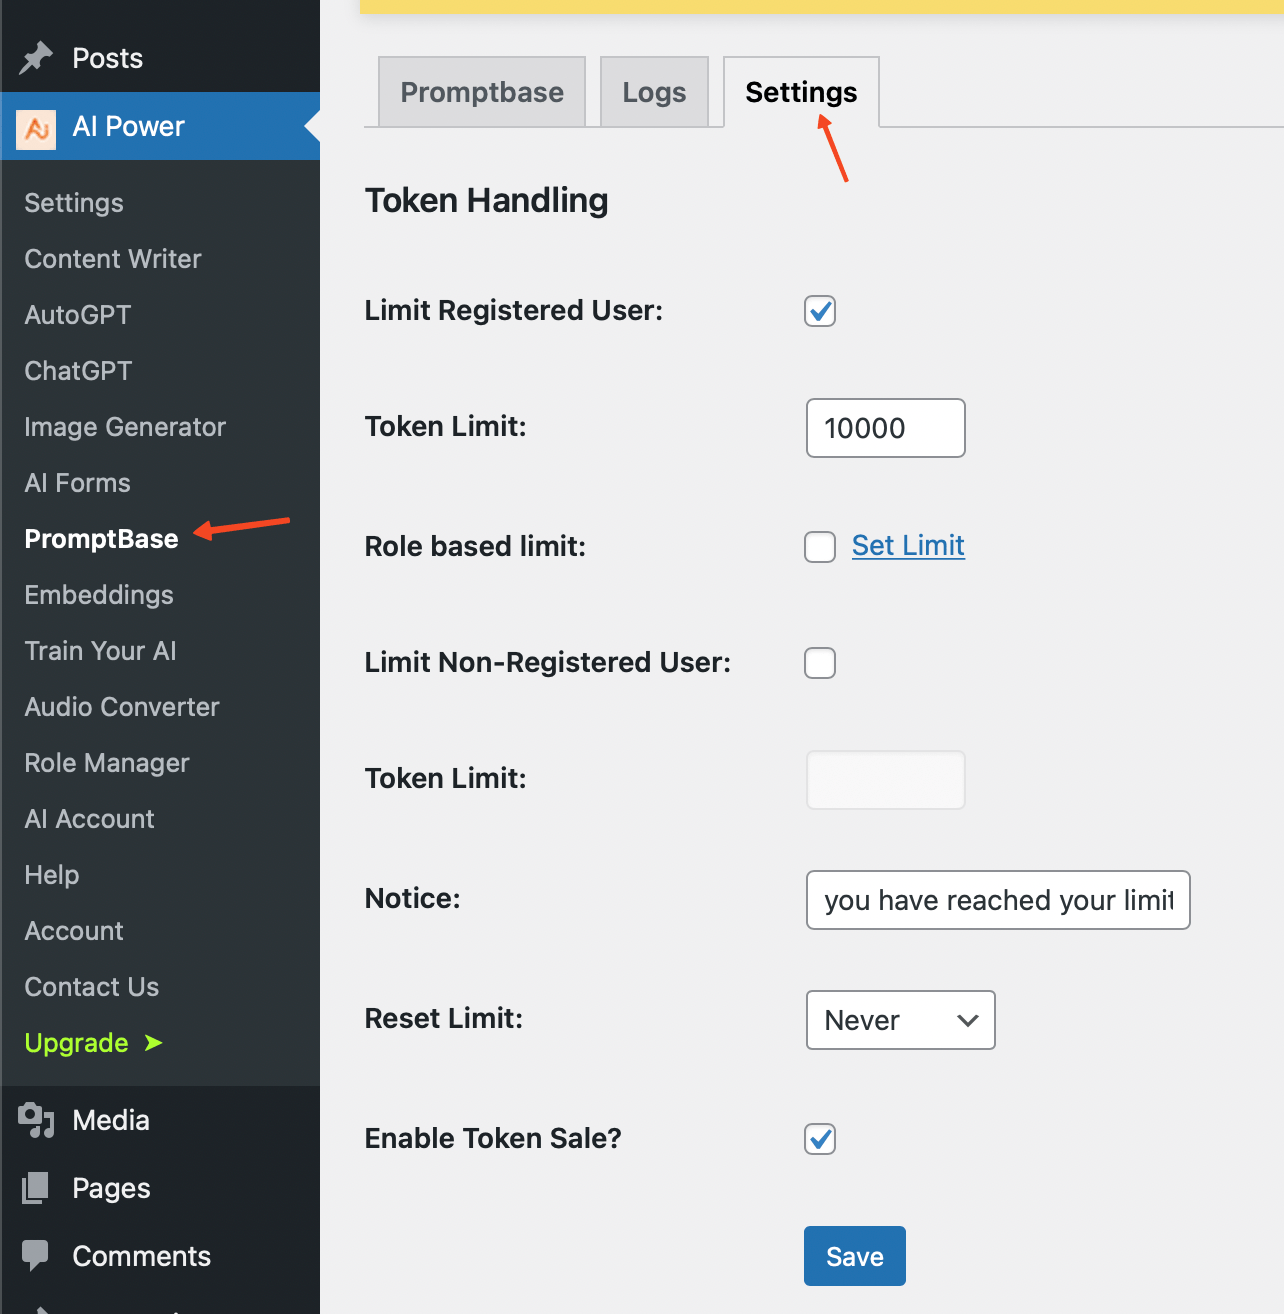
Token Handling
Our plugin provides a robust token handling feature that allows you to control and limit the usage of the PromptBase based on user roles and registration status.
This can be found under the PromptBase - Settings tab.
Here's a step-by-step guide on how to use this feature.
- Limit Registered User: This setting allows you to decide whether to place a limit on registered users. To enable this feature, check the corresponding box. If you don't want to limit registered users, leave the checkbox unmarked.
- Token Limit for Registered Users: This is where you define token limit for registered users. Enter the maximum amount you want each registered user to be able to spend on.
- Role-based Limit: This feature allows you to set individual token limits for different user roles on your Wordpress site. Clicking on Set Limit will open a modal window displaying all the user roles in your Wordpress site. Here, you can assign a specific limit for each role.
- Limit Non-Registered User: This setting is similar to Limit Registered User, but it applies to non-registered users. To enable this feature, check the corresponding box. If you don't want to limit non-registered users, leave the checkbox unmarked.
- Token Limit for Non-Registered Users: This setting allows you to define token limit for non-registered users. Enter the maximum amount you want each non-registered user to be able to spend on.
- Notice: Here, you can customize the message that users will see when they reach their limit. For example, "You have reached your limit".
- Reset Limit: This setting defines the interval at which the limit will reset. You can choose from Never, 1 day, 3 days, 1 week, 2 weeks, 1 month, 2 months, 3 months or 6 months. Selecting Never will mean that the limit does not reset, and users will have to wait until the next reset interval if they reach their limit.
Remember to click Save once you're done adjusting these settings to ensure all changes are applied.
This feature gives you great flexibility in managing usage and costs associated with the PromptBase on your site.
Token Sale
You can charge your users for their use of your PromptBase.
Our integration with WooCommerce allows you to sell tokens, which users can purchase and utilize to access and enjoy the PromptBase on your site.
Learn more about it here: User Account Management & Token Sale