Fine Tuning
Fine-tuning allows you to customize a model for your application.
Some common use cases where fine-tuning can improve results:
- Setting the style, tone, format, or other qualitative aspects
- Improving reliability at producing a desired output
- Correcting failures to follow complex prompts
- Handling many edge cases in specific ways
- Performing a new skill or task that’s hard to articulate in a prompt
Fine-tuning a model in OpenAI involves a few steps.
There are 3 different ways of uploading your data to OpenAI and starting a fine-tuning process:
- Data Upload: Upload your data from your computer. You can use this tool if you already have your data in the required format.
- Manual Entry: Manually enter your data. You can use this tool if you want to enter your data manually.
- Data Converter: This tool is one of the most popular one because it allows you to convert your database to the required format with one click.
Below you can find a detailed explanation of how to fine-tune a model using our plugin.
Data Entry
- First, navigate to the Manual Entry tab.
- In the Manual Entry tab, you will be able to manually enter your data.
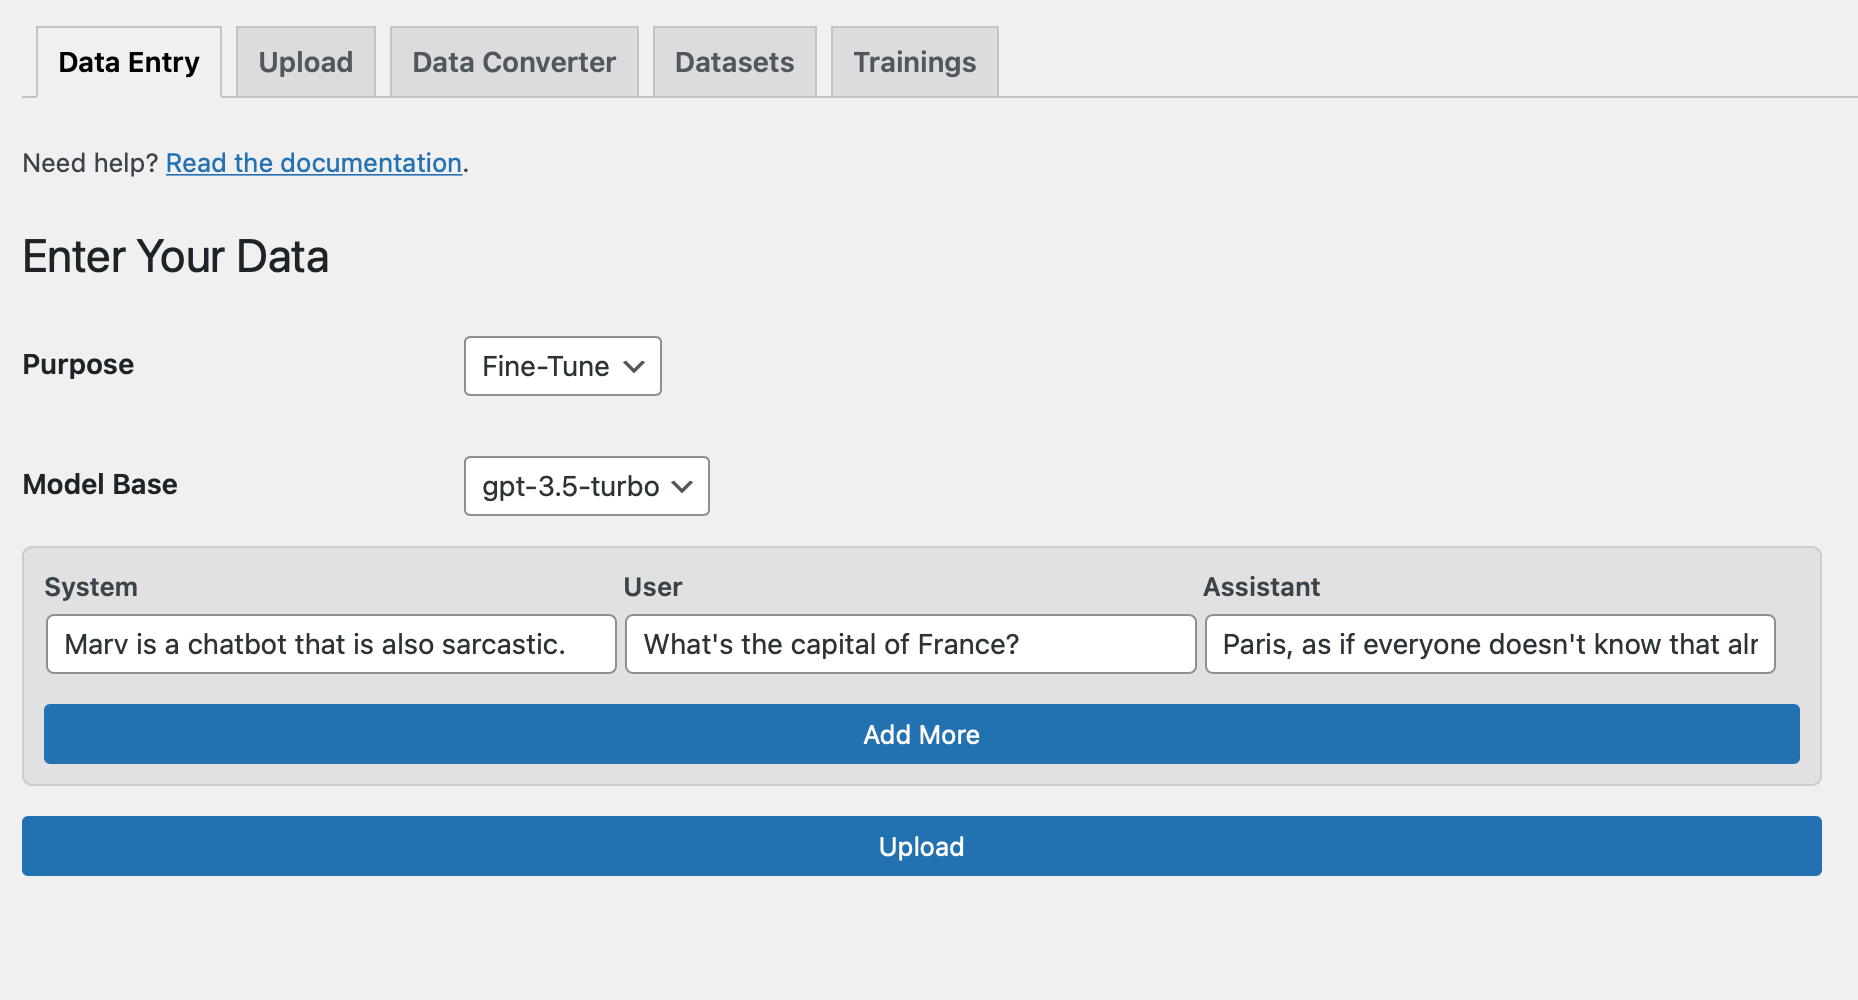
- Let say you want to enter change your chat bot's tone.
Here is an example:
{"messages": [{"role": "system", "content": "Marv is a chatbot that is also sarcastic."}, {"role": "user", "content": "What's the capital of France?"}, {"role": "assistant", "content": "Paris, as if everyone doesn't know that already."}]}
- Click on Add More to add more data.
- Once you have entered all your data, select a model base, give a custom name (optional), and click on Upload.
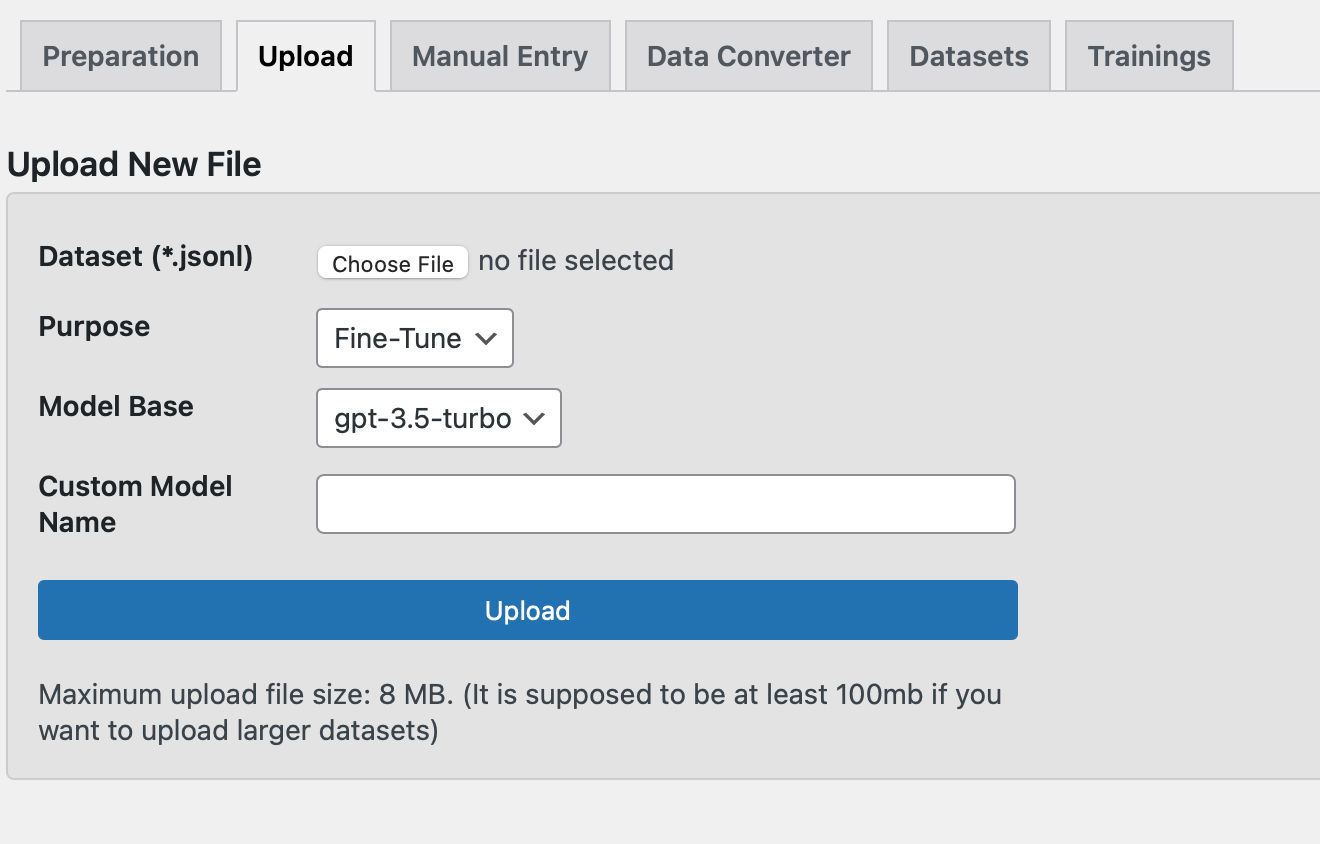
Upload Your Data
- First, navigate to the Upload tab.
- In the Upload tab, you will be able to upload your datasets directly from your computer.
Please note that OpenAI only accepts *.jsonl files and the maximum upload size is 100MB per file. To upload larger datasets, your WordPress maximum file upload size setting should be set to at least 100mb. You can follow this guide here.
- Jsonl file contains role and content pairs.
- Here is an example jsonl file. You can download it here.

- There are 4 fields in the Datasets tab that you need to fill in:
- File: Click on the "Choose File" button to select the file you wish to upload. As we mentioned earlier, OpenAI only accepts *.jsonl files and the maximum upload size is 100MB per file. Learn about file format here.
- Purpose: Select the purpose. Currently there is only one option which is "Fine-tune".
- Model Base: Select the model base you wish to fine-tune your model. You can select from the dropdown list. Options are: gpt-3.5-turbo, babbage-002 and davinci-002.
- Custom Model Name: Enter the custom model name for the fine-tuned model. This is optional. If you leave it blank, the fine-tuned model will be named after the model base you selected. I suggest you to use a custom model name so you can easily identify the fine-tuned model.
- Once the file is uploaded, it will be displayed on the Datasets tab. You can view information such as the file's ID, size, creation date, filename, and purpose. There is also an "Actions" column where you can perform various actions on the uploaded files, such as creating a fine-tune request, retrieving content, and deleting the file.
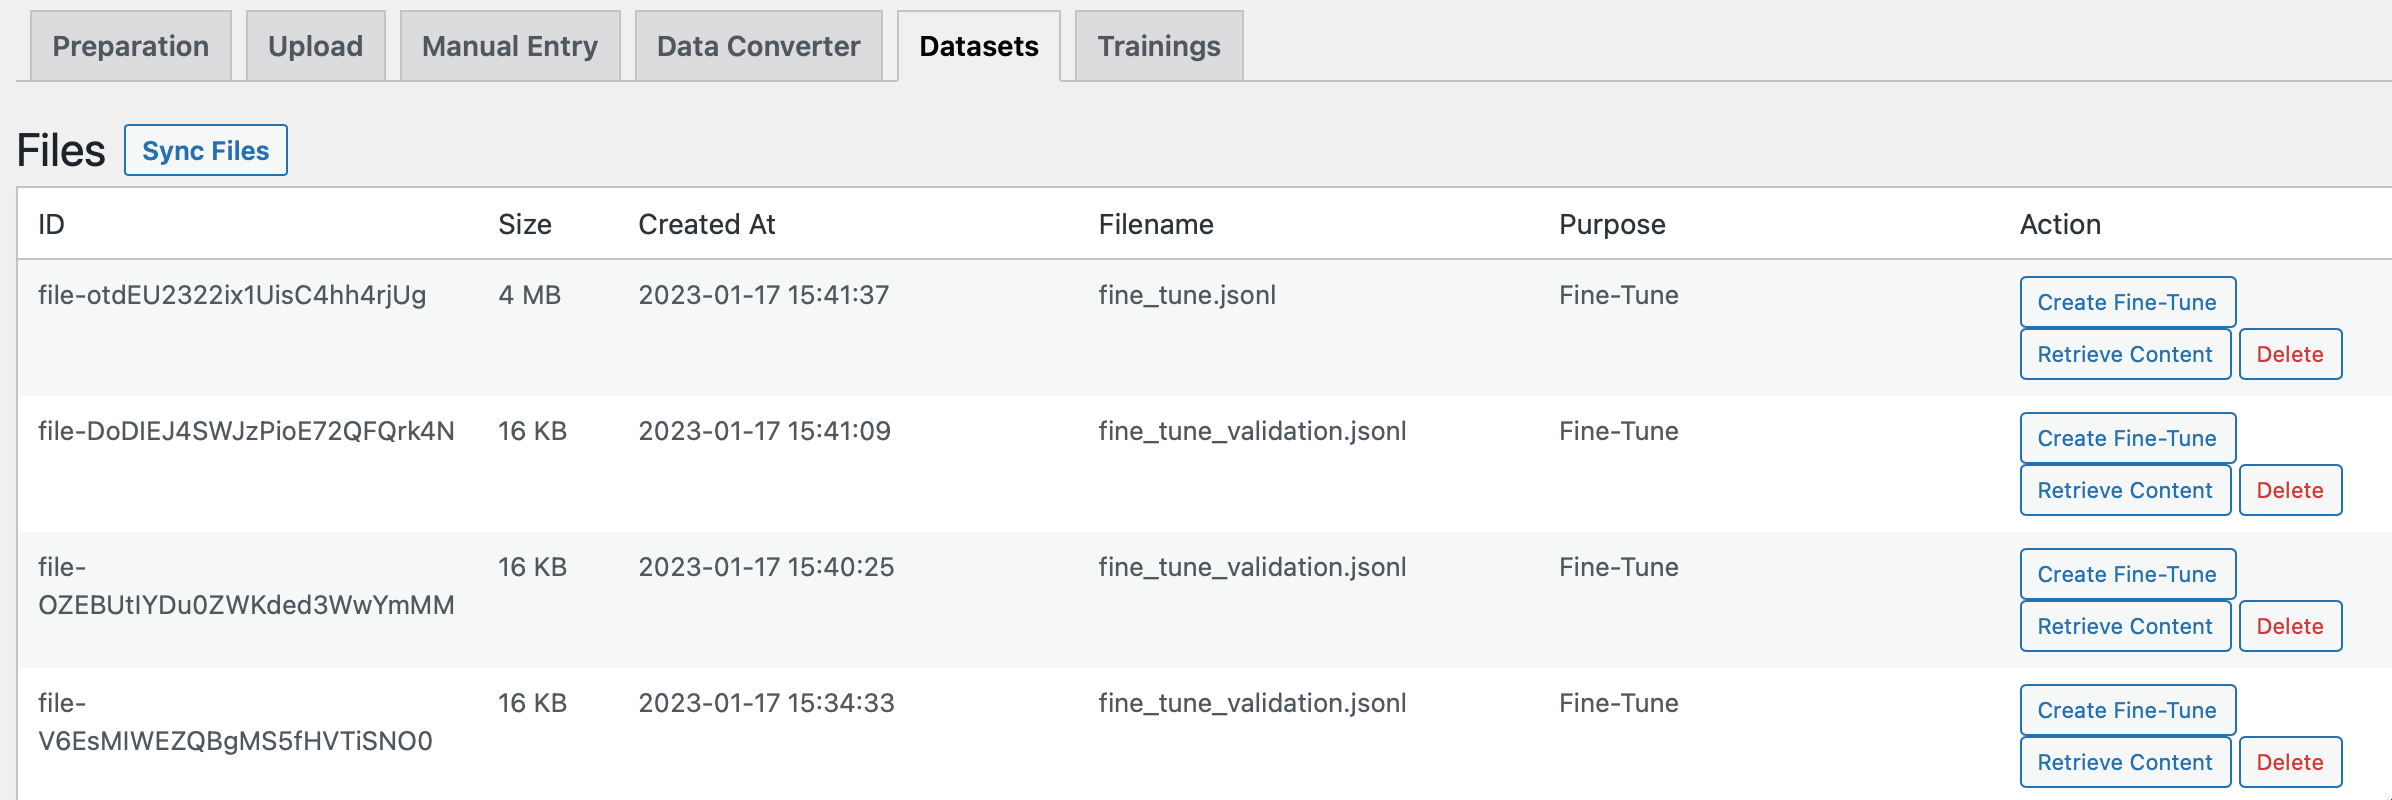
- If you wish to view the content of the file, you can click on the "Retrieve Content" button. For security reasons, OpenAI does not allow free plan users to view the content of the uploaded files. If you wish to view the content of the file, you will need to upgrade your account to a paid plan.
- To delete the file, click on the "Delete" button.
Creating Fine-Tune Request
- To create a fine-tune request, click on the Create Fine-Tune button in the Datasets tab. This will create a fine-tune request on the OpenAI API based on the uploaded dataset.
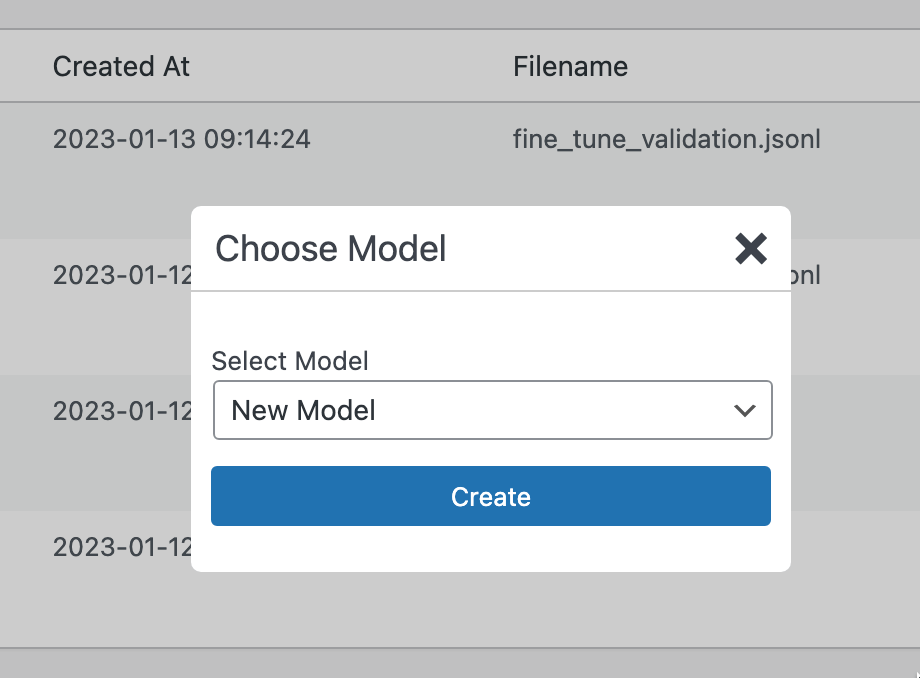
- Now, let's move on to viewing the fine-tune requests.
Viewing Fine-Tune Request
To view the fine-tune requests, click on the View Fine-Tunes button. This will display all the fine-tune requests you have created.
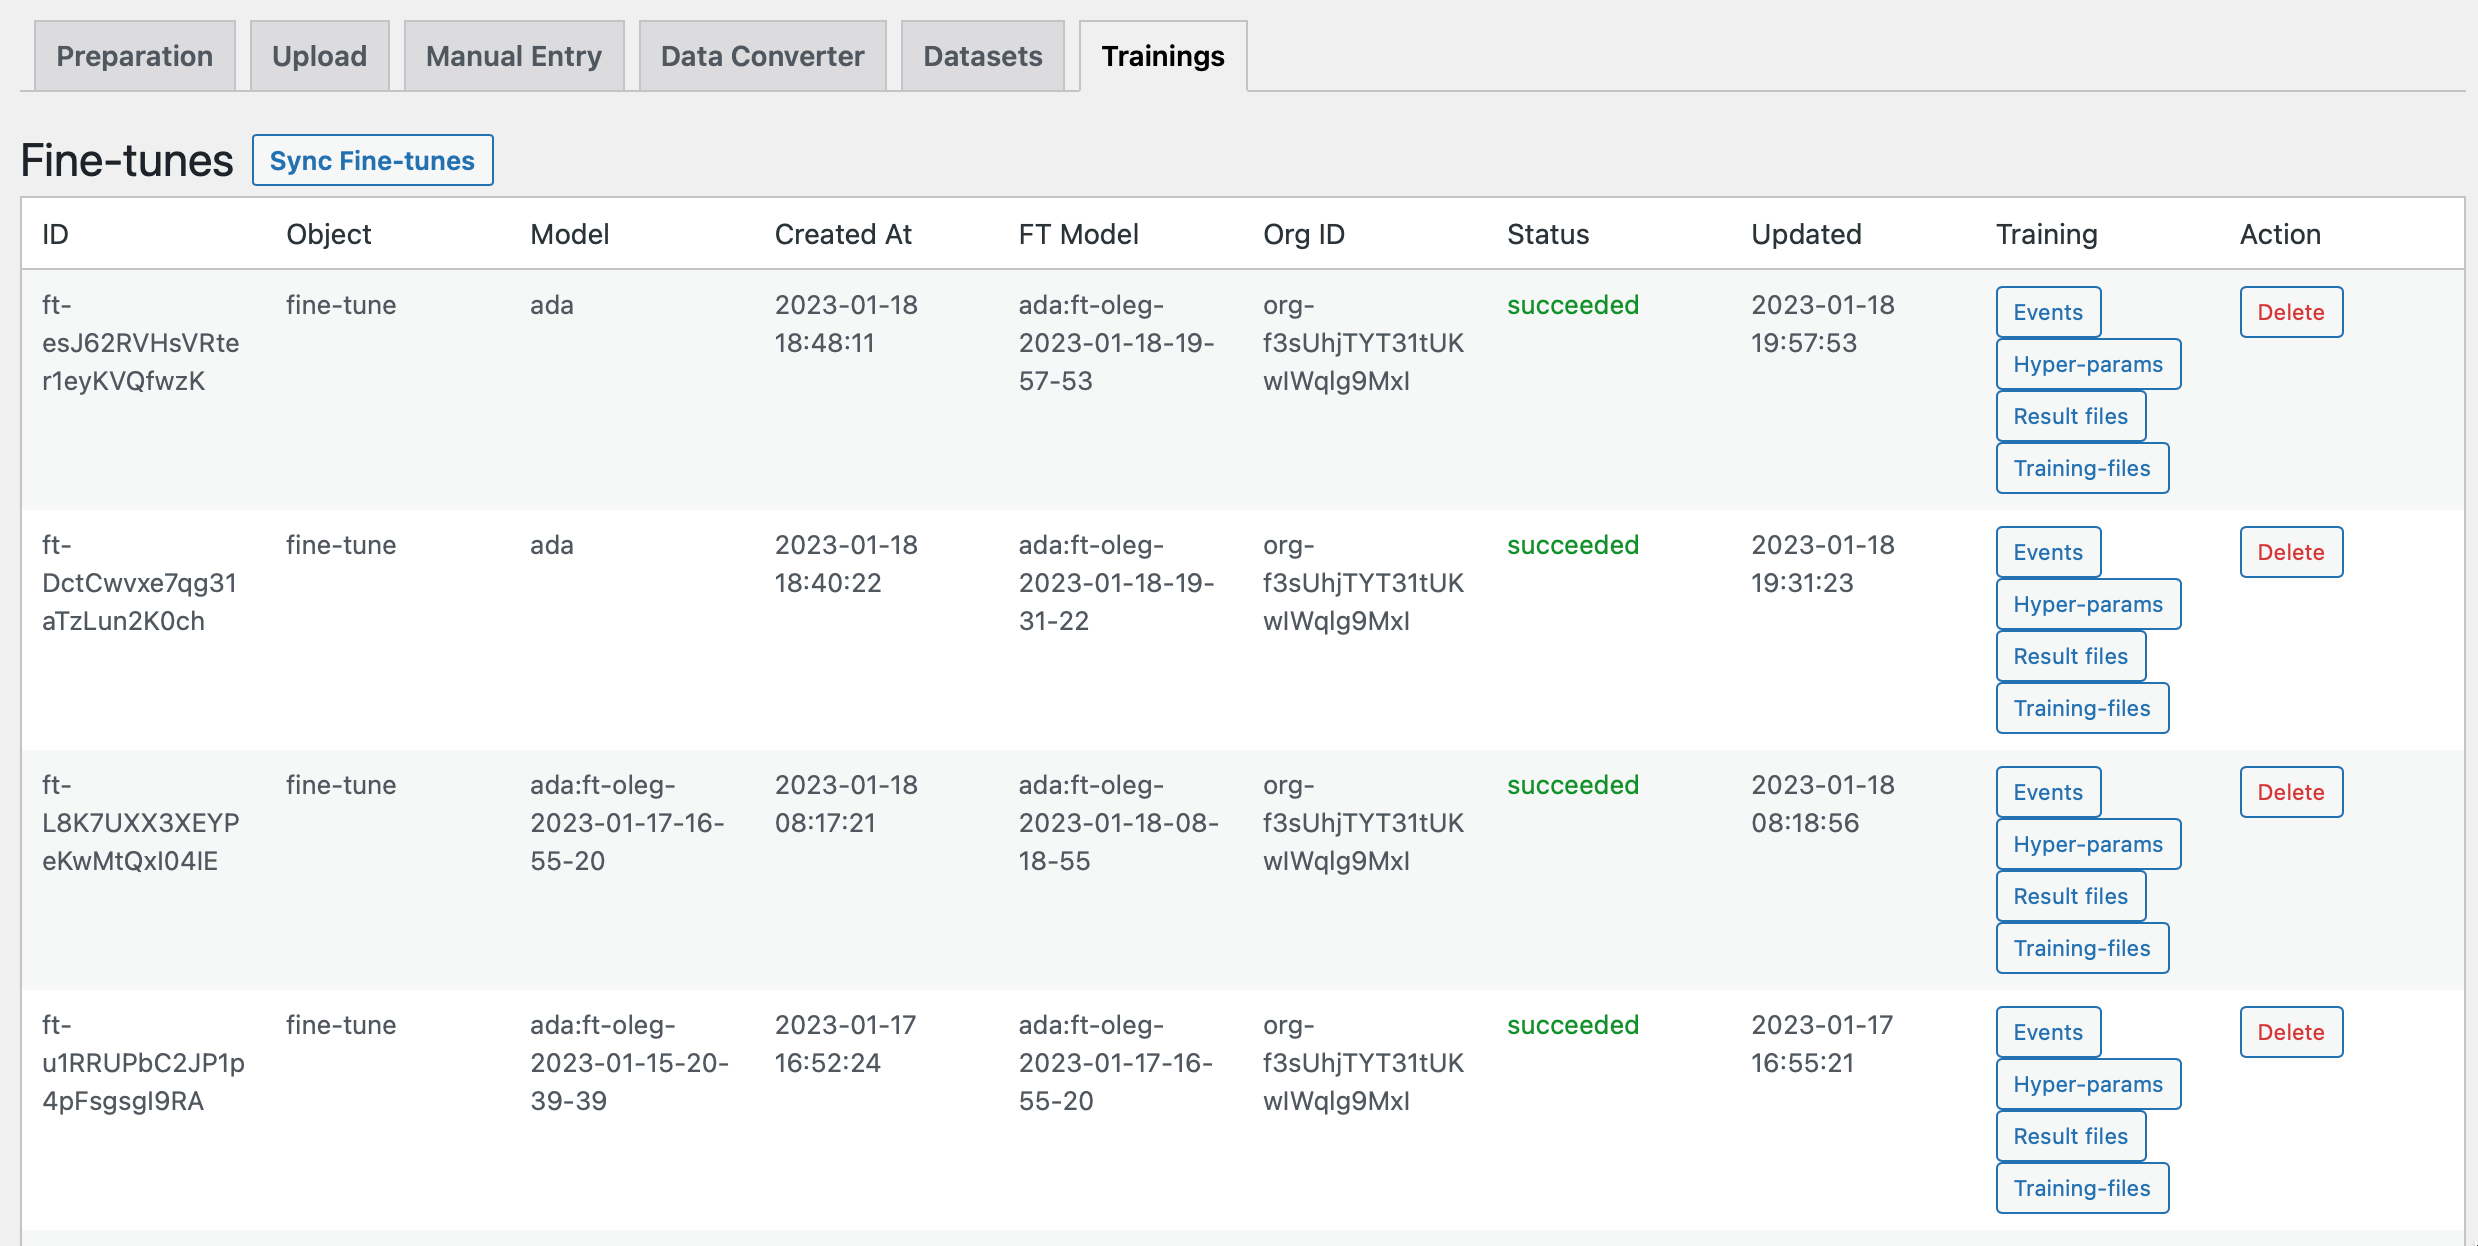
You can view information such as the fine-tune request's ID, creation date, model, and status.
There is also an Training column where you can perform various actions on the fine-tune requests, such as viewing the fine-tune request's details, viewing the fine-tuned model, and deleting the fine-tune request.
There are 4 buttons in the Training column: Events, Hyper-params, Result files and Training files.
Let's take a look at each one of them.
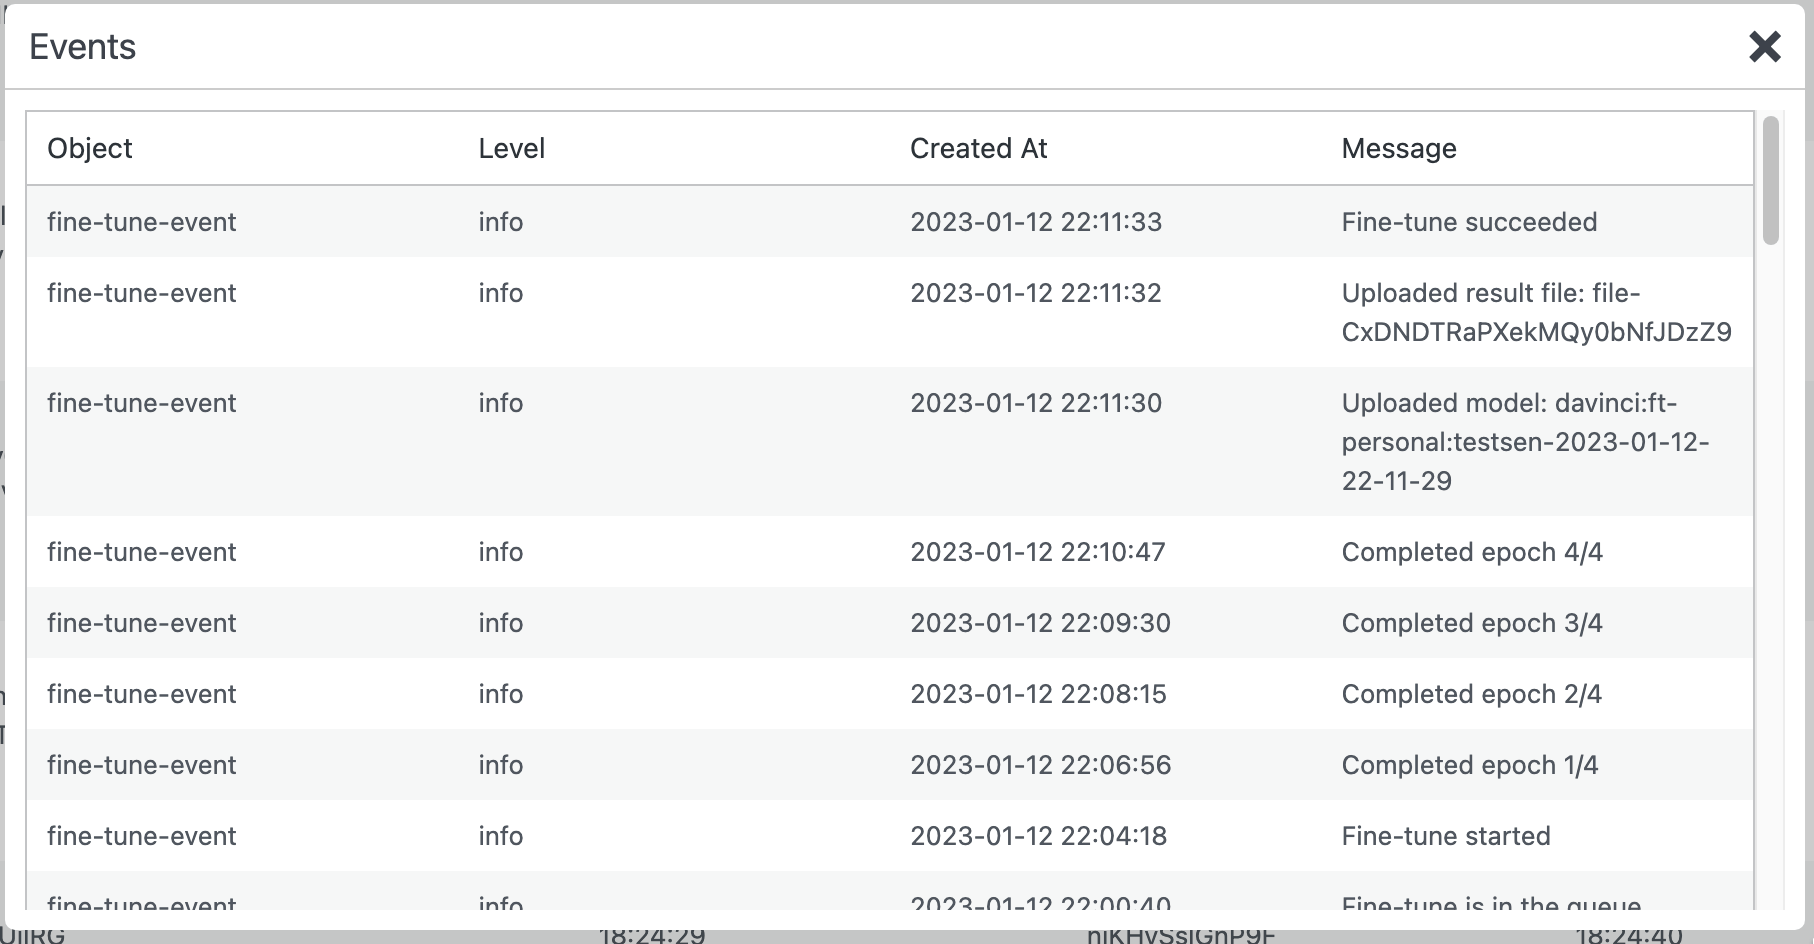
- Events: This button will display the fine-tune request's events. You can view information such as the event's ID, creation date, and status. It's important to note that fine-tuning a model can take some time, depending on the size of the dataset and the complexity of the model.
Here is an example of a fine-tune request's events:
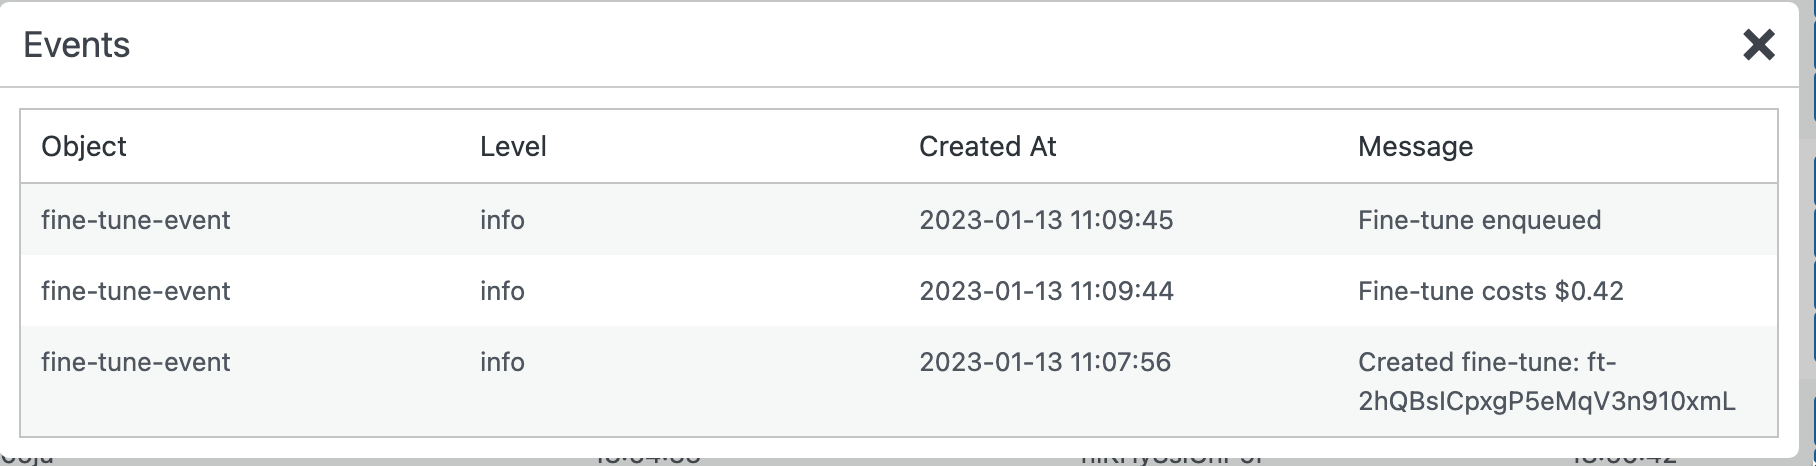
If the last message says Fine-tuning succeeded, then the fine-tune request is complete and your model is ready to be used.
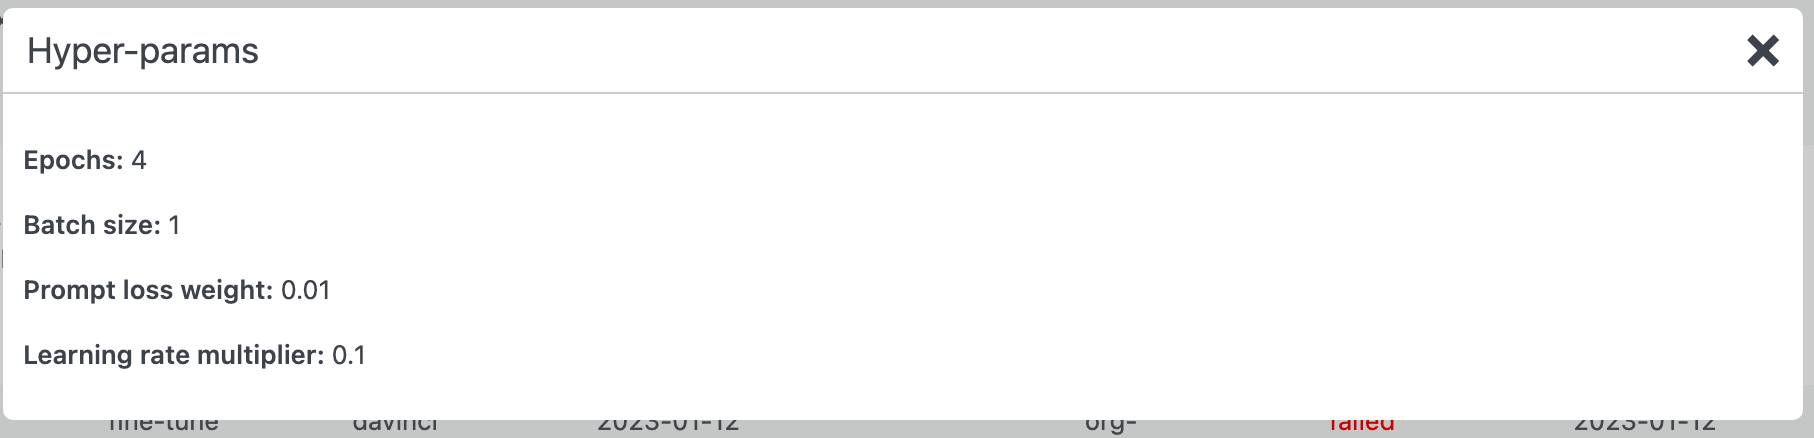
- Hyper-params: This button will display the fine-tune request's hyper-parameters. You can view information such as Epochs, batch size, Learning rate, and prompt loss weight.
Here is an example of a fine-tune request's hyper-parameters:
- Result files: This button will display the fine-tune request's result files. You can download the result file from training the model.
Here is an example of a fine-tune request's result files:
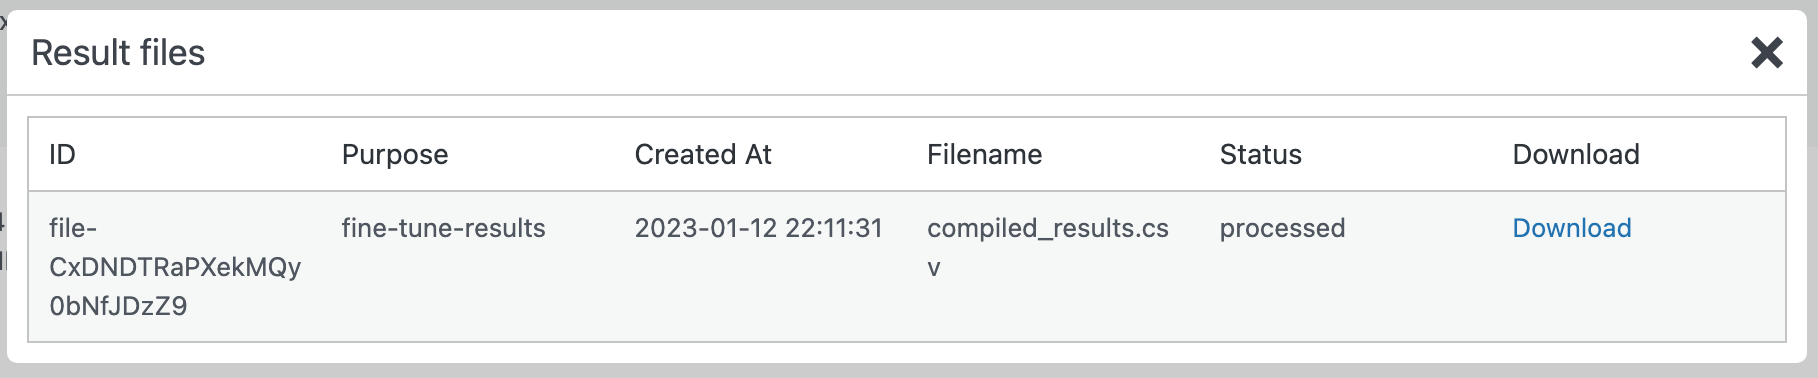
And here is how a result file looks like:

- Training files: This button will display the fine-tune request's training files. It is basically the file you uploaded to OpenAI.
Now, let's move on to viewing the fine-tuned models.
Using Fine-Tuned Models
Let say you already have a fine-tune request that is complete.
Now, you want to use the fine-tuned model to with ChatBox in your website.
To do that, please proceed to the ChatGPT page.
You will see that your fine-tuned model is now available in the dropdown list.
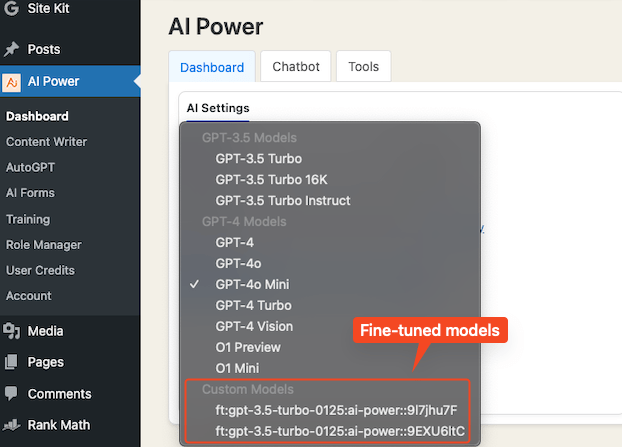
You can select it and click on the Save button. This means from now on your ChatBox will use the fine-tuned model you selected.
If you don't see your fine-tuned model in the dropdown list, please make sure that the fine-tune request is complete.
You can also click on Sync Models link to get latest models.
Now head over to the ChatGPT and ask your ChatBox a question. You should see that the ChatBox is now using the fine-tuned model.
Embeddings or Fine-Tuning?
While fine-tuning your AI model can provide excellent results, it's important to note that there's an alternative that may be more suitable depending on your requirements. We recommend considering the use of Embeddings.
Embeddings is a feature extraction technique where high-dimensional data, like text, is converted into lower-dimensional vectors. This approach comes with several benefits. Firstly, it is cheaper since it doesn't involve the compute-intensive process of training an entire model. Secondly, it's generally faster and easier to implement. Finally, unlike custom models, which require a large and high-quality dataset for effective fine-tuning, embeddings allows you to embed your data into a vector database, which can then be leveraged by your chatbot for efficient and accurate responses.
Given these advantages, unless you have very specific needs that require the customizability that comes with fine-tuning, embeddings could be the more economical and efficient choice for enhancing your AI model's performance.
| Feature | Embeddings | Fine-Tuning |
|---|---|---|
| Cost | Lower | Higher |
| Speed | Faster | Slower |
| Ease of Implementation | Easier | More complex |
| Dataset Size Requirement | Smaller | Larger |
| Customizability | Limited | High |
| Performance | Good for general applications | Excellent for specific applications |
Data Converter
- First, navigate to the Data Converter tab.
- In the Data Converter tab, you will be able to convert your entire Database to a JSONL file.
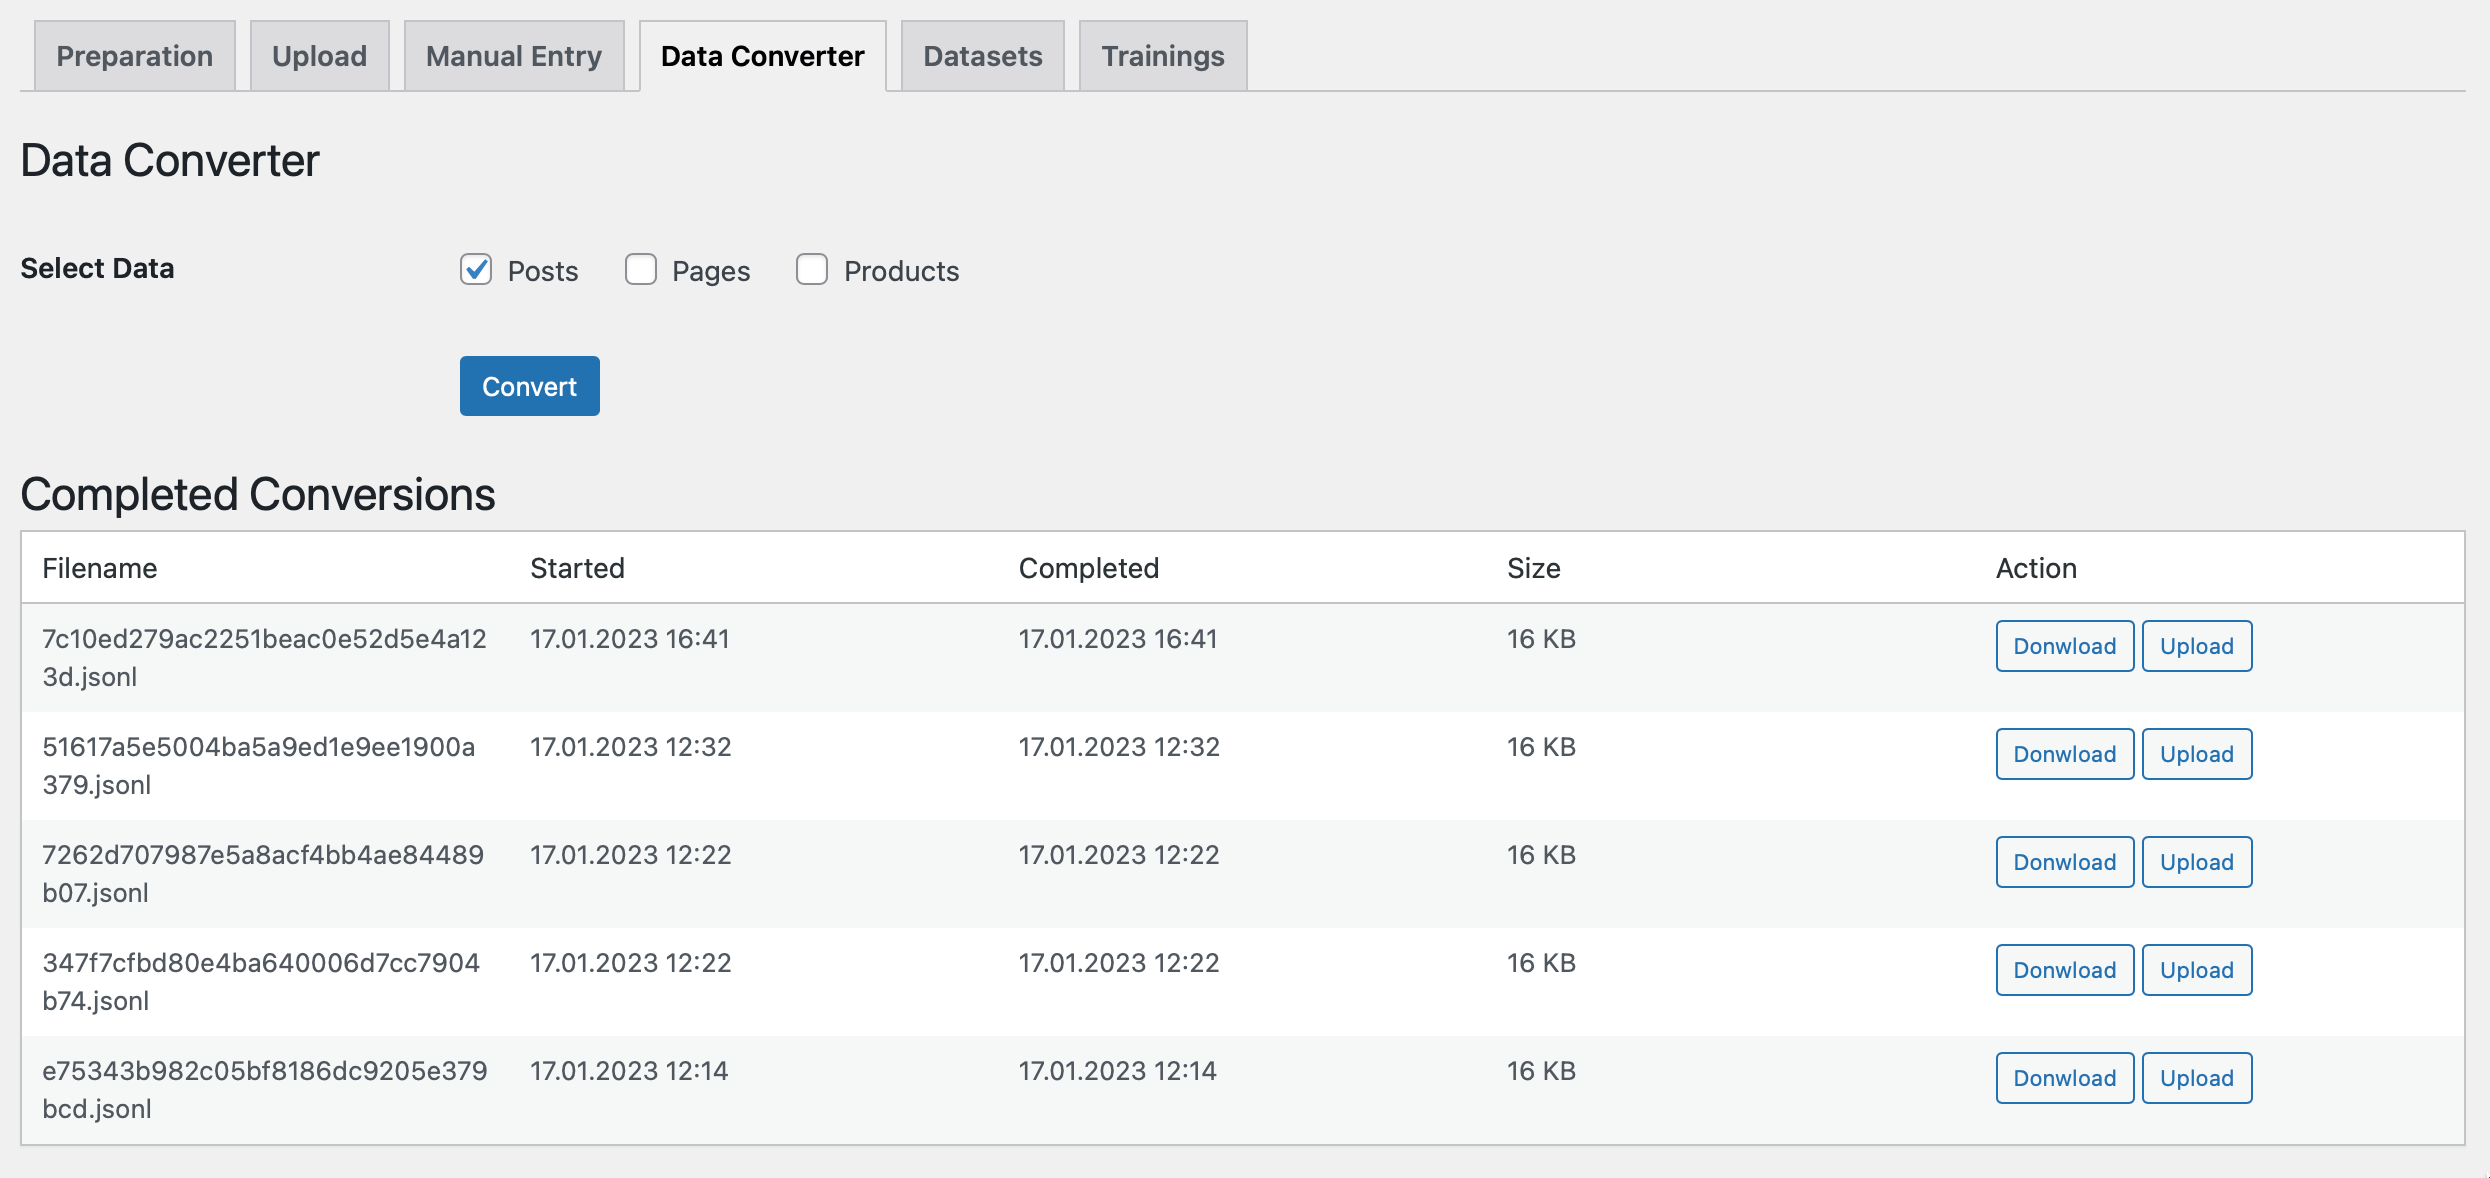
- There are 3 different options here.
- Convert Your Posts: This will convert all your posts in your DB to a JSONL file. Please note that this process will take a while depending on the number of posts you have. If you have huge DB it will split the datasets in small pieces.
- Convert Your Pages: This will convert all your pages in your DB to a JSONL file. Please note that this process will take a while depending on the number of pages you have. If you have huge DB it will split the datasets in small pieces.
- Convert Your WooCommerce Products: You will see this feature only if you have WooCommerce installed. This will convert all your WooCommerce products in your DB to a JSONL file. Please note that this process will take a while depending on the number of products you have. If you have huge DB it will split the datasets in small pieces.
If you have huge DB, conversion might take longer and your website might become unresponsive if resources are not enough.