Overview
Knowledge Base stores the content AI Puffer can search before it generates an answer or a piece of content. Use it for support answers, product details, documentation, policies, posts, pages, WooCommerce products, uploaded documents, and other source text you want AI Puffer to use as context.Providers
Use OpenAI Vector Stores, Pinecone, Qdrant, or Chroma.
Manage Vector Stores
Create, select, or delete vector targets.
Add Data
Add data and manage source records.
Settings
Configure chunking, batches, content rules, semantic search, and other settings.
Semantic Search
Publish and configure a frontend vector search form.
Troubleshooting
Fix missing targets, dimension errors, and empty results.
Providers
For Pinecone, Qdrant, and Chroma, the index or collection dimension must match the embedding model.
For example, if your Pinecone index, Qdrant collection, or Chroma collection is 3072 dimensions, use a 3072-dimension embedding model when adding data and when searching that data later.
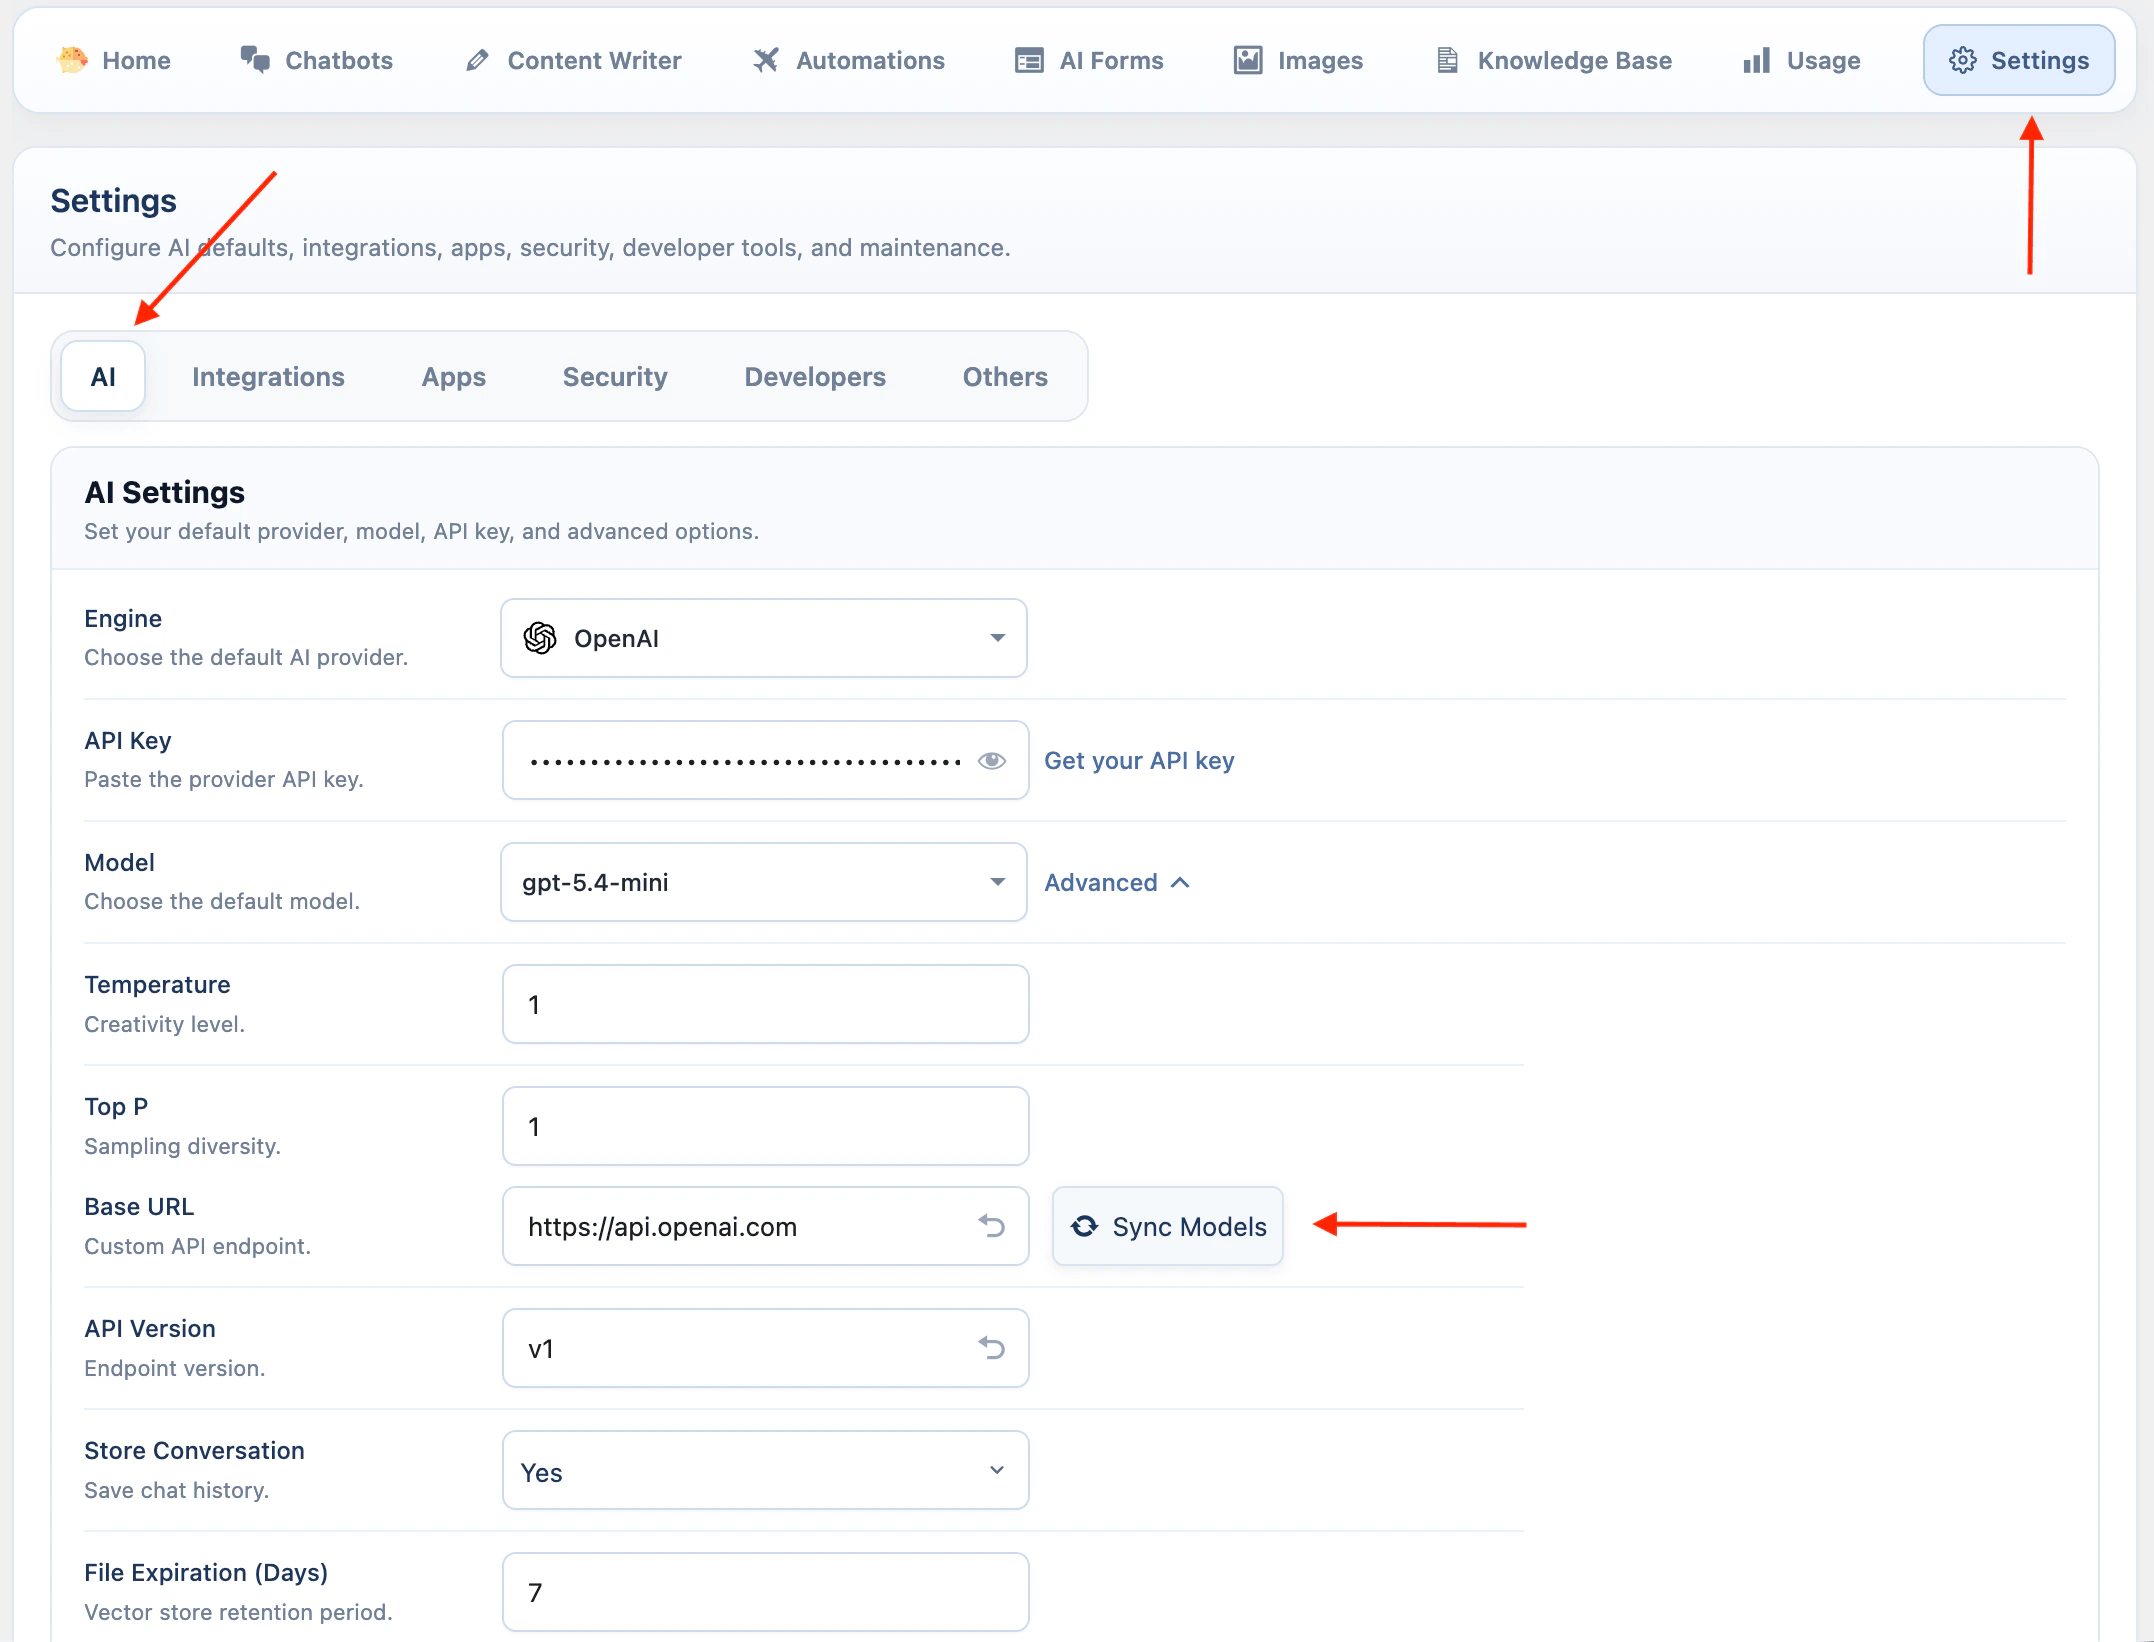
OpenAI
OpenAI Vector Stores use your OpenAI account directly.- Go to AI Puffer > Settings > AI.
- Select OpenAI as the AI provider.
- Enter your OpenAI API key.
- Sync models if needed.
- Go to AI Puffer > Knowledge Base > Stores to create or refresh OpenAI vector stores.
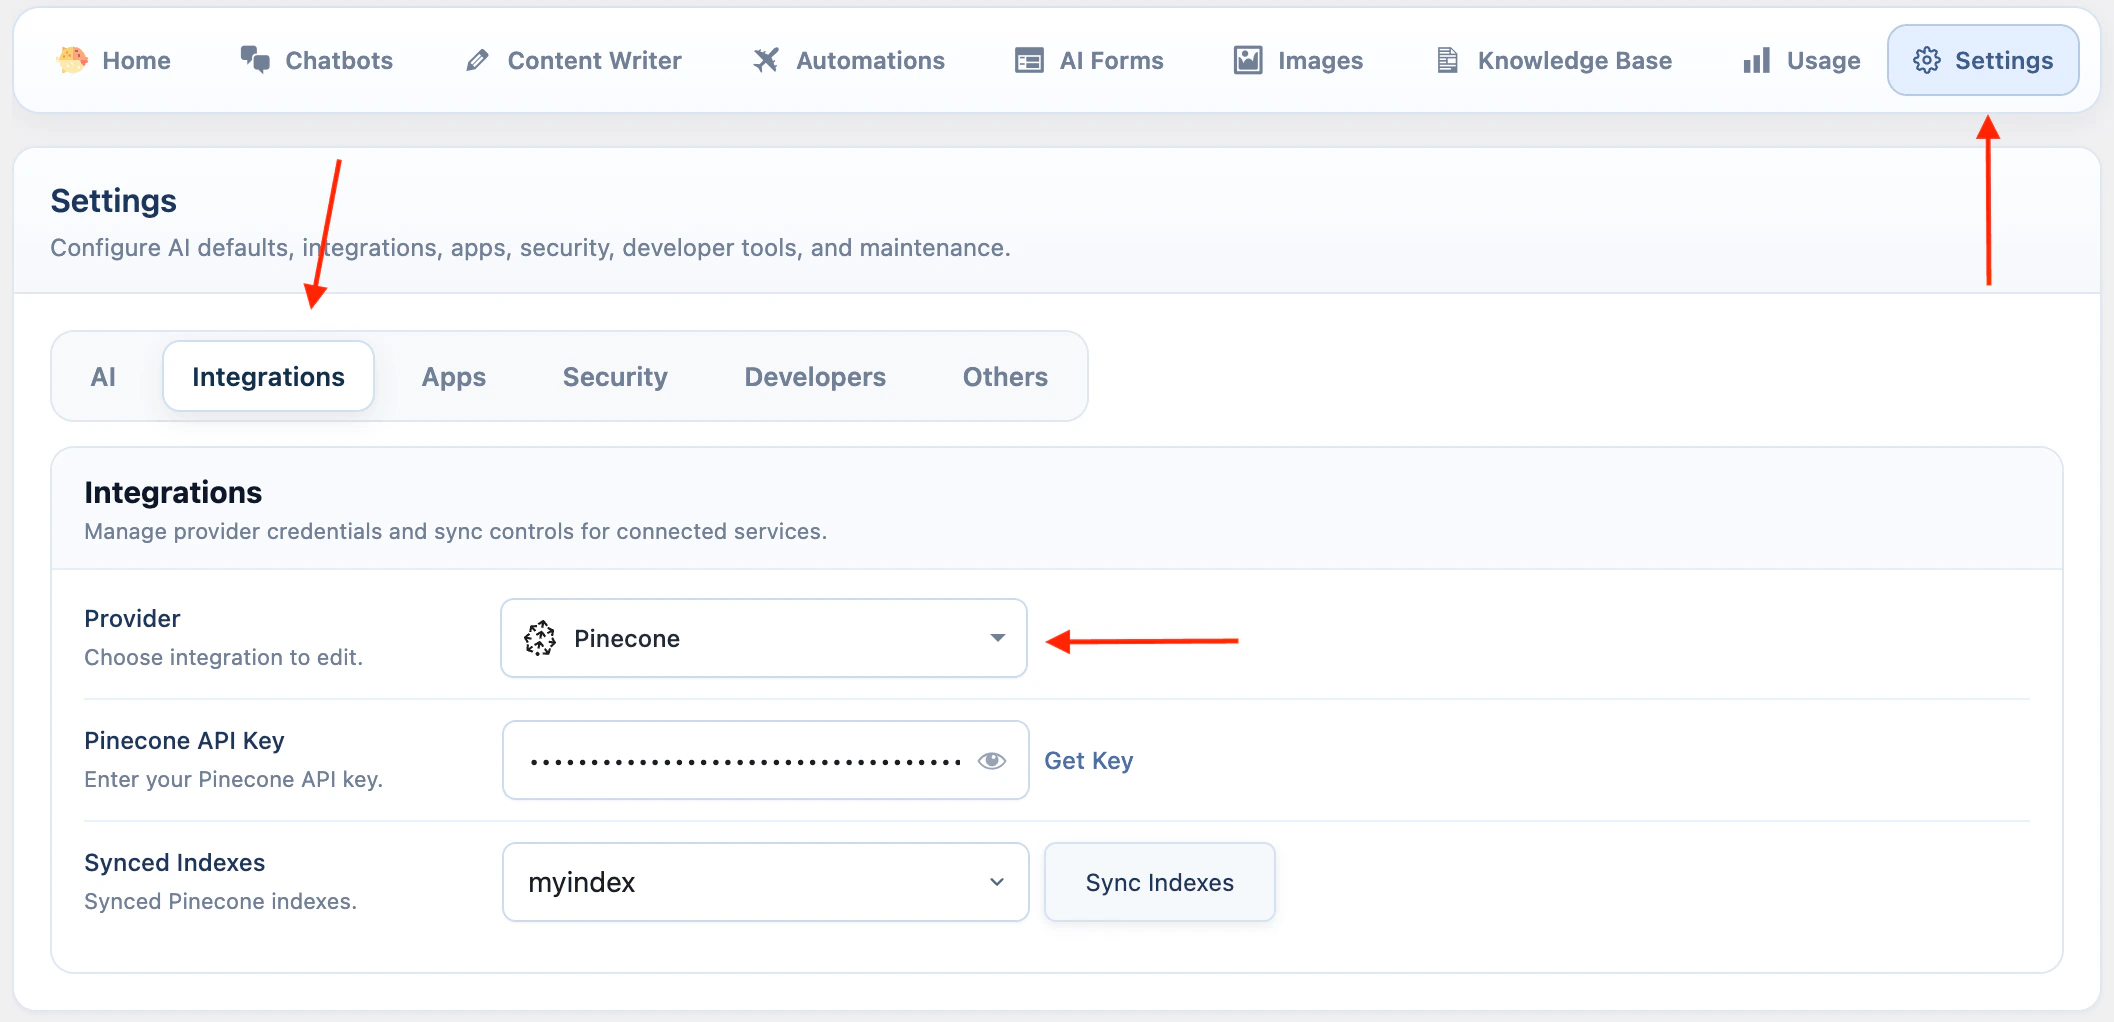
Pinecone
Pinecone is configured from the Integrations settings.- Go to AI Puffer > Settings > Integrations.
- Select Pinecone.
- Enter your Pinecone API Key.
- Click Sync Indexes to load indexes from Pinecone.
- Go to AI Puffer > Knowledge Base > Stores to create, refresh, or delete indexes.
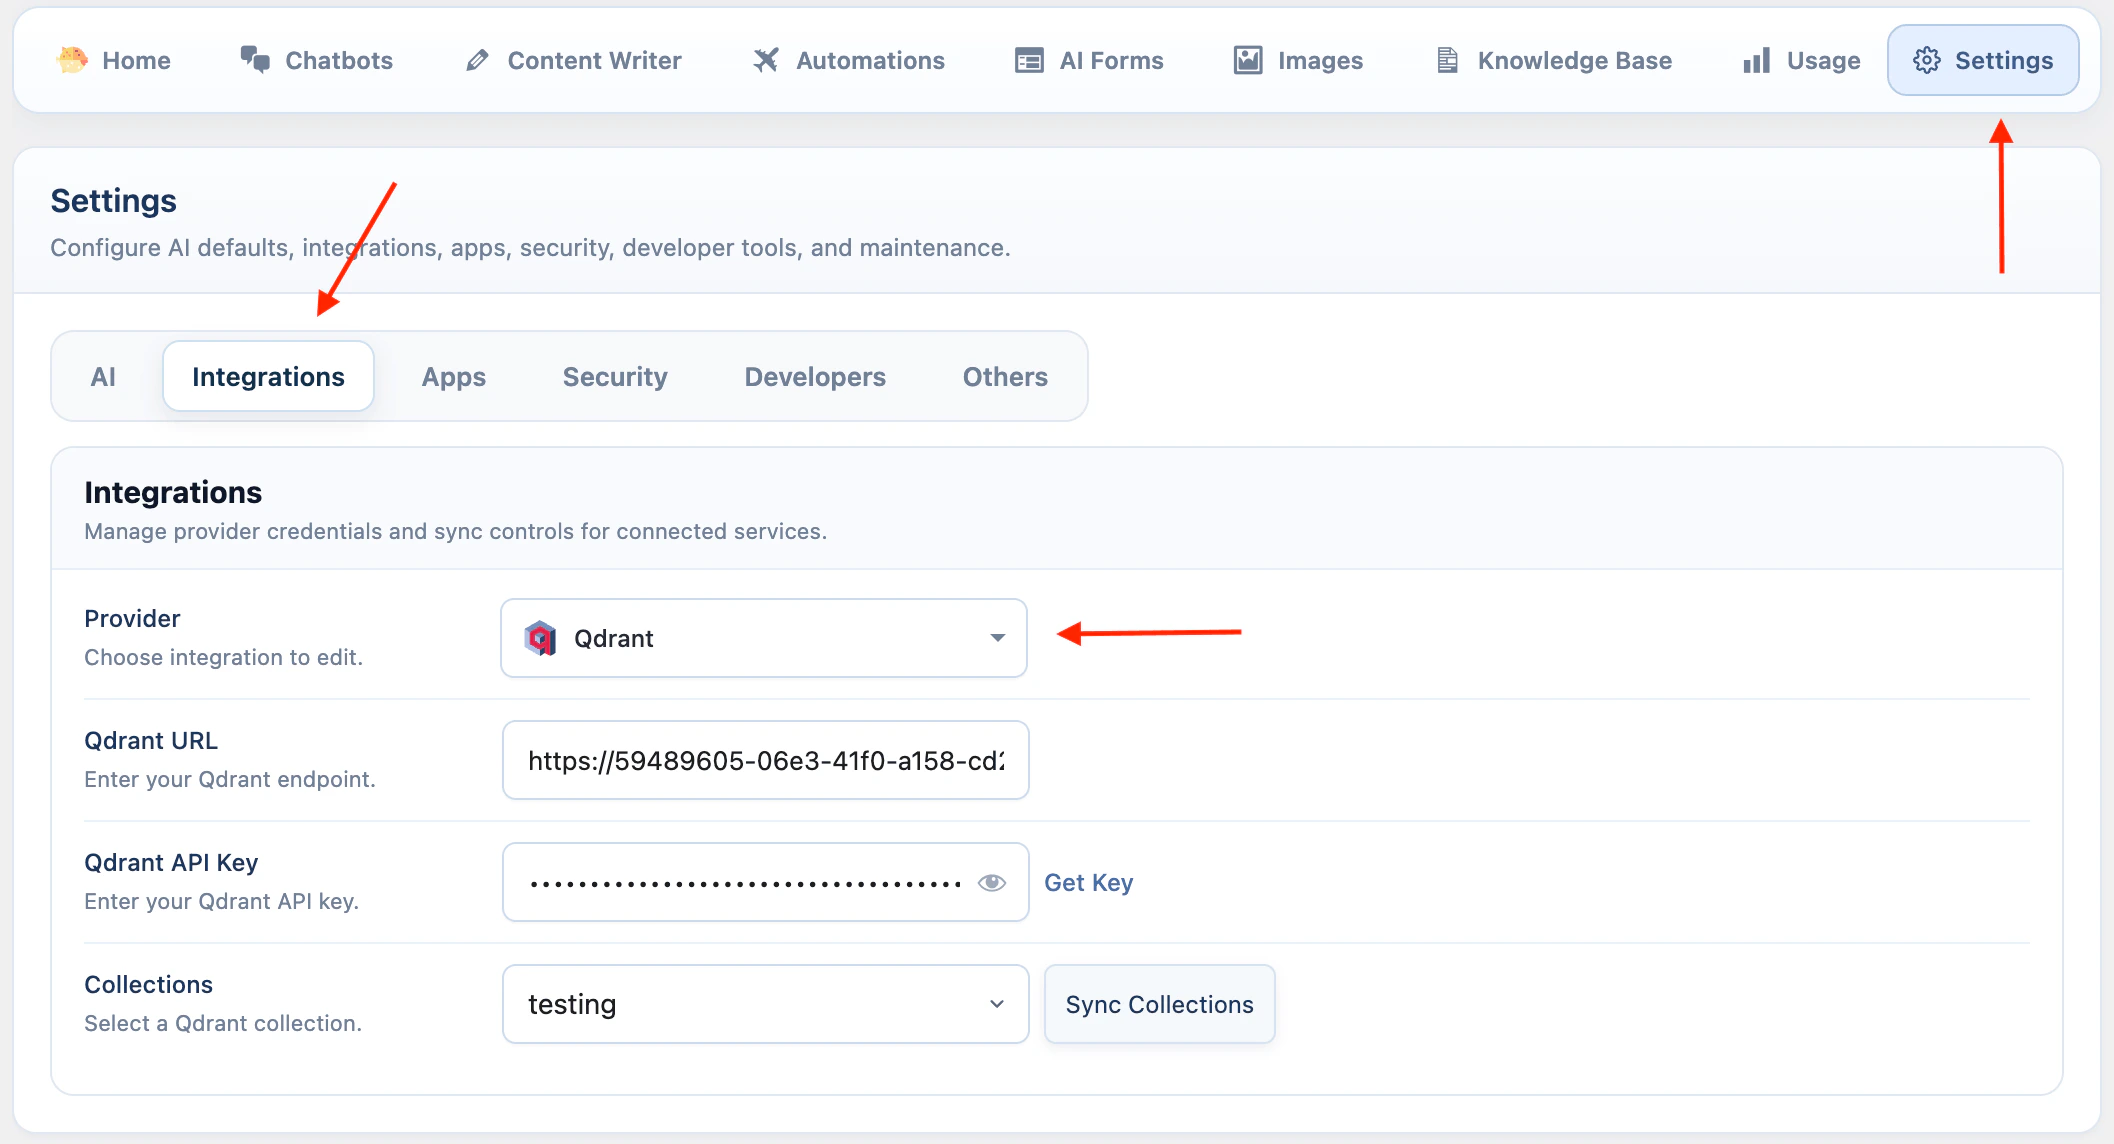
Qdrant
Qdrant requires both an endpoint URL and an API key.- Go to AI Puffer > Settings > Integrations.
- Select Qdrant.
- Enter your Qdrant URL.
- Enter your Qdrant API Key.
- Click Sync Collections to load collections from Qdrant.
- Go to AI Puffer > Knowledge Base > Stores to create, refresh, or delete collections.
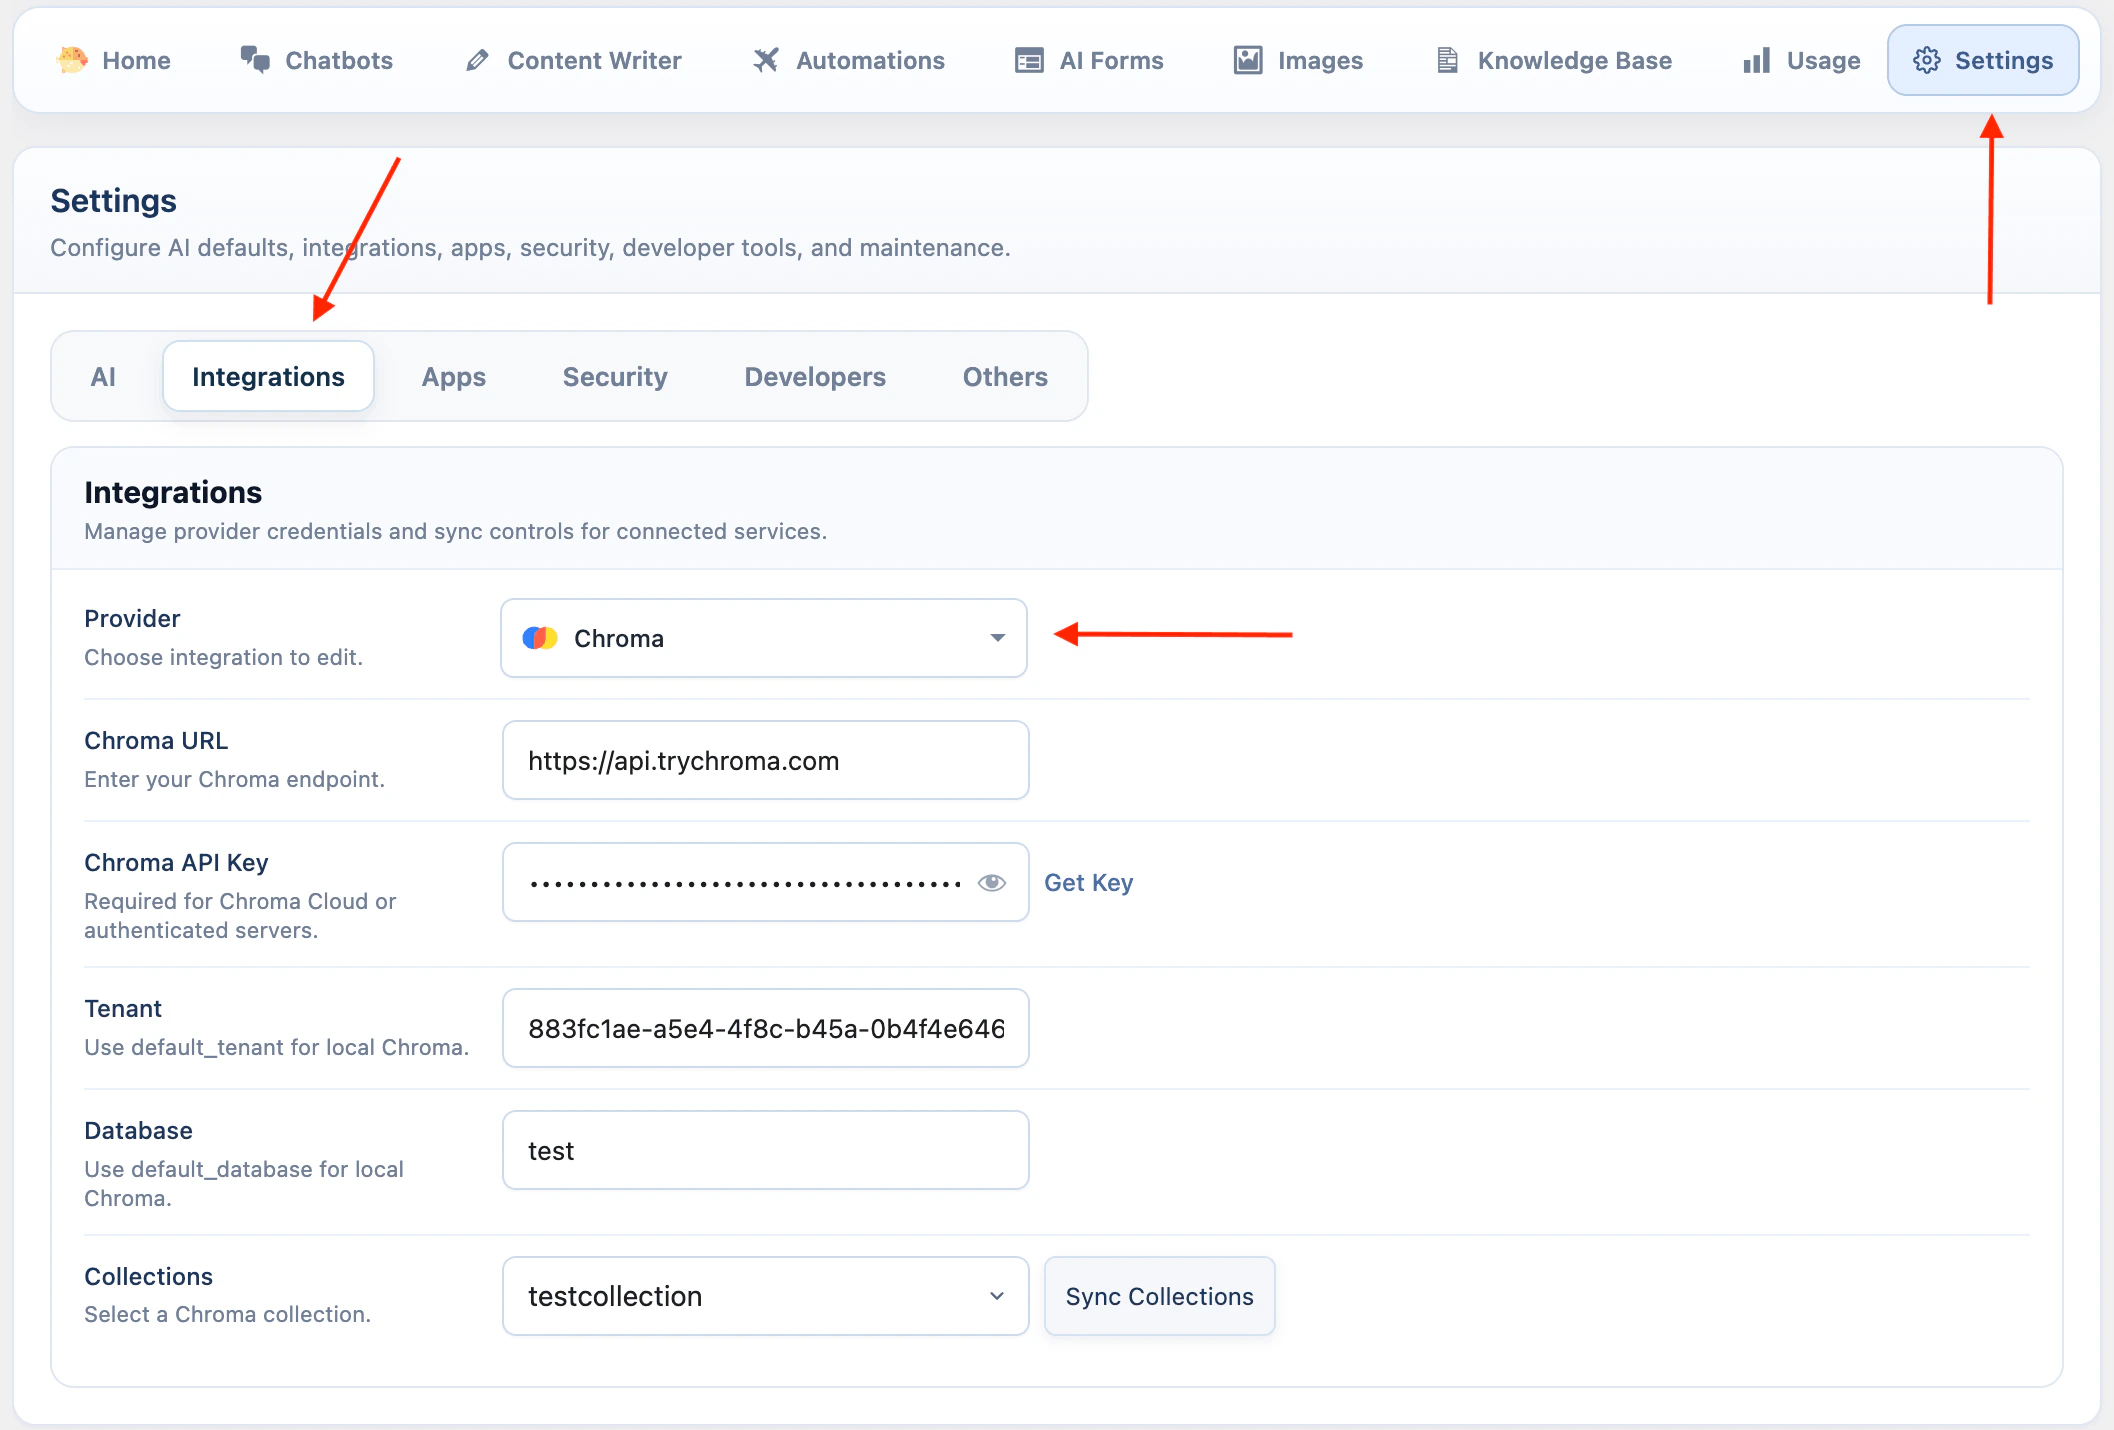
Chroma
Chroma uses endpoint, tenant, and database settings.- Go to AI Puffer > Settings > Integrations.
- Select Chroma.
- Enter your Chroma URL. For Cloud, you can use https://api.trychroma.com
- Enter your Chroma API Key if you use Chroma Cloud or an authenticated server.
- Enter the Tenant.
- Enter the Database.
- Click Sync Collections to load collections from Chroma.
- Go to AI Puffer > Knowledge Base > Stores to create, refresh, or delete collections.
default_tenant and the default database is default_database.
Embedding Providers
Pinecone, Qdrant, and Chroma store vectors that AI Puffer creates with a selected embedding model. Before adding data to these providers, configure the embedding provider you want to use in AI Puffer > Settings > AI. Supported embedding providers include OpenAI, Google, Azure, and OpenRouter. The selected embedding model must match the dimension of the Pinecone index, Qdrant collection, or Chroma collection. xAI is not an embedding provider or vector store provider in the current integration. xAI chatbots, forms, and text workflows can still use retrieved Knowledge Base context from OpenAI, Pinecone, Qdrant, or Chroma because AI Puffer sends that context as text.Manage Vector Stores
Use AI Puffer > Knowledge Base > Stores to create, refresh, inspect, or delete vector targets. The Stores tab is where you manage OpenAI vector stores, Pinecone indexes, Qdrant collections, and Chroma collections. The Data tab uses these targets when you add content.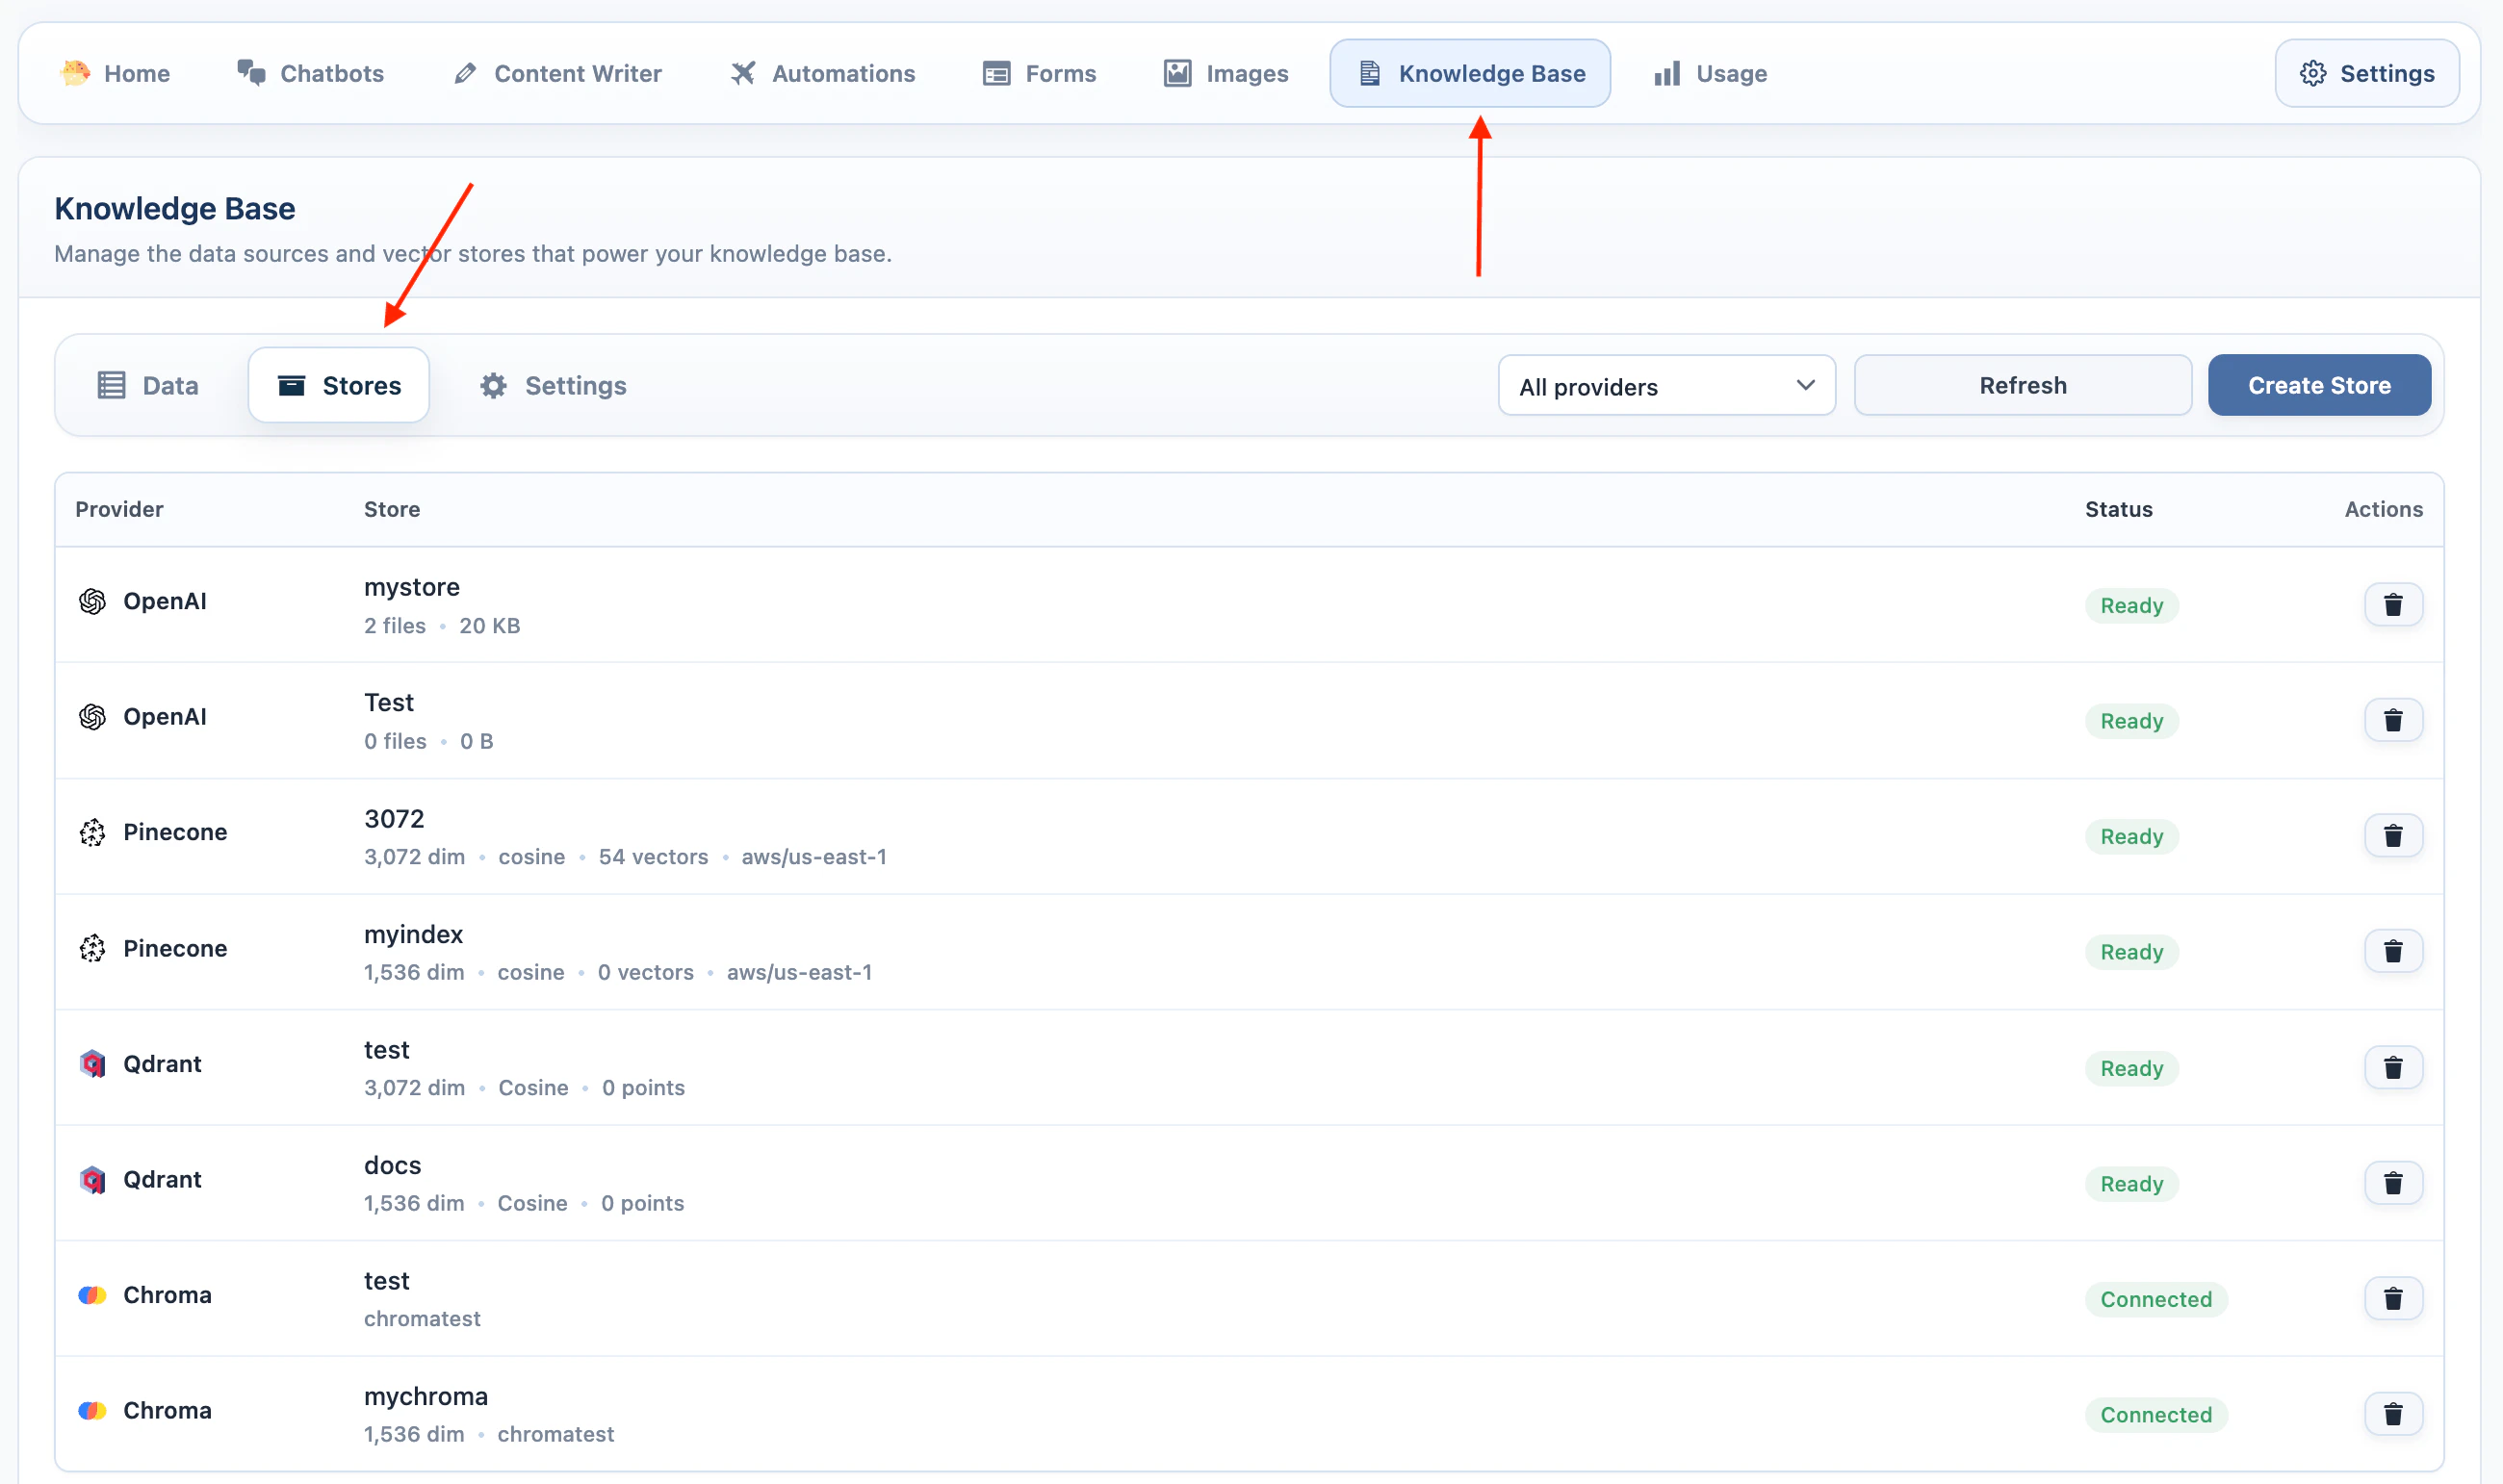
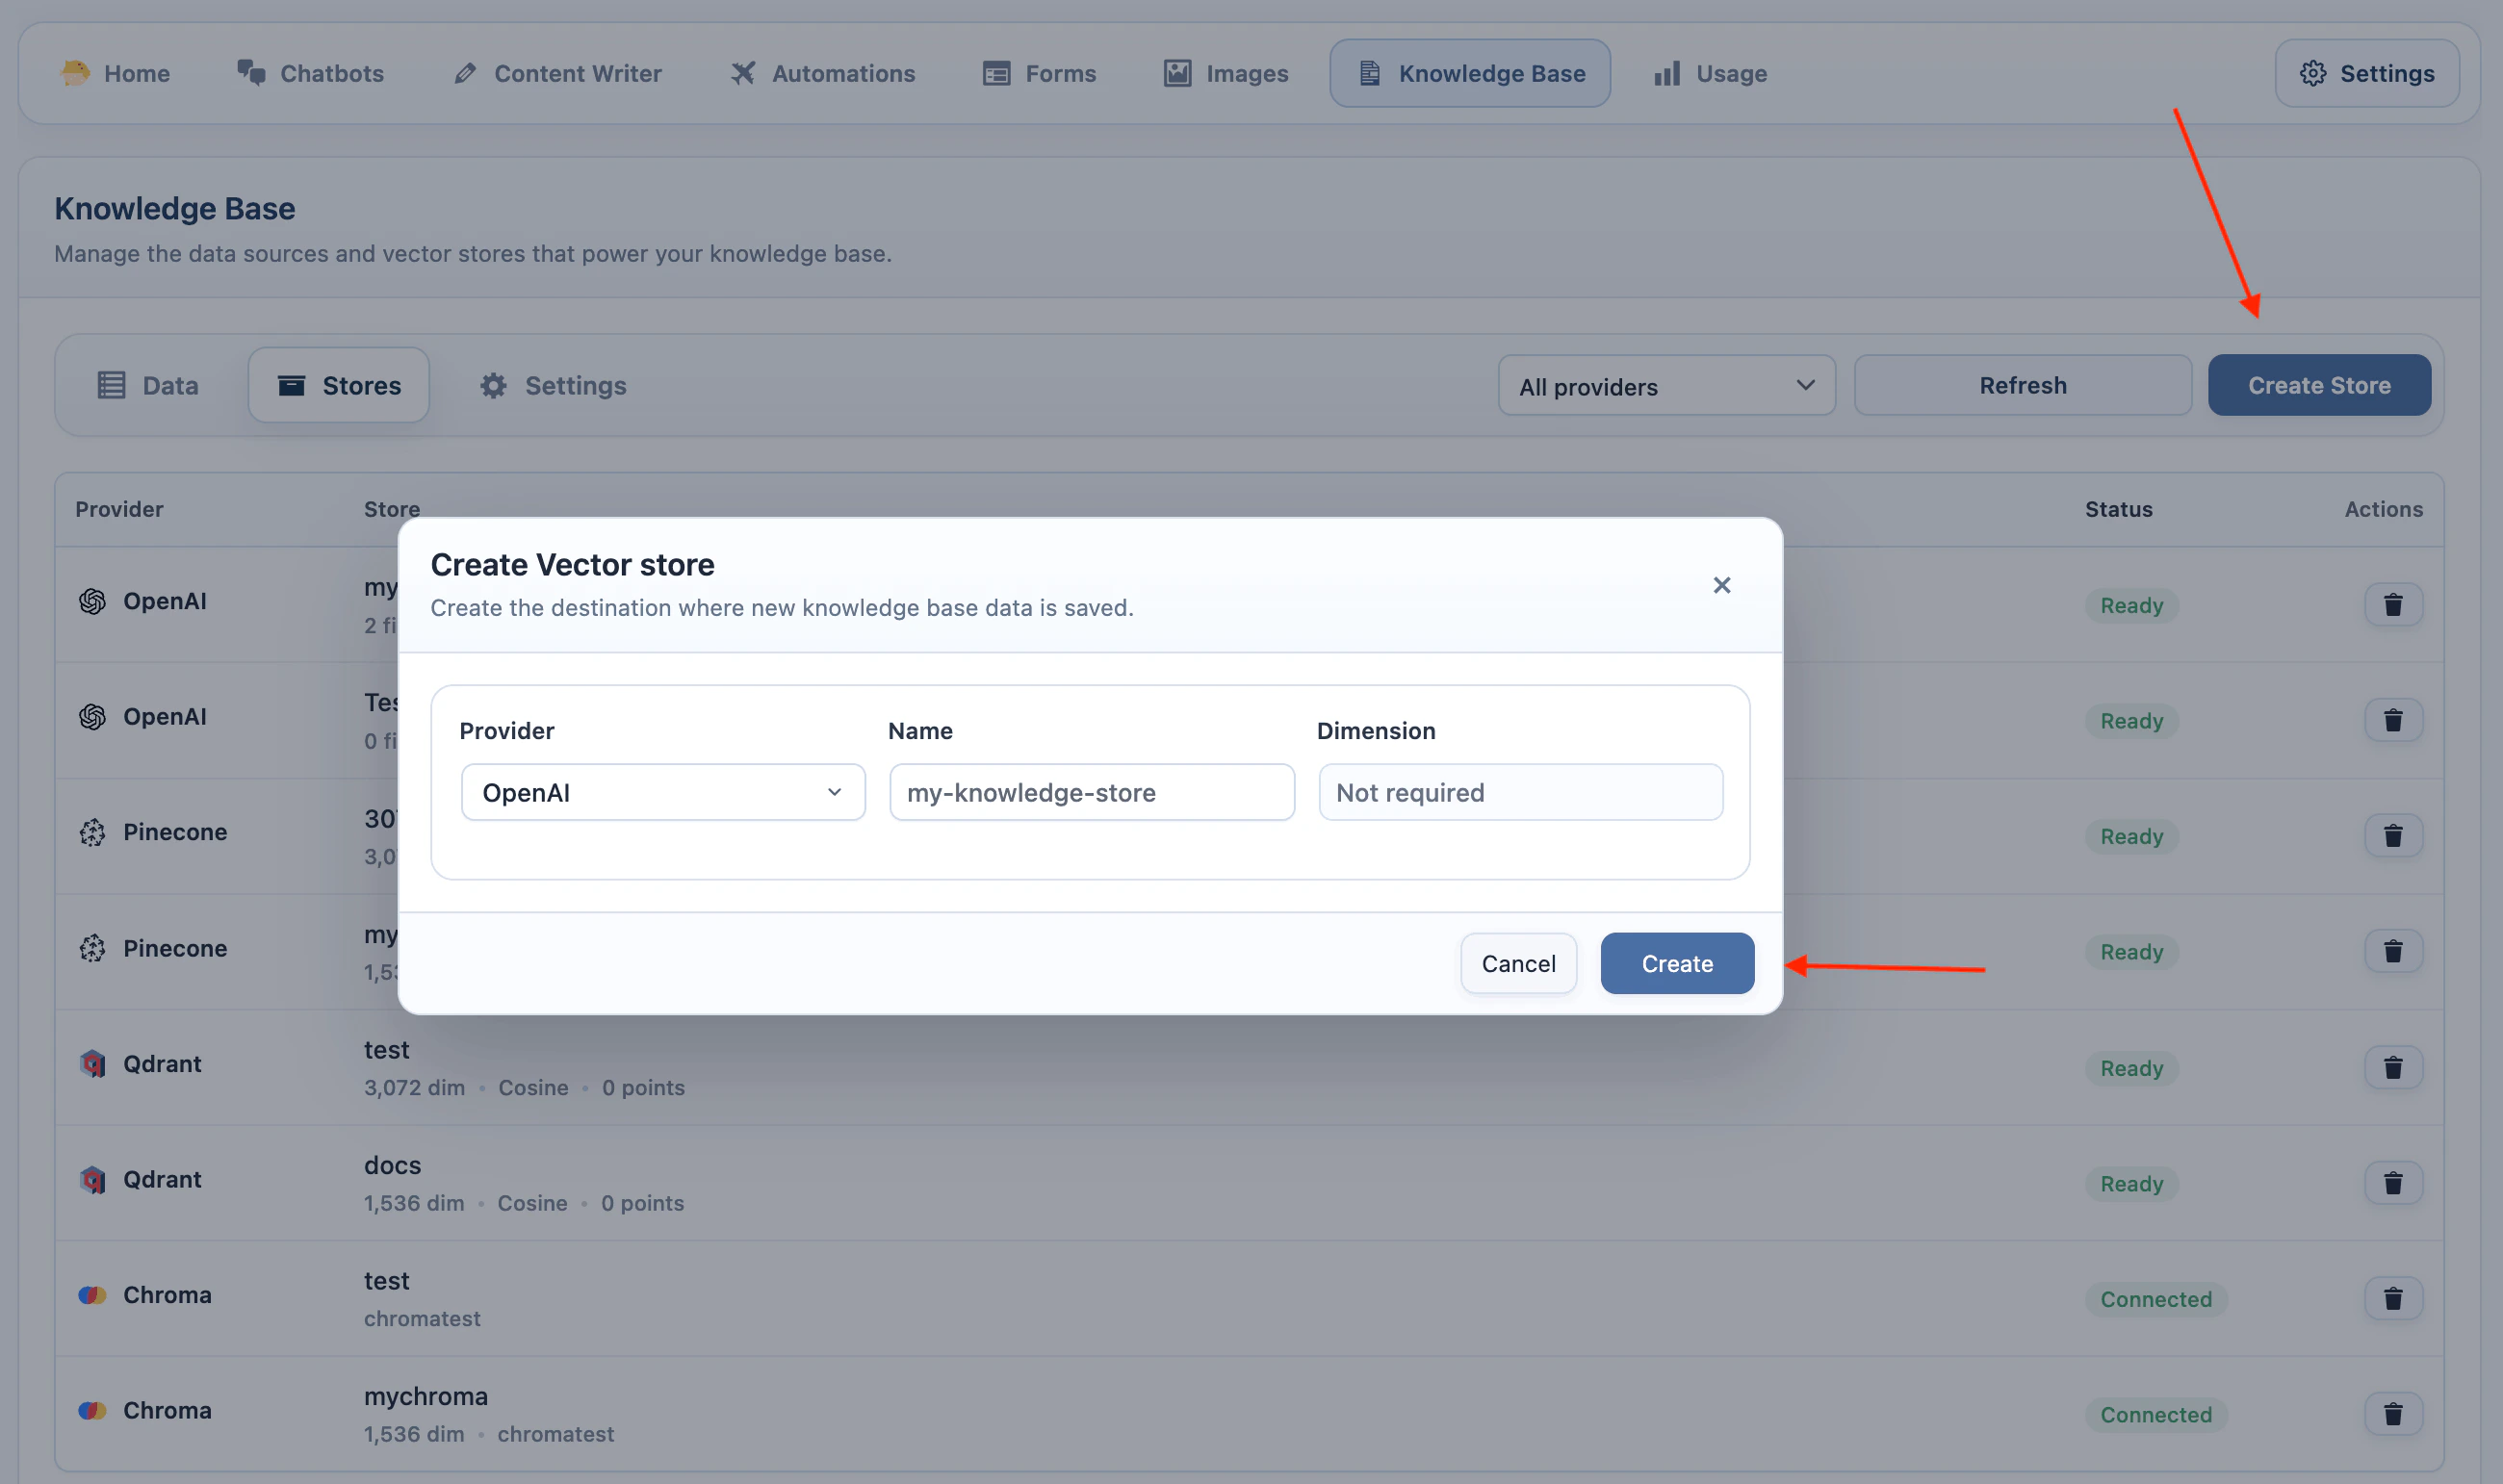
OpenAI Vector Stores
- Add your OpenAI API key in AI Puffer > Settings > AI.
- Go to AI Puffer > Knowledge Base > Stores.
- Select OpenAI as the provider.
- Click Create Store.
- Enter a store name.
- Click Create.
Pinecone Indexes
- Add your Pinecone API key in AI Puffer > Settings > Integrations.
- Go to AI Puffer > Knowledge Base > Stores.
- Select Pinecone as the provider.
- Select the embedding model you plan to use.
- Click Create Store.
- Enter an index name.
- Enter the dimension for the selected embedding model.
- Click Create.

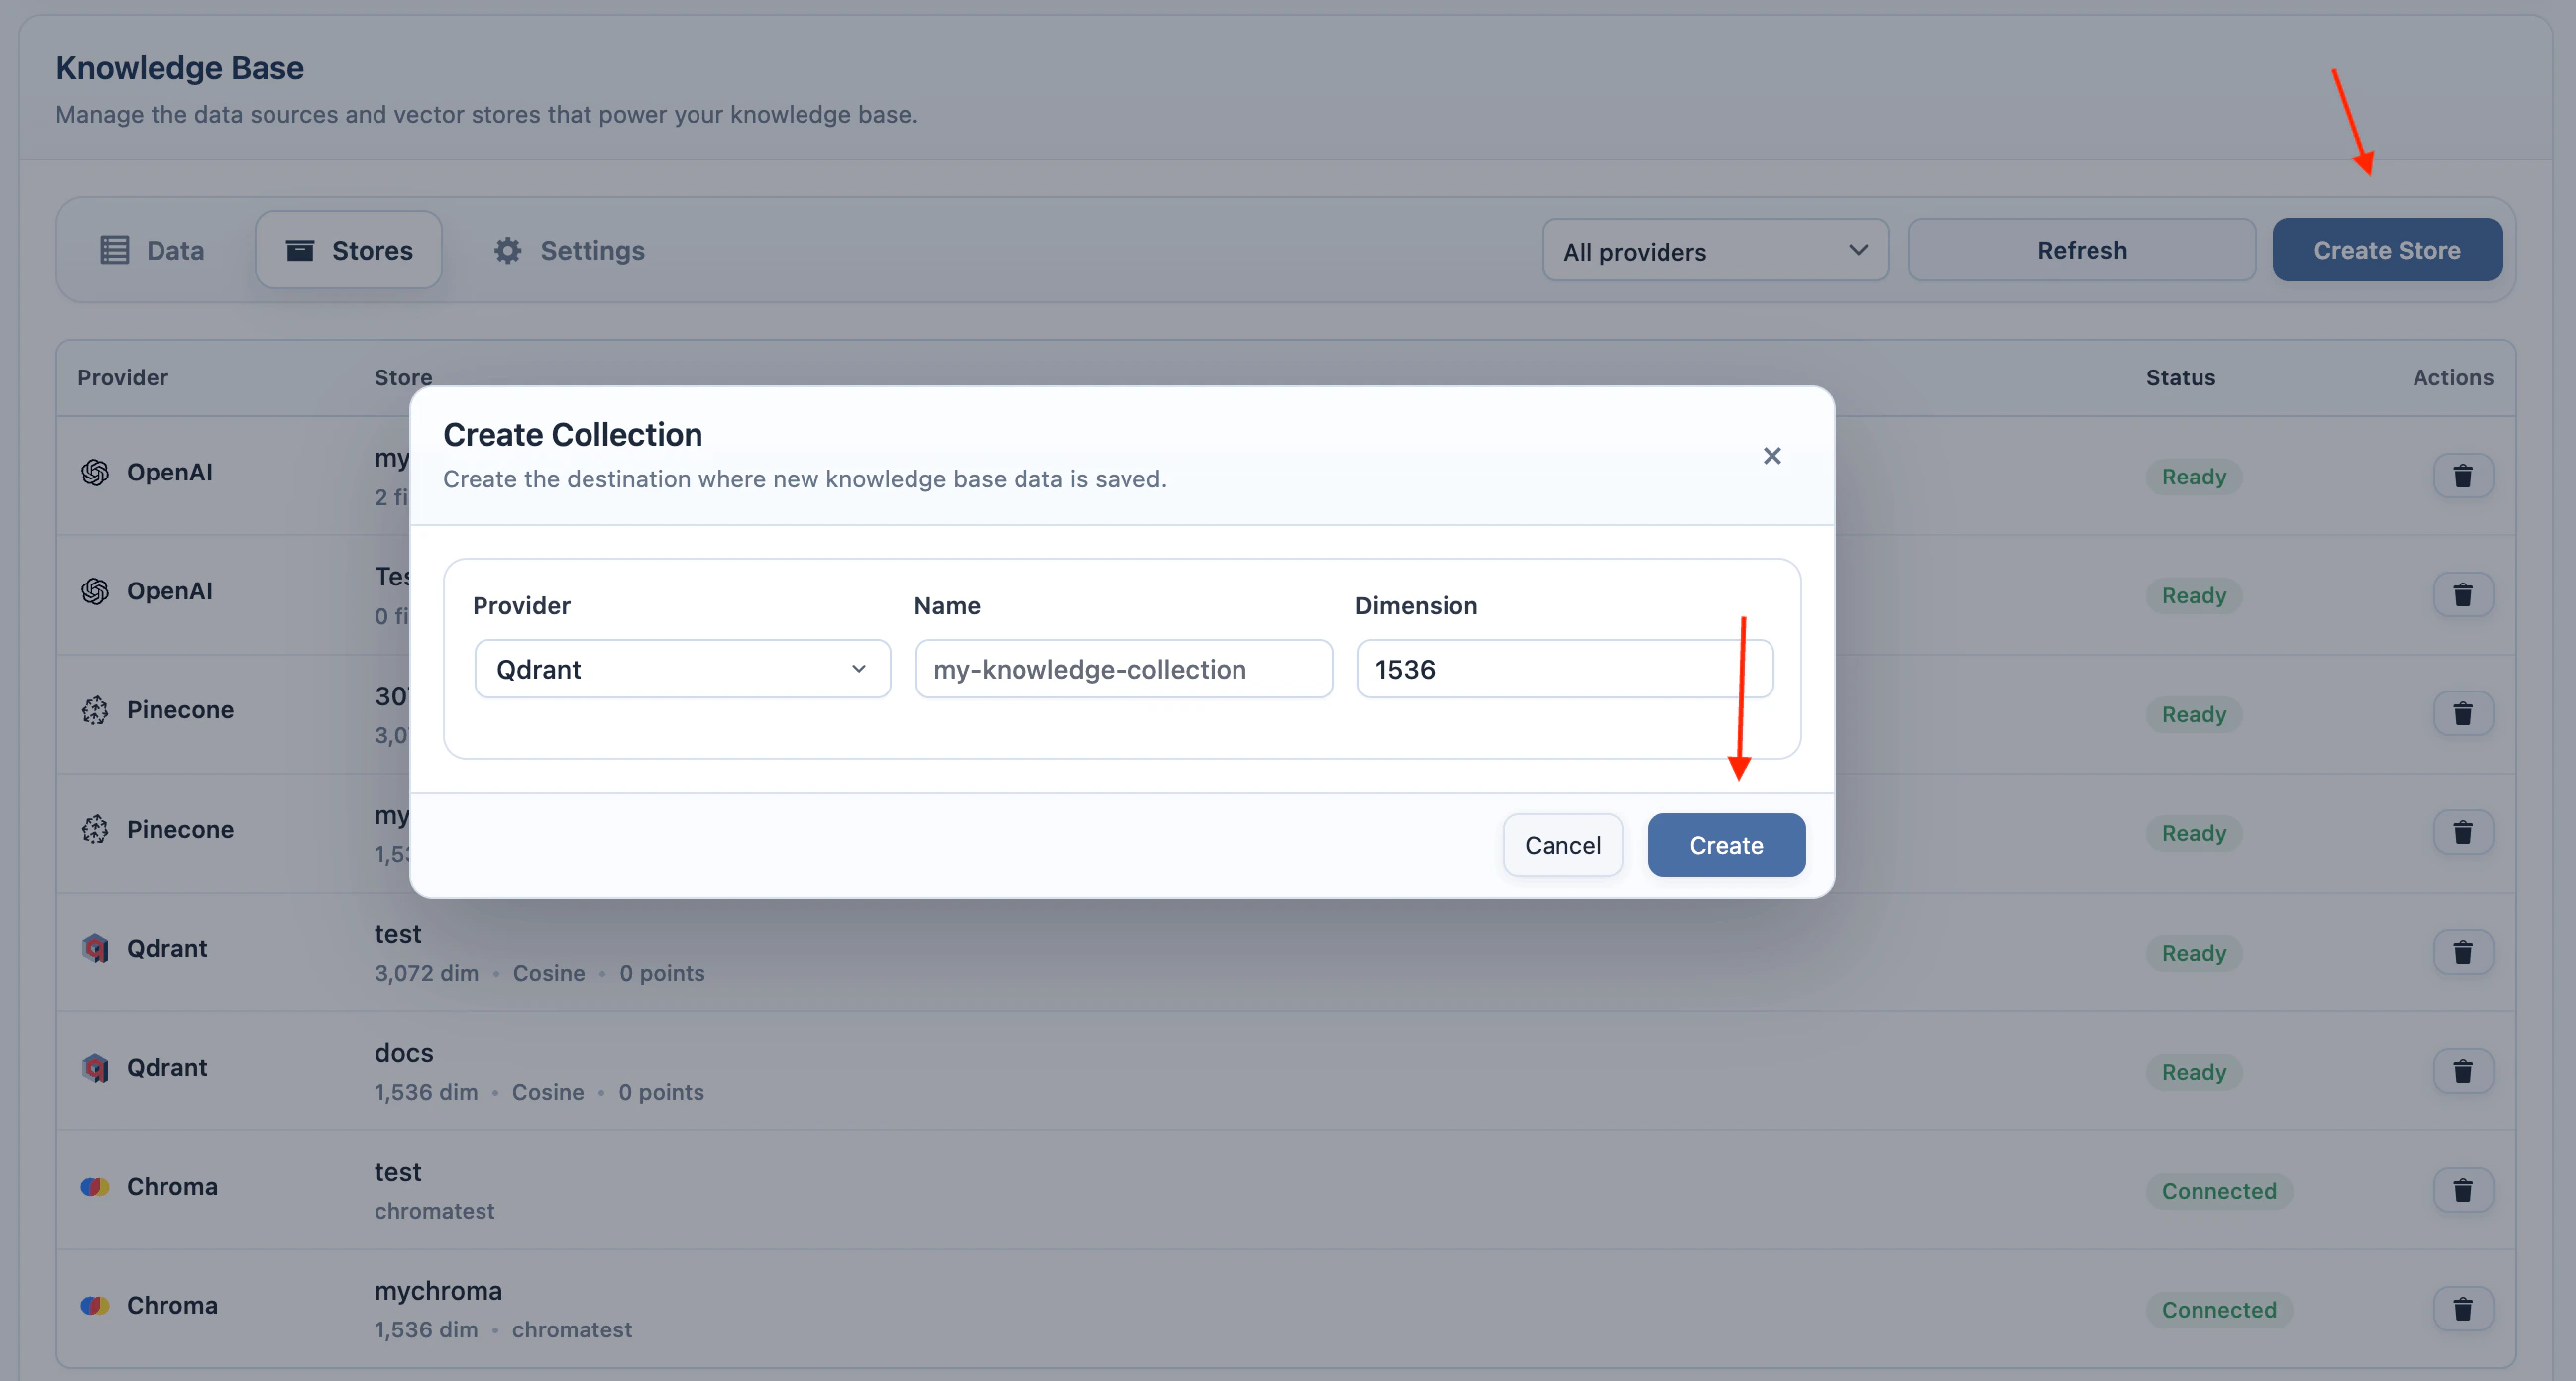
Qdrant Collections
- Add your Qdrant URL and API key in AI Puffer > Settings > Integrations.
- Go to AI Puffer > Knowledge Base > Stores.
- Select Qdrant as the provider.
- Select the embedding model you plan to use.
- Click Create Store.
- Enter a collection name.
- Enter the dimension for the selected embedding model.
- Click Create.
Chroma Collections
- Add your Chroma endpoint, tenant, database, and API key in AI Puffer > Settings > Integrations.
- Go to AI Puffer > Knowledge Base > Stores.
- Select Chroma as the provider.
- Click Create Store.
- Enter a collection name.
- Click Create.

Add Data
Use AI Puffer > Knowledge Base > Data to add new source data and manage existing source records. Before adding data:- Go to AI Puffer > Knowledge Base > Data.
- Select a provider.
- Select the target vector store, index, or collection.
- For Pinecone, Qdrant, or Chroma, select the embedding model.
- Click + Add Data.
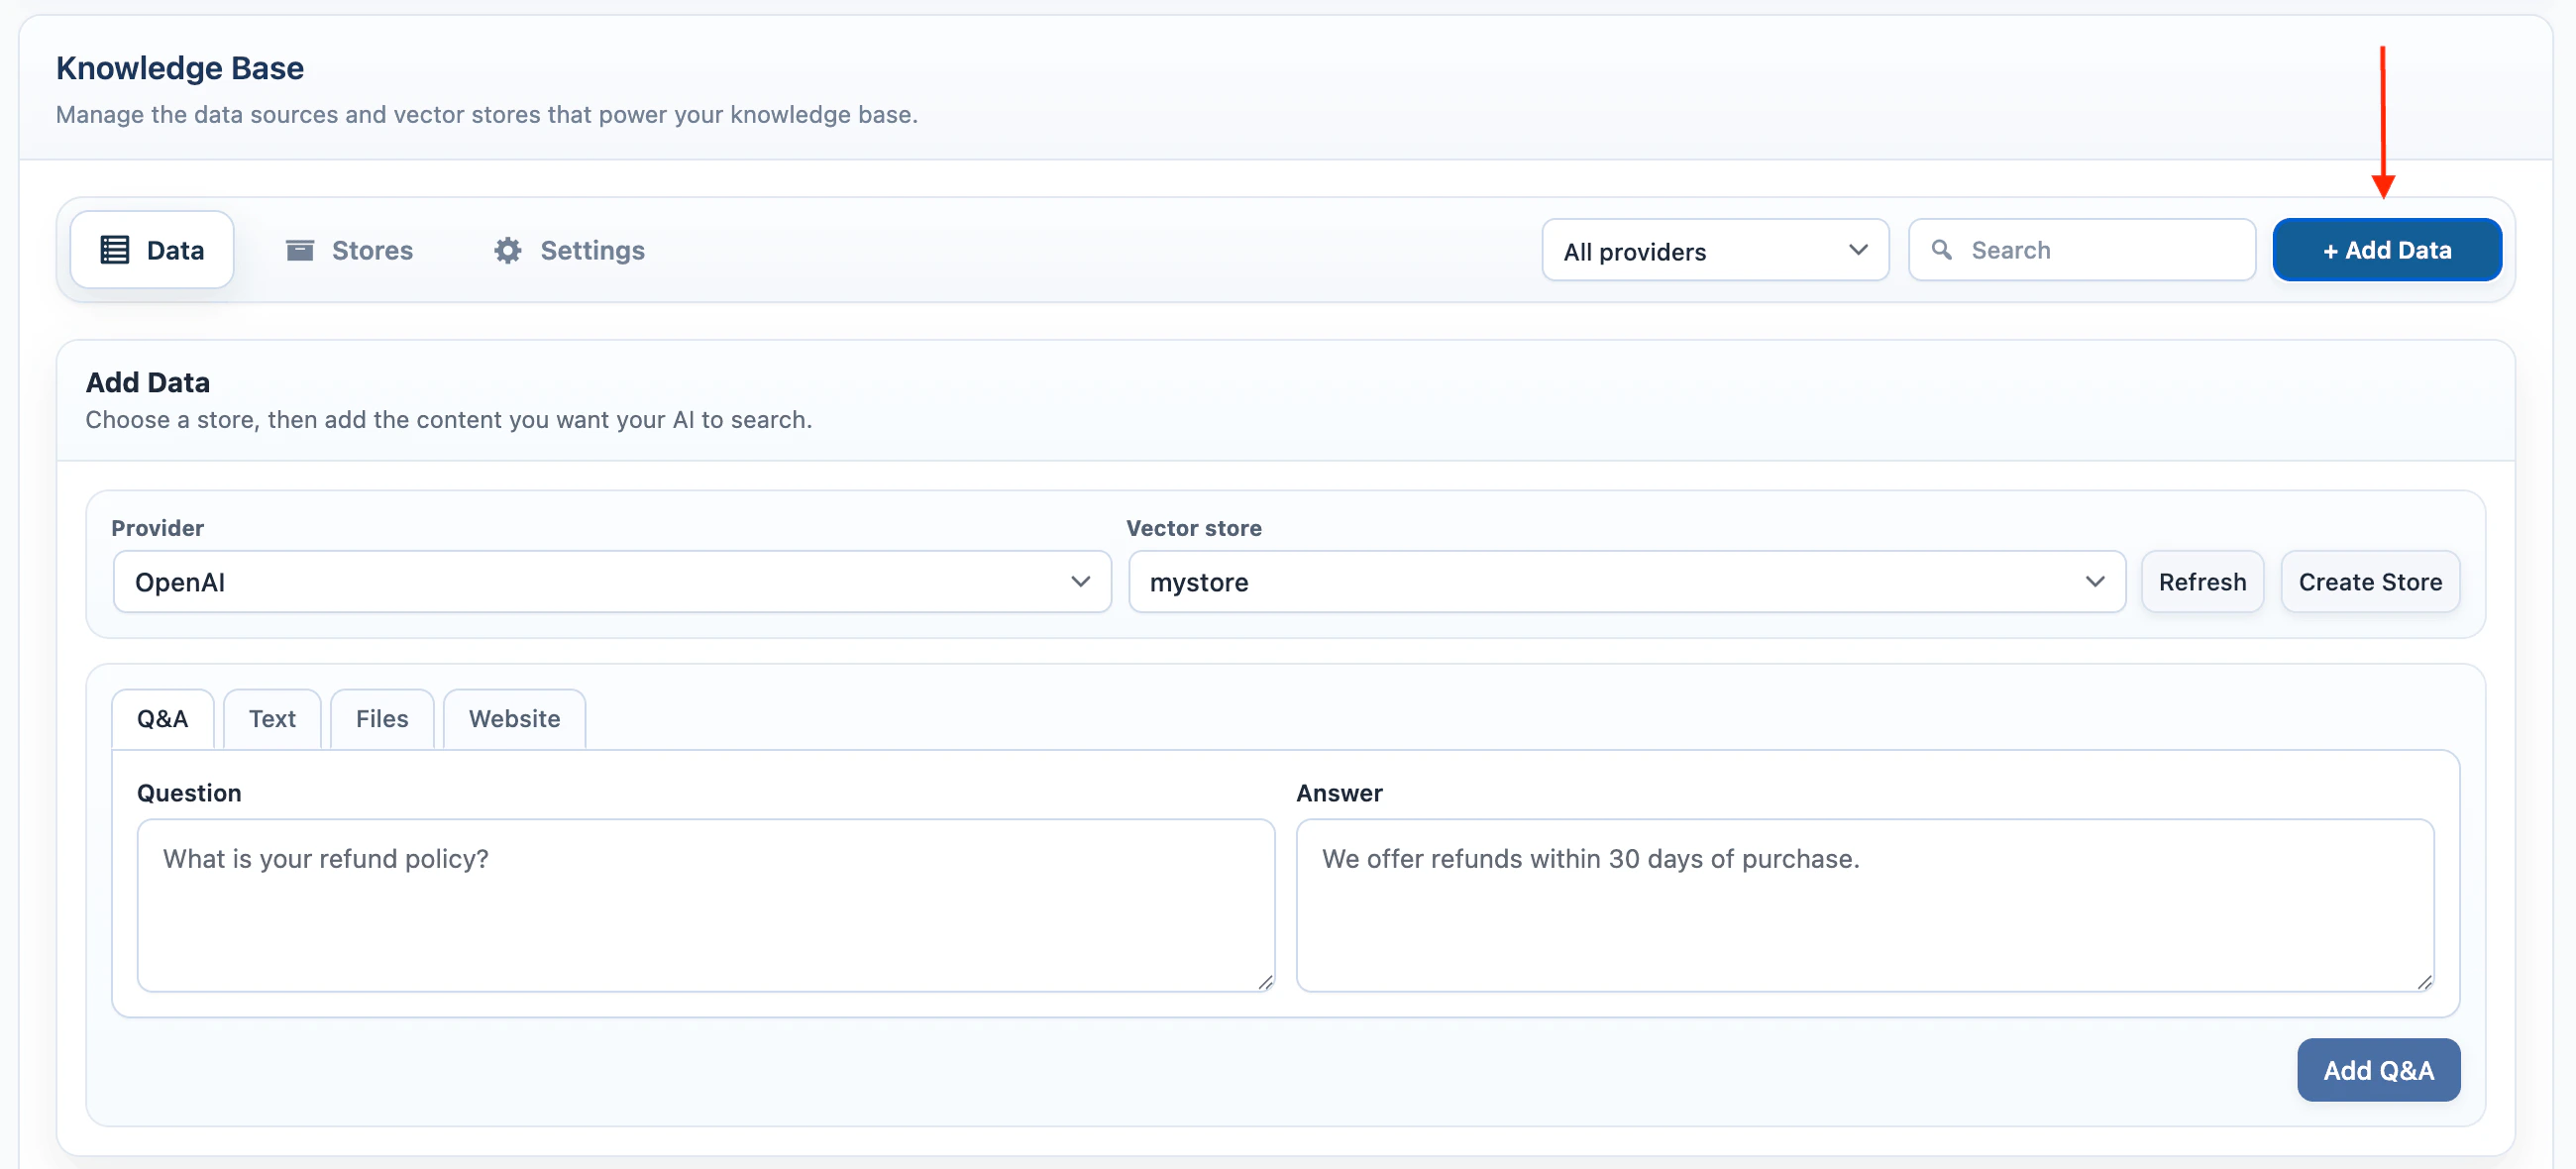
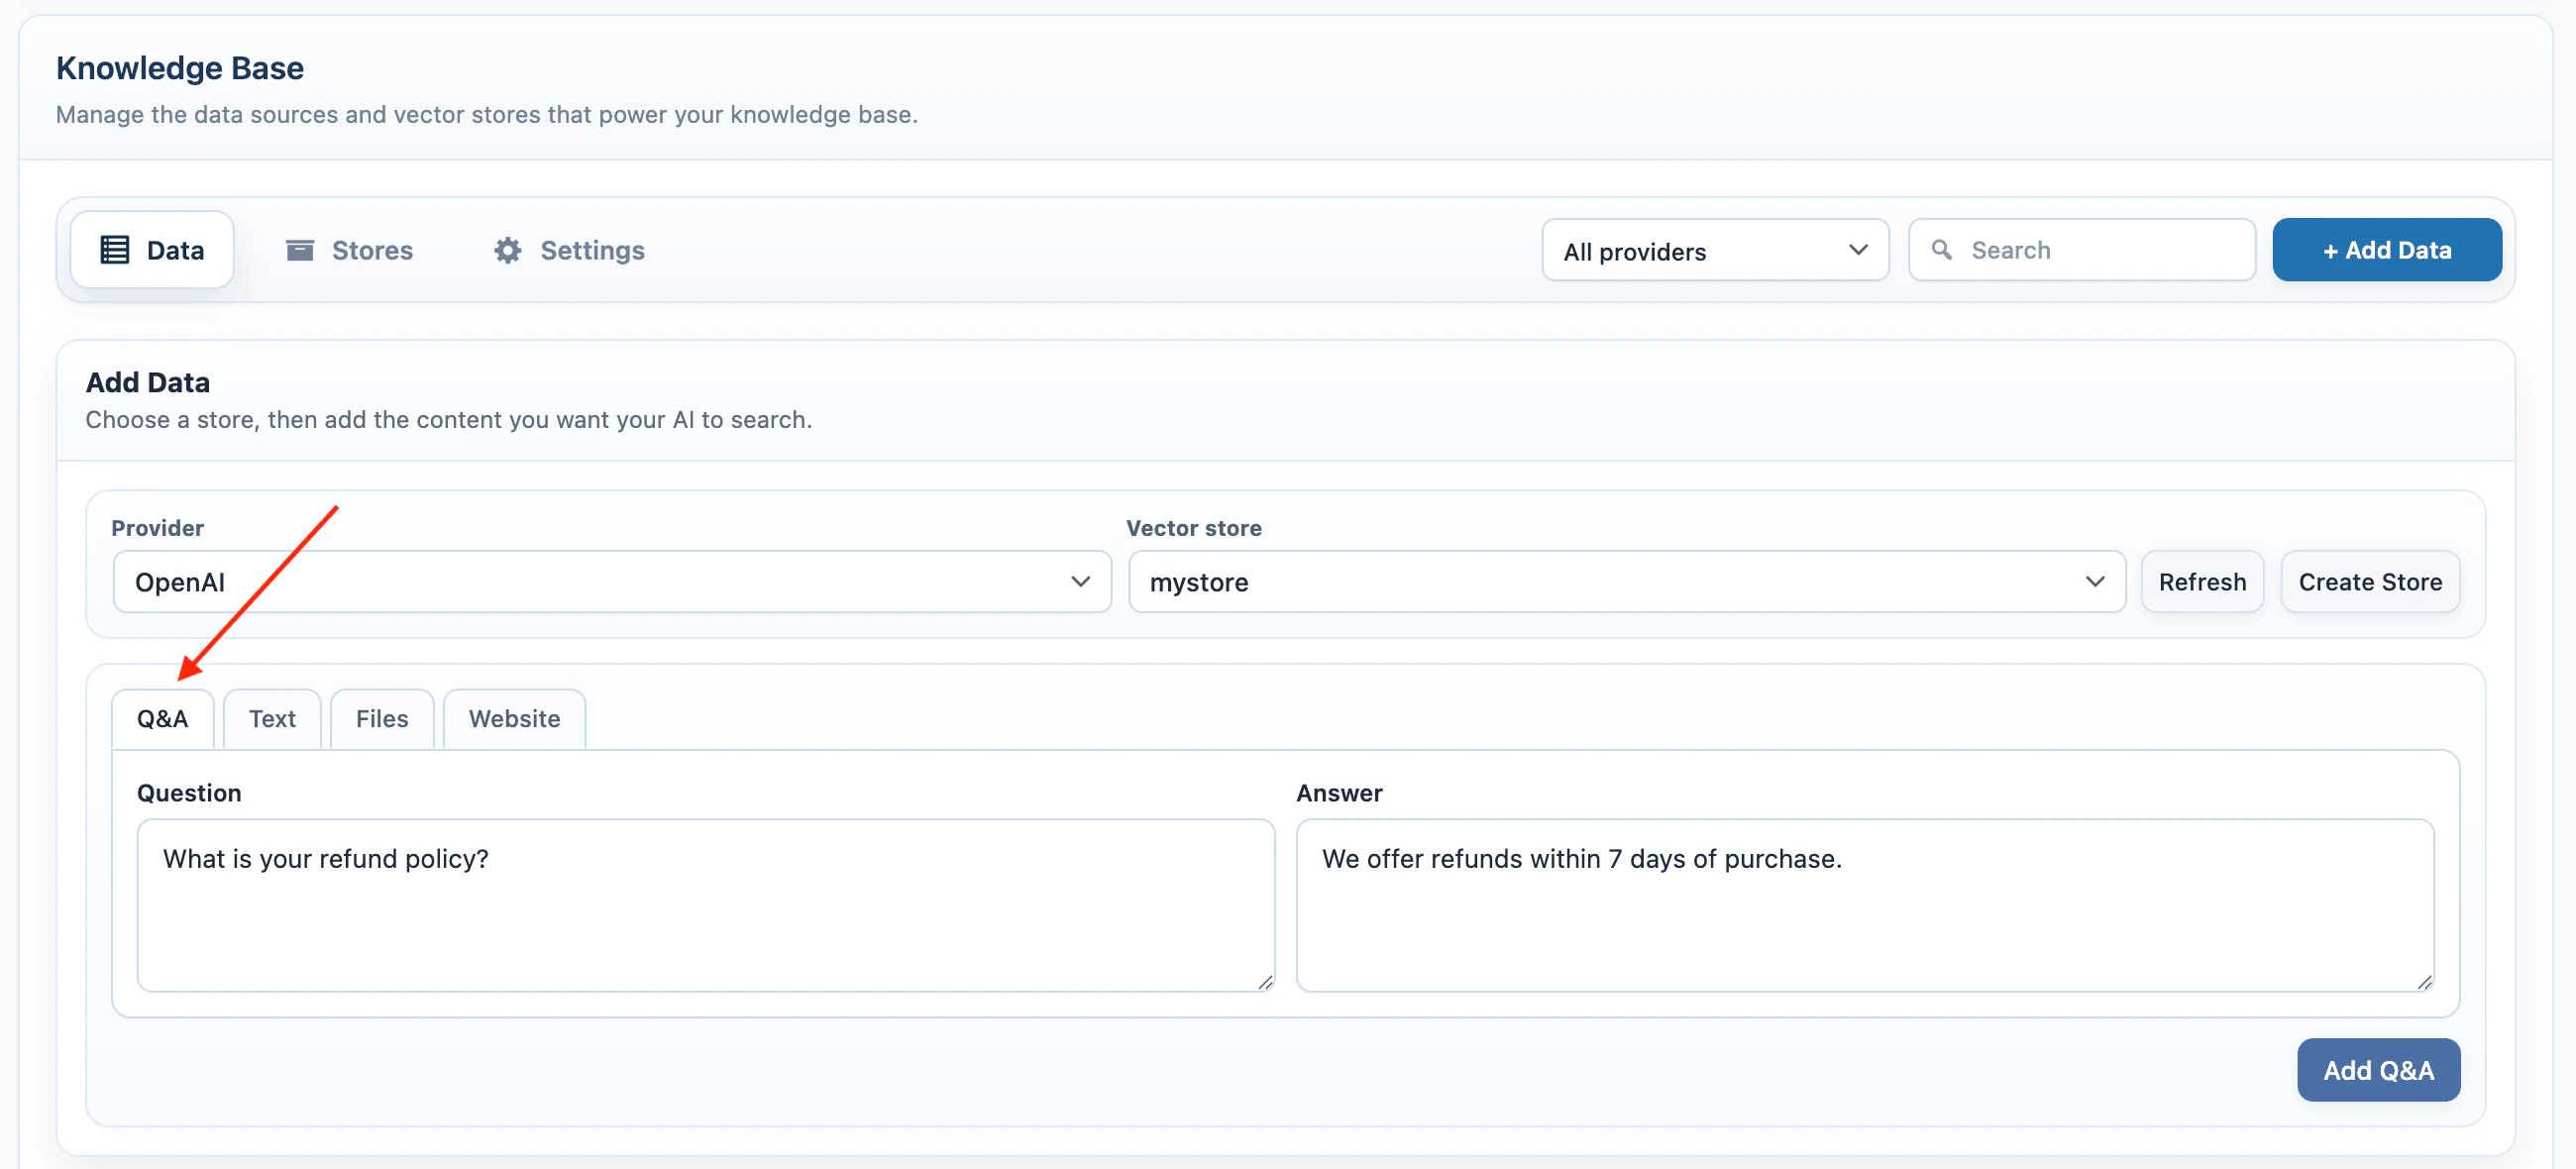
Q&A
Use Q&A for short answers that should be easy to retrieve later.- Select Q&A.
- Enter the question.
- Enter the answer.
- Click Add Q&A.
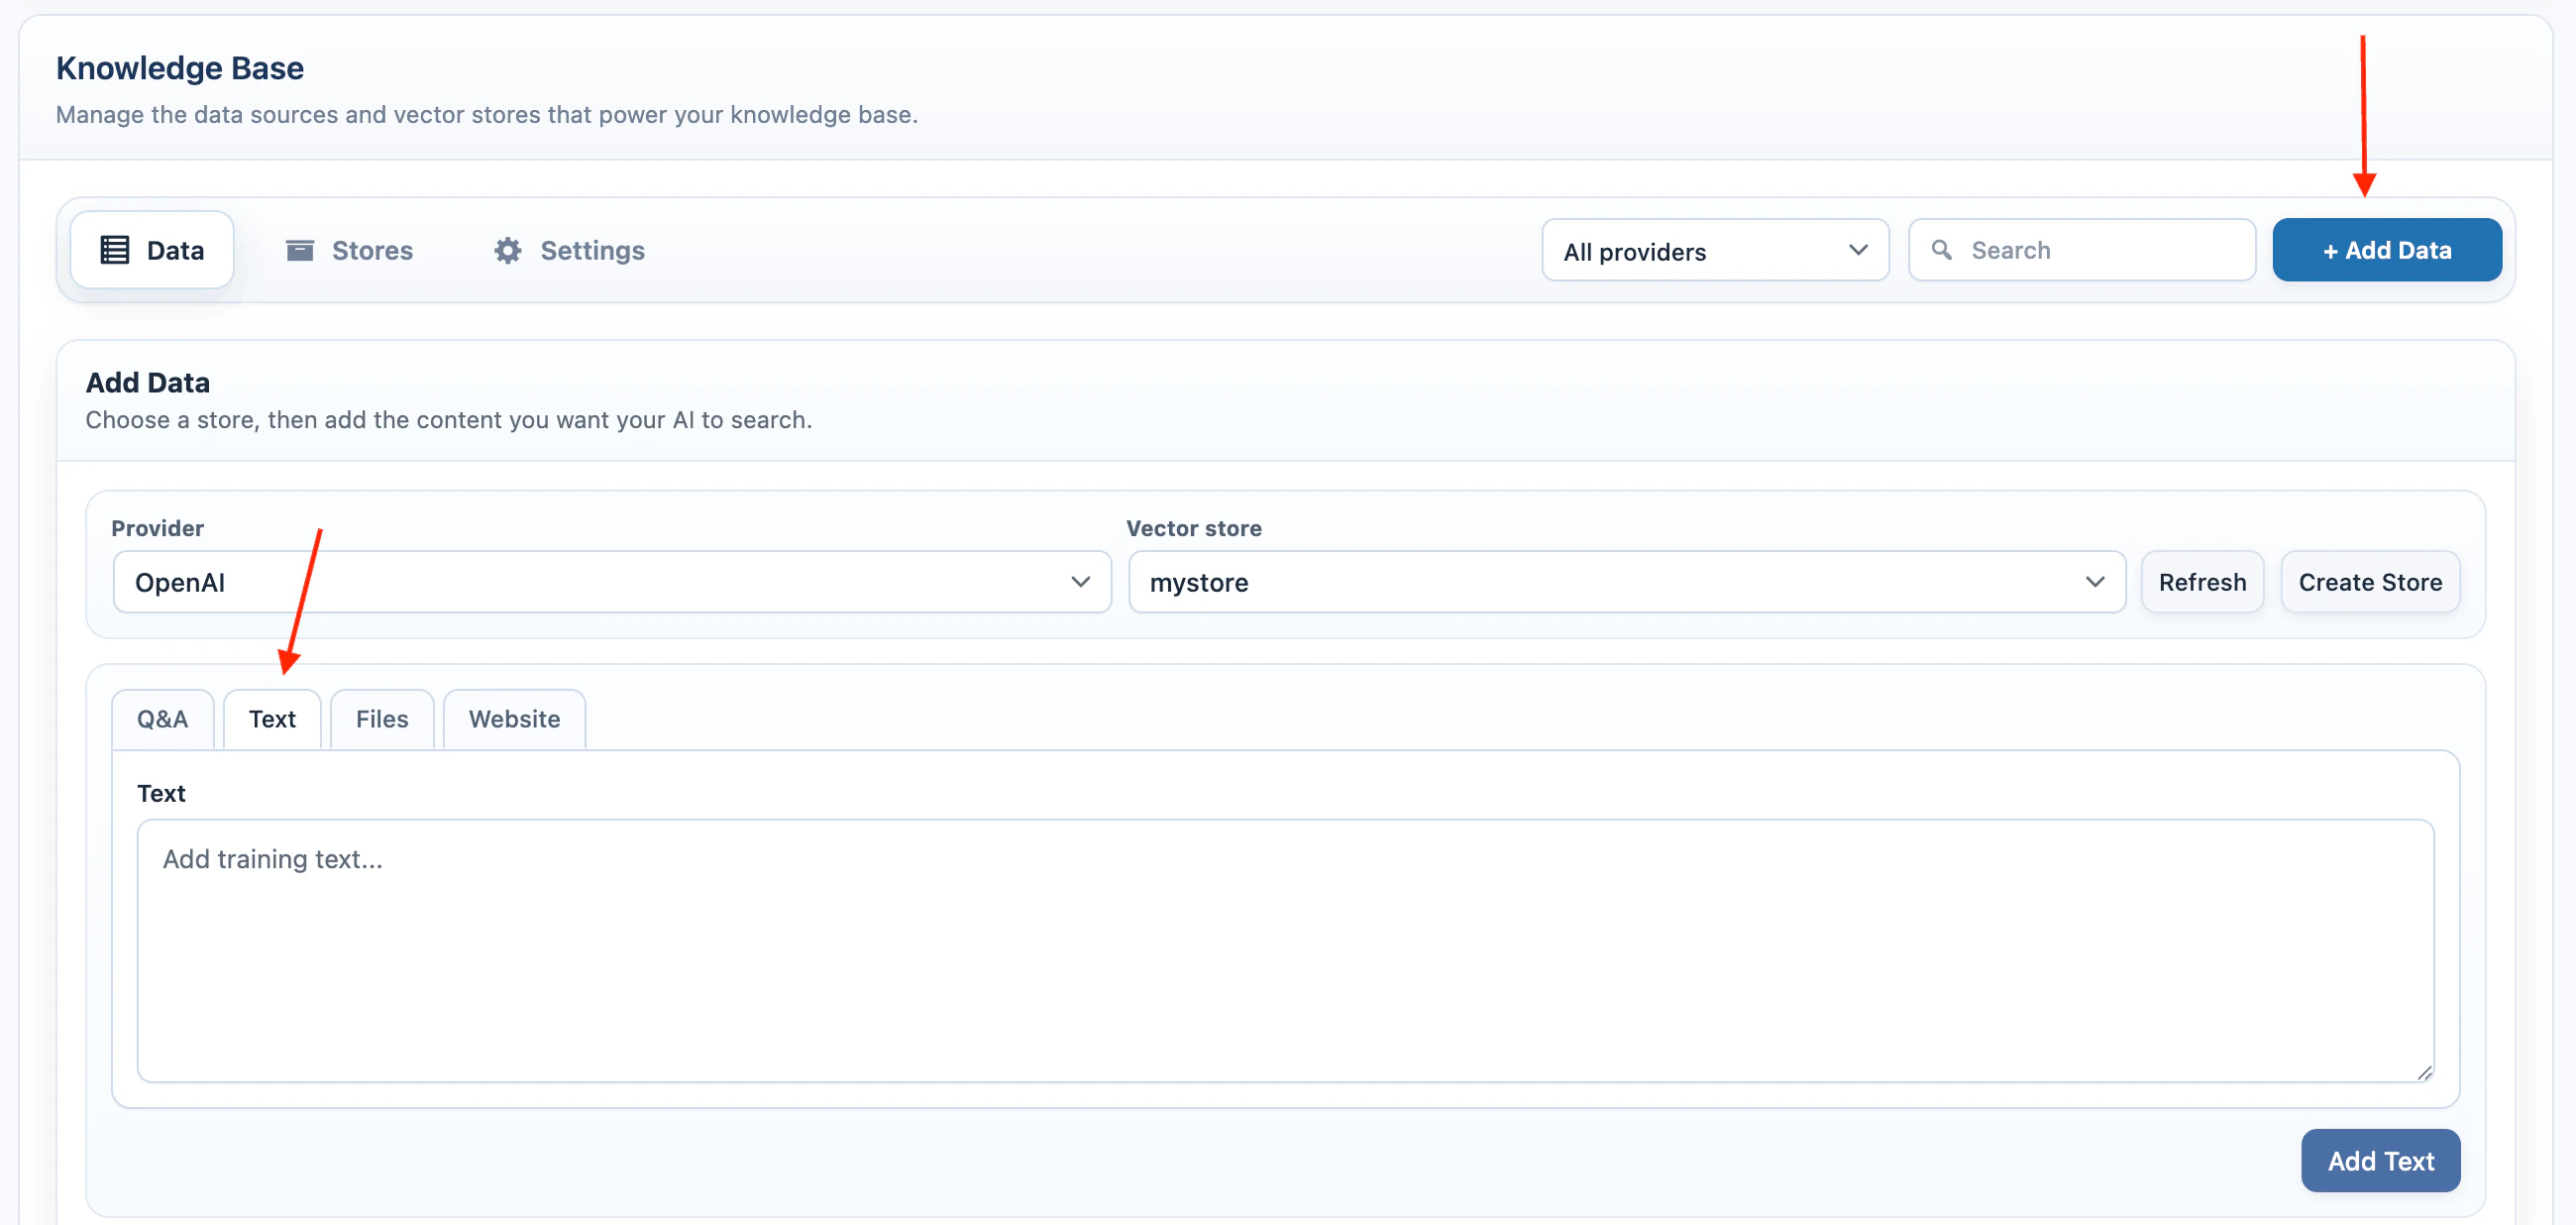
Text
Use Text for policies, instructions, product notes, support snippets, or any source text that does not already exist as WordPress content.- Select Text.
- Paste the source text.
- Click Add Text.
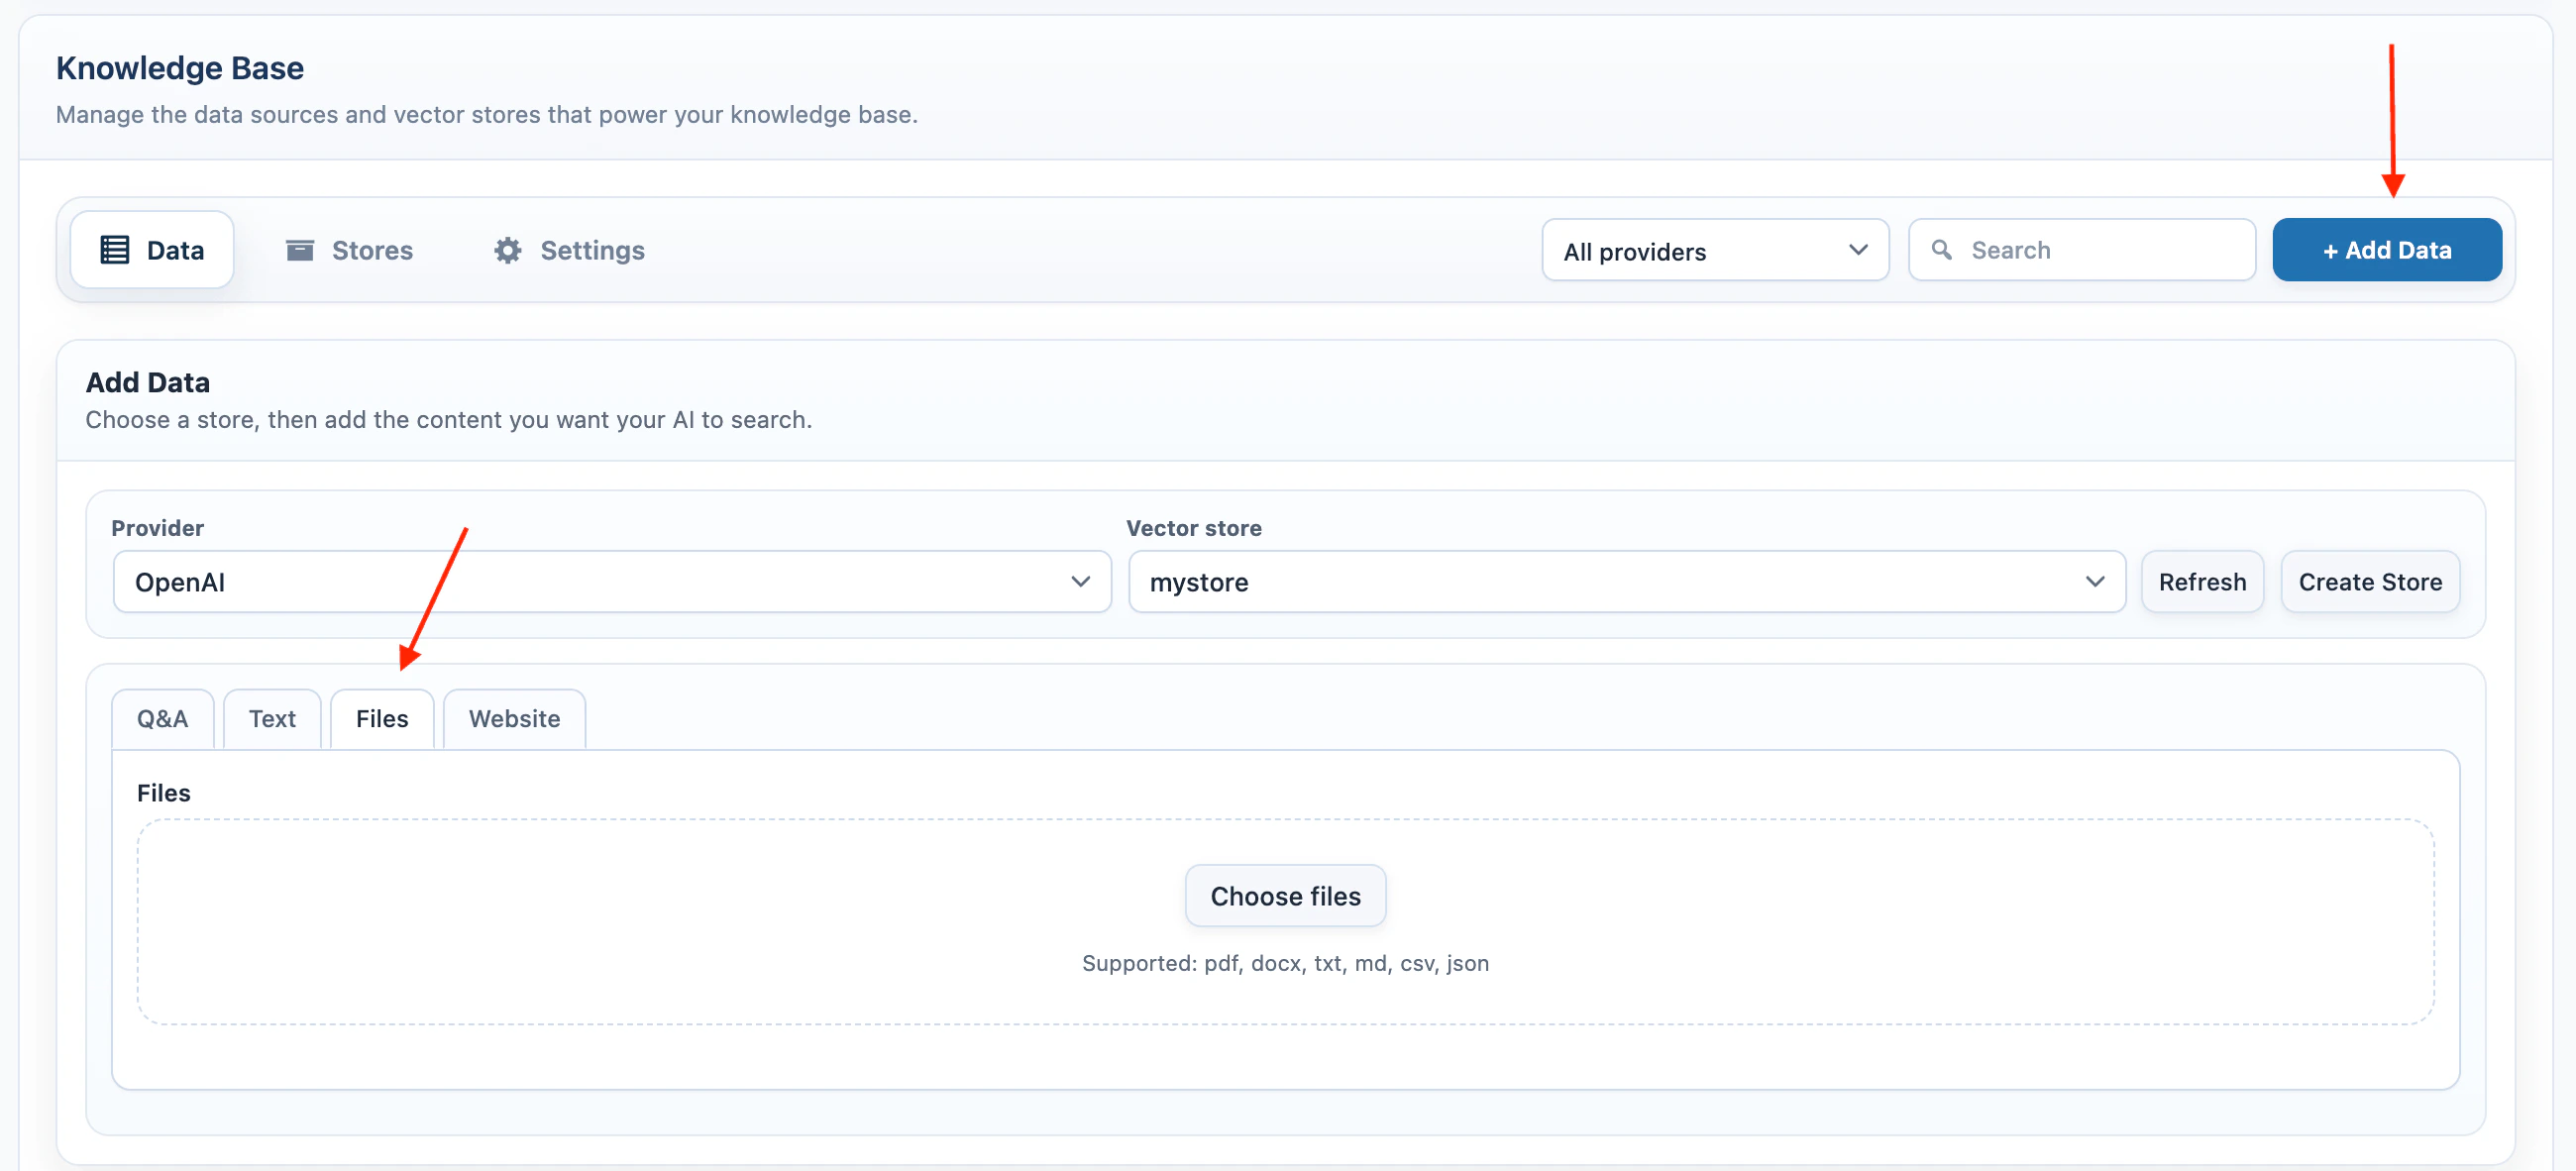
Files
Use Files when the source is already in a document.- Select Files.
- Click Choose files.
- Select one or more files.
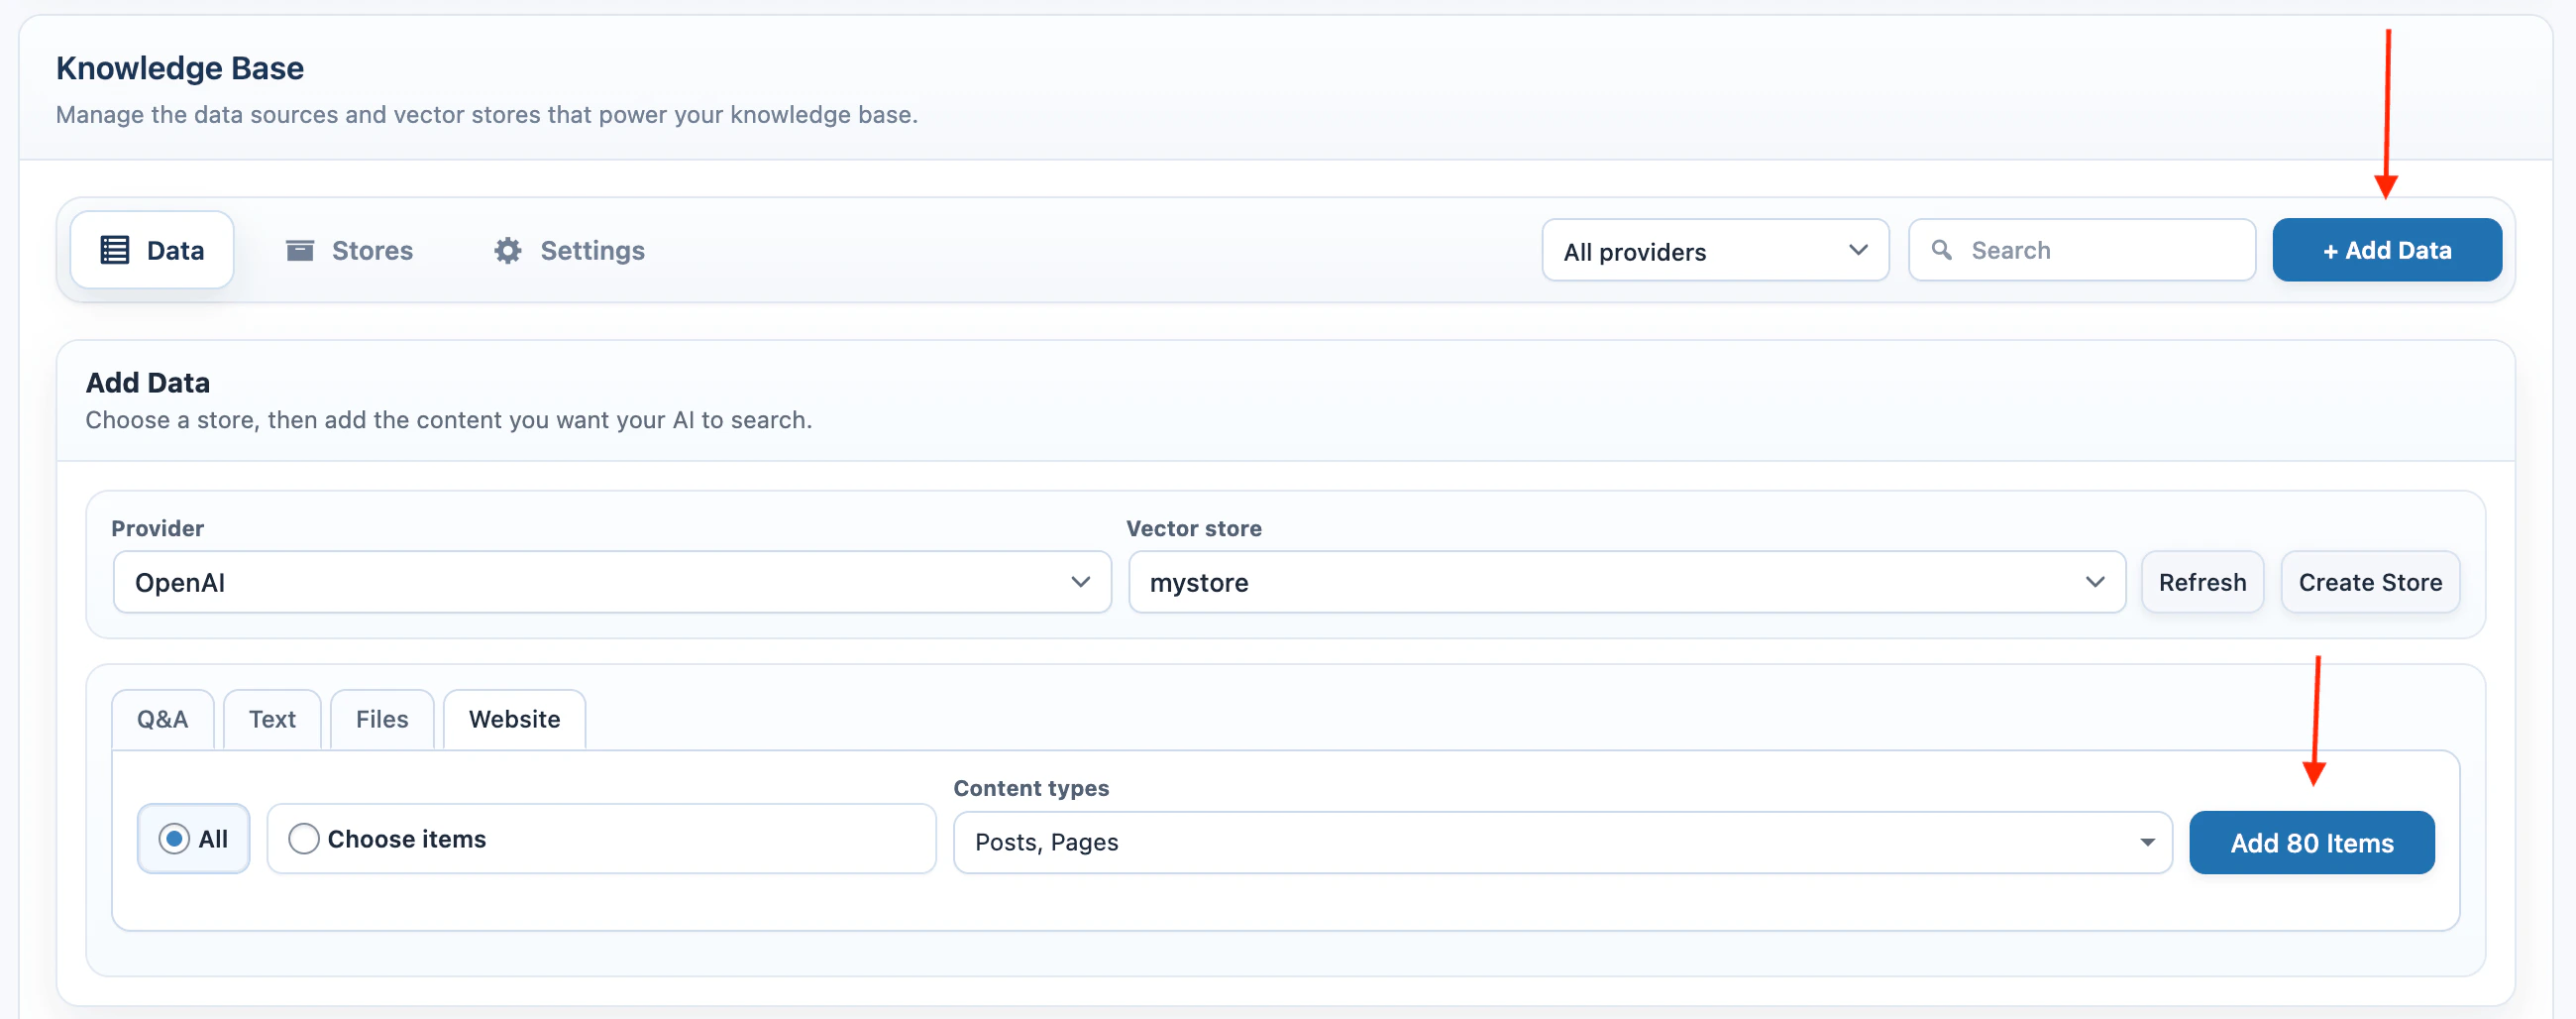
Website
Use Website when the source is WordPress content.- Select Website.
- Choose All or Choose items.
- Select the content types.
- If using Choose items, select the individual published items.
- Click Add Items.
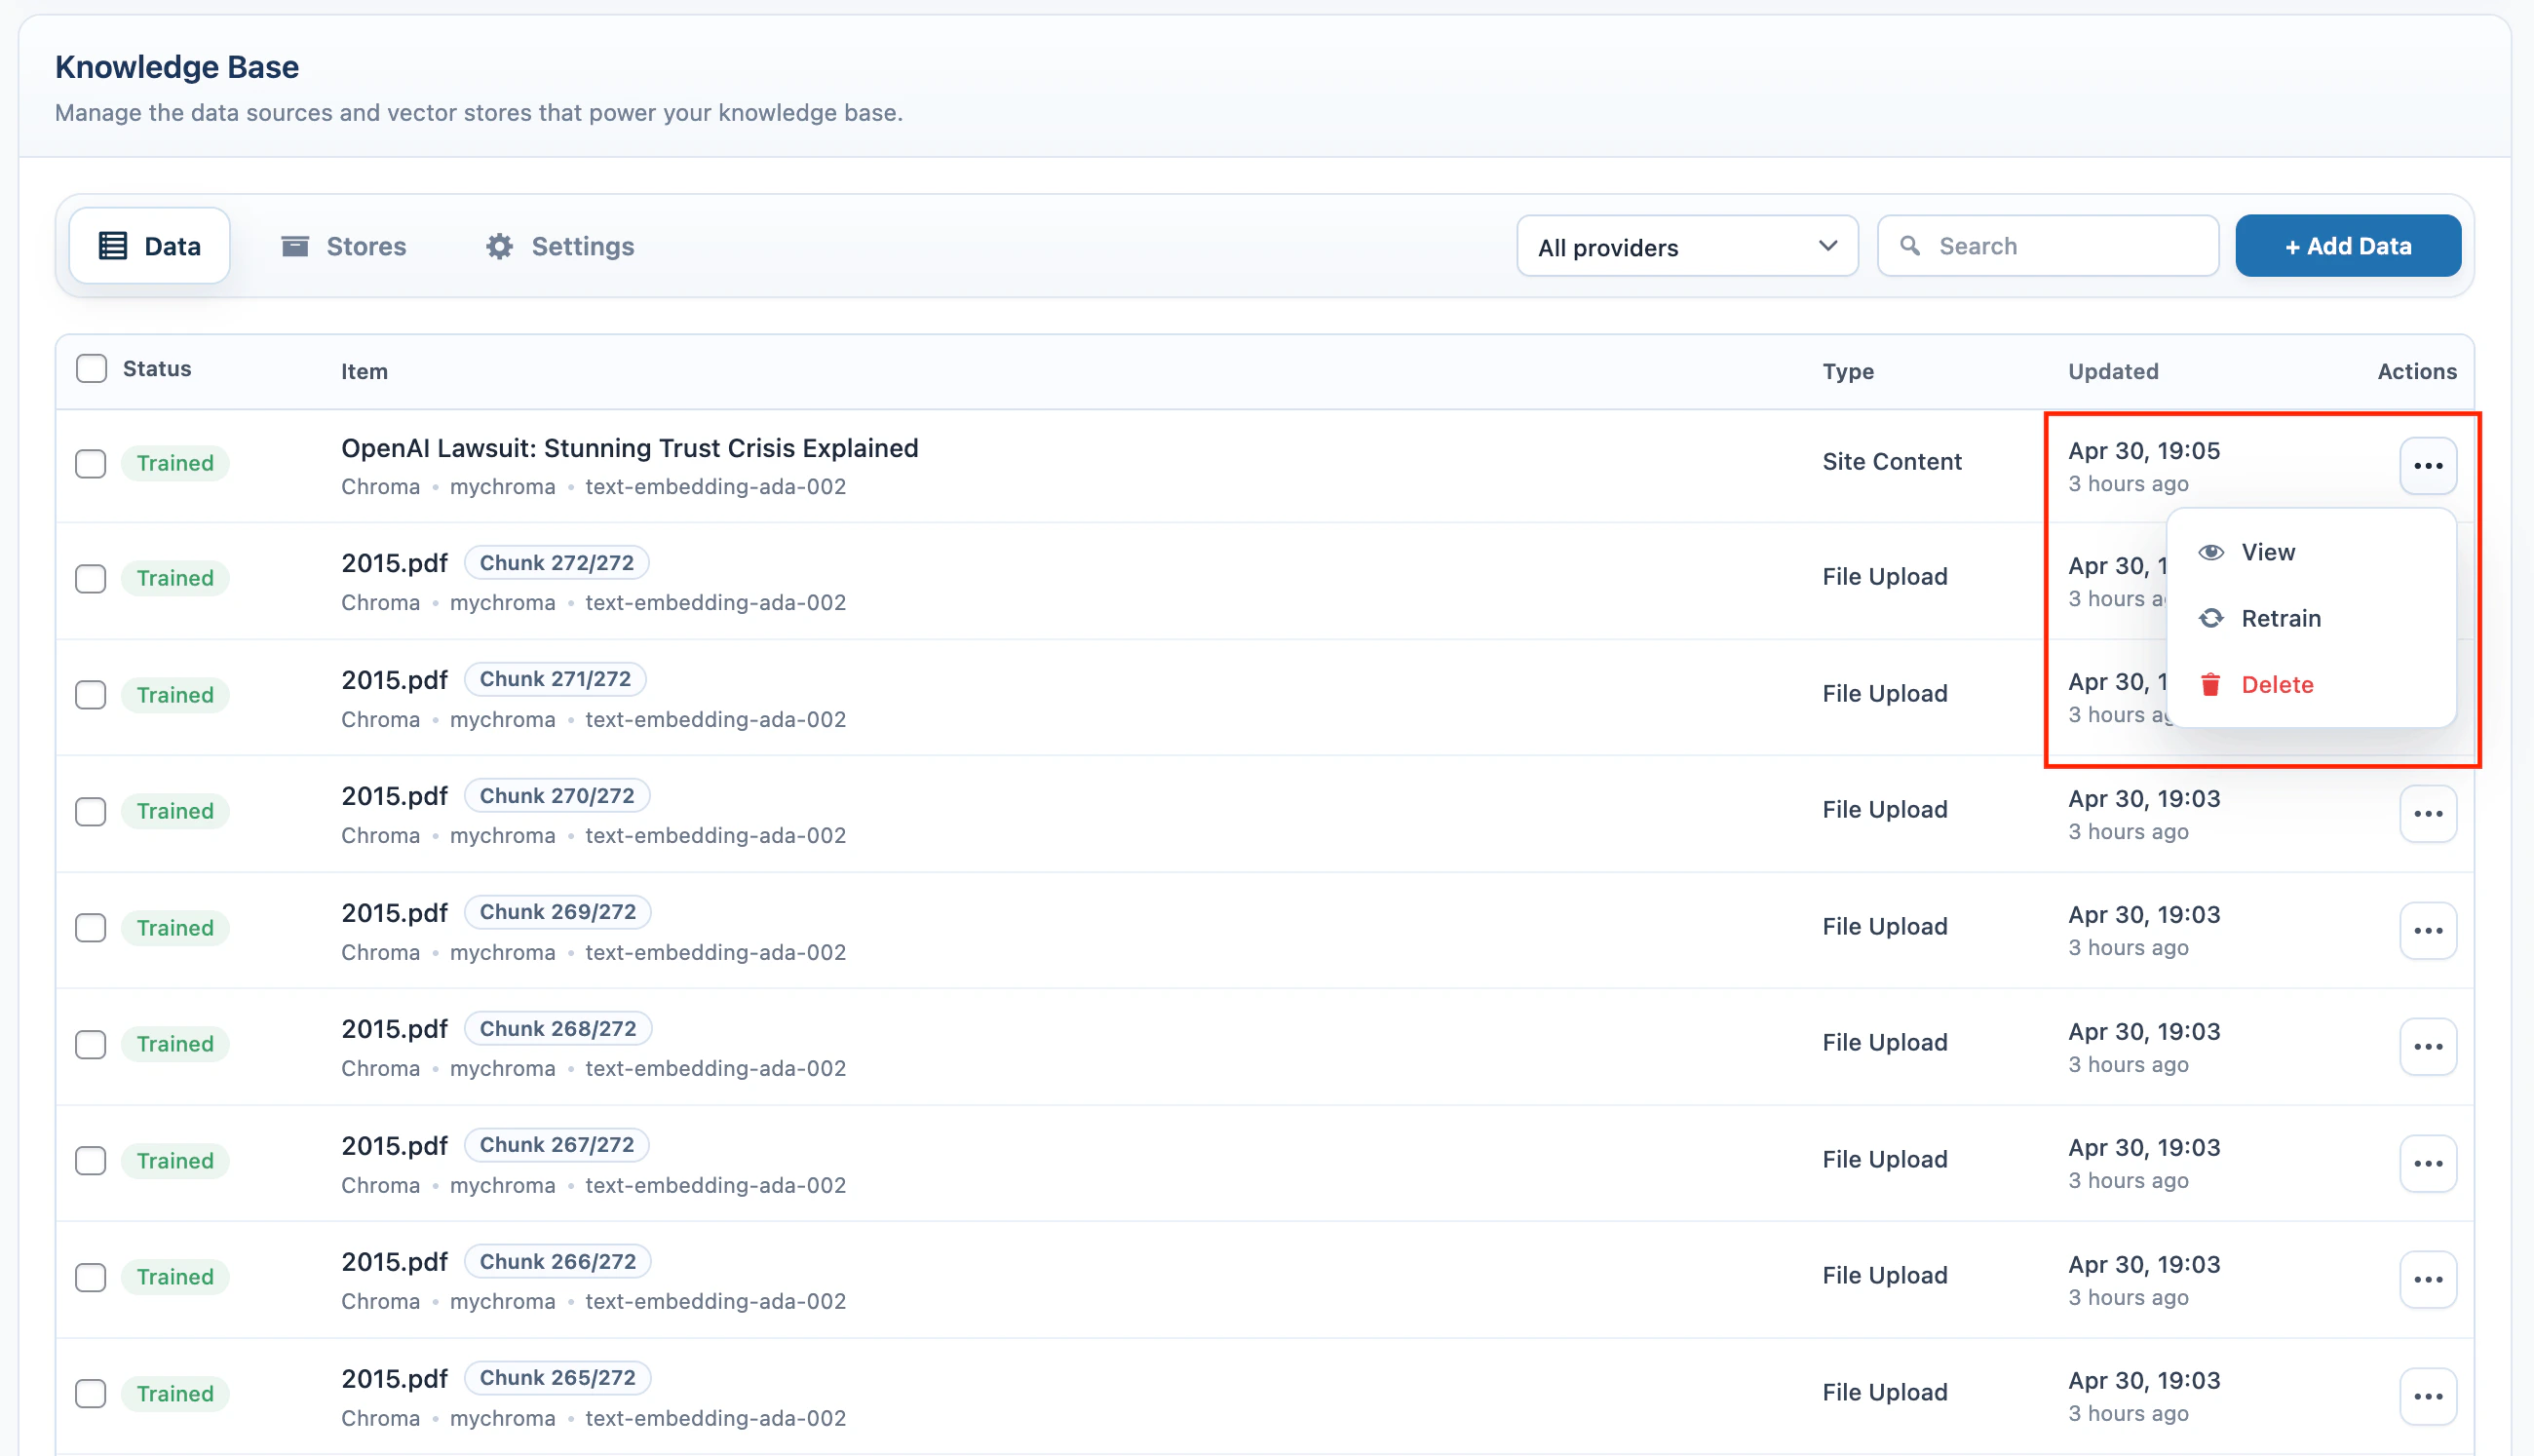
Manage Data
The source table in the Data tab shows the local records created while adding data.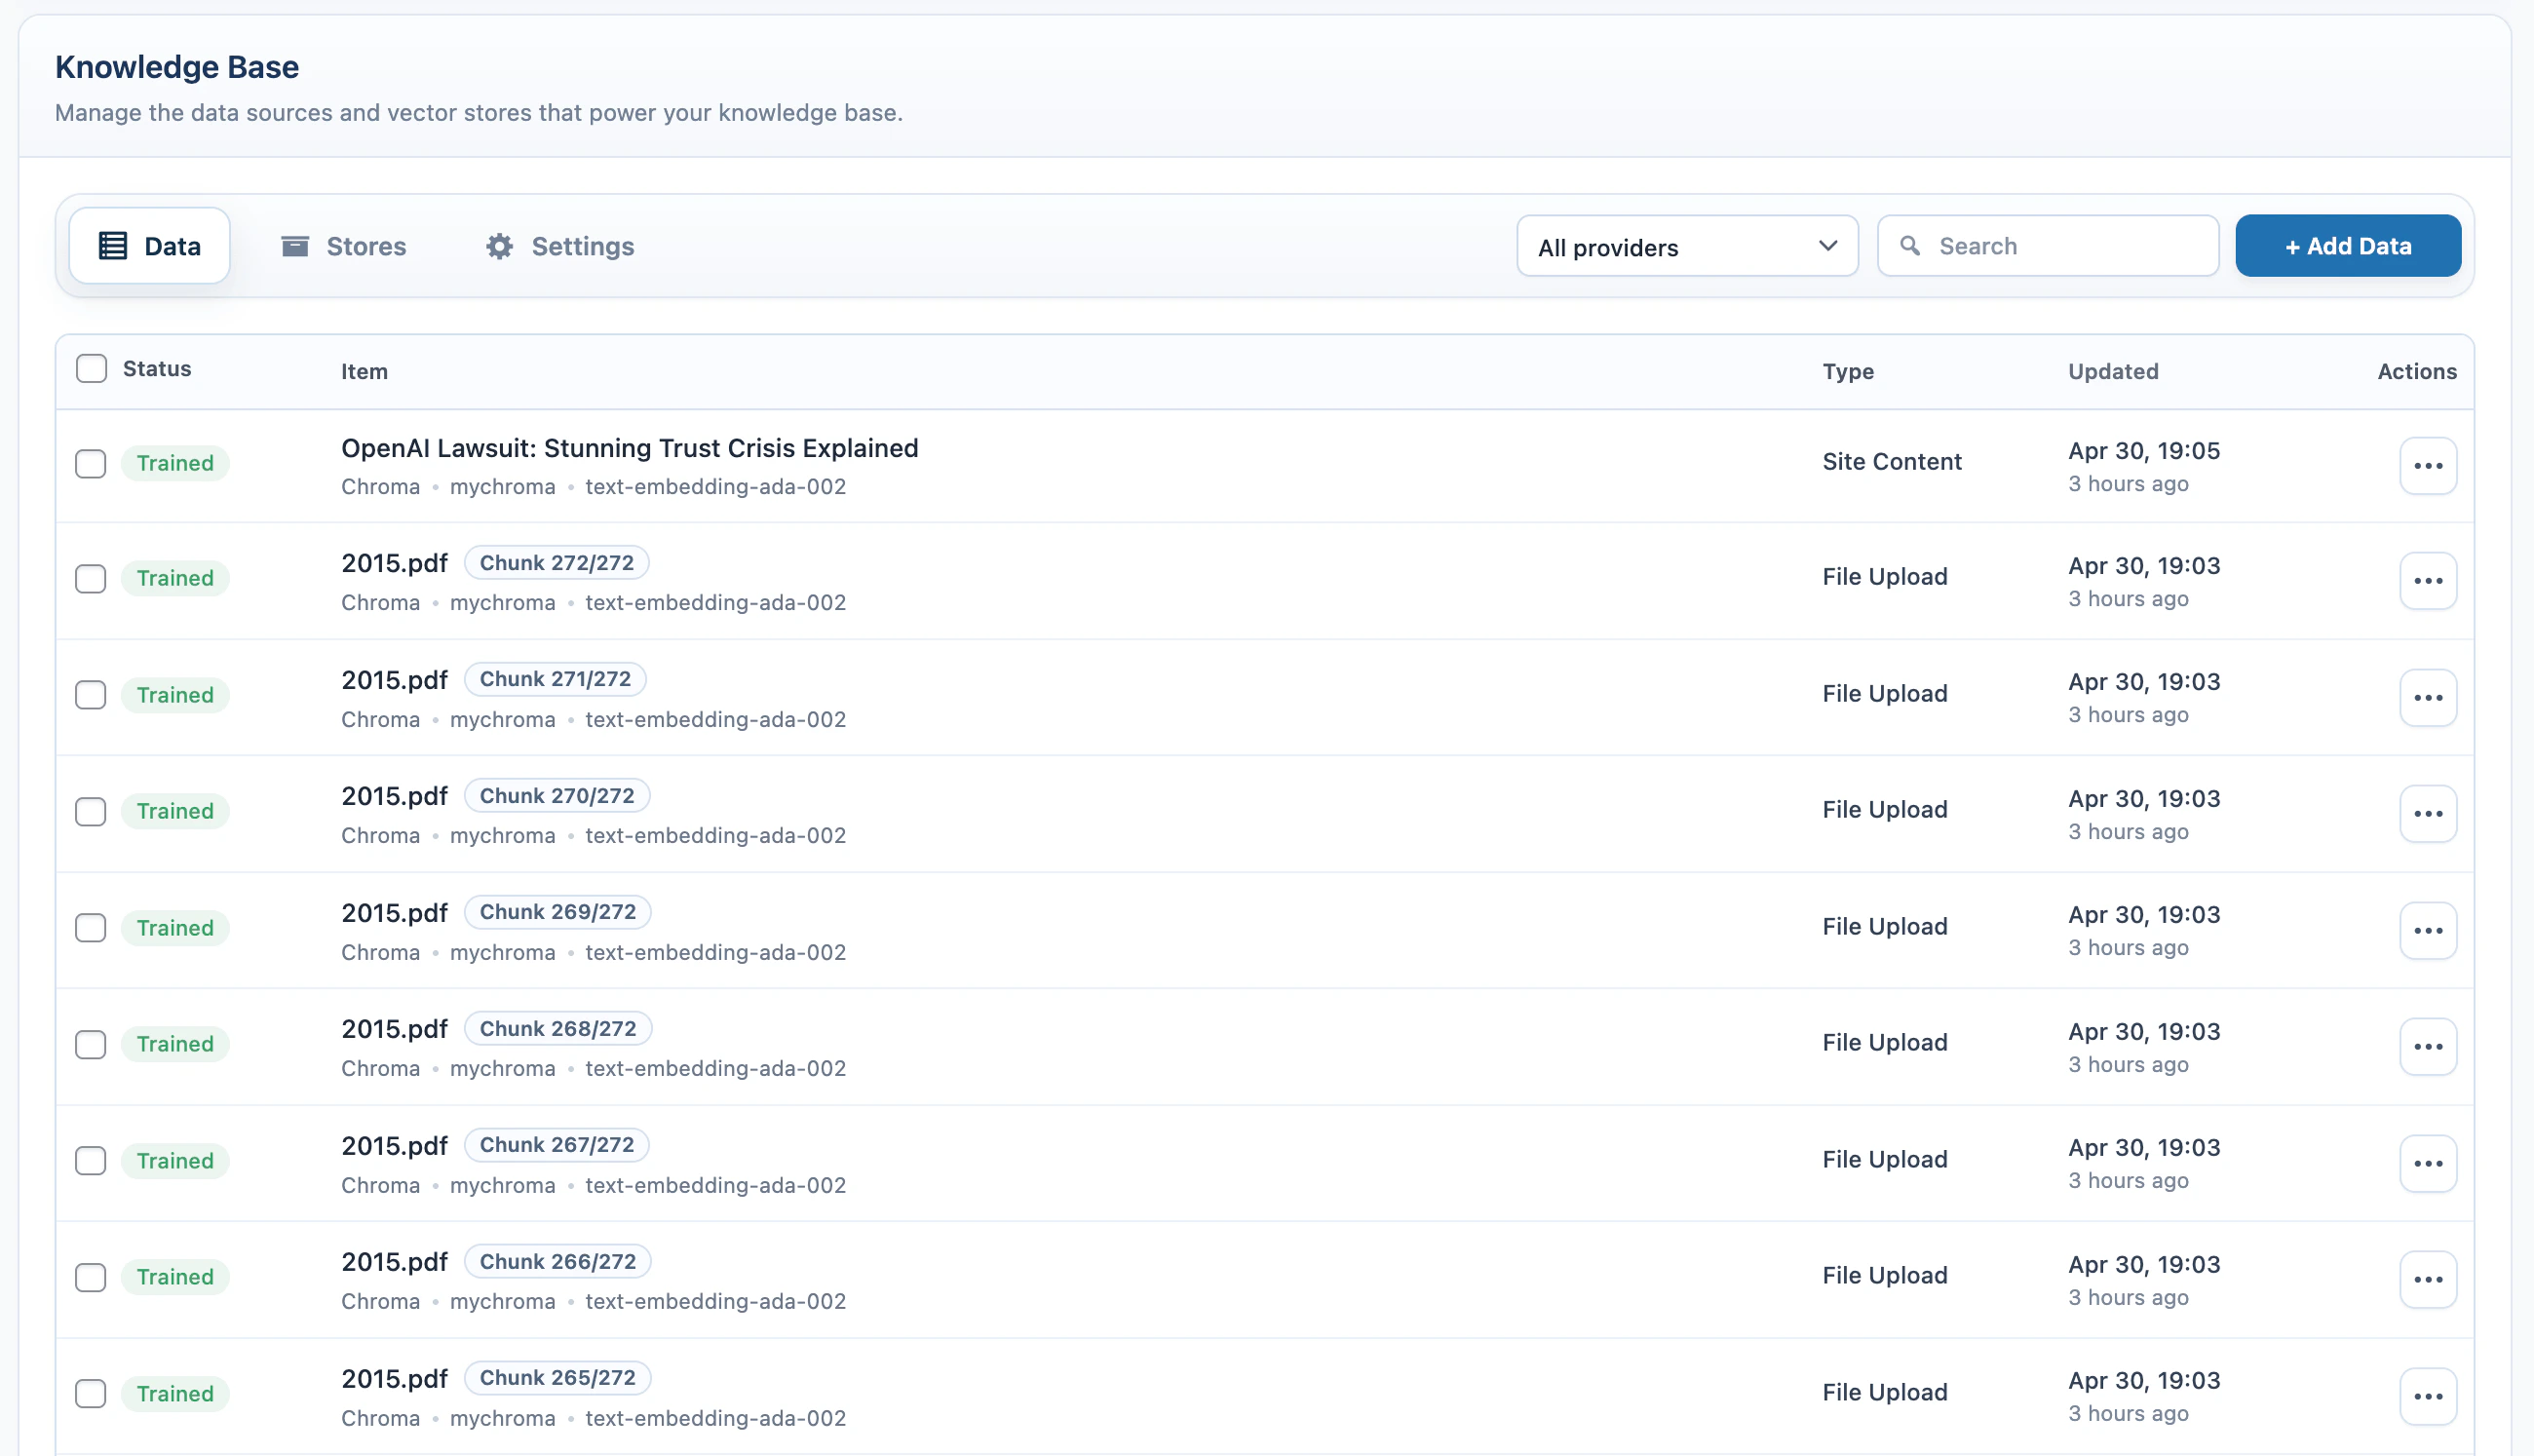
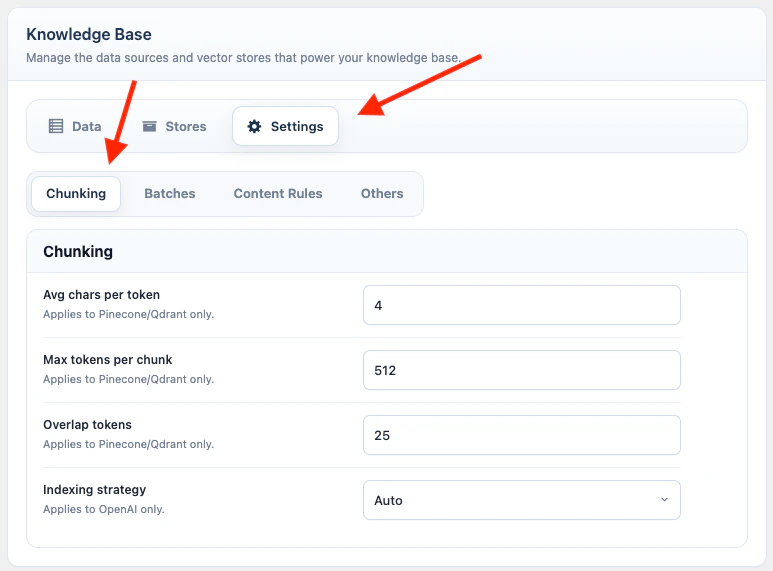
Settings
Open AI Puffer > Knowledge Base > Settings to configure Knowledge Base behavior. The Settings screen is split into tabs.Chunking
Document chunking controls how AI Puffer splits large uploaded files and WordPress Website content before embedding them for Pinecone, Qdrant, or Chroma.
Use smaller chunks when an embedding provider rejects long input. Keep some overlap for long documents where meaning continues across sections. Some embedding models have lower hard limits than the visible maximum, so AI Puffer may apply a safer model-specific cap during indexing.
OpenAI Vector Store file uploads use OpenAI File Search chunking instead of the Pinecone, Qdrant, and Chroma chunking settings above.
Batches
The Batches tab contains Embedding Batches, which controls how many file chunks AI Puffer sends to the embedding provider in one request.- Go to AI Puffer > Knowledge Base > Settings.
- Open Batches.
- Adjust the batch size for the embedding provider you use.
- Wait for the settings autosave to finish.
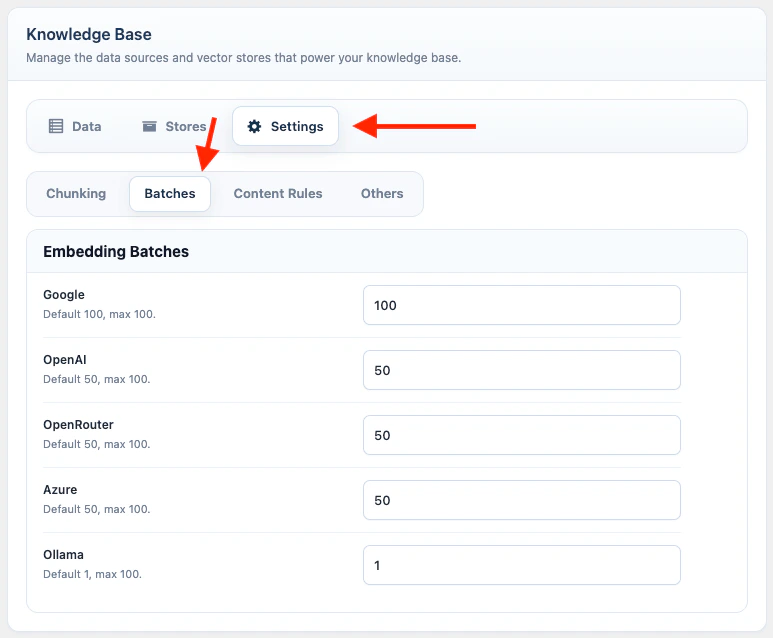
50 means AI Puffer sends up to 50 prepared file chunks to the embedding API at once. Larger batches can make file upload training much faster because they reduce repeated API calls.
Embedding batch settings apply only to chunked file uploads for Pinecone, Qdrant, and Chroma. Website training uses document chunking, but these batch-size settings do not change Q&A, Text, Website training, semantic search queries, or OpenAI Vector Store file uploads.
429, lower that provider’s batch size and try again. AI Puffer can pause and retry file upload processing when the provider sends a retry delay, but lowering the batch size is usually better for accounts with stricter quotas.
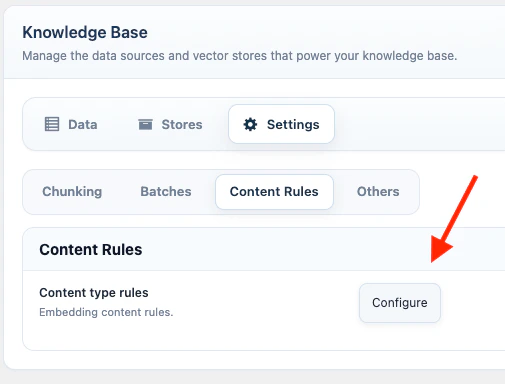
Content Rules
Content Rules define which WordPress fields are included when Website training or list-screen indexing sends WordPress content to a vector target.- Go to AI Puffer > Knowledge Base > Settings.
- Open Content Rules.
- Click Configure.
- Select a post type.
- Adjust Basic Labels if you want different labels for source URL, title, excerpt, or content.
- Enable or disable custom fields.
- Enable or disable taxonomies.
- For WooCommerce products, enable or disable product data such as SKU, price, stock, dimensions, and attributes.
- Save.
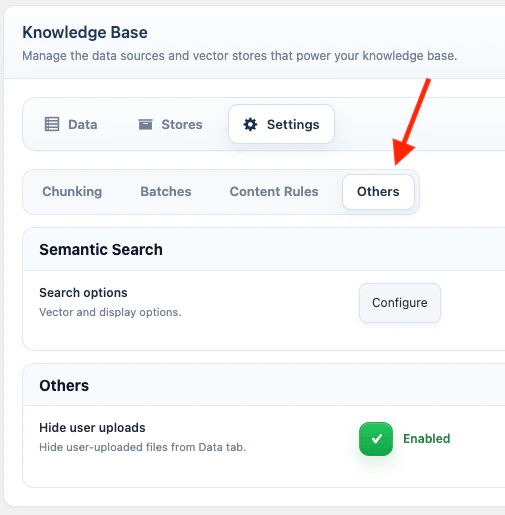
Others
Open AI Puffer > Knowledge Base > Settings, then open Others. The Others tab contains Semantic Search and admin visibility settings.Semantic Search
Semantic Search publishes a search form that queries a Pinecone index, Qdrant collection, or Chroma collection from the frontend. In Others, click Configure in the Semantic Search row.- Select Vector DB: Pinecone, Qdrant, or Chroma.
- Select the index or collection.
- Select the embedding model.
- Set Number of Results.
- Set No Results Text.
- Test a query in Try semantic search.
- Copy the shortcode.
Admin Visibility
The post-list Index button is managed from AI Puffer > Settings > Utilities. See WordPress Utilities.
Troubleshooting
Provider target is missing
Provider target is missing
Configure the provider credentials, then sync or create the vector target again.
Pinecone, Qdrant, or Chroma training fails
Pinecone, Qdrant, or Chroma training fails
Confirm the embedding model dimension matches the index or collection dimension.
Website content is missing fields
Website content is missing fields
Check Knowledge Base > Settings > Content Rules for that post type.
WordPress list indexing controls are missing
WordPress list indexing controls are missing
Enable AI Puffer > Settings > Utilities > Index button and confirm the user role can access the vector content indexer module.
Semantic Search returns no results
Semantic Search returns no results
Confirm the selected target contains trained data and the same embedding model is selected.