Overview
Images adds a frontend generator to a WordPress page. Visitors enter a prompt, choose a provider and model if those controls are visible, and receive the generated media on the page. Use it for image generation, image editing, Google video generation, logged-in user history, usage limits, logs, and connected app recipes. In WordPress admin, go to AI Puffer > Images. Use the Image Generator tab to preview and publish the generator shortcode. Use the Settings tab for limits, UI text, custom CSS, and frontend model access.Live image generator demo
Open the frontend image generator example.
Providers
See which providers support images, edits, and videos.
Generate Images
Let visitors create images from prompts.
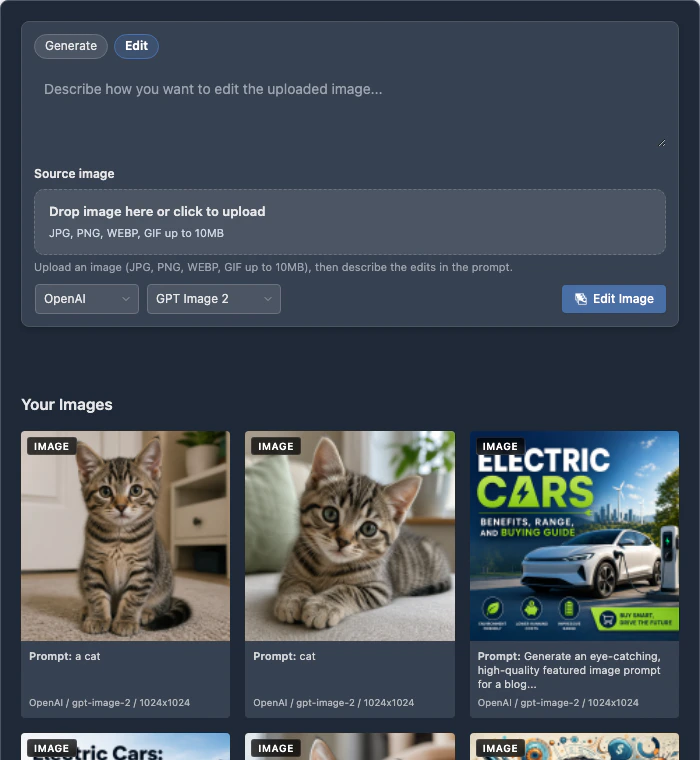
Edit Images
Let visitors upload an image and describe changes.
Generate Videos
Use Google video models from the frontend generator.
Publish
Embed the generator with a shortcode or block.
Settings
Configure the Limits, UI Text, Custom CSS, and Frontend Models tabs.
Connected Apps
Send generated media events to external apps.
Logs
Review image, edit, and video activity.
Providers
Set up at least one image provider before publishing the generator. If the model list is empty, configure the provider in AI Providers, sync models, then return to Images.
grok-imagine-image. Generated xAI URLs are temporary, so AI Puffer stores generated images in the WordPress Media Library when possible.
Generate Images
To generate an image:- Open a page that contains the image generator.
- Select the provider and model if those selectors are visible.
- Enter the prompt.
- Click Generate.

Edit Images
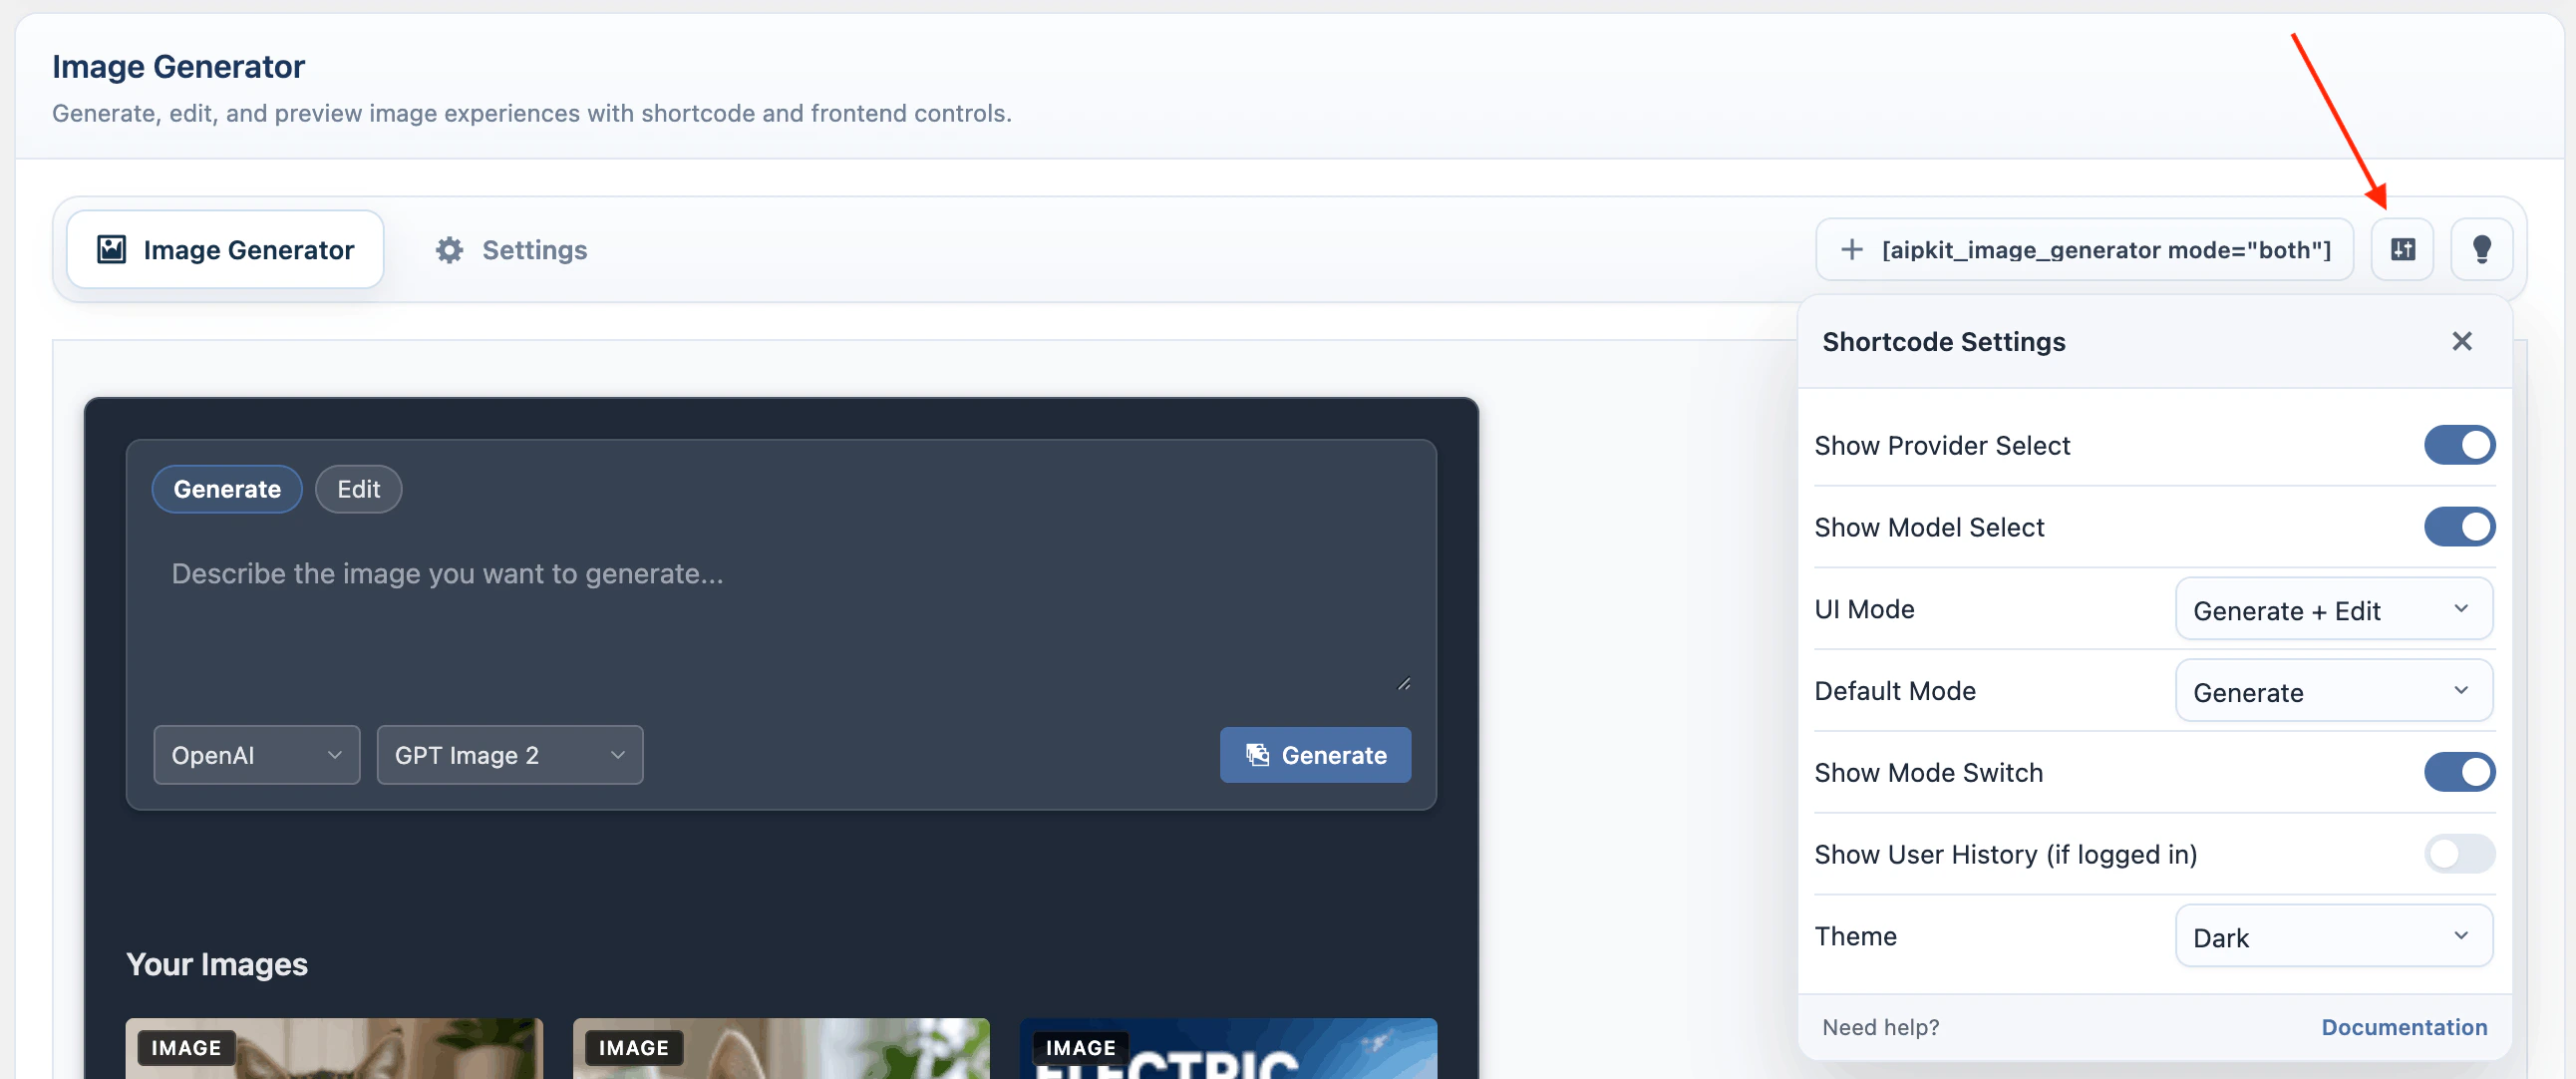
Use edit mode when visitors should upload an image and describe the change they want. To enable edit mode from the Images screen:- Go to AI Puffer > Images > Image Generator.
- Click the settings icon next to the shortcode.
- Set UI Mode to Edit only or Generate + Edit.
- If you choose Generate + Edit, choose the Default Mode and whether to show the mode switch.
- Click the shortcode snippet to copy the updated shortcode.
- Add it to a page.
- Select Edit if the mode switch is visible.
- Select OpenAI, Google, OpenRouter, or xAI.
- Select a model that supports editing.
- Upload one source image.
- Enter the edit prompt.
- Click Edit Image.
Generate Videos
Video generation uses Google video models. To use it:- Go to AI Puffer > Settings > AI.
- Add the Google API key.
- Sync Google models.
- Return to AI Puffer > Images.
- Publish the generator shortcode or block.
- On the frontend, select Google and a video model.
- Enter a prompt and click Generate.

Publish
Shortcode
Add the basic shortcode to any page, post, or shortcode area:- Go to AI Puffer > Images > Image Generator.
- Click the settings icon beside the shortcode.
- Choose the options you want.
- Click the shortcode snippet to copy the updated shortcode.
- Add it to a page or post.
When provider or model selectors are hidden, the shortcode uses the
provider and model attributes as fixed values.
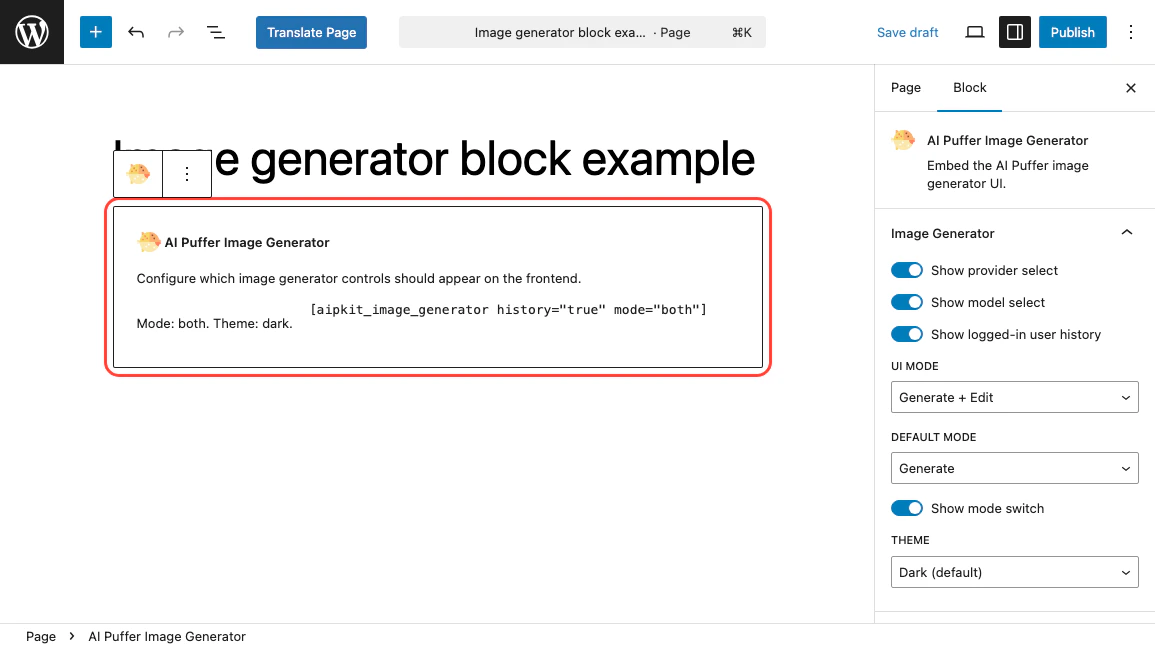
Block
Use the block when you prefer the block editor.- Edit a page or post.
- Add the AI Puffer Image Generator block.
- Choose whether to show provider and model selectors.
- Choose the UI mode.
- Enable history if needed.
- Choose the theme.
- Save the page.
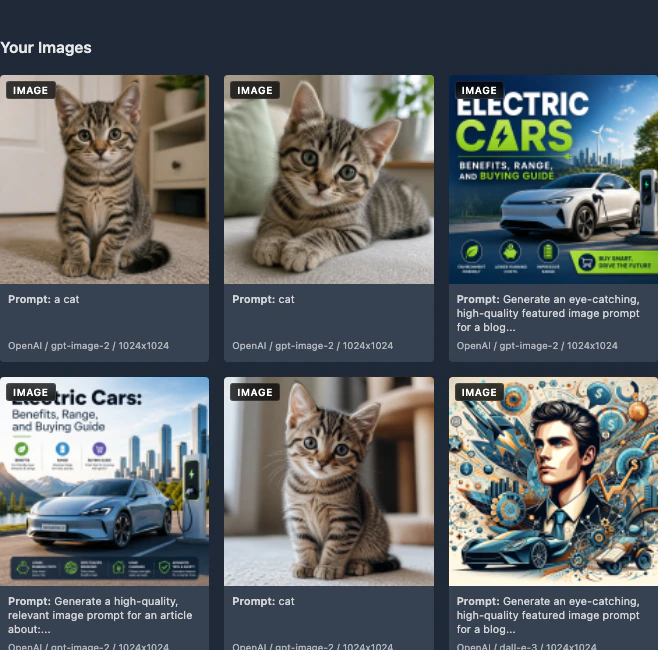
User History
History shows previously generated images and videos for logged-in users. To enable it, turn on Show User History in the shortcode settings panel, enable history in the block, or addhistory="true" to the shortcode.
Guest generations are not shown in user history.
Settings
Open AI Puffer > Images > Settings. The Settings screen is split into tabs.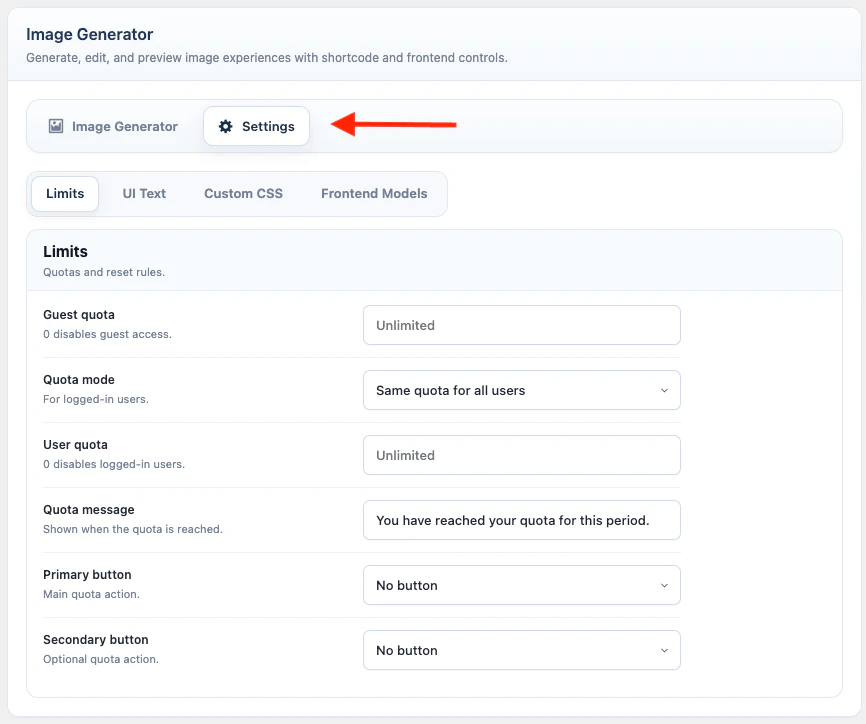
Limits
Limits control how much image generator usage is allowed for guests and logged-in users. Open Limits.- Set Guest quota.
- Choose Quota mode for logged-in users.
- Set User quota or Role-based quotas.
- Choose Reset period.
- Edit Quota reached message.
- Configure optional primary and secondary buttons.
Reset periods are Never, Daily, Weekly, and Monthly.
UI Text
UI Text changes the frontend labels without editing code. Open UI Text.Custom CSS
Custom CSS applies to generators using the custom theme. Open Custom CSS. Use the custom theme in the shortcode:Frontend Models
Frontend Models controls which models visitors can select when the frontend provider or model selectors are visible. Open Frontend Models.- Select the models visitors can use.
- Leave all models unselected if you want to allow every configured image and video model.
- Save the settings.
allowed_models shortcode attribute.
Connected Apps
Connected Apps can run a recipe after a successful image or video generation.- Go to AI Puffer > Settings > Apps.
- Connect the app or webhook destination.
- Create a recipe that uses the Image Generated event.
- Publish the image generator on a page.
- Generate an image or video to test the recipe.
image.generated after the output is complete. For payload fields, see Event Webhooks.
Logs
Image and video requests are logged with the module set toimage_generator.
Logs can include the prompt, provider, model, mode, usage, WordPress user, guest session, and edit source image metadata. Source image binary data is not stored in the log.
Usage operations:
Troubleshooting
The shortcode renders nothing
The shortcode renders nothing
Check that Images is enabled in AI Puffer > Settings > Modules and that the shortcode is on a published page. Admin users may see a module-disabled message; visitors see empty output.
The provider or model list is empty
The provider or model list is empty
Configure the provider in AI Puffer > Settings > AI or Settings > Integrations, sync models, then reload the Images screen. If Frontend Models is restricted, confirm that the selected models still exist.
Image editing does not work
Image editing does not work
Use OpenAI, Google, or OpenRouter. The selected model must support image editing, and the visitor must upload one JPG, PNG, WEBP, or GIF image under 10 MB.
Video generation keeps processing
Video generation keeps processing
Google video generation can take time. Keep the page open while AI Puffer checks the operation status. If it times out, try a shorter prompt and review the related log entry.
History is missing
History is missing
History only appears for logged-in users. Enable Show User History in the shortcode settings panel, enable history in the block, or add
history="true" to the shortcode.Quota message appears
Quota message appears
Open AI Puffer > Images > Settings > Limits and review the guest, user, or role-based quota. If you sell credits, also check the user’s balance and the pricing rules in Usage.