Overview
Usage is where you review saved AI activity and manage AI Puffer credits. In WordPress admin, go to AI Puffer > Usage. The screen has two tabs: Logs and Billing. Logs are for reviewing saved requests and conversations. Billing is for pricing rules, ledger activity, user balances, and WooCommerce credit packages.AI Puffer credits are internal plugin credits. They do not replace OpenAI, Google, Anthropic, xAI, Replicate, or other provider billing. Provider API usage is still billed by the provider account you connect.
Logs
Search, inspect, export, delete, and retain saved activity.
Pricing
Define how model usage is converted into AI Puffer credits.
Activity
Review credits added, debited balances, and usage entries.
Balances
Edit user balances and reset periodic usage.
WooCommerce Integration
Sell credit packages and publish a customer dashboard.
Troubleshooting
Check common setup and billing issues.
Logs
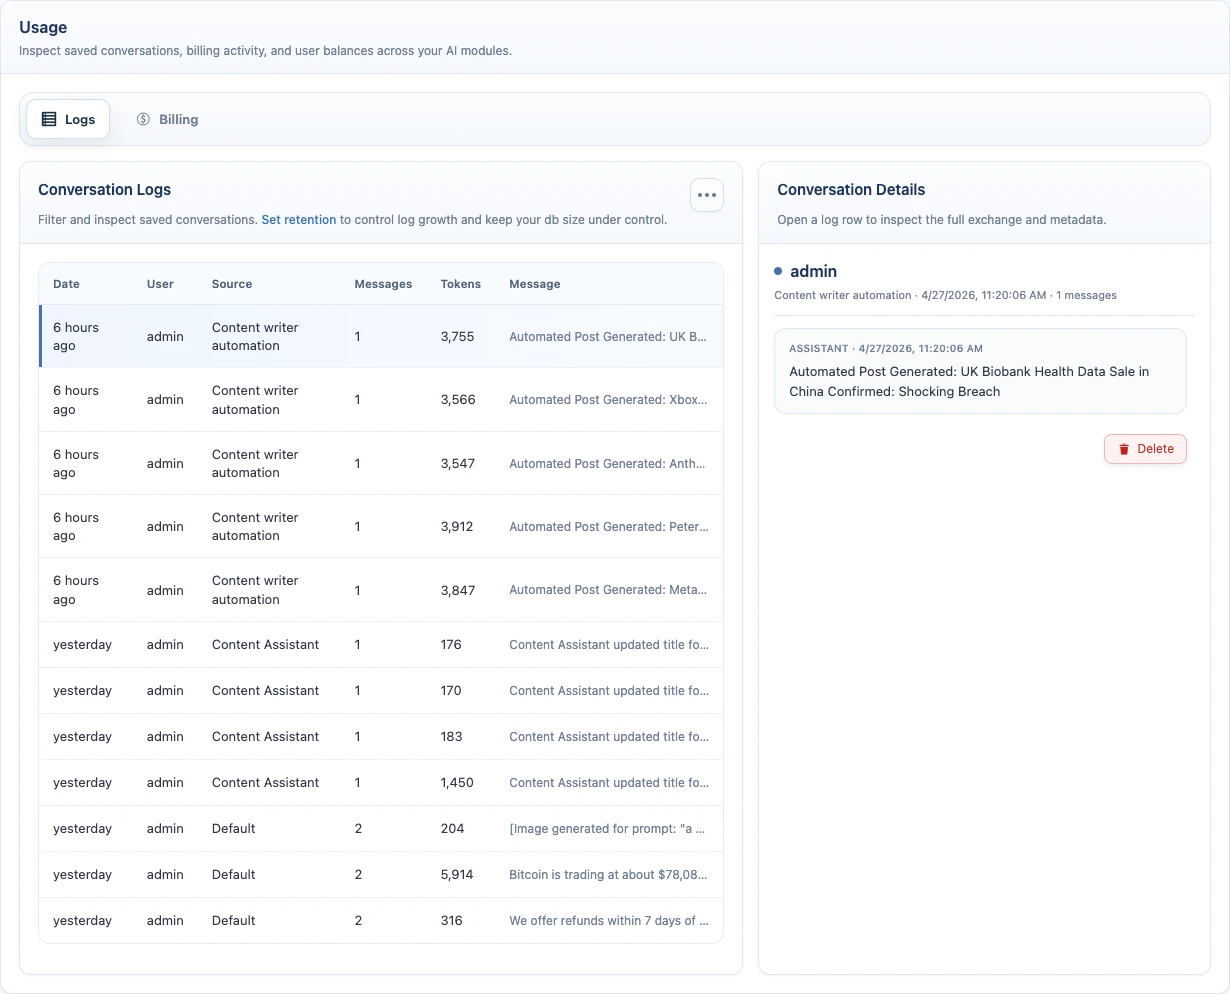
Open AI Puffer > Usage > Logs. Logs show saved activity from AI Puffer modules. Use them to review conversations, inspect request metadata, check vector search results, export records, and control retention.Conversation Logs
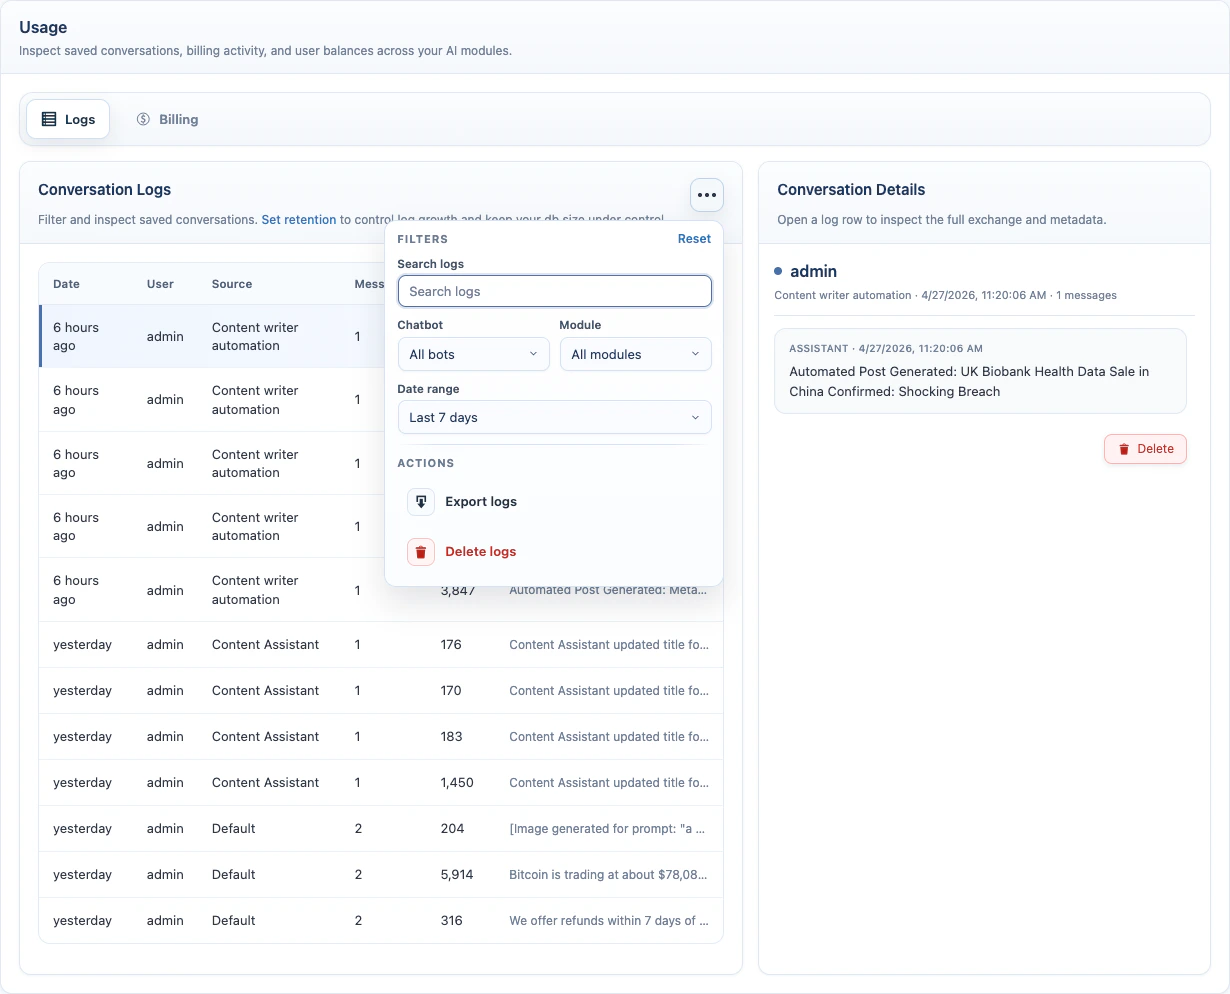
Conversation logs store the saved message history for chatbot and other AI requests. Use filters to find the records you need, then open a row to inspect the full exchange.
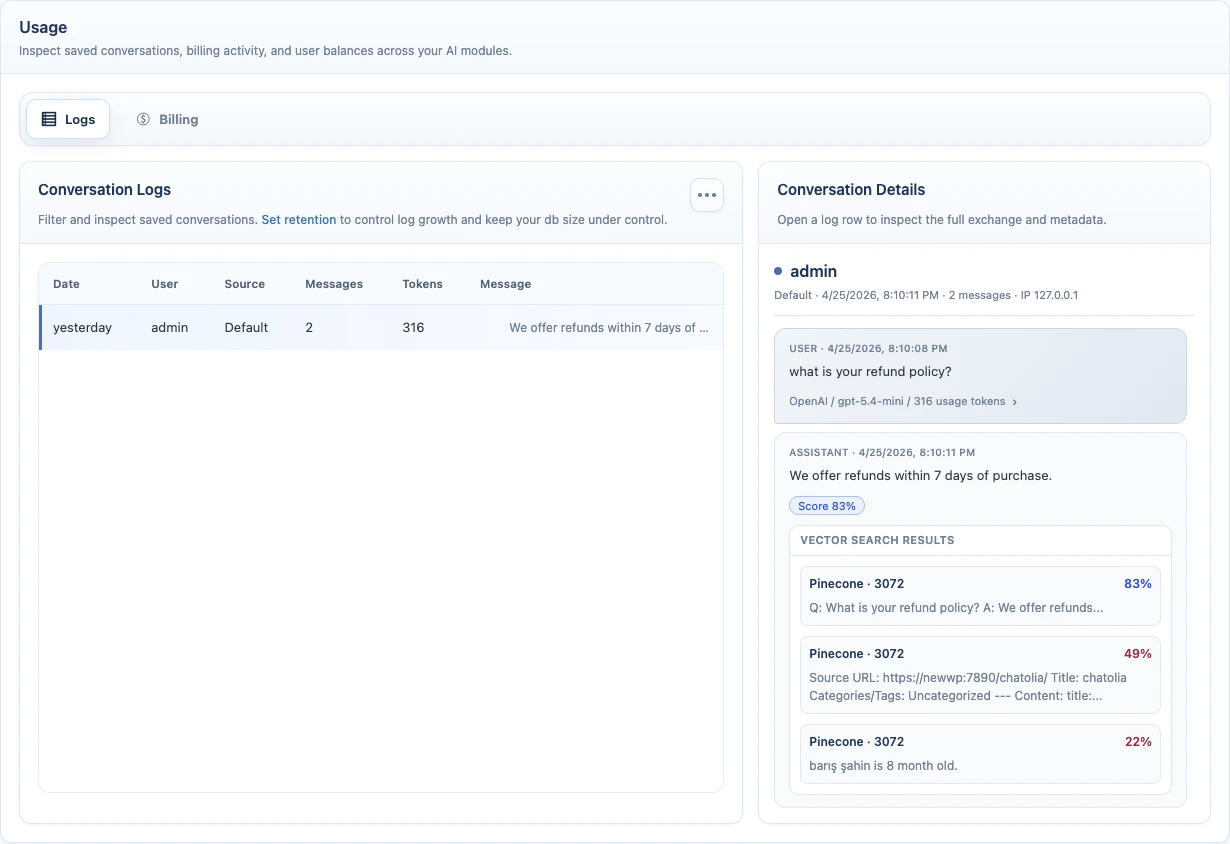
Click a row to open Conversation Details. The detail panel shows the full exchange, timestamps, provider and model metadata, usage tokens, request payloads when saved, and a delete button for that single log.
Vector Scores
When a chatbot, Content Writer request, or other AI request uses vector context, the assistant message can show a Score badge. The score shows how closely the retrieved content matched the user’s request. Click the badge to see the vector provider, source, score, and content preview.
Scores explain retrieval quality. They do not grade the final AI answer.
Export and Delete
To export logs:- Open AI Puffer > Usage > Logs.
- Apply filters if needed.
- Open the actions menu.
- Click Export logs.
- Open AI Puffer > Usage > Logs.
- Apply filters if you only want to delete part of the log history.
- Open the actions menu.
- Click Delete logs.
- Confirm the action.
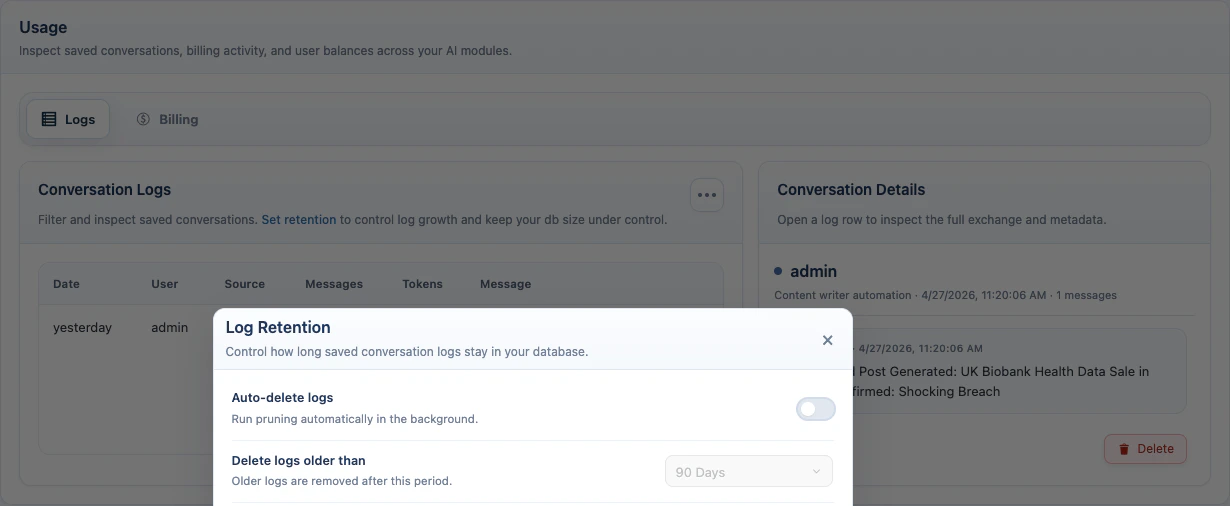
Log Retention
Log retention automatically removes old logs. To configure it:- Open AI Puffer > Usage > Logs.
- Click Set retention.
- Enable Auto-delete logs.
- Choose Delete logs older than.
- Save the setting.
Billing
Open AI Puffer > Usage > Billing. Billing connects three things:- Pricing rules decide how much a request costs in AI Puffer credits.
- Balances store prepaid credits for logged-in users.
- Quotas limit usage for guests, users, or roles when a balance is not enough.
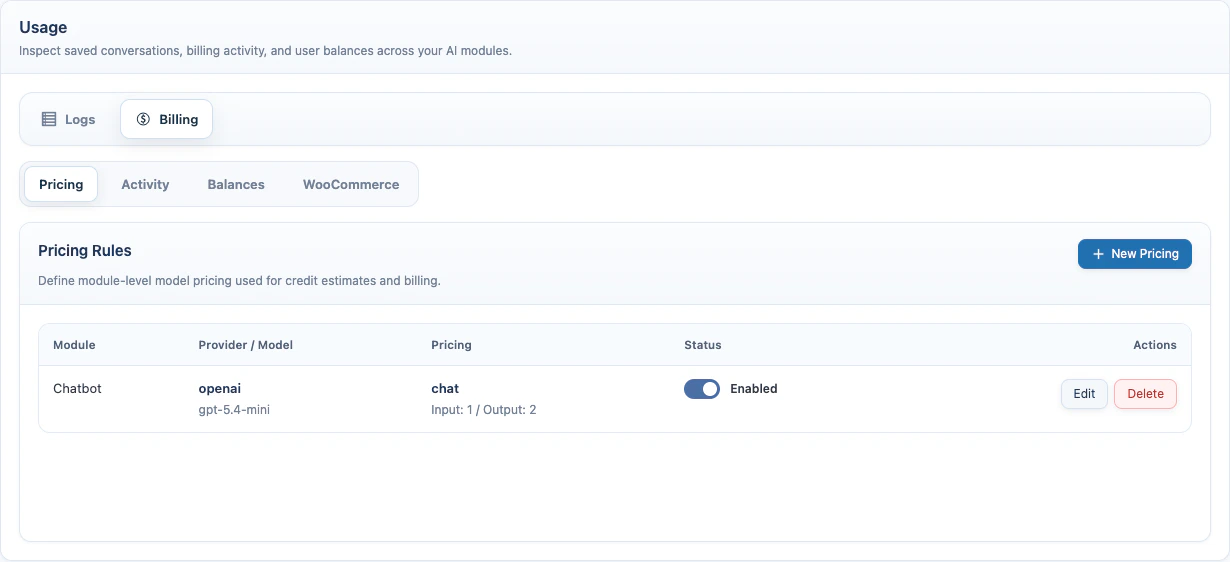
Pricing
Open AI Puffer > Usage > Billing > Pricing. Pricing rules tell AI Puffer how many credits a model operation should cost.How Pricing Works
Credits are internal AI Puffer units. You decide how many credits each request should cost. Use Flat when every request should cost the same amount. Use Per 1K Tokens when longer chat or form requests should cost more. Use Per Image or Per Video for media tools. For chat and AI forms, tokens are the pieces of text sent to and returned from the AI provider. Input tokens are the user message, instructions, and context sent to the model. Output tokens are the AI response. For xAI text requests, pricing rules use the token usage returned by the xAI response when it is available. For xAI image generation and image editing, AI Puffer records provider usage metadata when xAI returns it, but credit deduction still follows your configured image pricing rule such as Per Image or Flat. Example token rule:
If a request uses 800 input tokens and 300 output tokens:
AI Puffer rounds the result up, so this request is charged as 2 credits.
Example flat rule:
Every matching request costs 5 credits, no matter how long the prompt or response is.
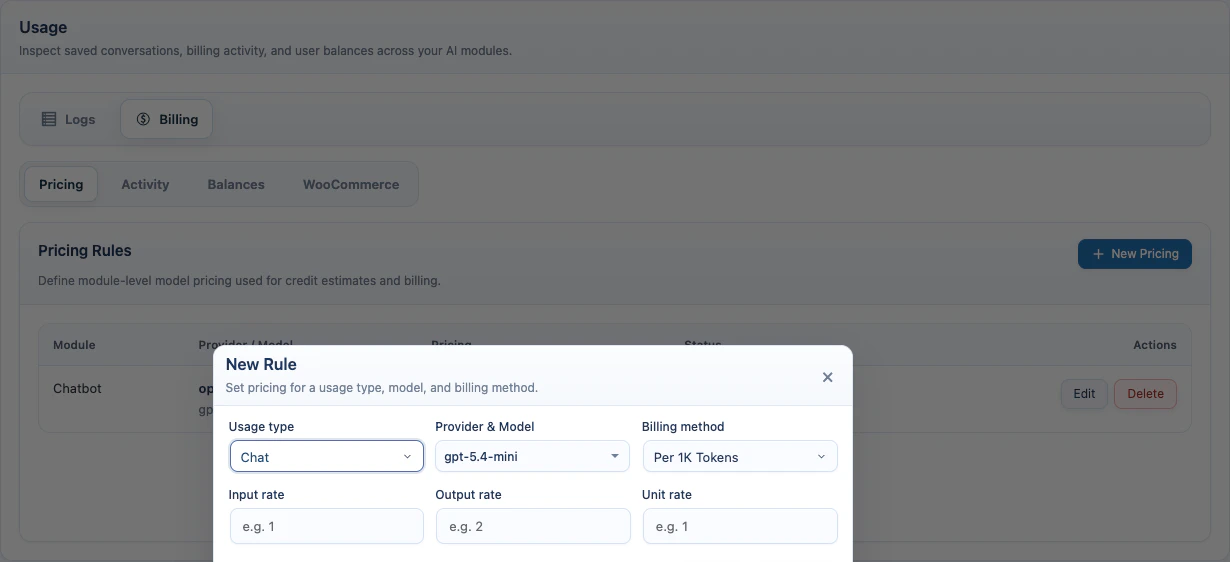
To create a pricing rule:
- Click New Pricing.
- Select Usage type.
- Select Provider & Model.
- Select Billing method.
- Enter the rate.
- Click Save Rule.
Supported billing methods:
Pricing rules can be enabled, disabled, edited, or deleted from the Pricing table.
If a matching pricing rule exists, AI Puffer uses that rule to estimate and record credit usage. If no rule matches, it falls back to the raw recorded usage units.
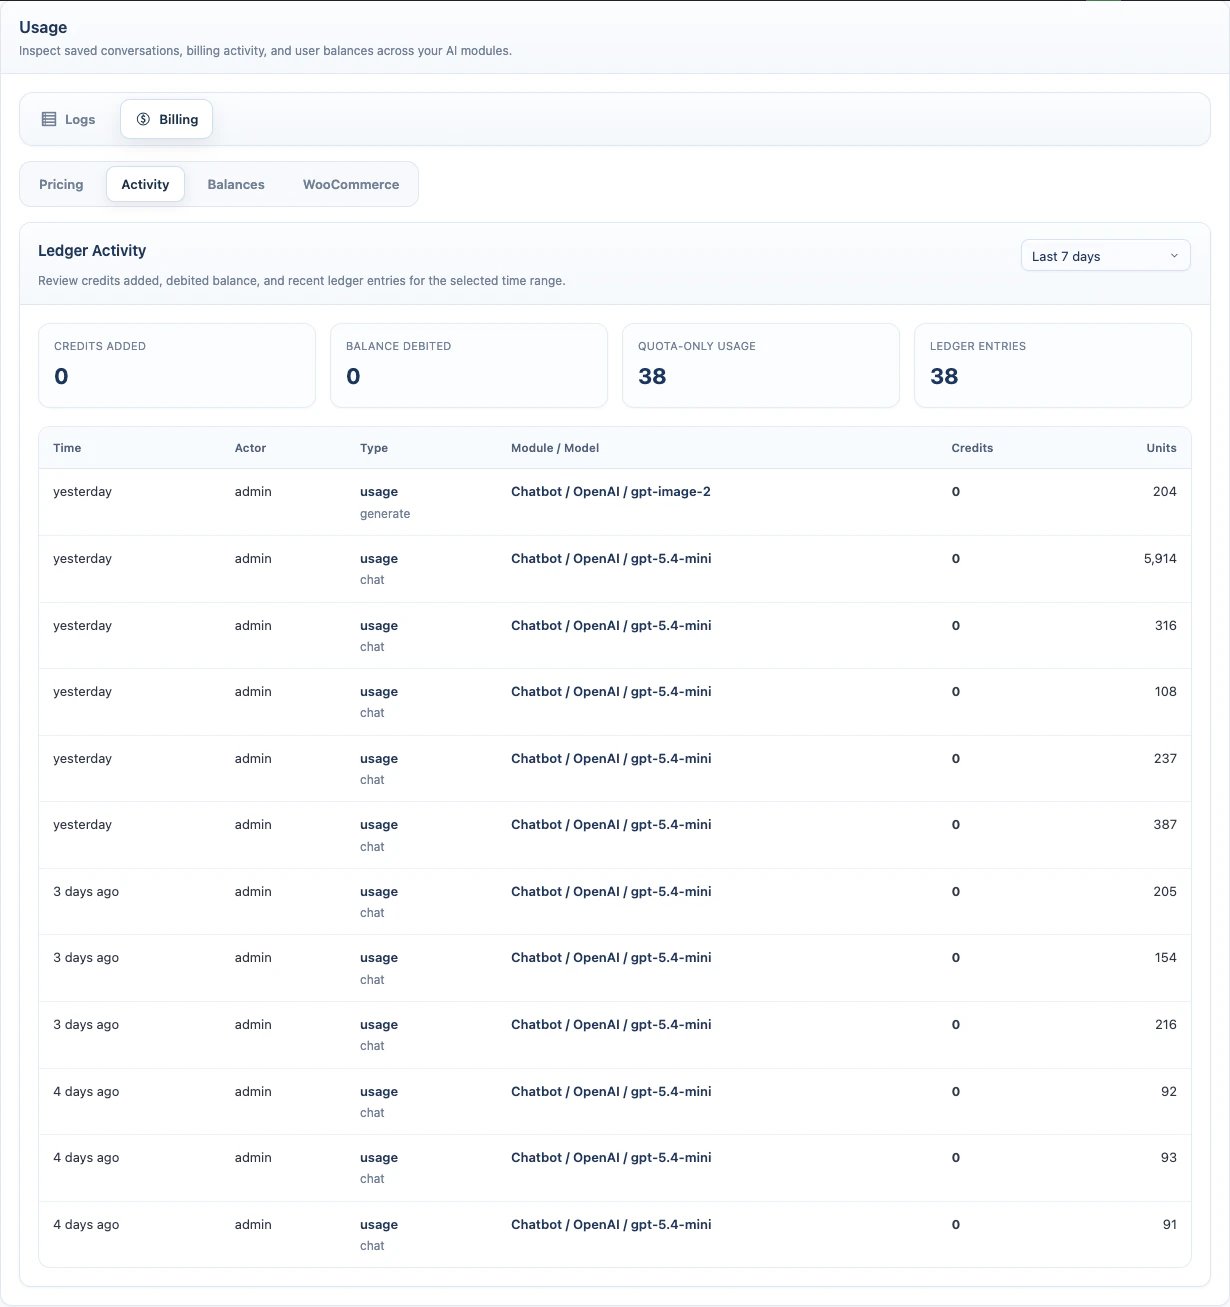
Activity
Open AI Puffer > Usage > Billing > Activity. Activity shows the ledger for the selected time range. Available ranges:
The ledger table shows time, actor, type, module/model, credit change, and usage units.
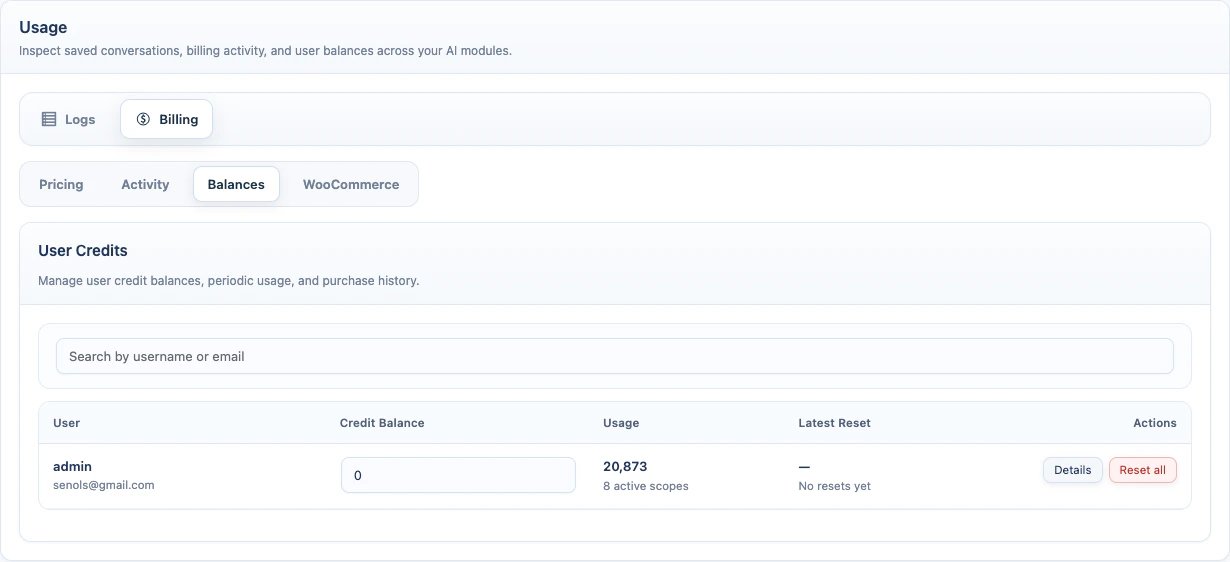
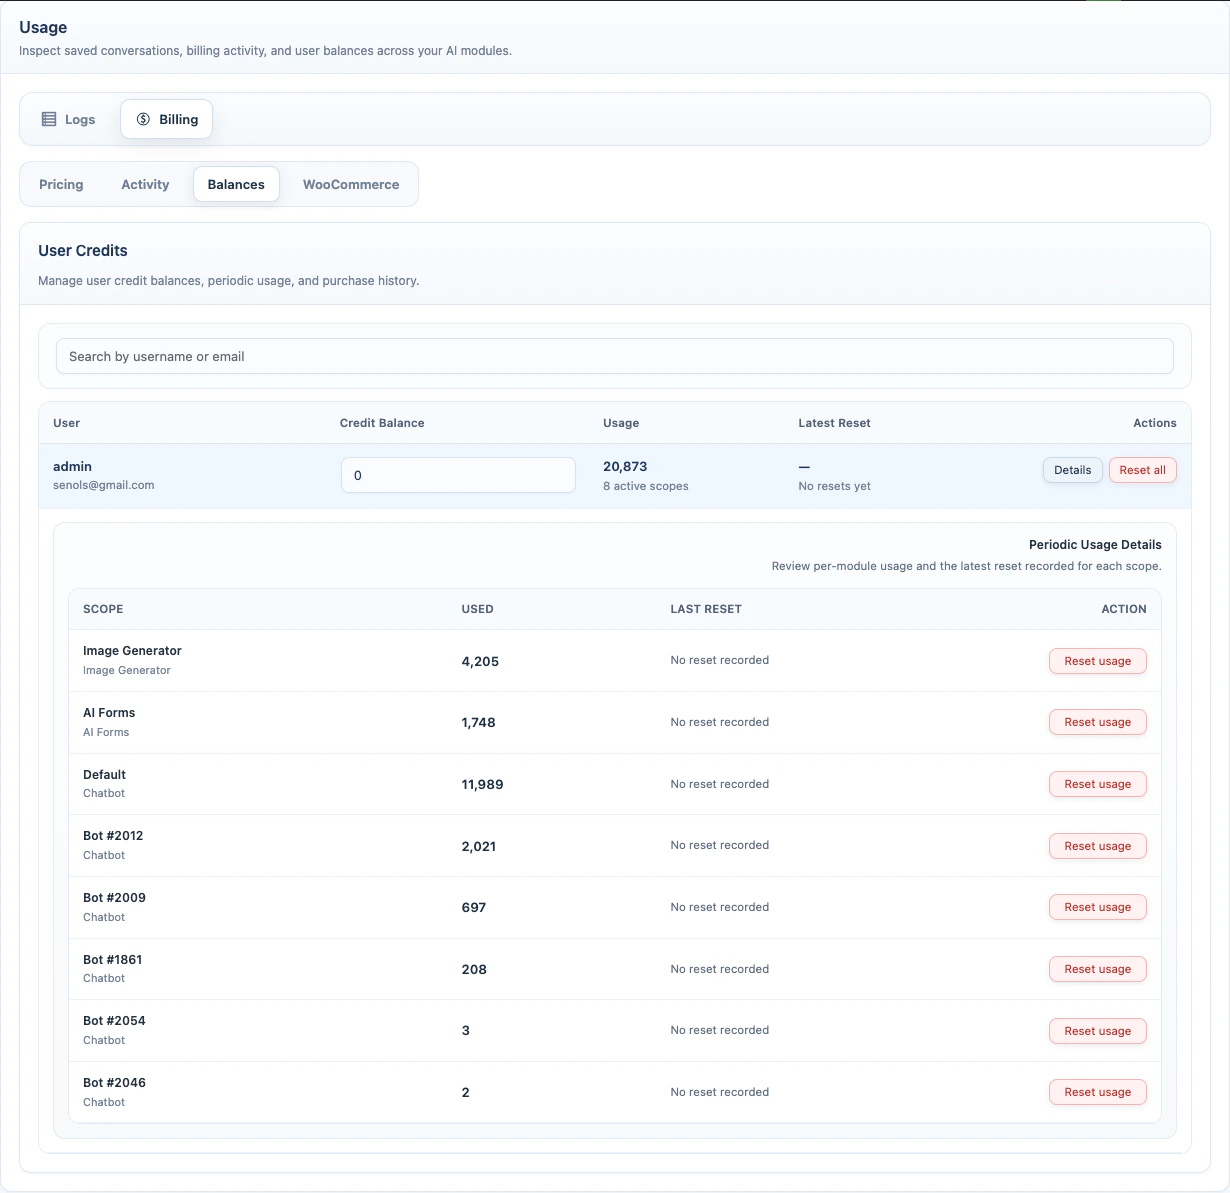
Balances
Open AI Puffer > Usage > Billing > Balances. Balances is for logged-in WordPress users. Use it to search users, edit credit balances, review periodic usage, reset usage, and view purchase history. The table includes:
To edit a balance:
- Search for the user.
- Edit Credit Balance.
- Press Enter or click outside the field.
- Click Details for a user.
- Click Reset usage for one scope, or Reset all for all scopes.
- Confirm the reset.
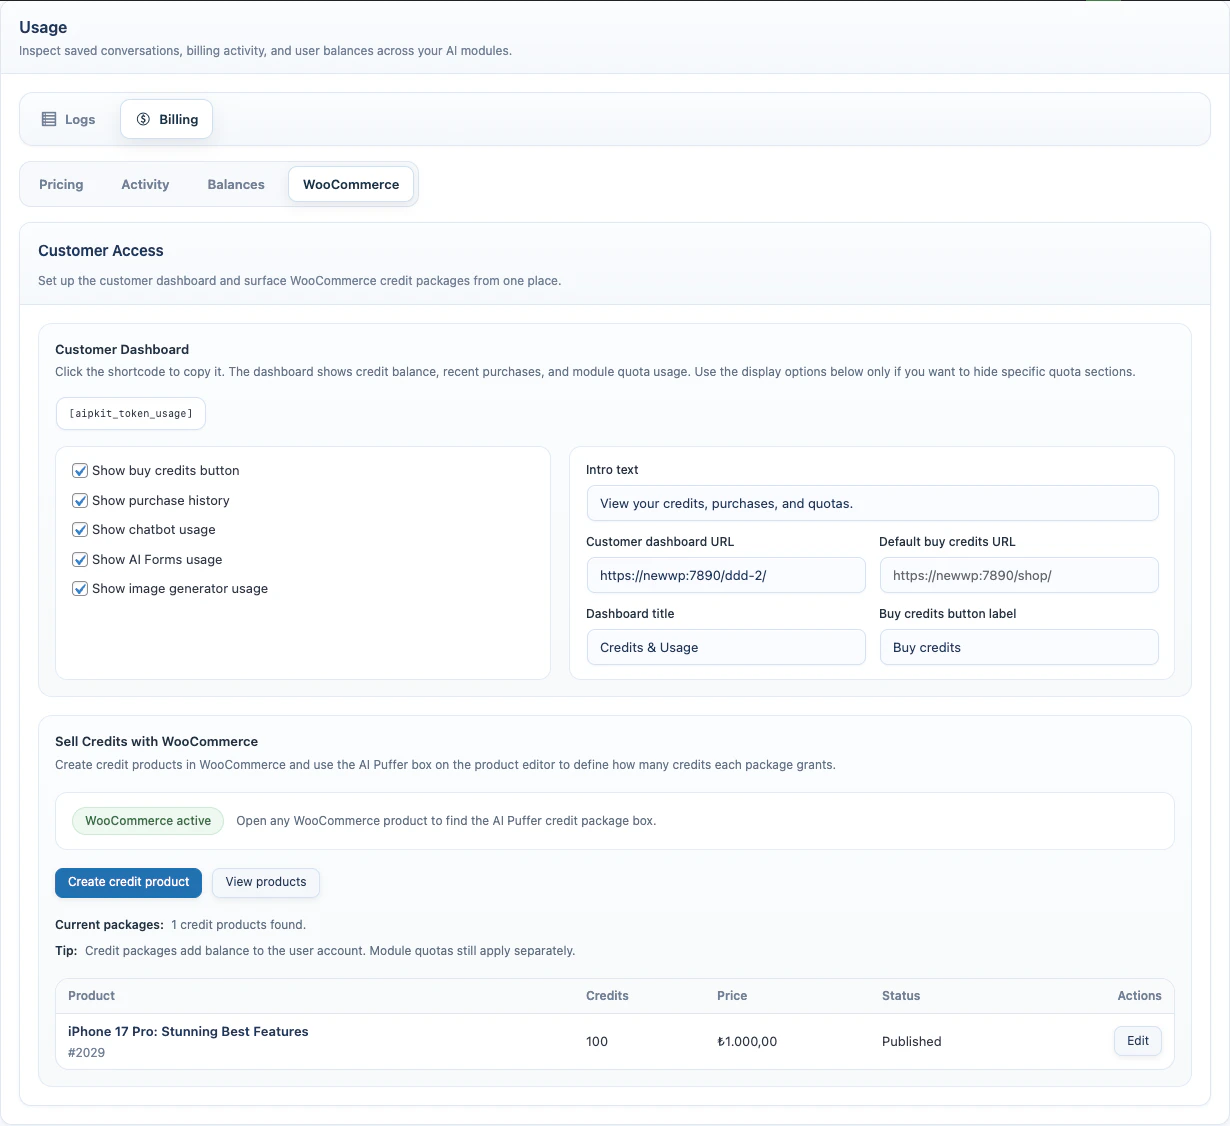
WooCommerce Integration
Open AI Puffer > Usage > Billing > WooCommerce. Use this tab to publish a customer dashboard and connect WooCommerce products to AI Puffer credits.WooCommerce credit delivery requires a WordPress user account. Guest checkout orders without a linked user cannot receive credits automatically.
- Create a WordPress page, such as Credits & Usage.
- Add this shortcode:
- Publish the page.
- Open AI Puffer > Usage > Billing > WooCommerce.
- Set Customer dashboard URL to that page.
- Set Default buy credits URL if you want dashboard buttons and quota messages to send users to a specific page.
Examples:
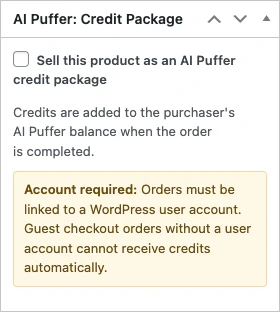
- Open WooCommerce > Products.
- Create or edit a product.
- Find the AI Puffer: Credit Package box.
- Enable Sell this product as an AI Puffer credit package.
- Enter Credits Granted Per Quantity.
- Set the normal WooCommerce product price.
- Publish or update the product.
Troubleshooting
Pricing model is missing
Pricing model is missing
- Open AI Providers.
- Confirm the provider API settings are saved.
- Sync models for that provider.
- Return to Usage > Billing > Pricing and create the rule again.
Credits were not granted after purchase
Credits were not granted after purchase
Check these items:
Customer dashboard does not show usage
Customer dashboard does not show usage
- Confirm the visitor is logged in.
- Confirm the page contains
[aipkit_token_usage]. - Check role access if role access is enabled.
- Confirm the related module has recorded usage for that user.
- Confirm the shortcode attribute for that module is not set to
false.
User sees a quota message after buying credits
User sees a quota message after buying credits
Check these items:
- Confirm the WooCommerce order is completed.
- Confirm the user’s credit balance increased in Usage > Billing > Balances.
- Confirm the user is logged in.
- Confirm the module has a matching pricing rule.
- Confirm the request cost does not exceed the user’s remaining balance plus available quota.
Logs are growing too large
Logs are growing too large
- Open Usage > Logs.
- Click Set retention.
- Enable Auto-delete logs.
- Choose a shorter retention period.
- Delete old logs manually if needed.
Balance changes are not visible in Activity
Balance changes are not visible in Activity
- Open Usage > Billing > Activity.
- Select a date range that includes the change.
- Check whether the balance was changed from Usage > Billing > Balances or through a completed WooCommerce order.