Google Sheets
You can now integrate Google Sheets with our plugin, allowing you to generate content directly from your sheets.
How It Works?
Once you connect your Google Sheets with the GPT Agent, the system constantly monitors your sheets for any new records.
When a new record is detected, the GPT Agent retrieves the information and sends it to the queue processor for content generation.
By integrating Google Sheets with our plugin, you can seamlessly generate content directly from your sheets, making the process more efficient and streamlined.
Requirements
For the Google Sheets module, you need to set up two cron jobs: one for retrieving the data from Google Sheets and another for processing the queue.
Queue Processor:
* * * * * php /var/www/html/index.php -- wpaicg_cron=yes
Google Sheets:
* * * * * php /var/www/html/index.php -- wpaicg_sheets=yes
Learn how to setup a cron job here.
You also need to have a Google Cloud account. This is required to access and retrieve data from the configured Google Sheets.
Setup
Creating a Google Cloud Service Account
To use the Google Sheets feature, create a service account in your Google Cloud Console and upload your credentials to the plugin.
Follow these steps:
-
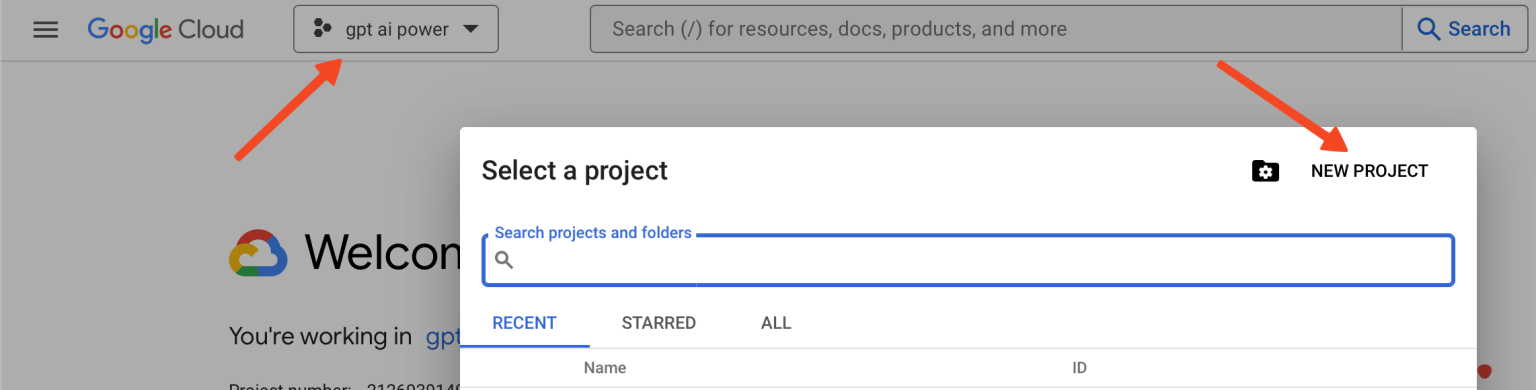
Visit your Google Cloud Console dashboard.
-
Click the dropdown menu in the top left corner and select Create new project.
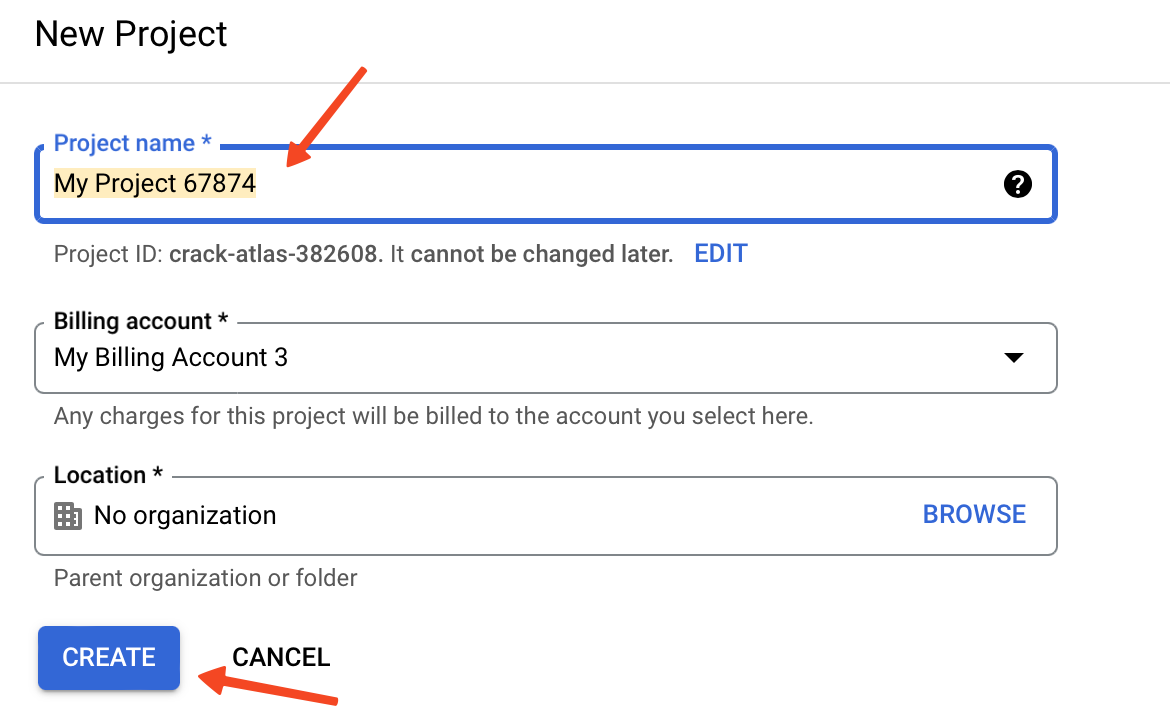
- Name your project or use the default name, then click Create.
Our plugin uses Google’s official Sheets API, which has usage limits. View the quota limits here.
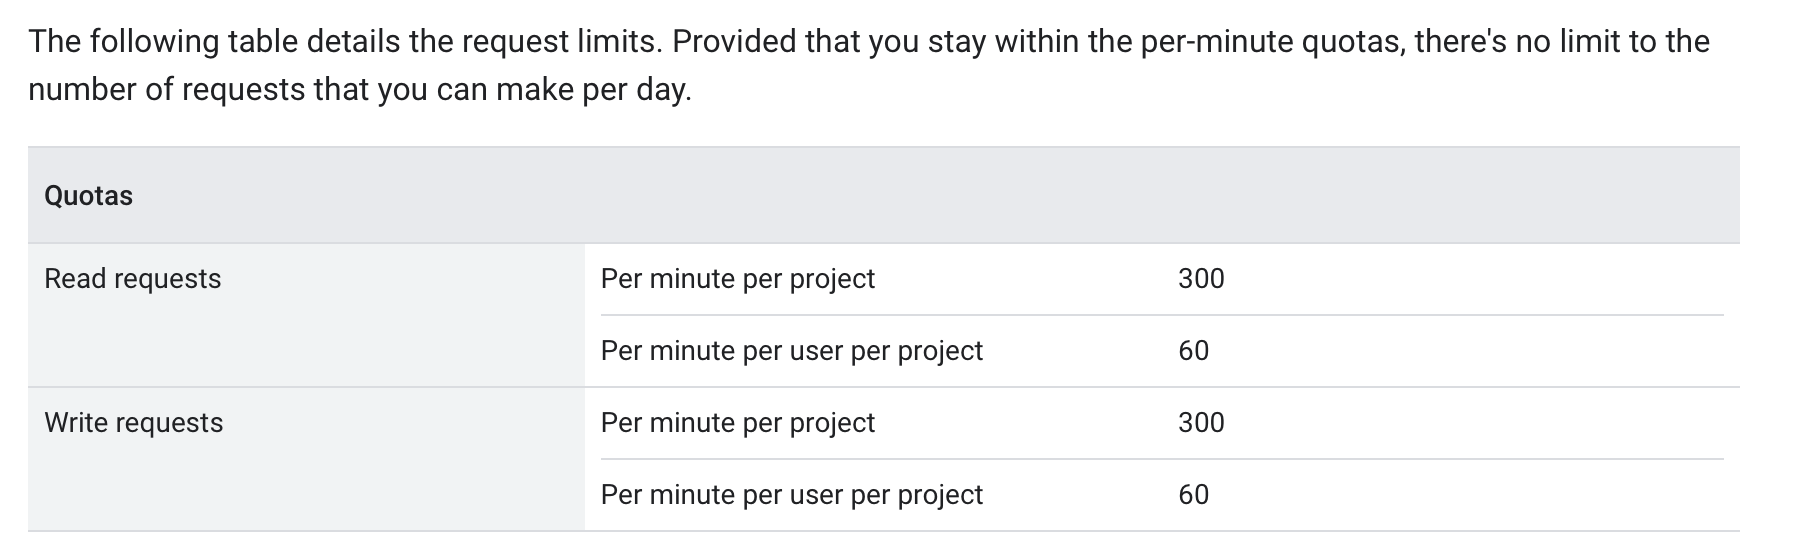
In accordance with Google's policy, we can make 60 requests per minute. If you have a large Google Sheet and want to process more rows, request a quota increase from Google. Once approved, update the quota limit field in the settings page.
- Select your project.
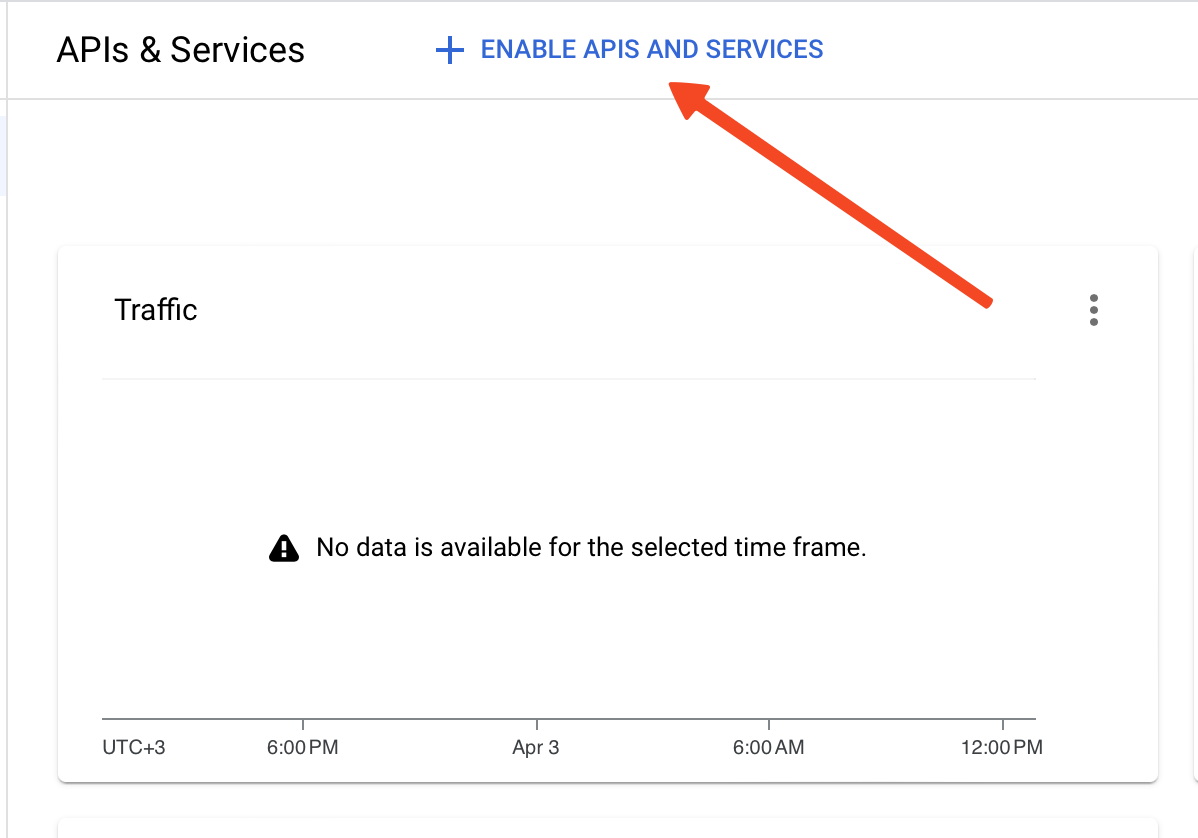
- Click on the Dashboard link.

- Click on Go to APIs Overview.
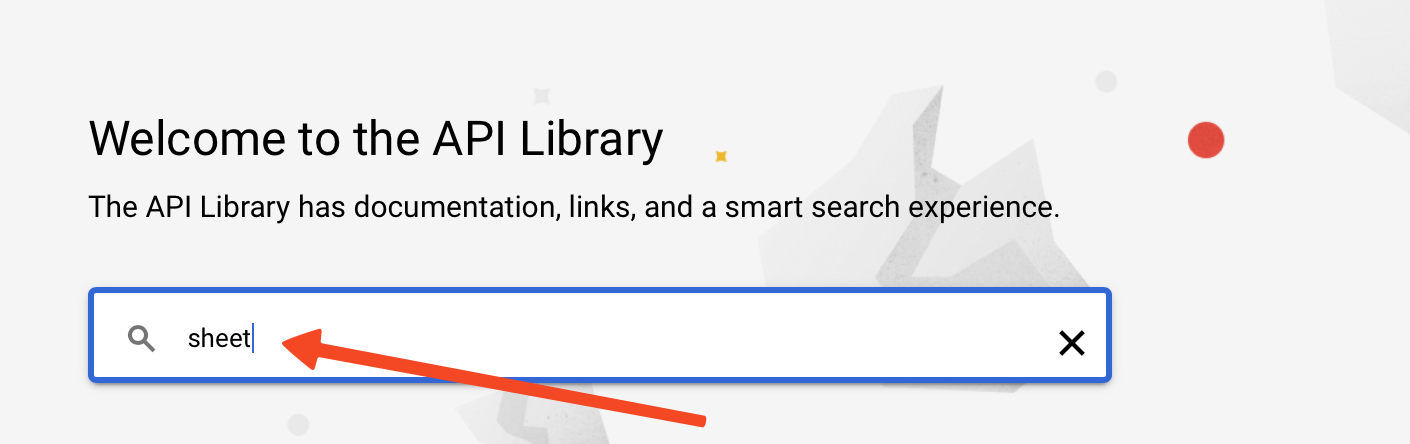
- Click on Enable APIs and Services.
- Type Sheet and press enter.
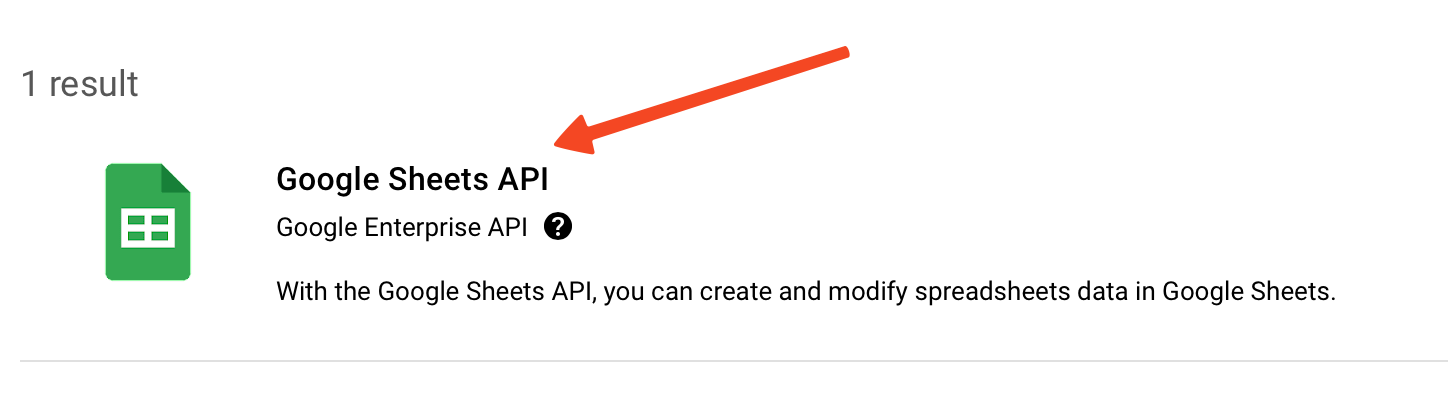
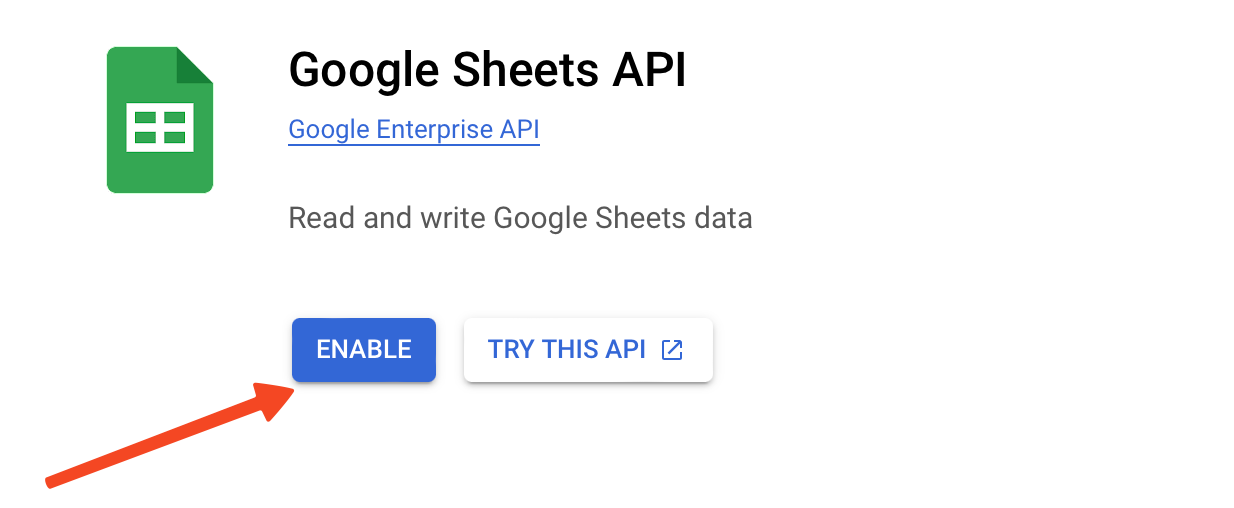
- Click on Google Sheets API.
- Click the Enable button.
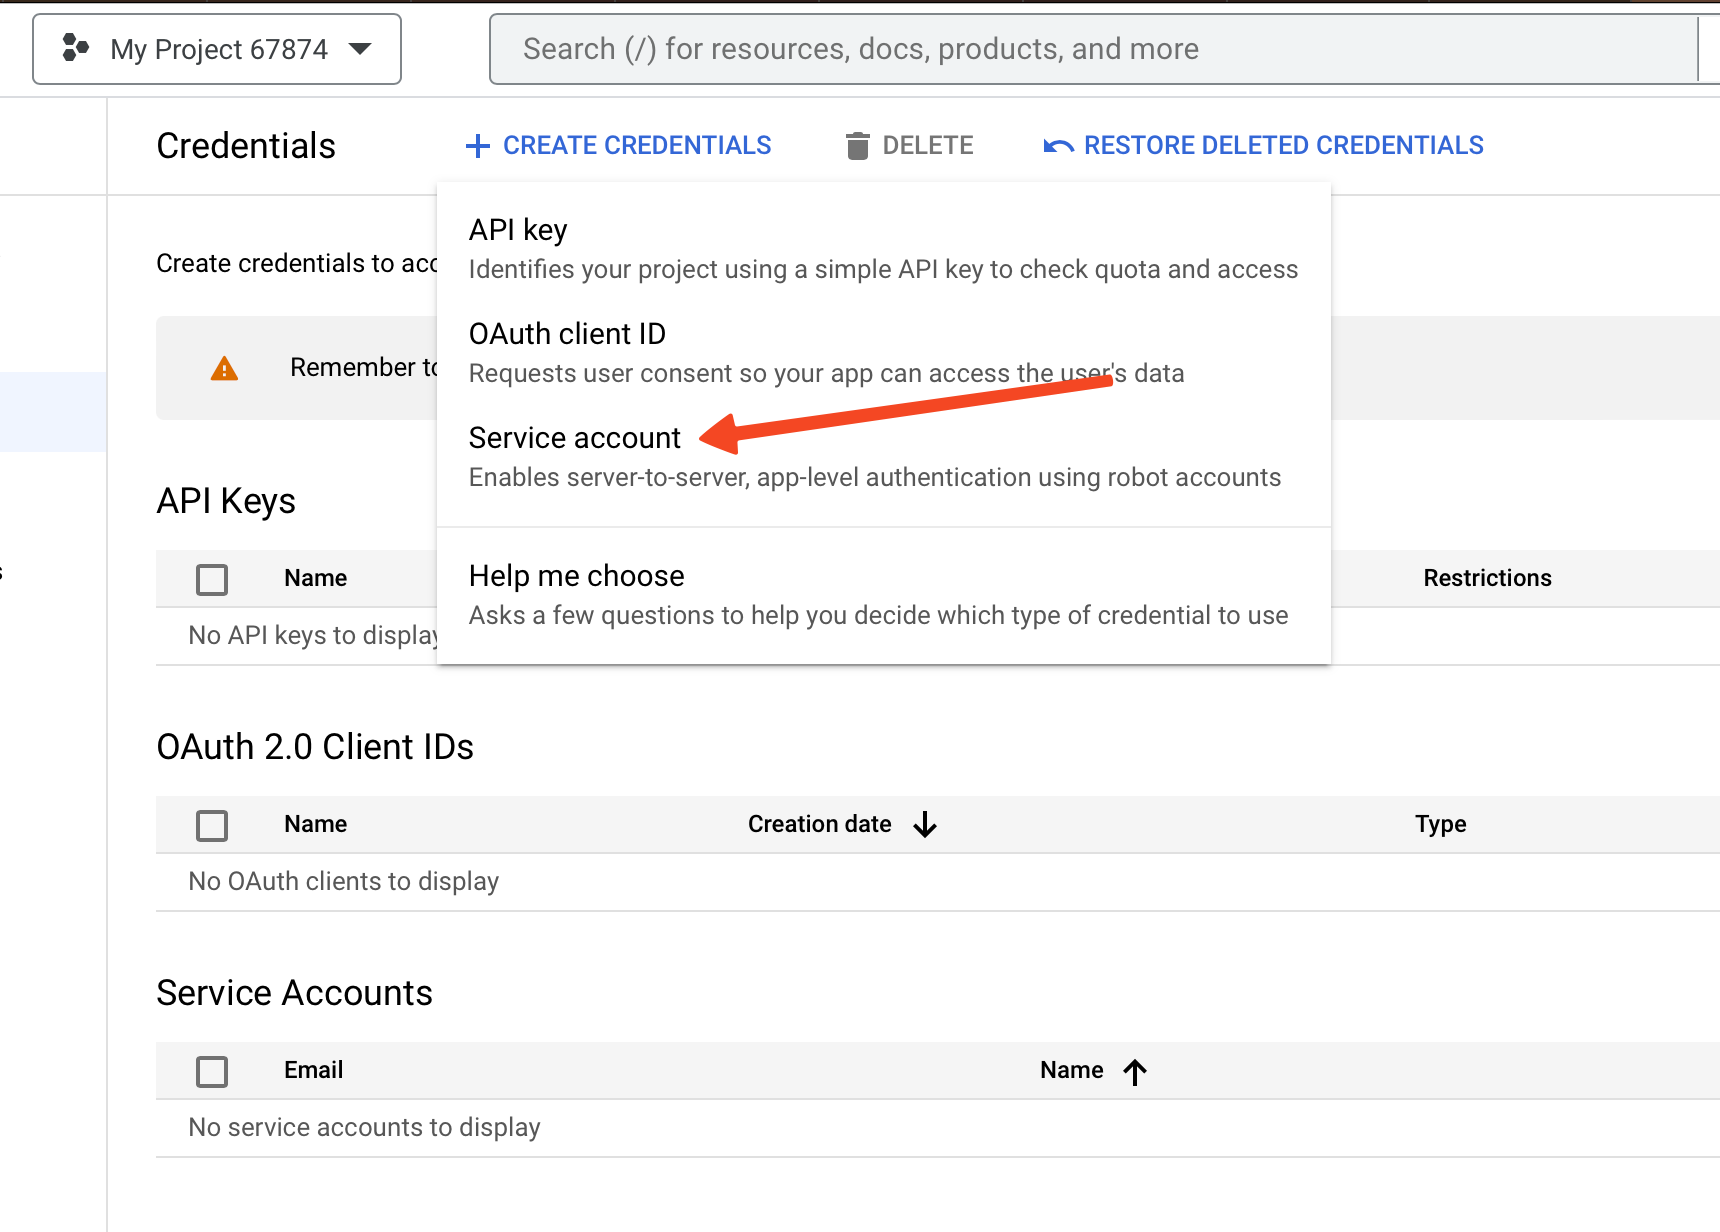
- Navigate to Credentials.

- Click on Create credentials and choose Service Account.
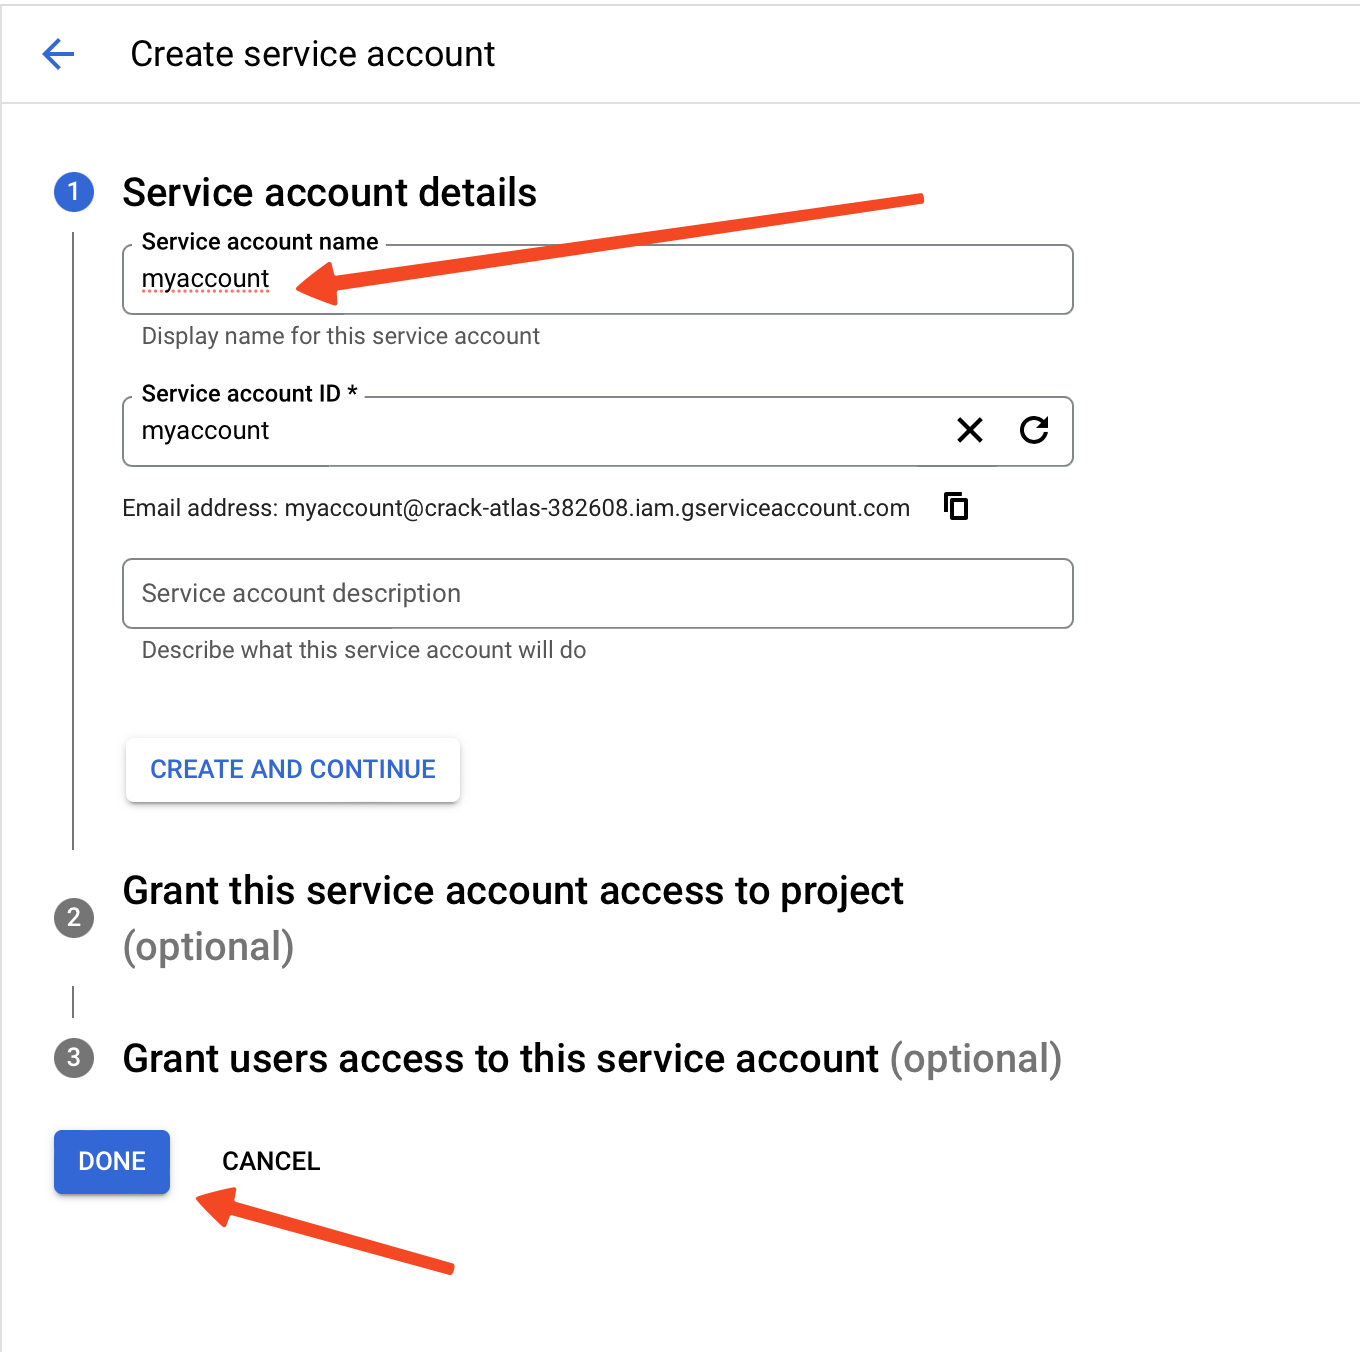
- Assign a name to your service account and click the Done button at the bottom.
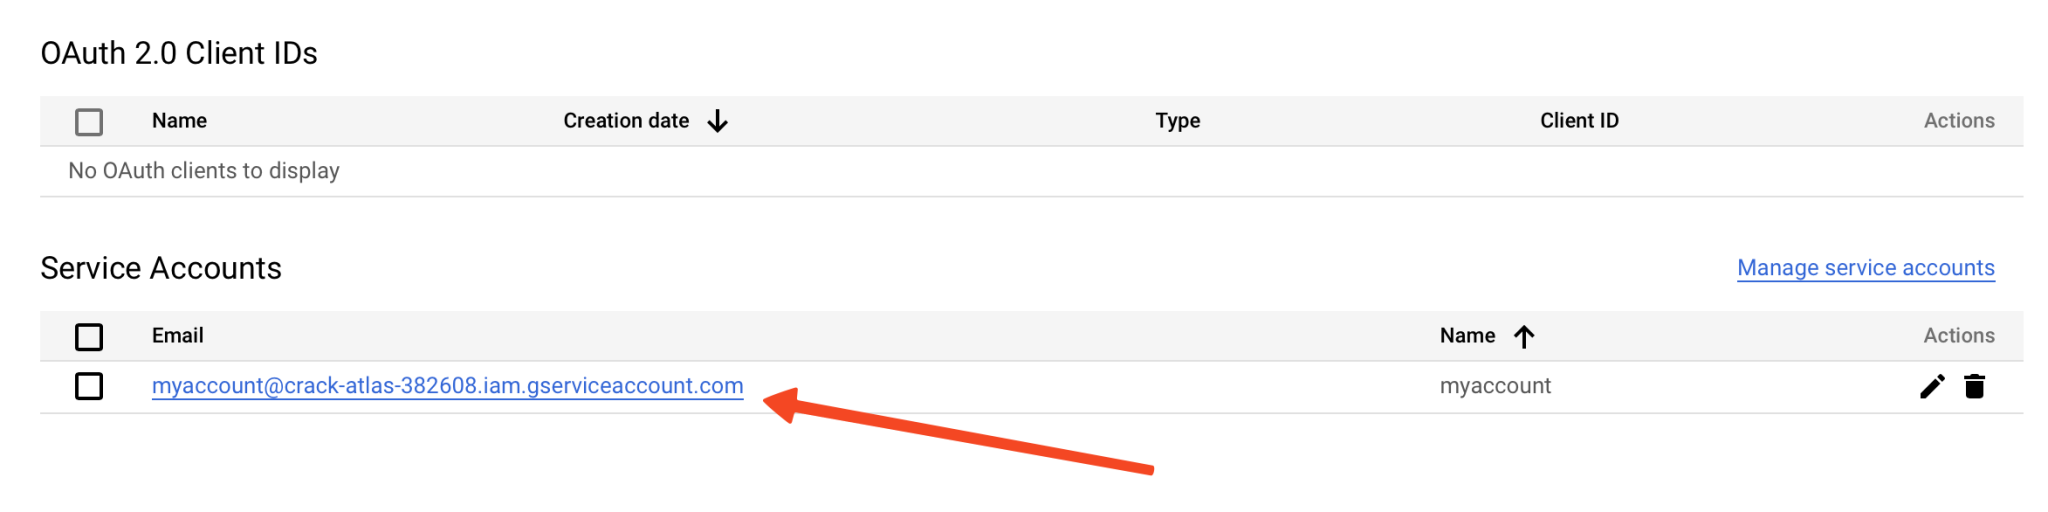
- Click on your service account.
- Go to the Keys tab.
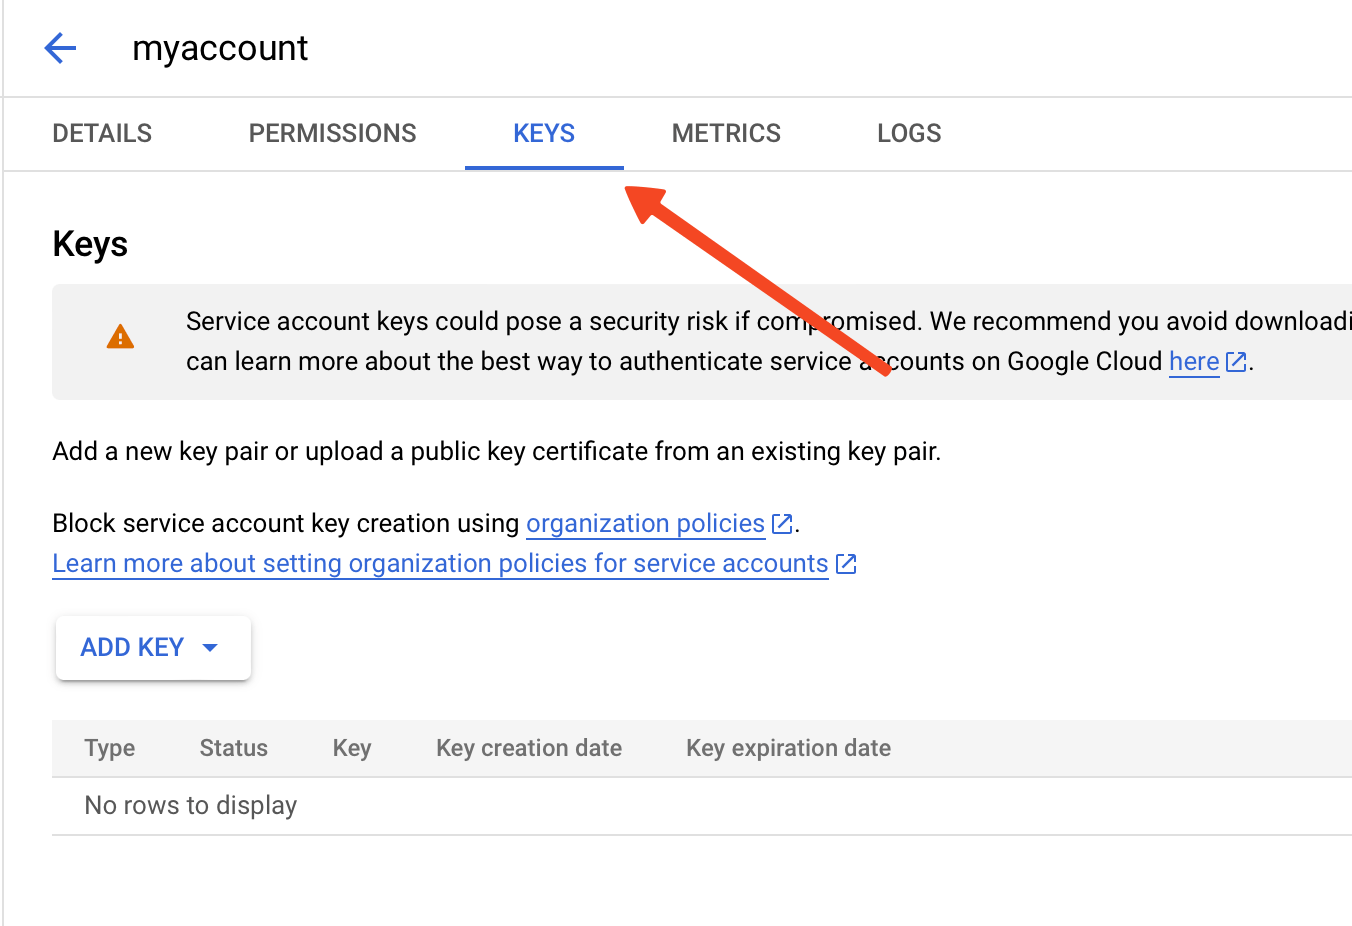
- Click on Add Key and select Create new key.
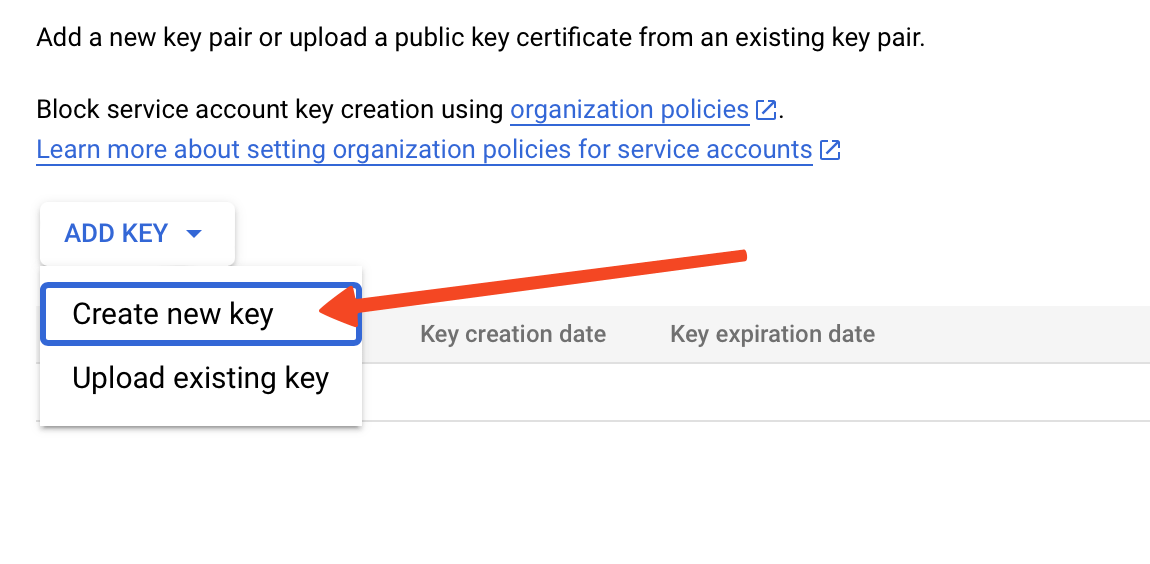
- Choose JSON and click Create.

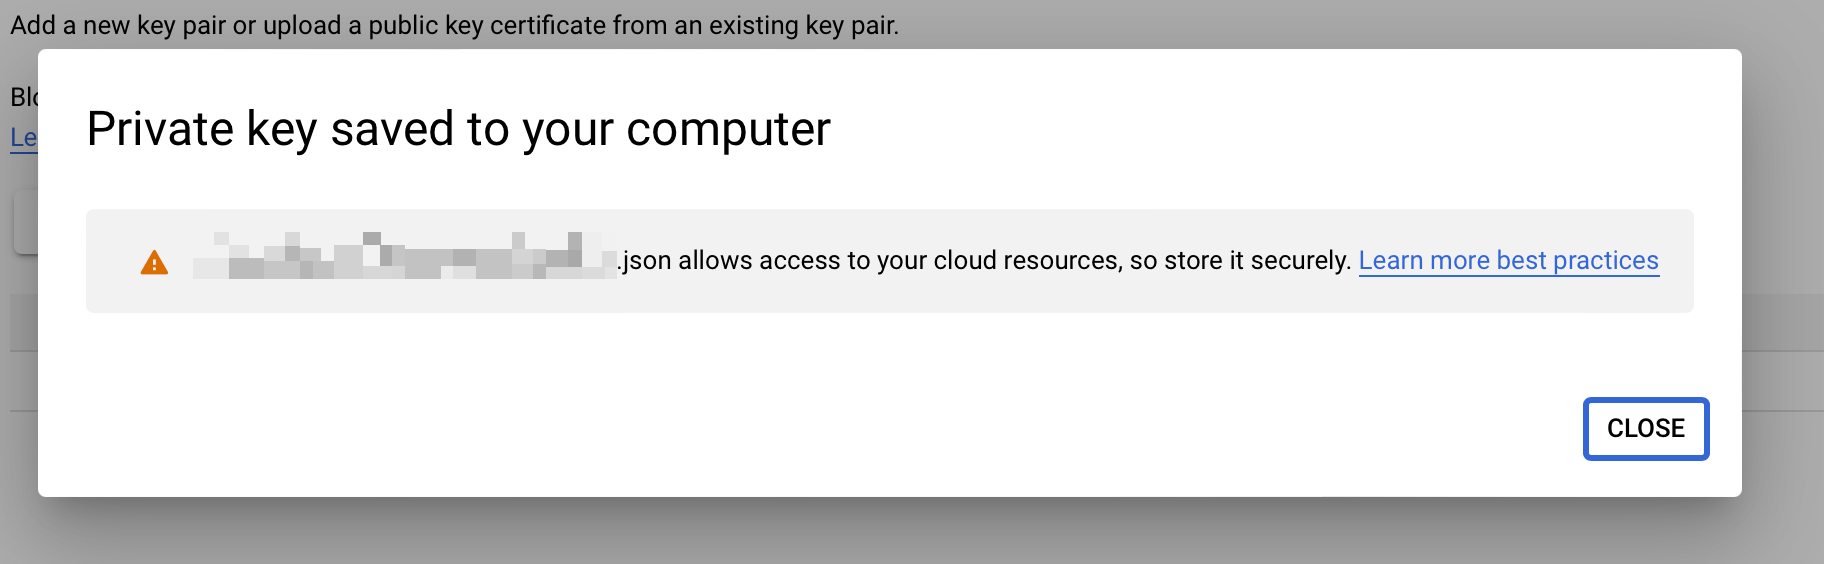
- This action will save your private key to your computer, likely in the Downloads folder.
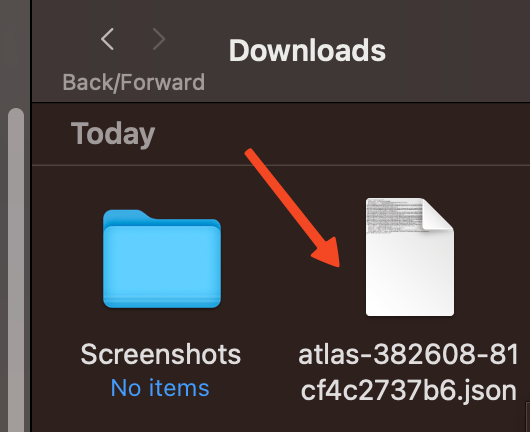
- Locate the downloaded credentials file (JSON) in your download folder; this file grants access to the Google Sheets API.
- In the plugin's “AutoGPT” page, go to the Google Sheets tab and click Choose to upload your JSON file.
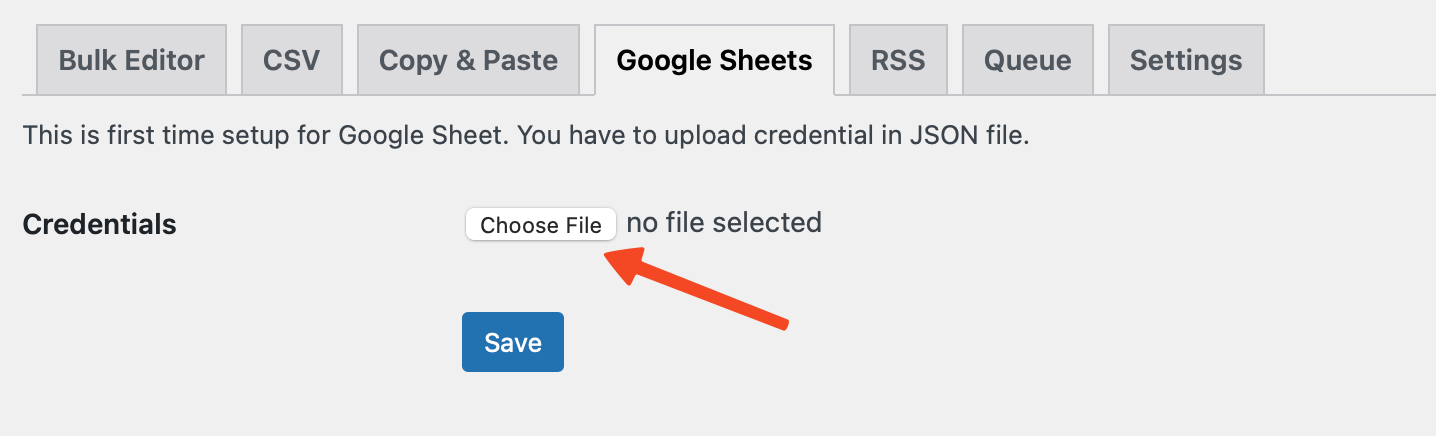
- Click the Save button.
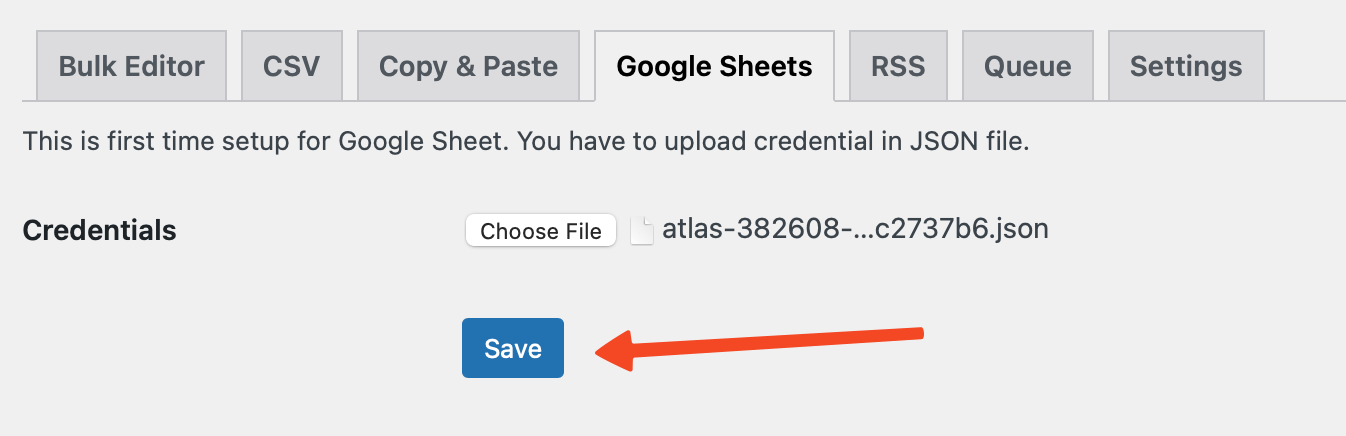
- A success message should appear, indicating that the file has been successfully uploaded.
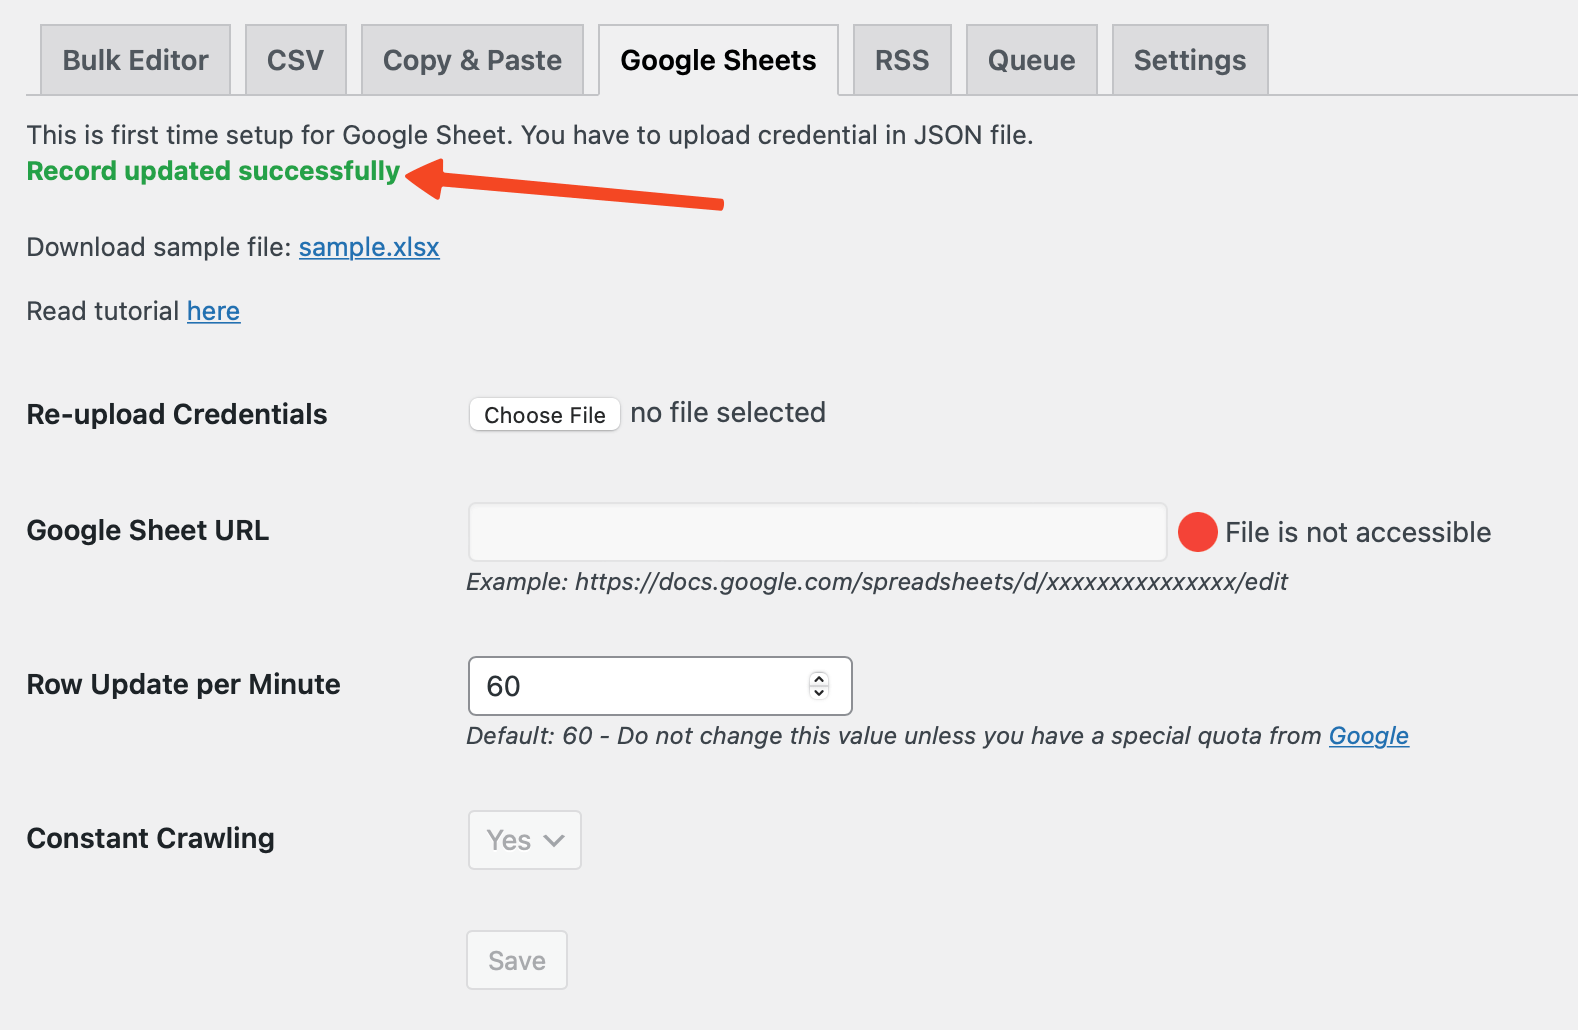
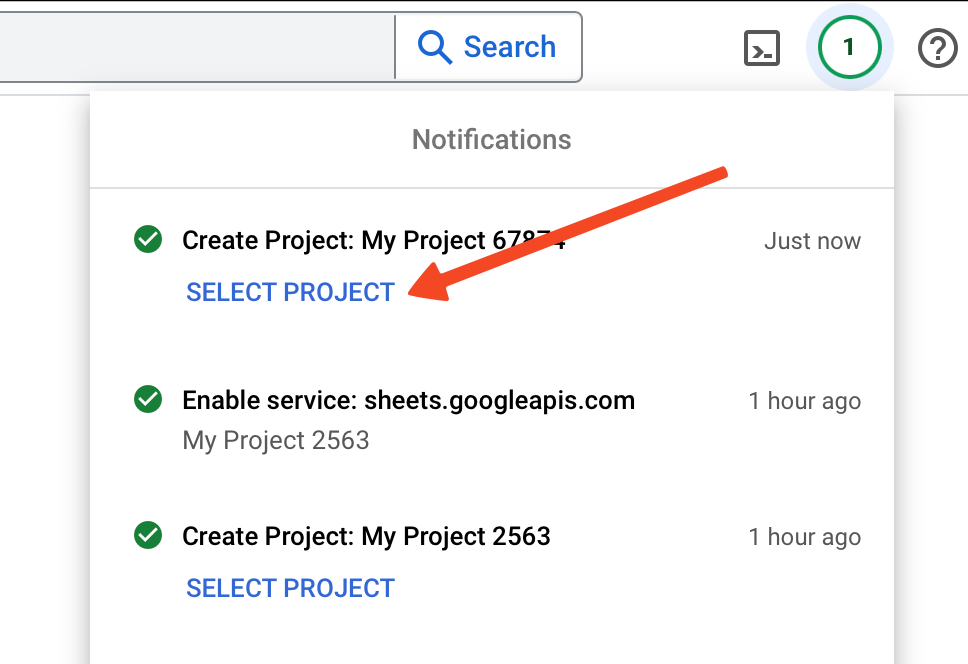
Congratulations! You’ve successfully created and uploaded your credentials.
The next step is to set up the Cron Job to activate all the greyed-out fields.
Configuring Cron Jobs for Google Sheets
-
Follow the steps outlined in this guide to set up a Cron Job.
-
Ensure that you include the specific PHP command for the Google Sheets job in your Cron Job configuration to make it functional.
-
You can find your php command under Google Sheets tab.
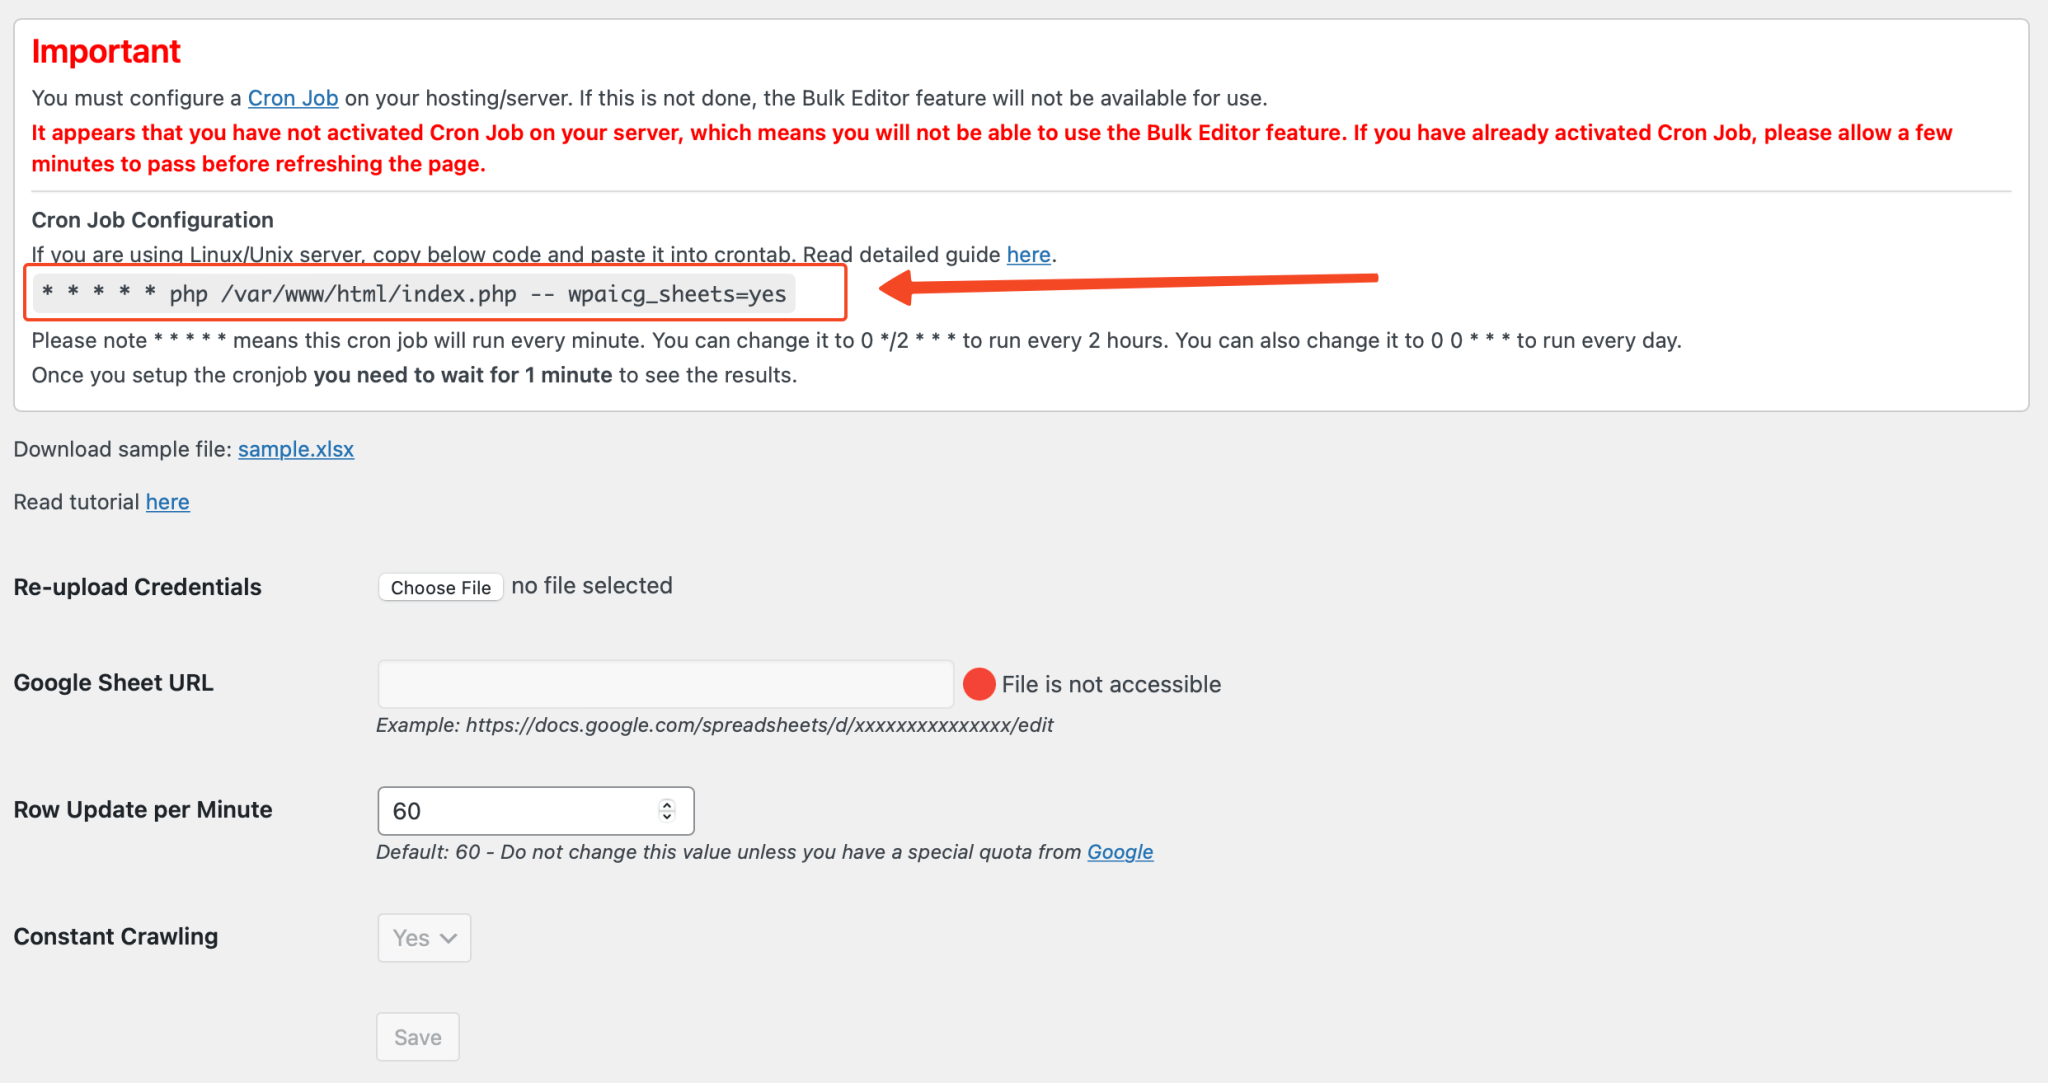
Your PHP command may vary depending on your server setup.
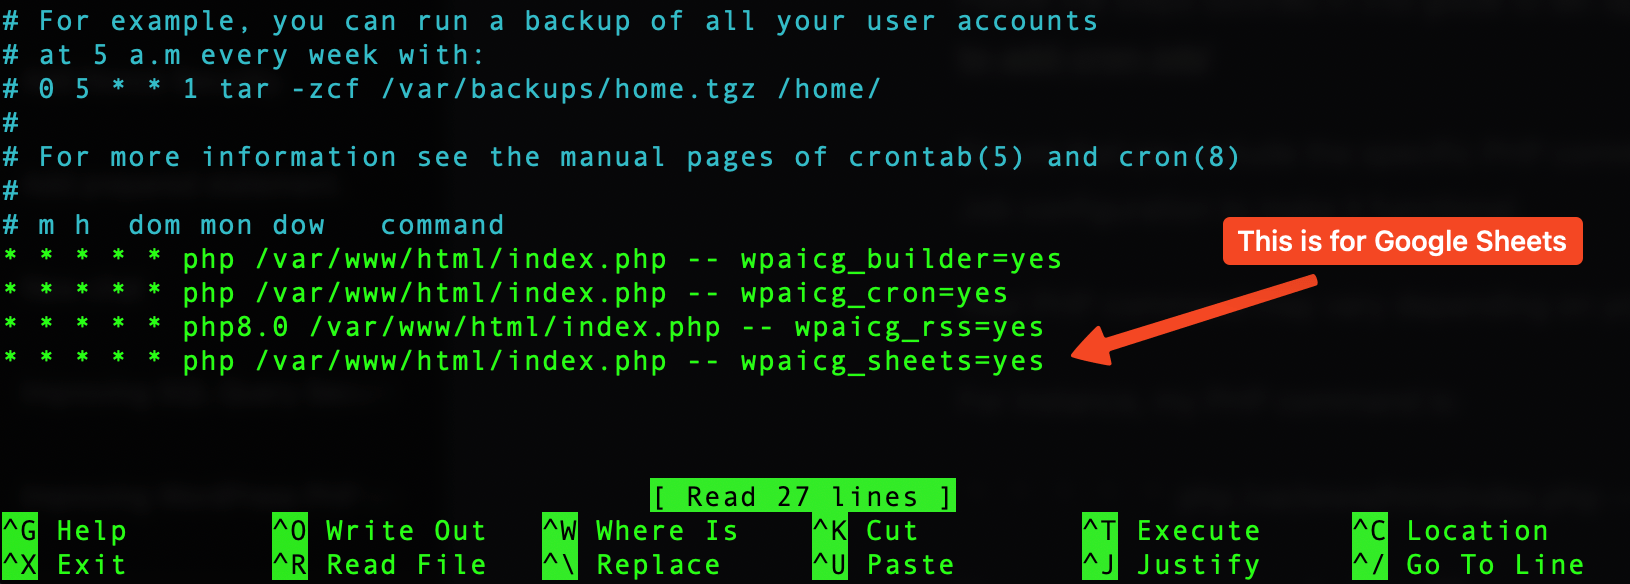
For the Google Sheets module, you need to set up two cron jobs: one for retrieving the data from Google Sheets and another for processing the queue.
Queue Processor:
* * * * * php /var/www/html/index.php -- wpaicg_cron=yes
Google Sheets:
* * * * * php /var/www/html/index.php -- wpaicg_sheets=yes
Learn how to setup a cron job here.
However, your command might differ.
This is how my Cron setup looks like.
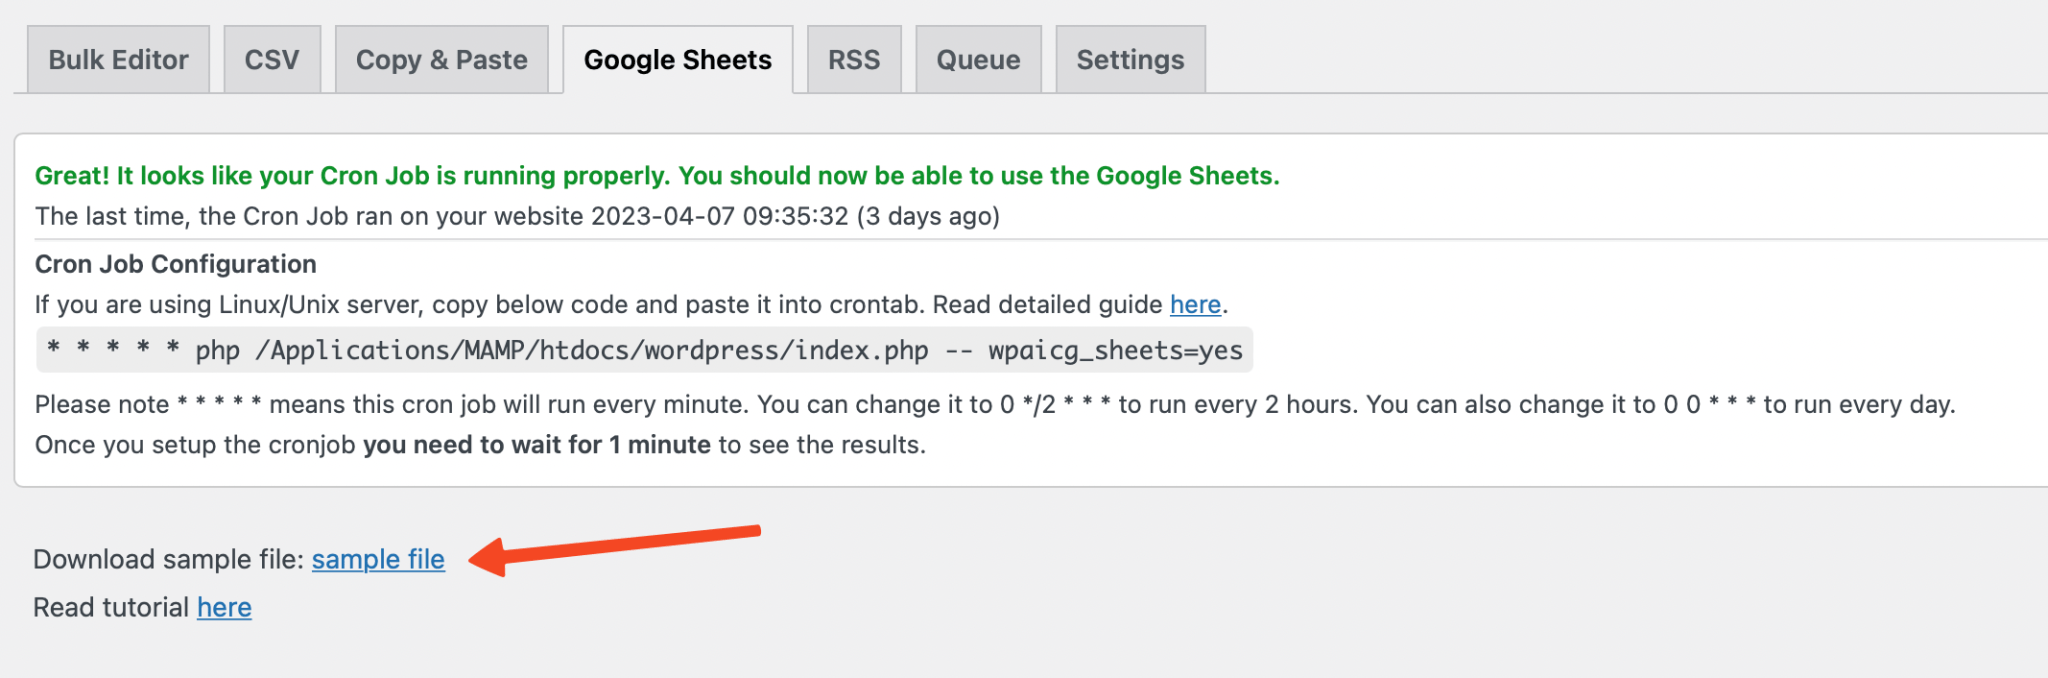
Once the Cron Job setup is complete, you should see a message stating, “Great! It looks like your Cron Job is running properly. You should now be able to use the Google Sheets."
Additionally, all previously greyed-out fields will be activated, allowing you to proceed to the next step—adding the Google Sheet URL and configuring permissions.
Setting Up Google Sheets
With the cron job functioning and our credentials uploaded, it's time to create a Google Sheet, grant write permissions to the service account we just set up, and enter the Google Sheet URL in the designated field.
- Visit your Google Drive.
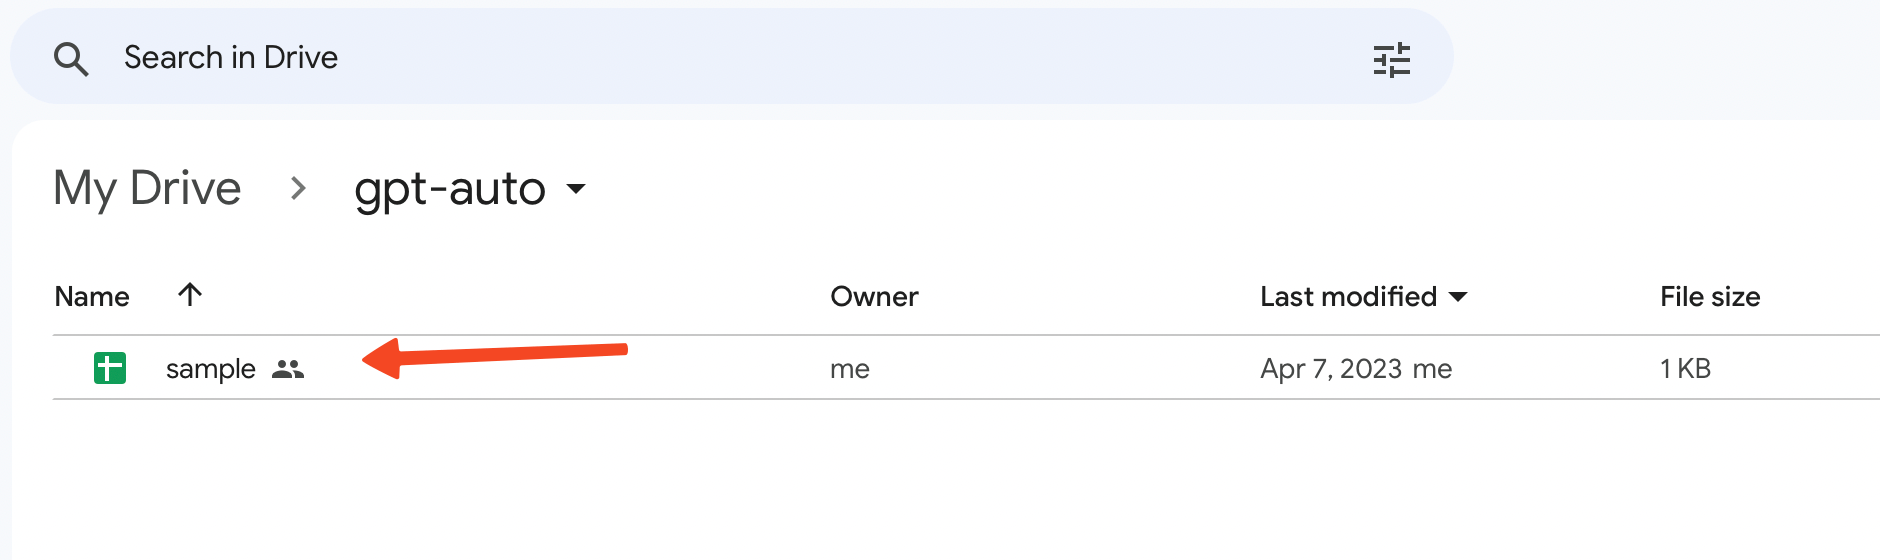
- Create a new folder.
- Download the sample file found under the Google Sheets tab or you can download it from here.
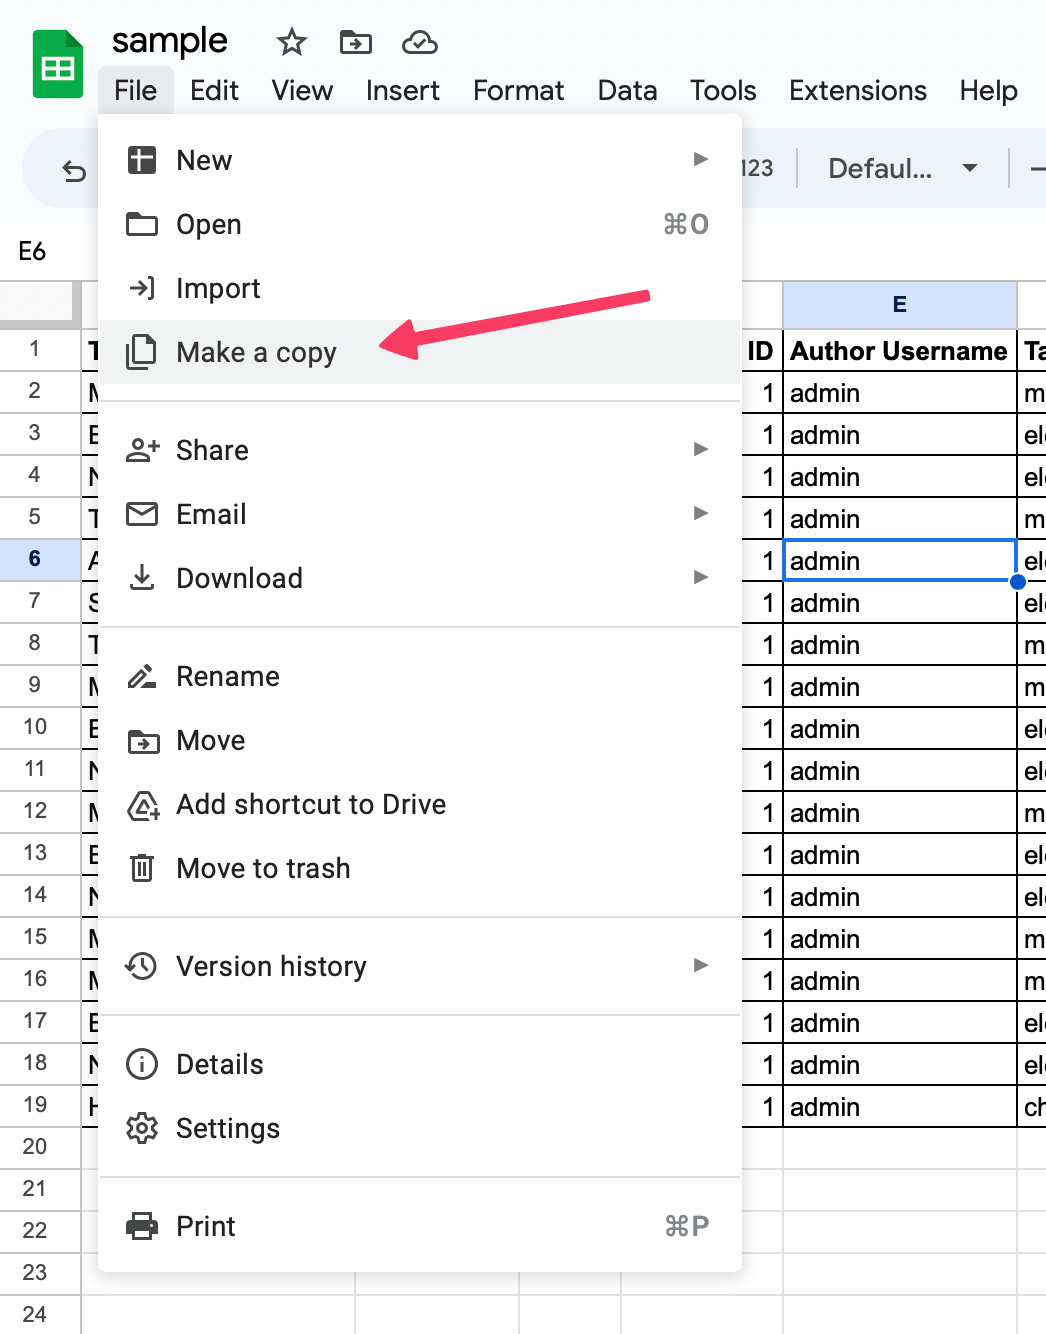
- Upload the sample file to your folder.
-
Open the sample file by double-clicking on it.
-
Click the Share button in the top right corner.
- Return to your Google Console and copy the service account address.

- Go back to Google Sheets and add this address in the share window. Ensure you select Editor and click the Share button.
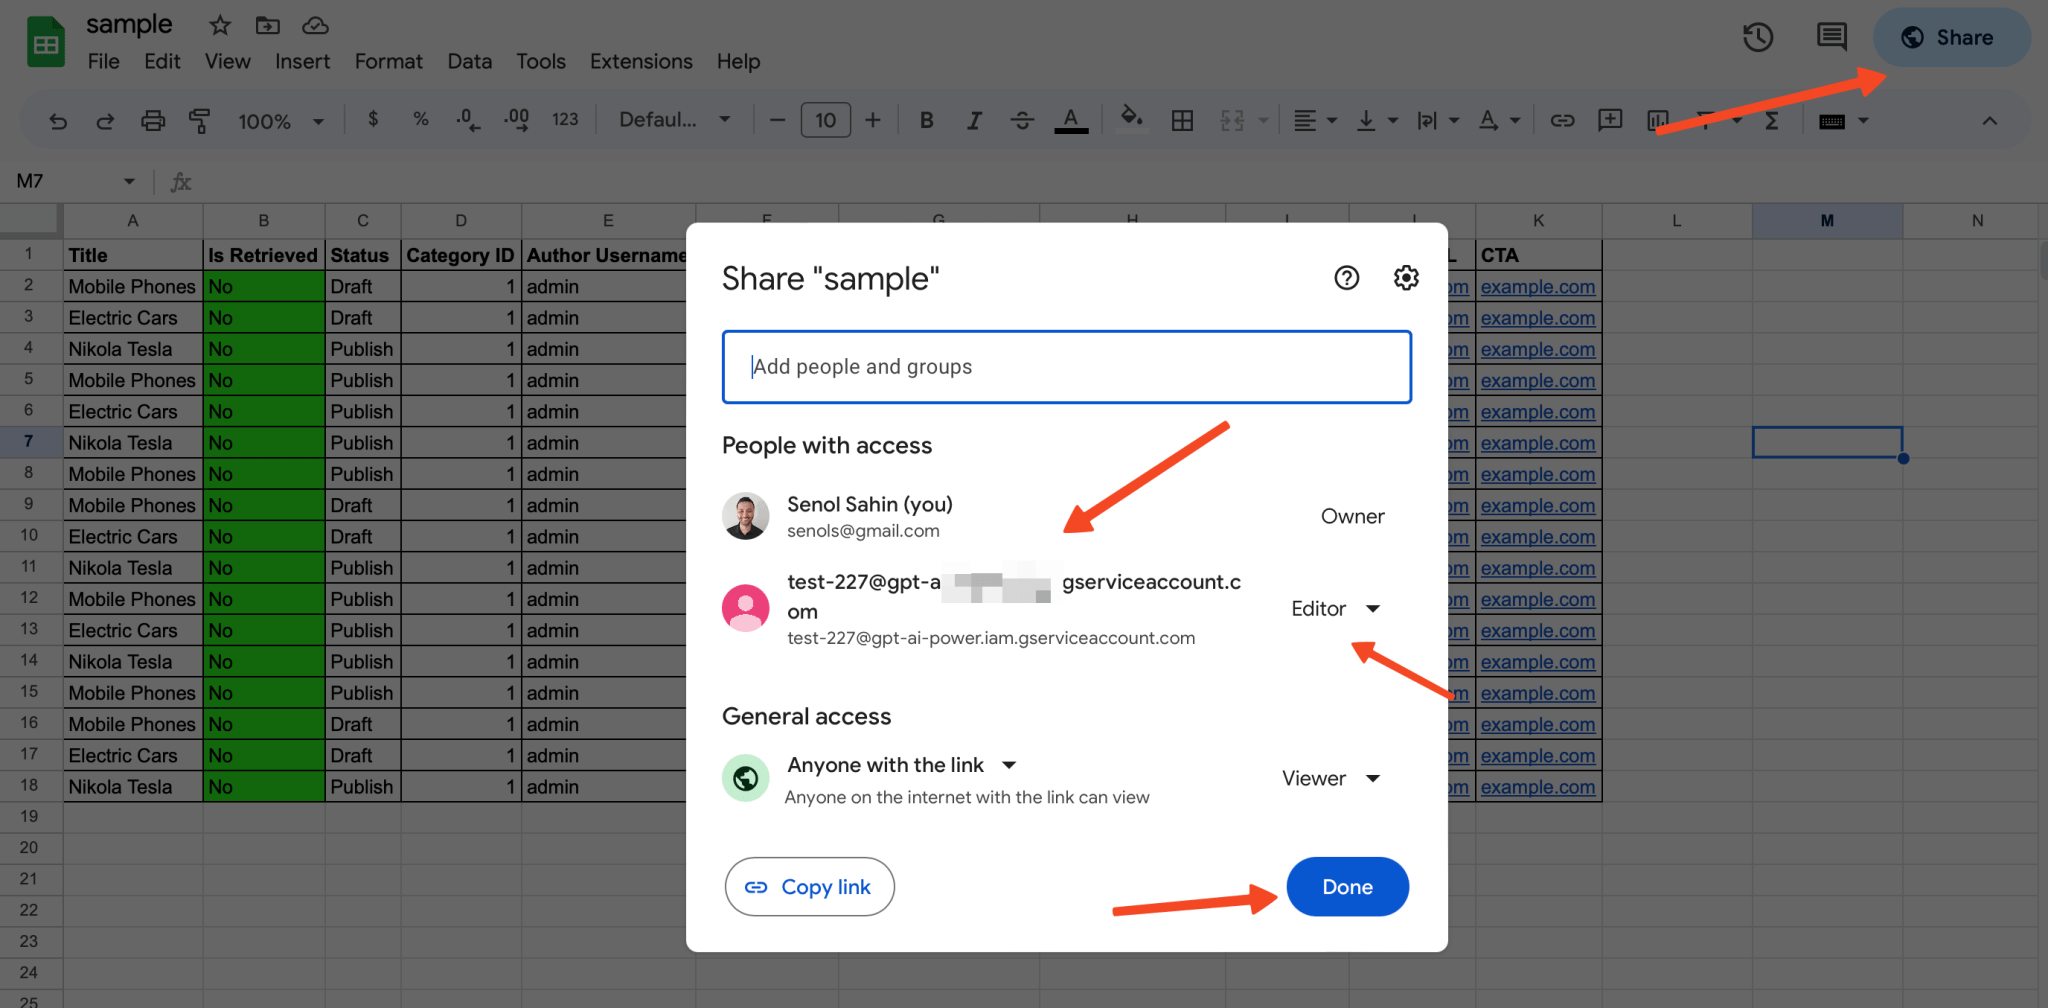
-
This action shares your Google Sheet with your service account, allowing it to update the sheet.
-
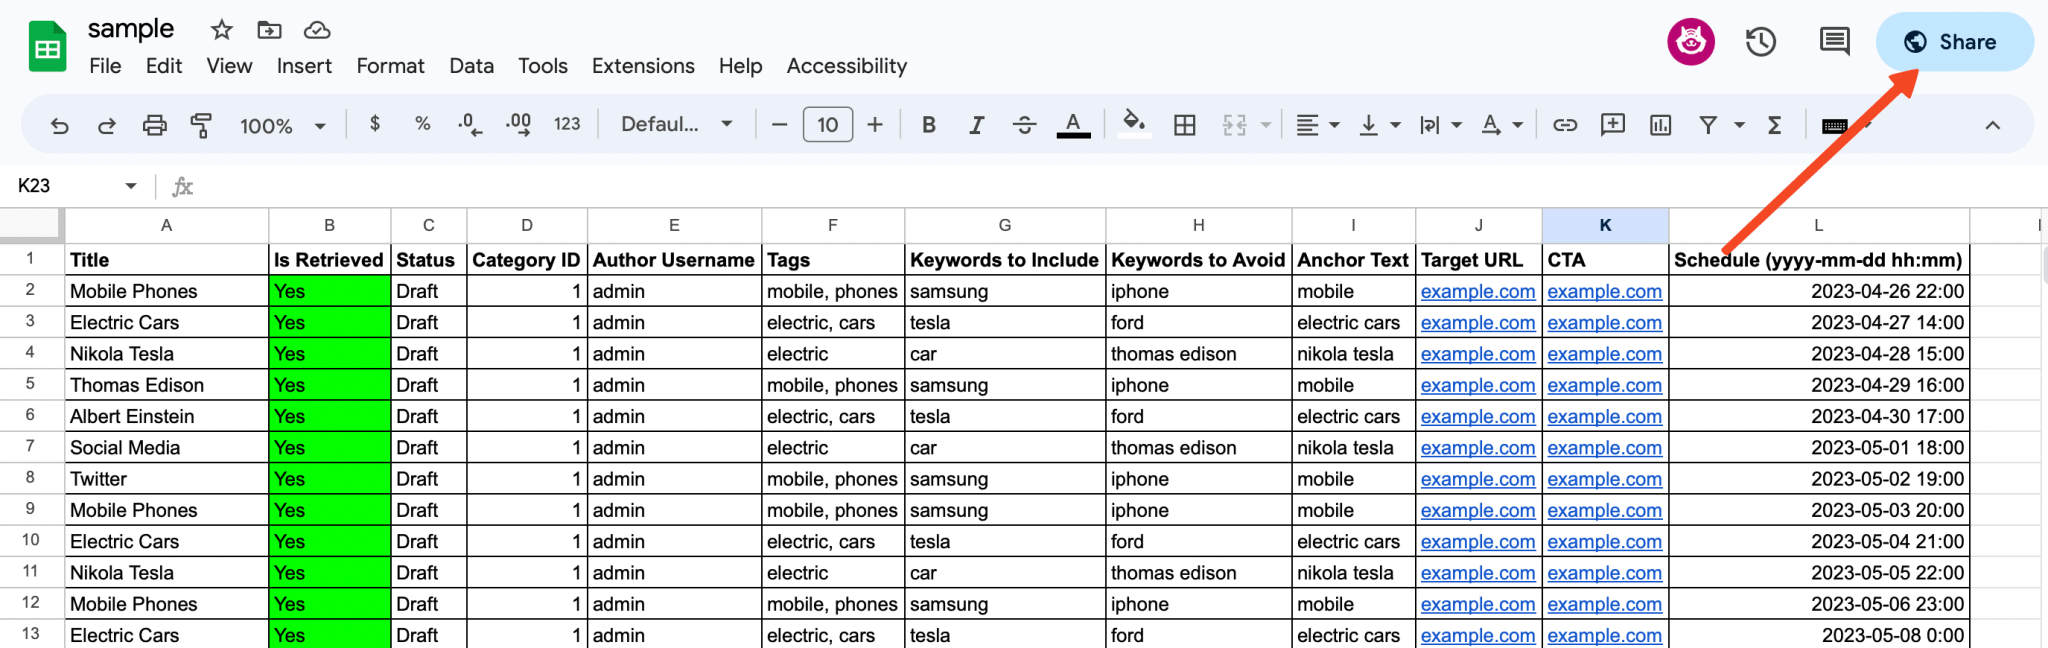
You can now enter your titles, keywords, and other details per row.
You must use the exact same format. If you change the location of any column, it will not work.
Column Definitions and Usage
| Column | Description |
|---|---|
| Title | Mandatory |
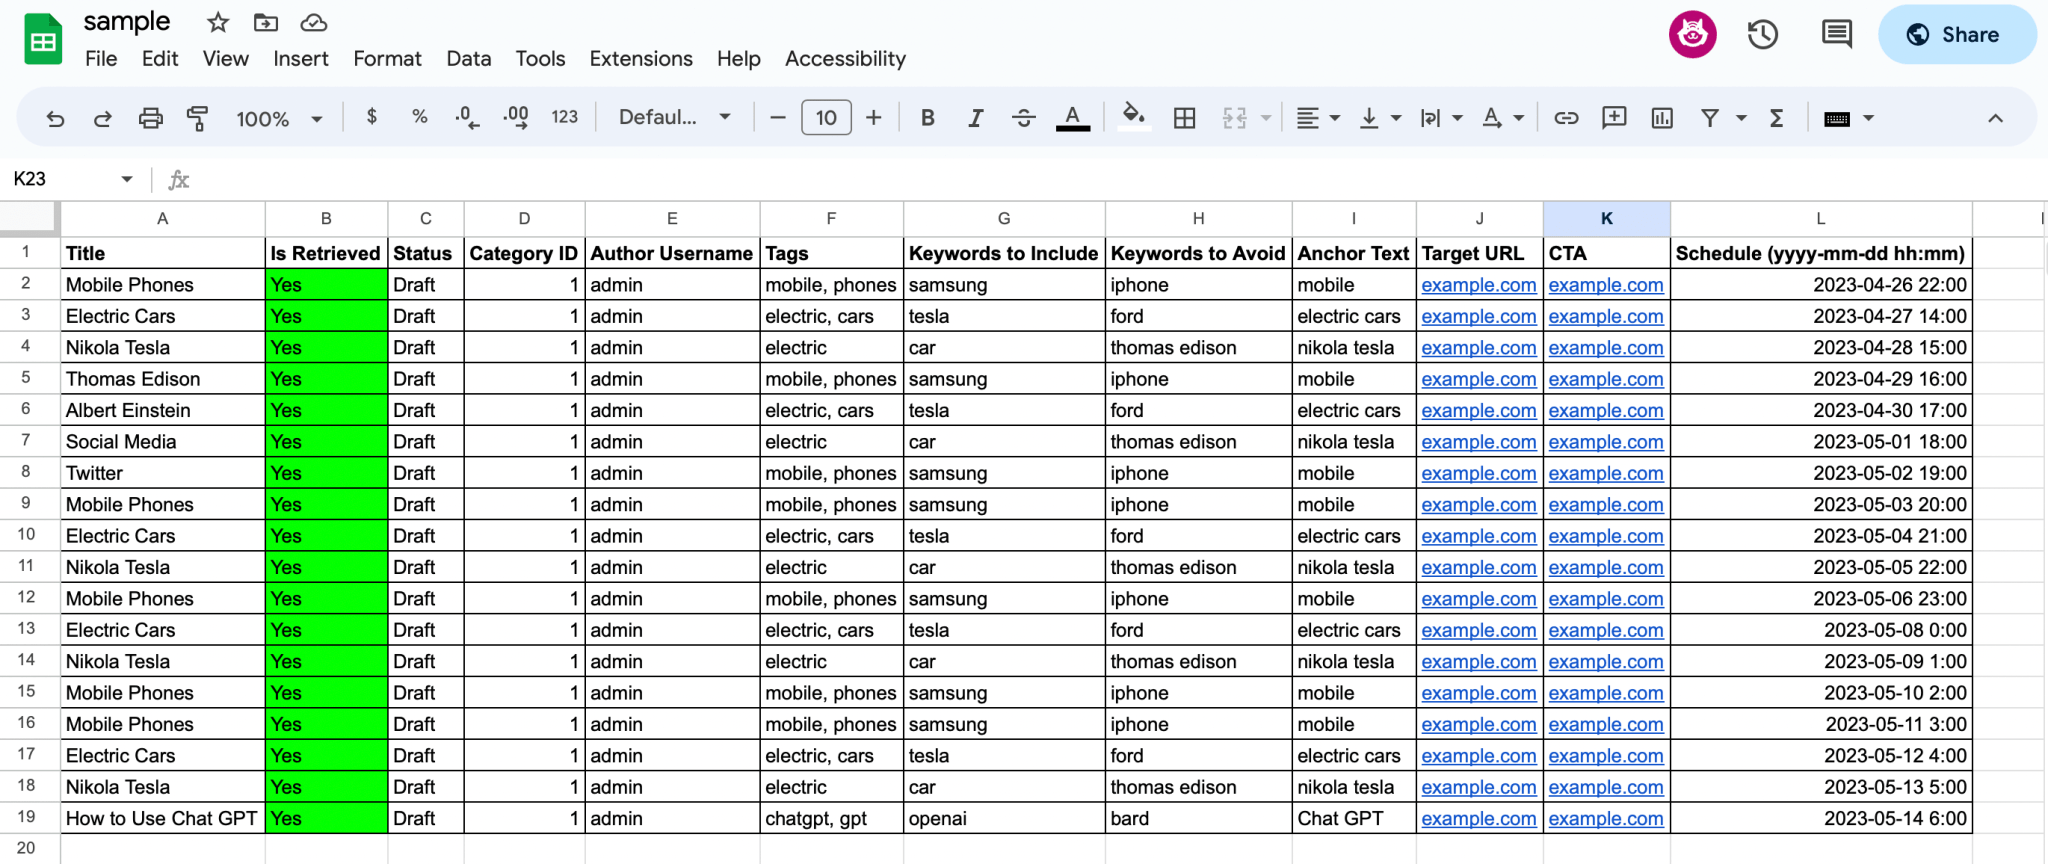
| Is Retrieved | Mandatory. Make sure to put "No" in this column. "No" indicates that the row has not yet been processed by our plugin. Once processed, it will be updated to "Yes" to prevent duplicates. Always set this field to "No" when adding new entries. If left empty or set to any value other than "No," our plugin will ignore it. |
| Status | Optional. It can be either "Draft" or "Publish." If left empty, your post will have a "Draft" status. |
| Category ID | Optional. Do not use the category name; it must be the category ID. You may leave this field empty. |
| Author | Optional. Use the author username. You may leave this field empty. |
| Tags | Optional. You may leave this field empty. |
| Keywords | Optional. Keywords to include. You may leave this field empty. |
| Keywords | Optional. Keywords to avoid. You may leave this field empty. |
| Anchor Text | Optional. You may leave this field empty. |
| Target URL | Optional. You may leave this field empty. |
| CTA | Optional. Call-to-action. You may leave this field empty. |
| Schedule | You can use this column to schedule your posts. Format must be like this: yyyy-mm-dd hh:mm. If you use a different format it will not work. If this column has value then Status column (Draft/Publish) become meaningless as if there is a schedule date it means it will be published on that date. So plugin will ignore status if schedule date is not empty. |
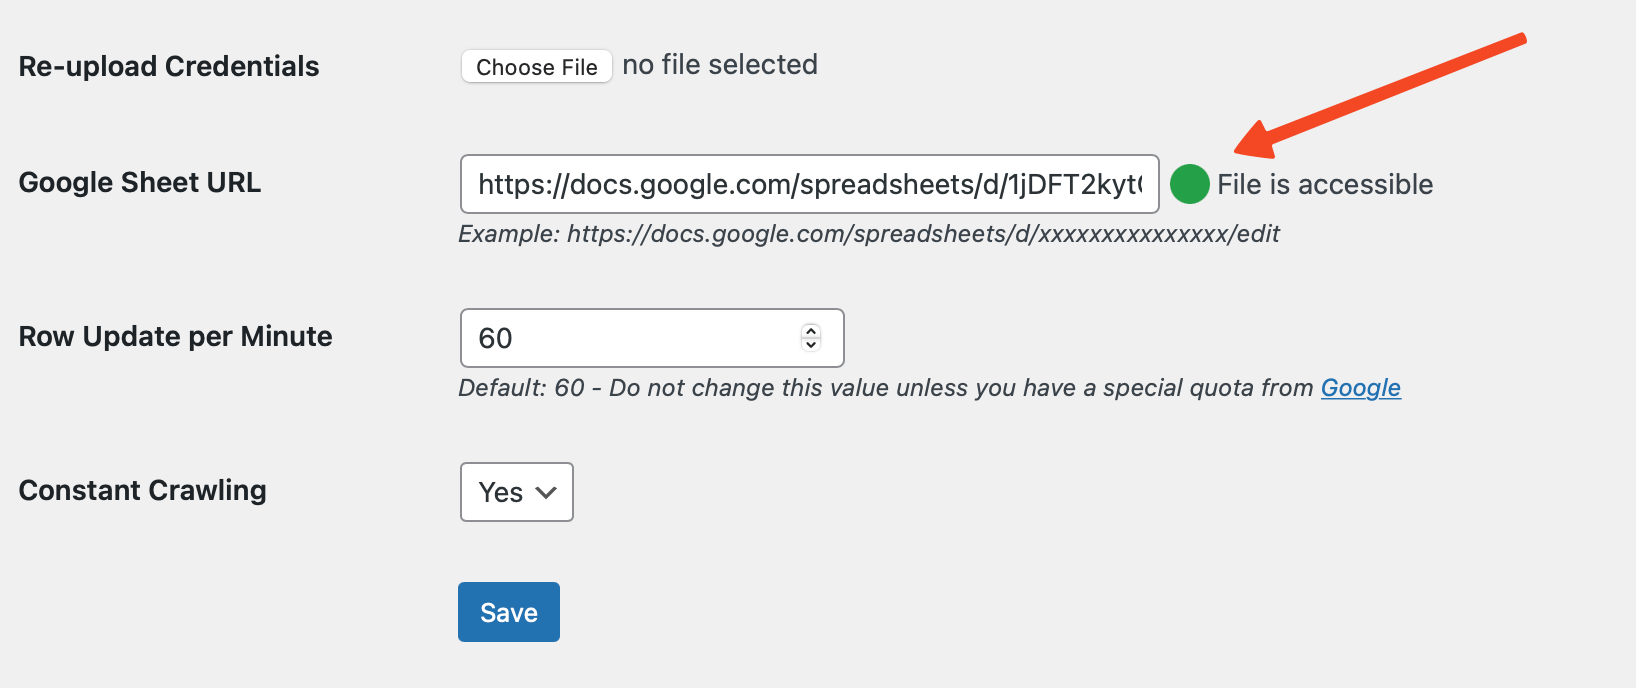
- After setting up your Google Sheet, copy its URL and paste it into the plugin. Make sure your url format is same like this:
https://docs.google.com/spreadsheets/d/xxxxxxxxxxxxxxx/edit
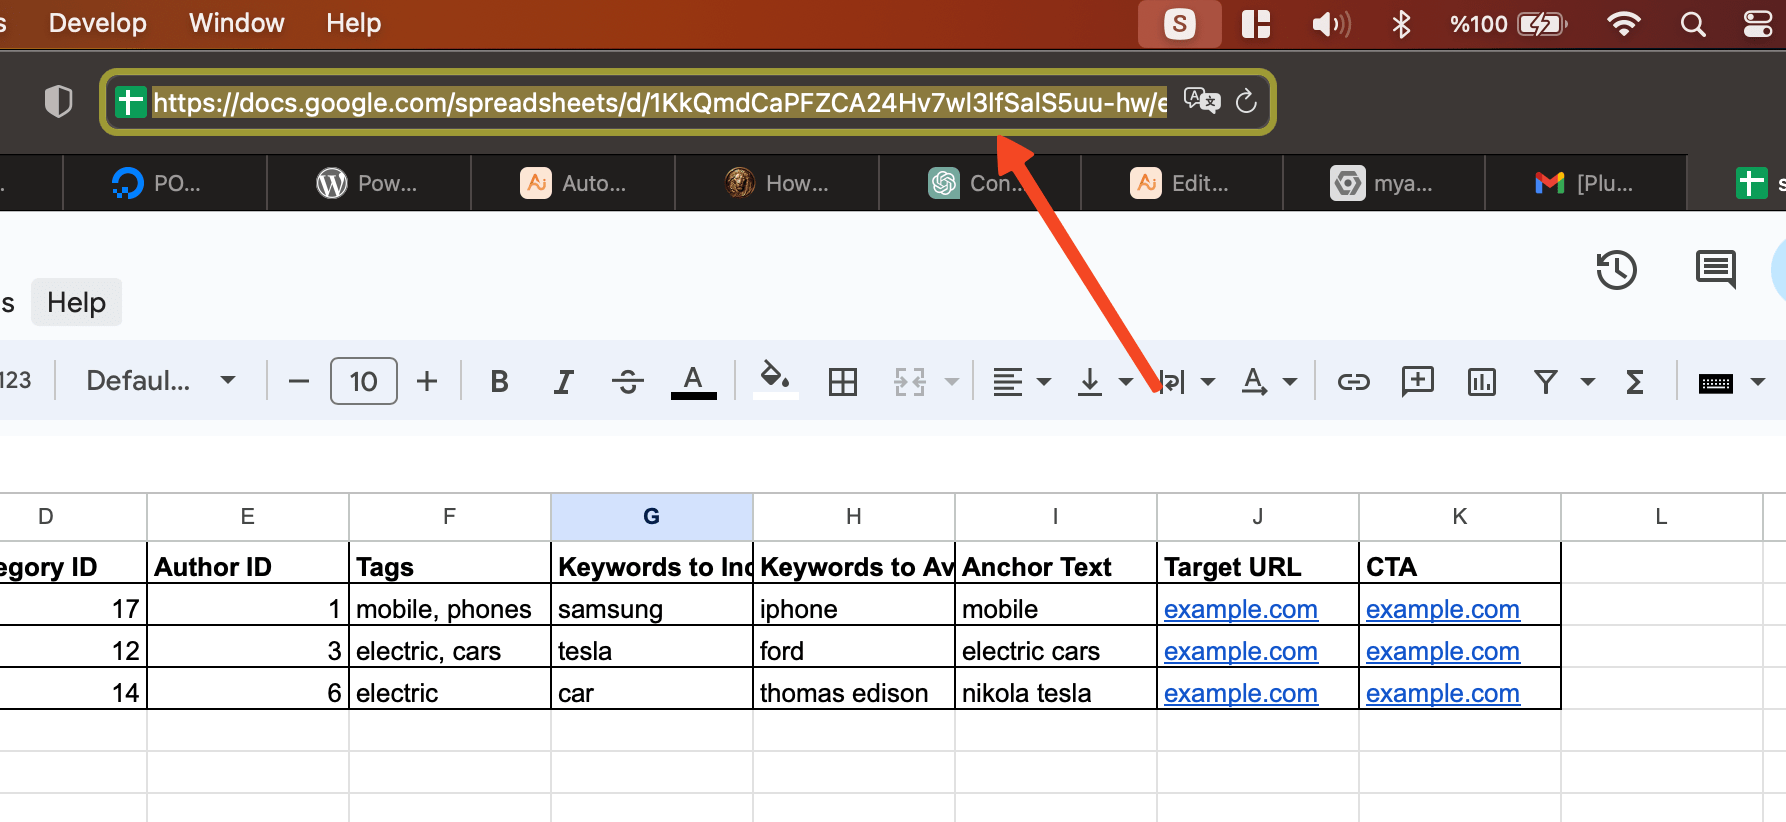
- Paste the url in the text field and hit Save button.

Wait for at least 1 minute (based on cronjob interval) and refresh the page.
There are 2 more additional options under the Google Sheets tab.
- Row Update per Minute: The default value is 60. Avoid changing this value unless you have a special quota from Google. This setting means that the plugin will process 60 rows per minute.
- Constant Crawling: If set to Yes, the plugin will constantly check your Google Sheet for new rows. The frequency of the check depends on your cron job interval. For example, if your cron job interval is set to every minute, the plugin will check for new rows every minute.
If you see a notification stating File is accessible congratulations!
This means your Google Sheet can now be accessed by our plugin, and you can begin adding rows to your sheet.
- You can track your jobs status in Queue tab.
Using Custom Prompt
If you don't want to use the built-in prompts that come with the plugin and prefer to use your own, you can go to AutoGPT - Settings and enable the custom prompt option.
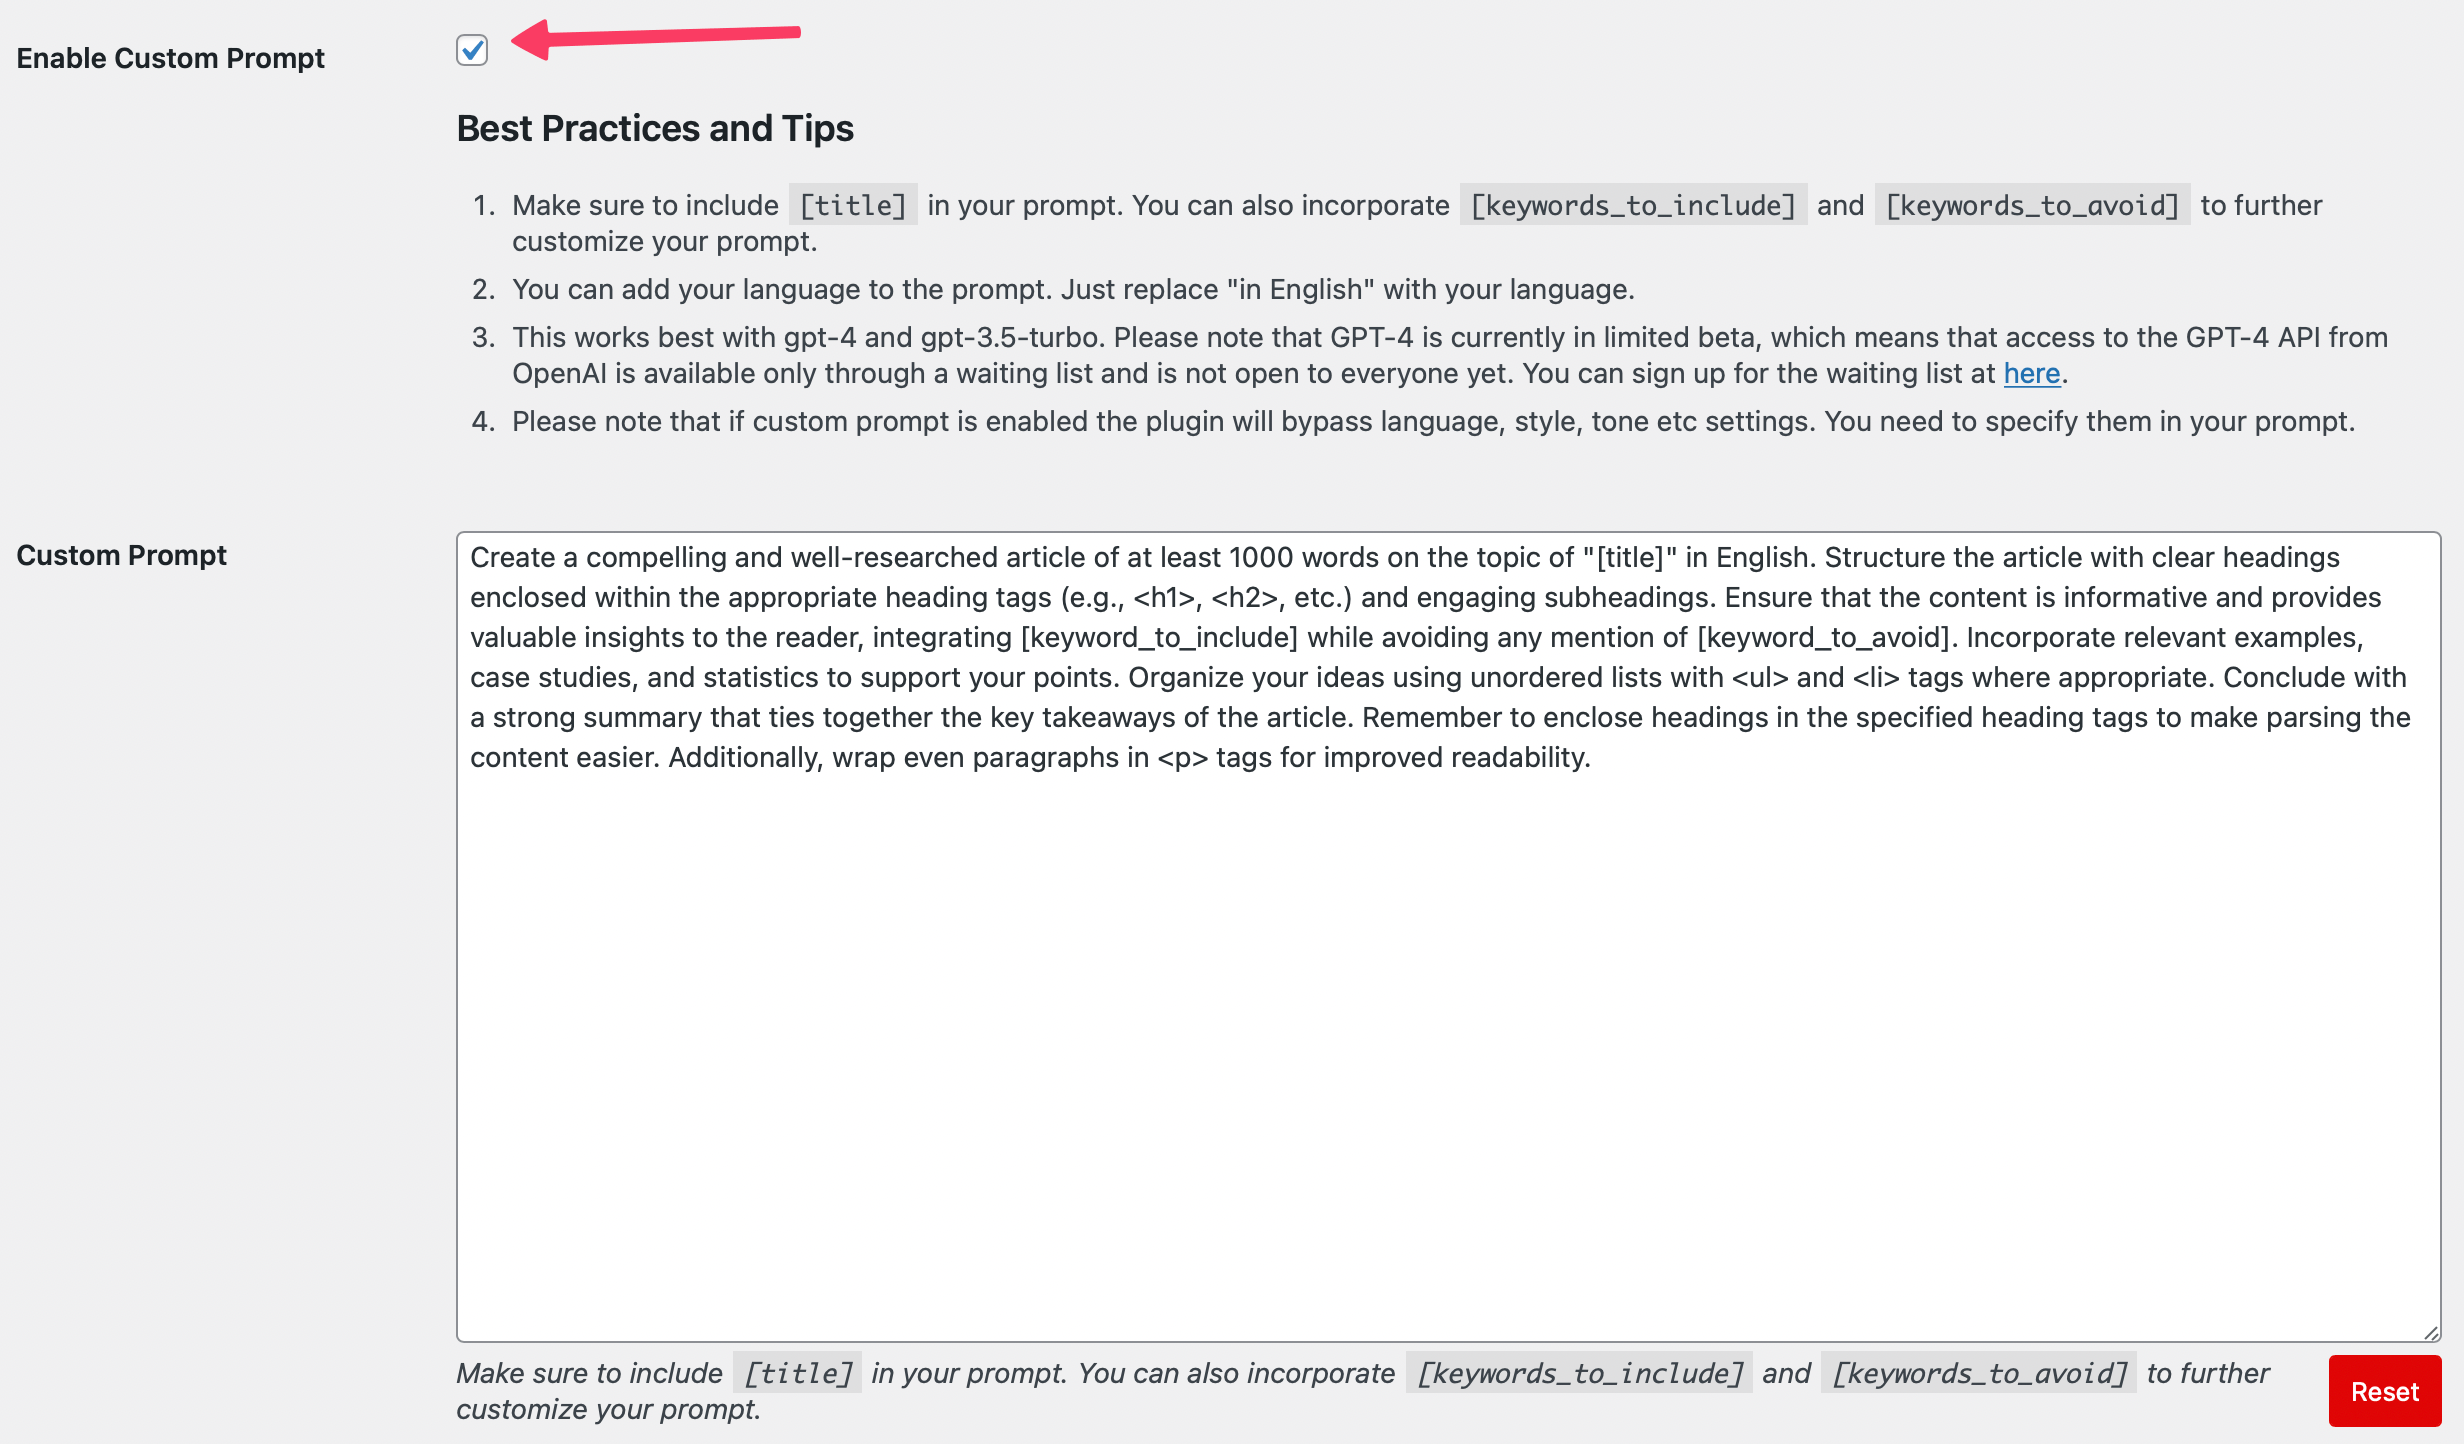
Best Practices and Tips
- Make sure to include
[title]in your prompt. If you are in a Pro Plan you can also add[keywords_to_include]and[keywords_to_avoid]to further customize your prompt. - You can add your language to the prompt. Just replace "in English" with your language.
- This works best with gpt-4 and gpt-3.5-turbo.
- Please note that if the custom prompt is enabled, the plugin will bypass language, style, tone, etc., settings. You need to specify them in your prompt.
Auto Restart Failed Jobs
You can choose to automatically restart failed jobs after a specific amount of time or after a certain number of attempts.
To enable the restart feature, go to the AutoGPT - Settings tab.
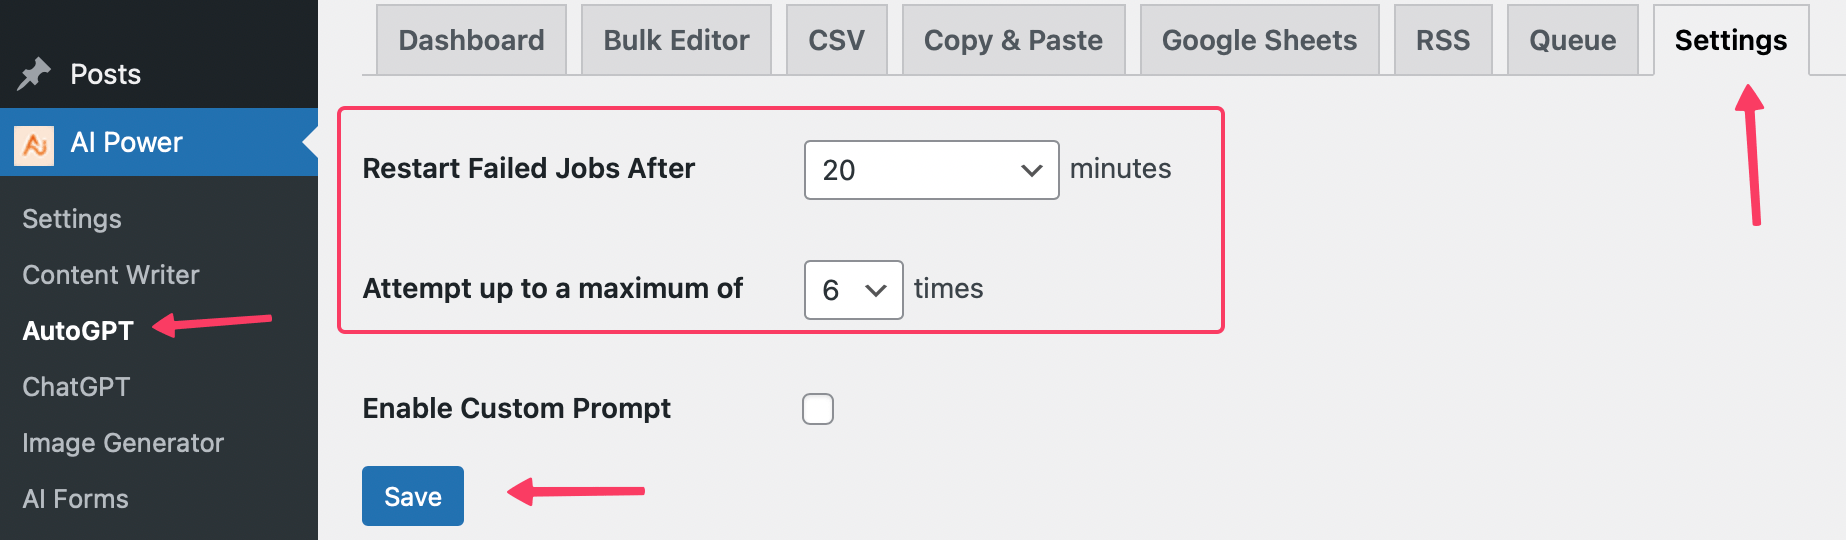
-
Restart Failed Jobs After: Set the amount of time after which the tool should attempt to restart a failed job. Available options: Do not restart, 20, 30, 40, 50 and 60 minutes.
-
Attempt up to a Maximum of: Define the maximum number of times the tool should try to restart a failed job before giving up. Available options: 1 to 10 times.
By configuring these settings, you can ensure that your content generation process continues smoothly even if there are temporary issues with the OpenAI servers or if you run out of quota.
For example, if a bulk job fails due to unforeseen circumstances such as OpenAI servers being down or you are out of quota, the tool will automatically attempt to restart the failed job based on the settings you have selected.
Monitoring
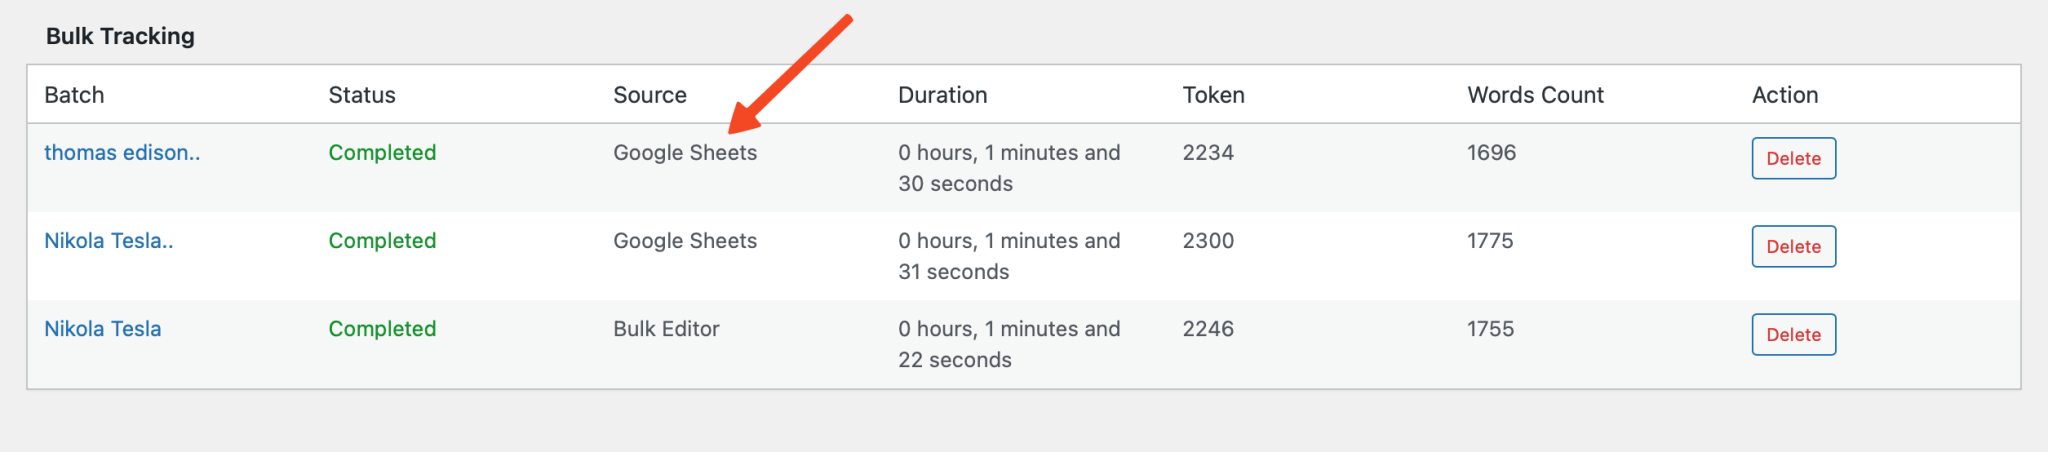
The queue feature in Auto Content Writer is a helpful tool that allows users to keep track of the progress of their content creation.
When you generate multiple articles at once using the GPT agents, they are added to a queue, and you can monitor the status of each batch in the Queue tab.
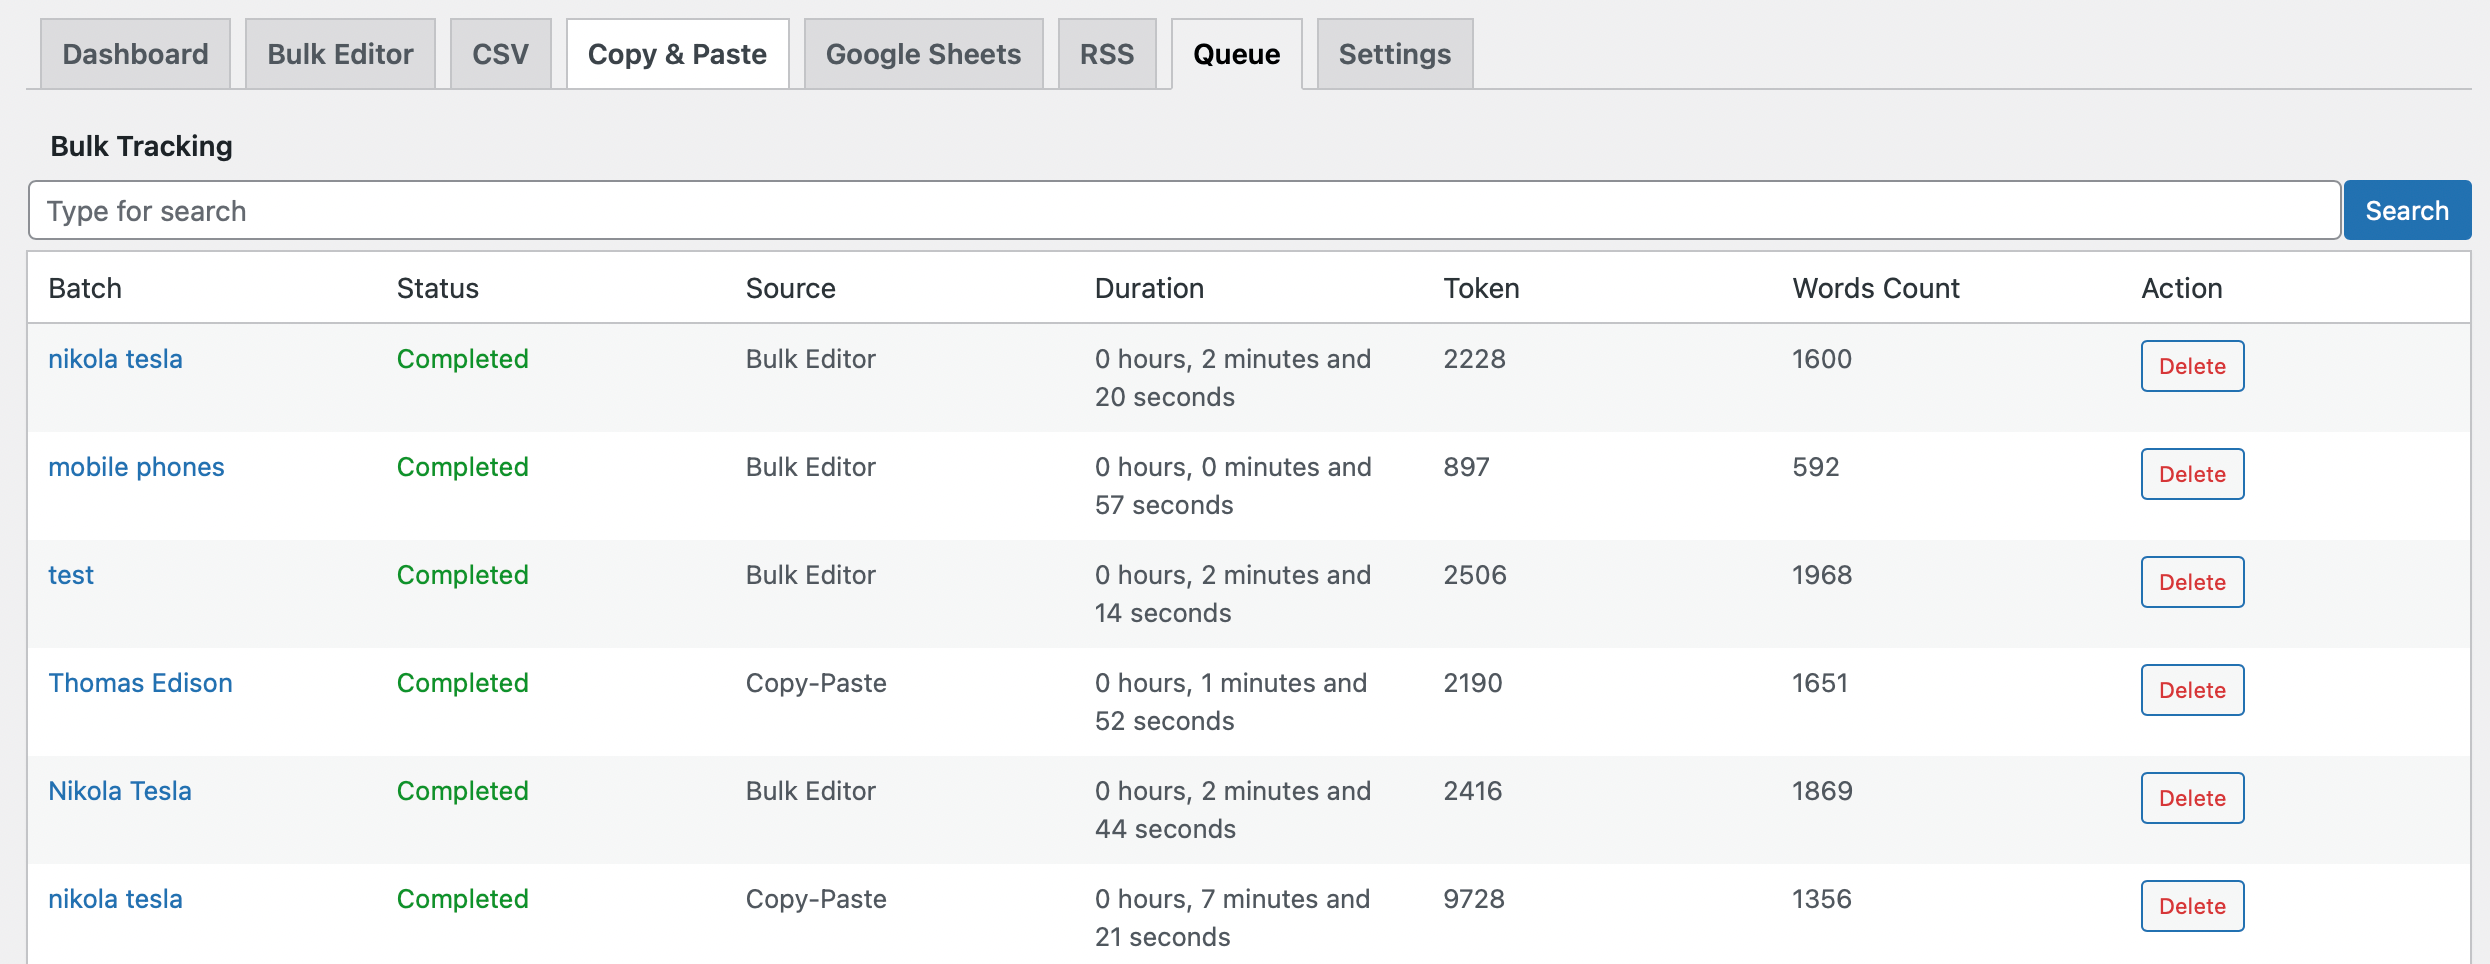
There are seven fields in the Queue tab that give you information about each batch of content.
| Field | Description |
|---|---|
| ID | The ID field shows the unique identifier for each batch. |
| Batch | The Batch field shows you the list of titles in that batch. It is clickable, and once you click on it, you can see the list of titles in that batch. |
| Status | The Status field shows whether the batch is pending, cancelled, in progress, or completed. |
| Source | The Source field shows where the batch was created, whether in the Bulk Editor, CSV, Copy-Paste, RSS or Google Sheets feature. |
| Duration | The Duration field shows how long it took to generate all the contents in that batch. |
| Token | Token field shows how many tokens were spent to generate the content. |
| Word Count | The Word Count field shows how many words are in that batch. |
| Action | The Action field provides a delete button to delete the batch if you no longer need it. Please note that deleting a batch will not delete the content that was generated. |
In addition to the monitoring capabilities, you can also filter batches based on their status.
This allows you to quickly view batches that are completed, pending, or in other states, enhancing your ability to manage the content creation process.
Furthermore, the Queue tab provides a summary of the total number of batches, as well as the number of pending and completed batches. This gives you a quick overview of your content generation activities.
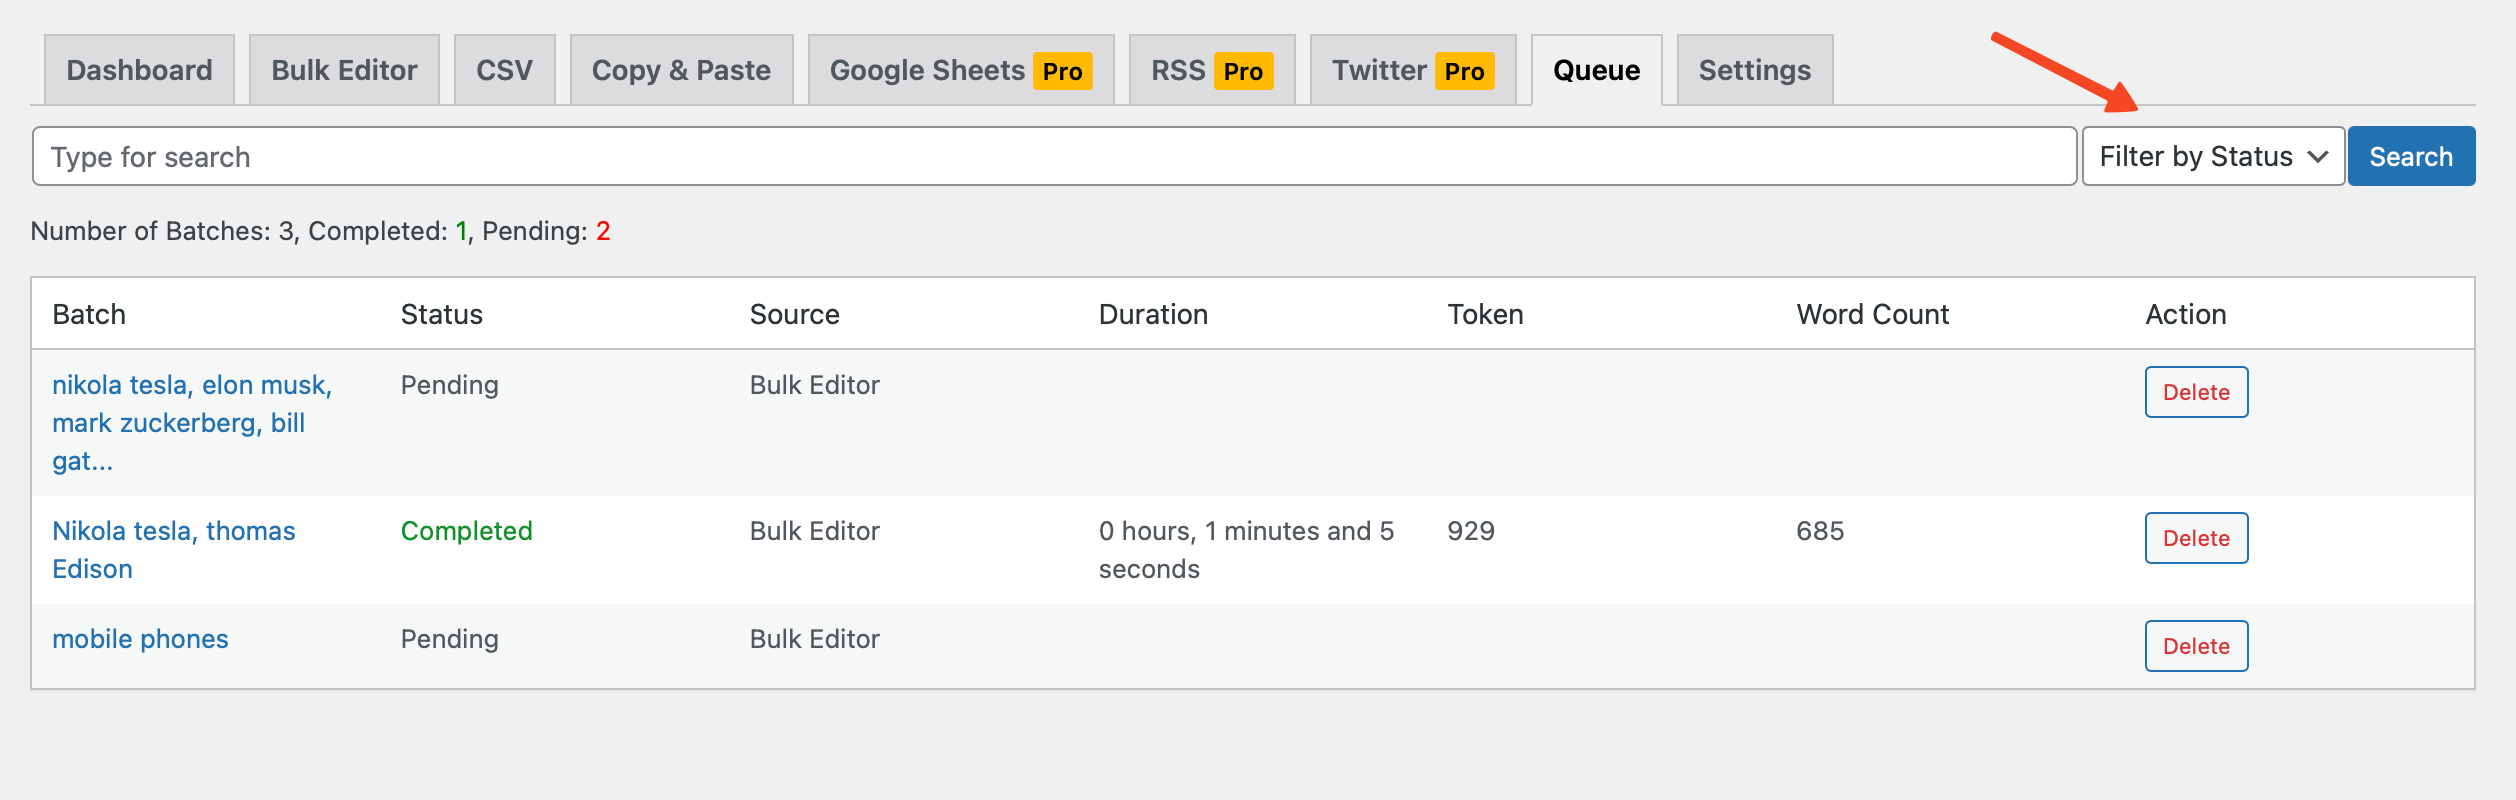
With the Queue feature, you can easily keep track of the progress of your content creation and stay organized. You can also cancel a batch if it is taking longer than expected or if you no longer need the content.
Deleting a job from the queue will only remove the job from the queue and will not delete the content that was generated.
Limitations
The Google Sheets module offers a convenient way to generate content in bulk using a Google Sheets document. However, there are a few limitations that users should be aware of:
- Availability of Google Sheets API: The Google Sheets API must be available and accessible at all times. If the API is down or inaccessible, the plugin will not be able to fetch the rows and therefore cannot generate content.
- Google Sheets Format: Your document must be in the Google Sheets format. Other formats like CSV or Excel are not supported by this module.
- Valid Google Cloud Service Account: You must have a valid Google Cloud Service account. The plugin uses this account to interact with the Google Sheets API. If your account is invalid or suspended, the plugin will not be able to access your Google Sheets document.
- Google API Rules: You must comply with Google's API rules and limitations. Any breach of these rules can result in your Google Cloud Service account being suspended or even banned.
- Row Update per Minute: The default value for this setting is 60. This means that the plugin will process 60 rows per minute. Changing this value can result in overloading the Google Sheets API, so it's recommended to leave it at the default unless you have a special quota from Google.
- Server Access to Google Sheets API Endpoints: Your server must have access to Google Sheets API endpoints. If your server is blocked from accessing these endpoints, the plugin will not be able to fetch rows from the Google Sheets document. You may need to adjust your firewall or other network settings to ensure the necessary access.
Ensure that the Google Sheets API is available, your document is in the Google Sheets format, you have a valid Google Cloud Service account, and you are complying with Google's API rules. The default setting for row update per minute is 60. It's recommended to avoid changing this value unless you have a special quota from Google.