Azure
Bring Your Own Key Model
Our plugin uses a Bring Your Own Key model, acting as a bridge between your WordPress site and Azure OpenAI services.
You need an Azure account and API credits from Azure to use our plugin. This approach lets you control your API keys and ensures access to the latest Azure OpenAI technology.
Buying our plugin does not include Azure credits. You need to purchase credits separately from Azure. Check their pricing page for details.
How to Generate an Azure OpenAI API Key
Registration
Azure OpenAI Service requires registration. Microsoft may restrict access based on availability and eligibility.
Application Process
- Visit Azure OpenAI Service.
- Click
Apply Now. - Complete the form using your work email.
Awaiting Approval
After submission, Microsoft will review your request. Once approved, they will inform you.
Accessing Azure Portal
- Navigate to Azure Portal.
- Click "Create a Resource".
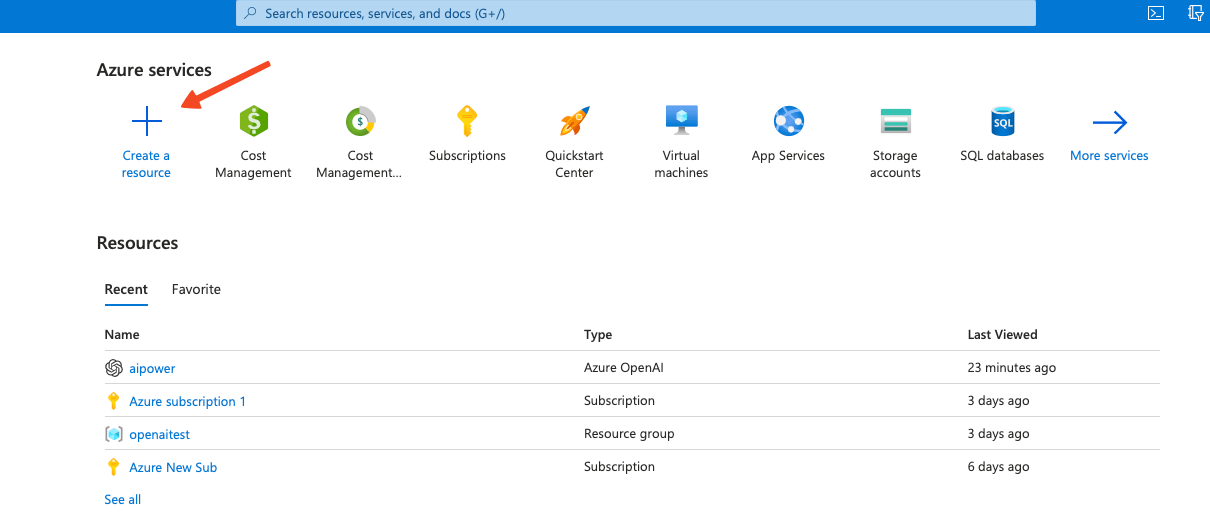
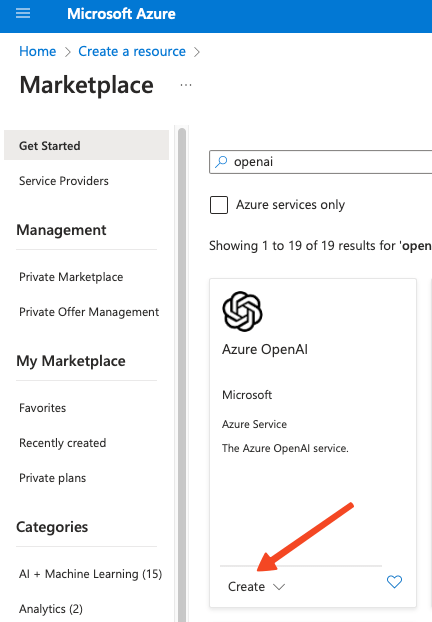
- In the search bar, type "OpenAI". Select Azure OpenAI from the results.
- Click
Create Azure OpenAI.
- After creating the resource, select it. On the left menu, find "Keys and Endpoint".

- Copy your Azure OpenAI API key and endpoint.
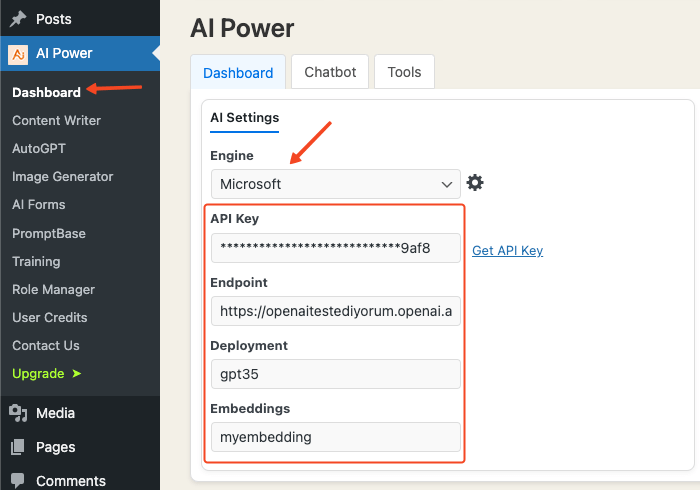
Setting Up AI Power Plugin
- Go to the AI Power plugin on your WordPress dashboard.
- Navigate to
Dashboardtab. - Select
Azurefrom the dropdown list. Enter your API key, endpoint, and deployment name.
- Log in to Azure AI Studio.
- Click
Modelsto see available models.
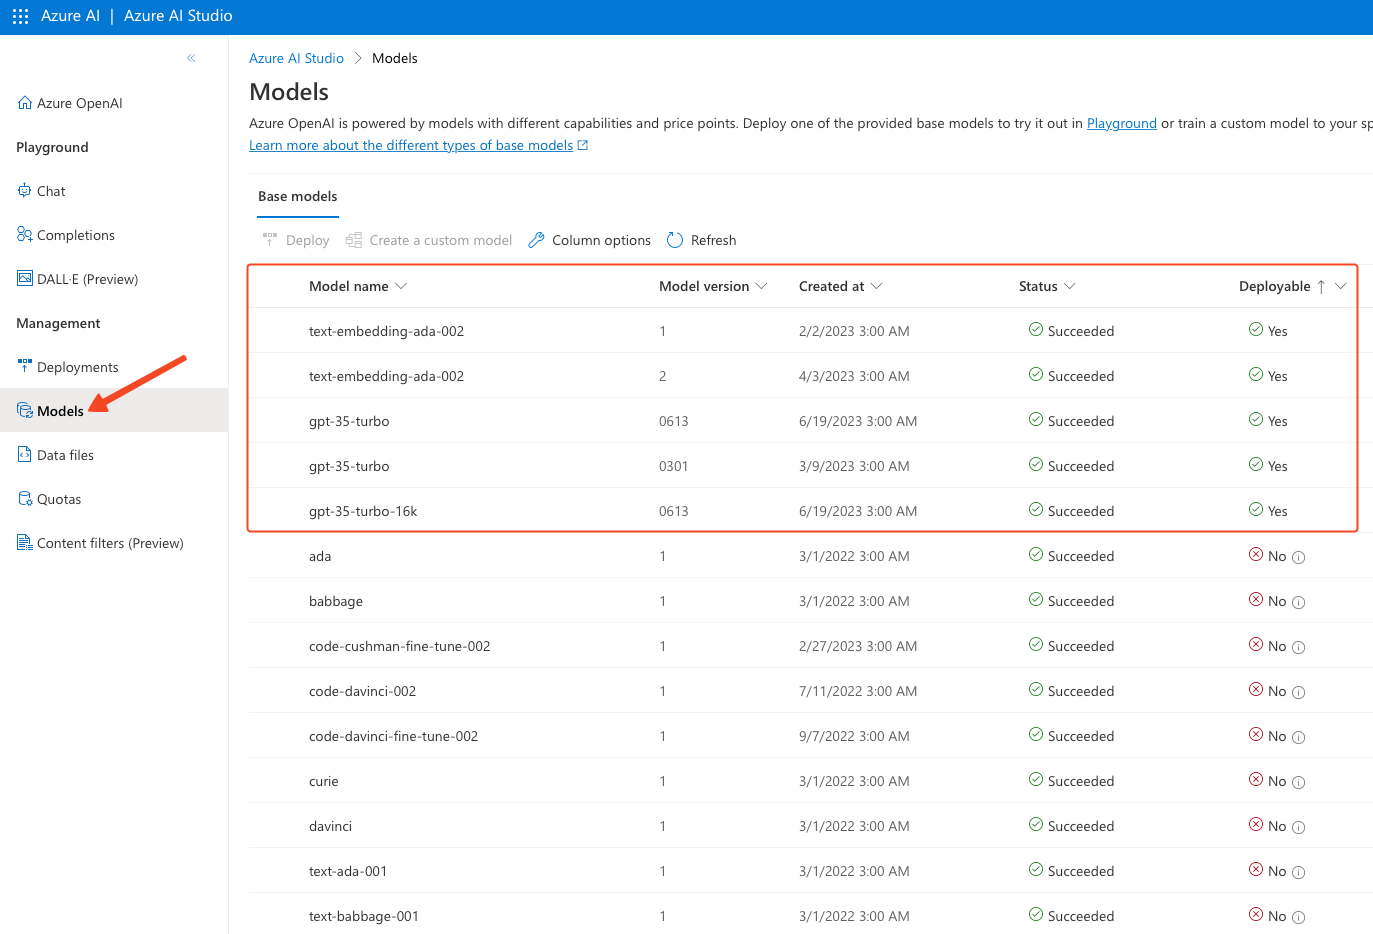
Only models marked "Yes" under "Deployable" can be deployed.
Deploying a Model
- Select a deployable model.
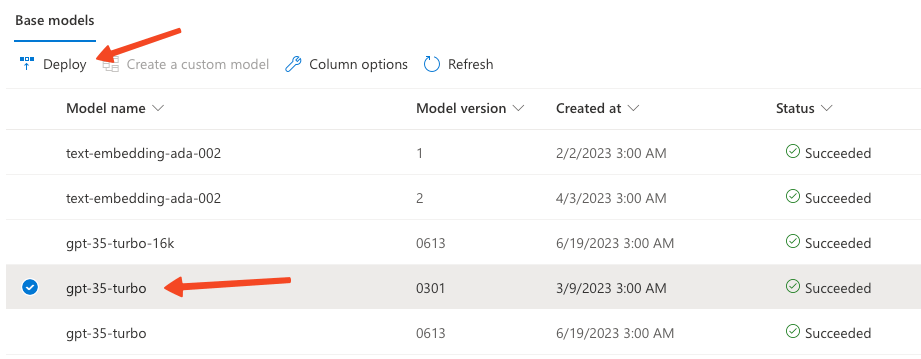
- Click
Deploy.
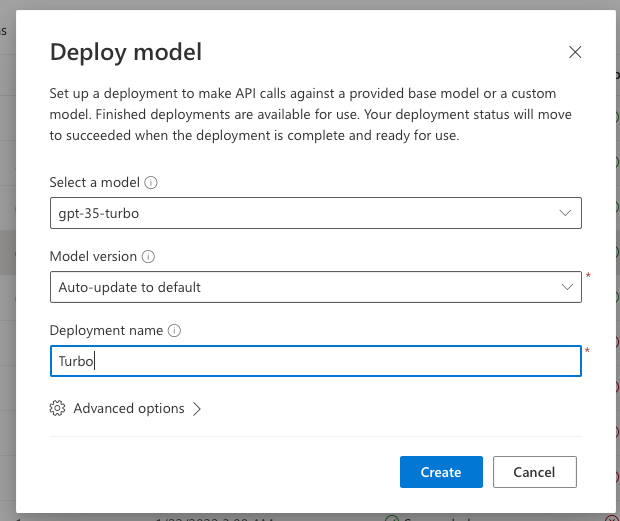
- Specify the base model, version, and deployment name. Click
Deploy. - Copy the deployment name and paste it into the plugin under
Settings>AI Engine.
For embeddings, deploy the text-embedding-ada-002 model and copy its name.
Save Settings
Click Save in the plugin after entering all details.
Limitations
Before setting Azure as your provider, note its limitations:
- Unsupported Modules: Fine-tuning and Audio Converter.
When you enable Azure:
- Speech to Text: Disabled because Whisper is not available on Azure yet.
- Moderation: Azure's content filtering replaces the plugin's moderation feature.
- Image Generator: Azure allows up to 5 images, while OpenAI allows up to 10.
Frequently Asked Questions (FAQs)
1. Why is GPT-4 not in the Azure model list?
You need to fill out another form to get on the GPT-4 waitlist. Apply here.
2. What is the price for using Azure OpenAI Service?
Pricing is pay-as-you-go. For details, check Azure OpenAI Service pricing.
3. What criteria does Azure use to evaluate and approve submitted use cases?
Azure evaluates based on:
- Responsible use of the service.
- Capacity to onboard and serve customers.
4. How is Azure OpenAI Service different from the OpenAI API provided by OpenAI?
Azure OpenAI Service combines OpenAI API capabilities with Azure's enterprise-level security, compliance, and regional availability.
5. What models are available through Azure OpenAI Service?
Azure OpenAI Service offers GPT-3, Codex, and Embeddings models. Dall·E 2 is available to invited customers. Learn more.
6. What is the service-level agreement (SLA) for Azure OpenAI Service?
Azure guarantees 99.9% uptime. For details, view the SLA.