User Portal
User Portal is a location where users who have purchased our plugin can manage their account details. This includes their profile information, websites, licenses, subscriptions, and invoices.
As a paid user, you can:
- View and manage the websites where you've installed the product.
- Deactivate licenses from websites.
- Upgrade, Downgrade or Cancel your subscriptions.
- Update your billing details.
- View your payment history and download invoices.
Receiving Your Portal Credentials
After successfully completing your payment, you will receive an email containing your login credentials for the User Portal.
Login Issues
If you forgot your password or did not receive it, you can easily generate a new one by using the "Forgot Password" option on the login page. You can access the login page here: User Portal Login
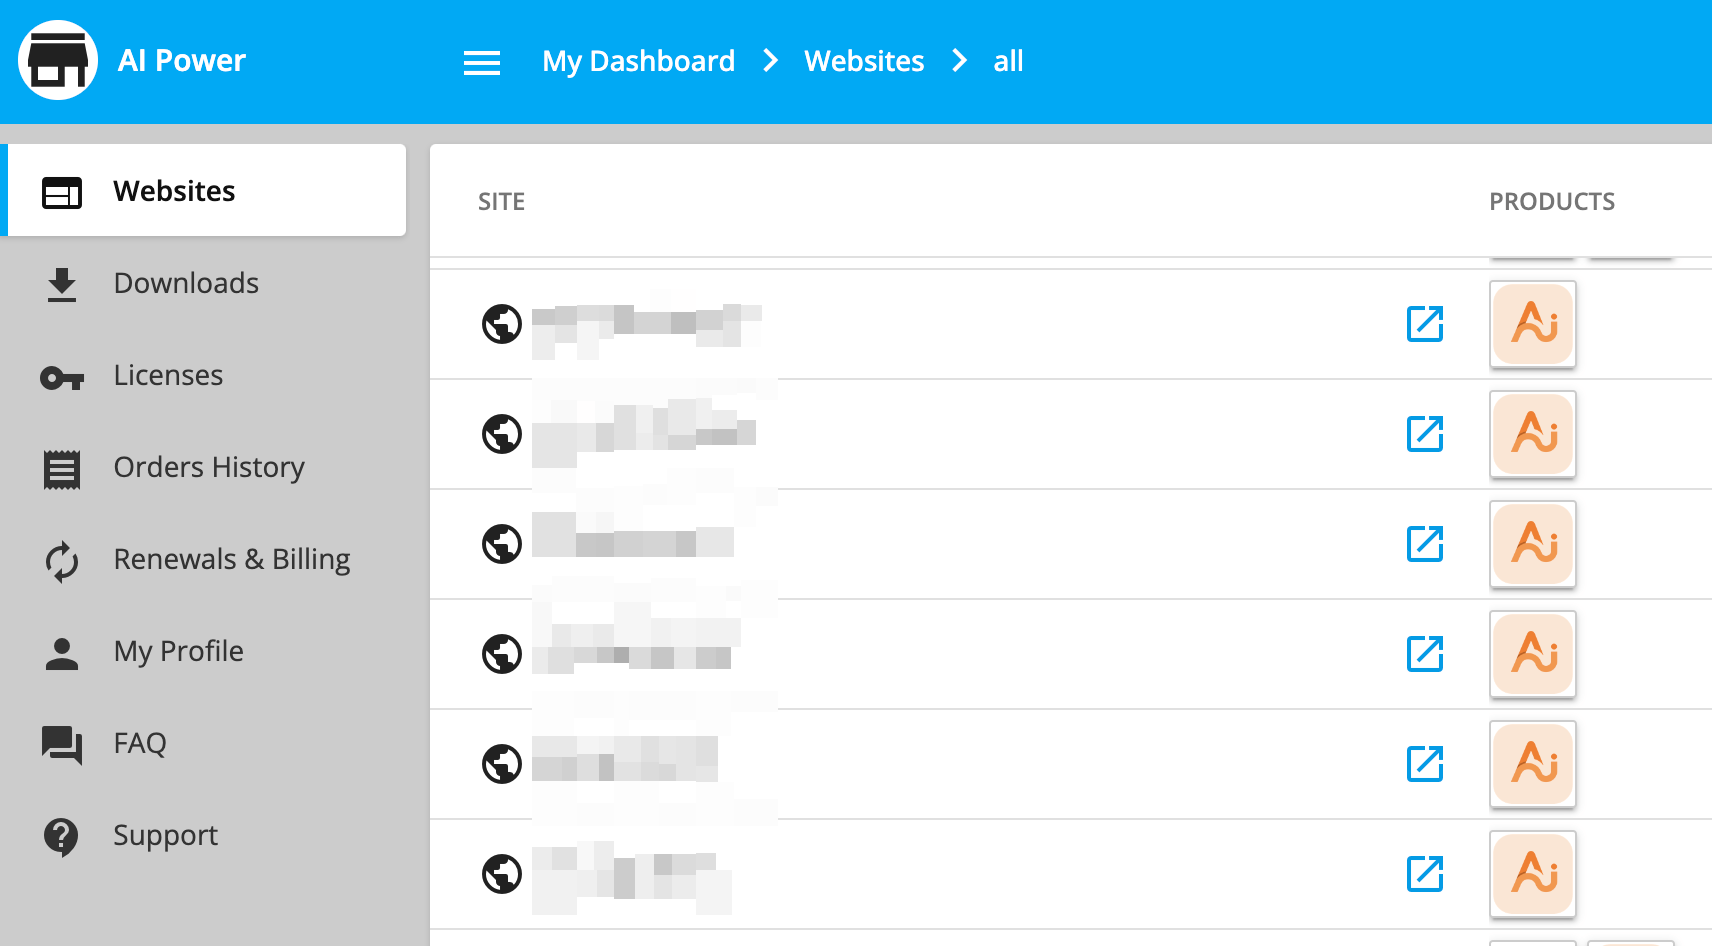
Website Management
Within the User Portal, you can manage all of your websites from a central location.
Add new sites, remove old ones, or change details at any time. This can be done through the following link: Manage Websites
Moving a license from one website to another
- Go to the Websites section.
- Click on the row of the website that currently has the license activated. If there are multiple products running on that site, the next screen will show you all of those products.
- Simply click on the relevant product to open the details panel, where you’ll be able to click the Deactivate button under the LICENSE section.
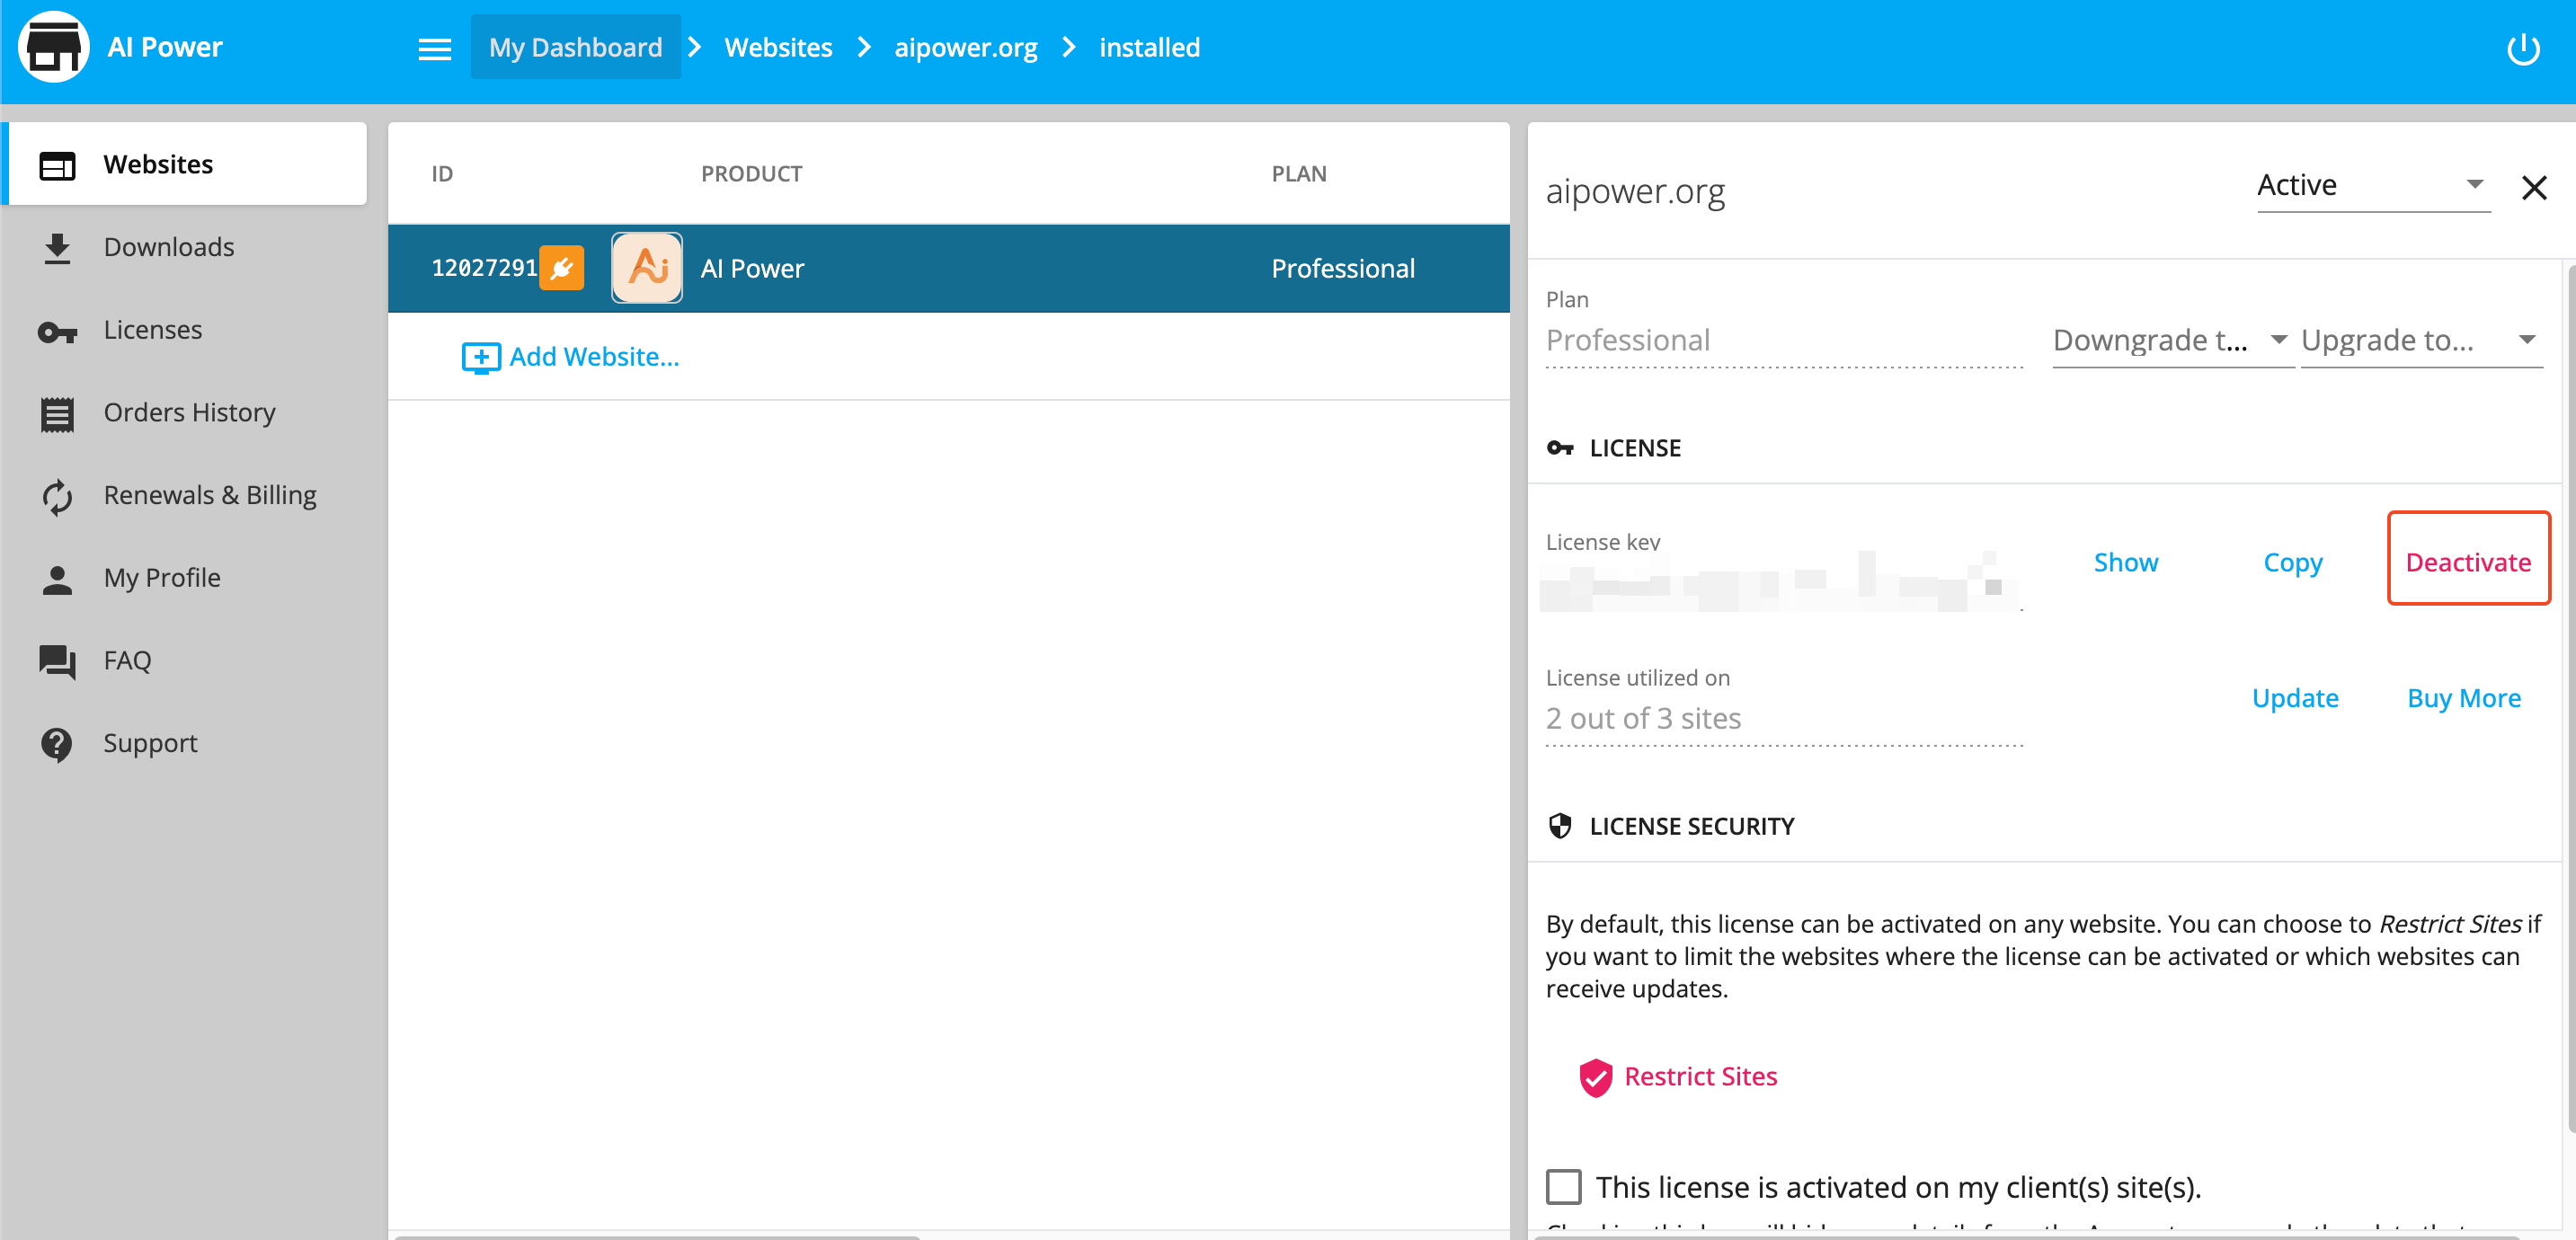
After the license is deactivated, you’ll be able to reuse it on any other website.
Downloads
You can access all your downloads from the portal.
It's the central repository for all your purchased items, available at this link: Downloads
Downloading older versions of the plugin
- Go to the Downloads section and look for the Download text.
- Click on the arrow icon beside it. It will open a menu with previous versions of a product.
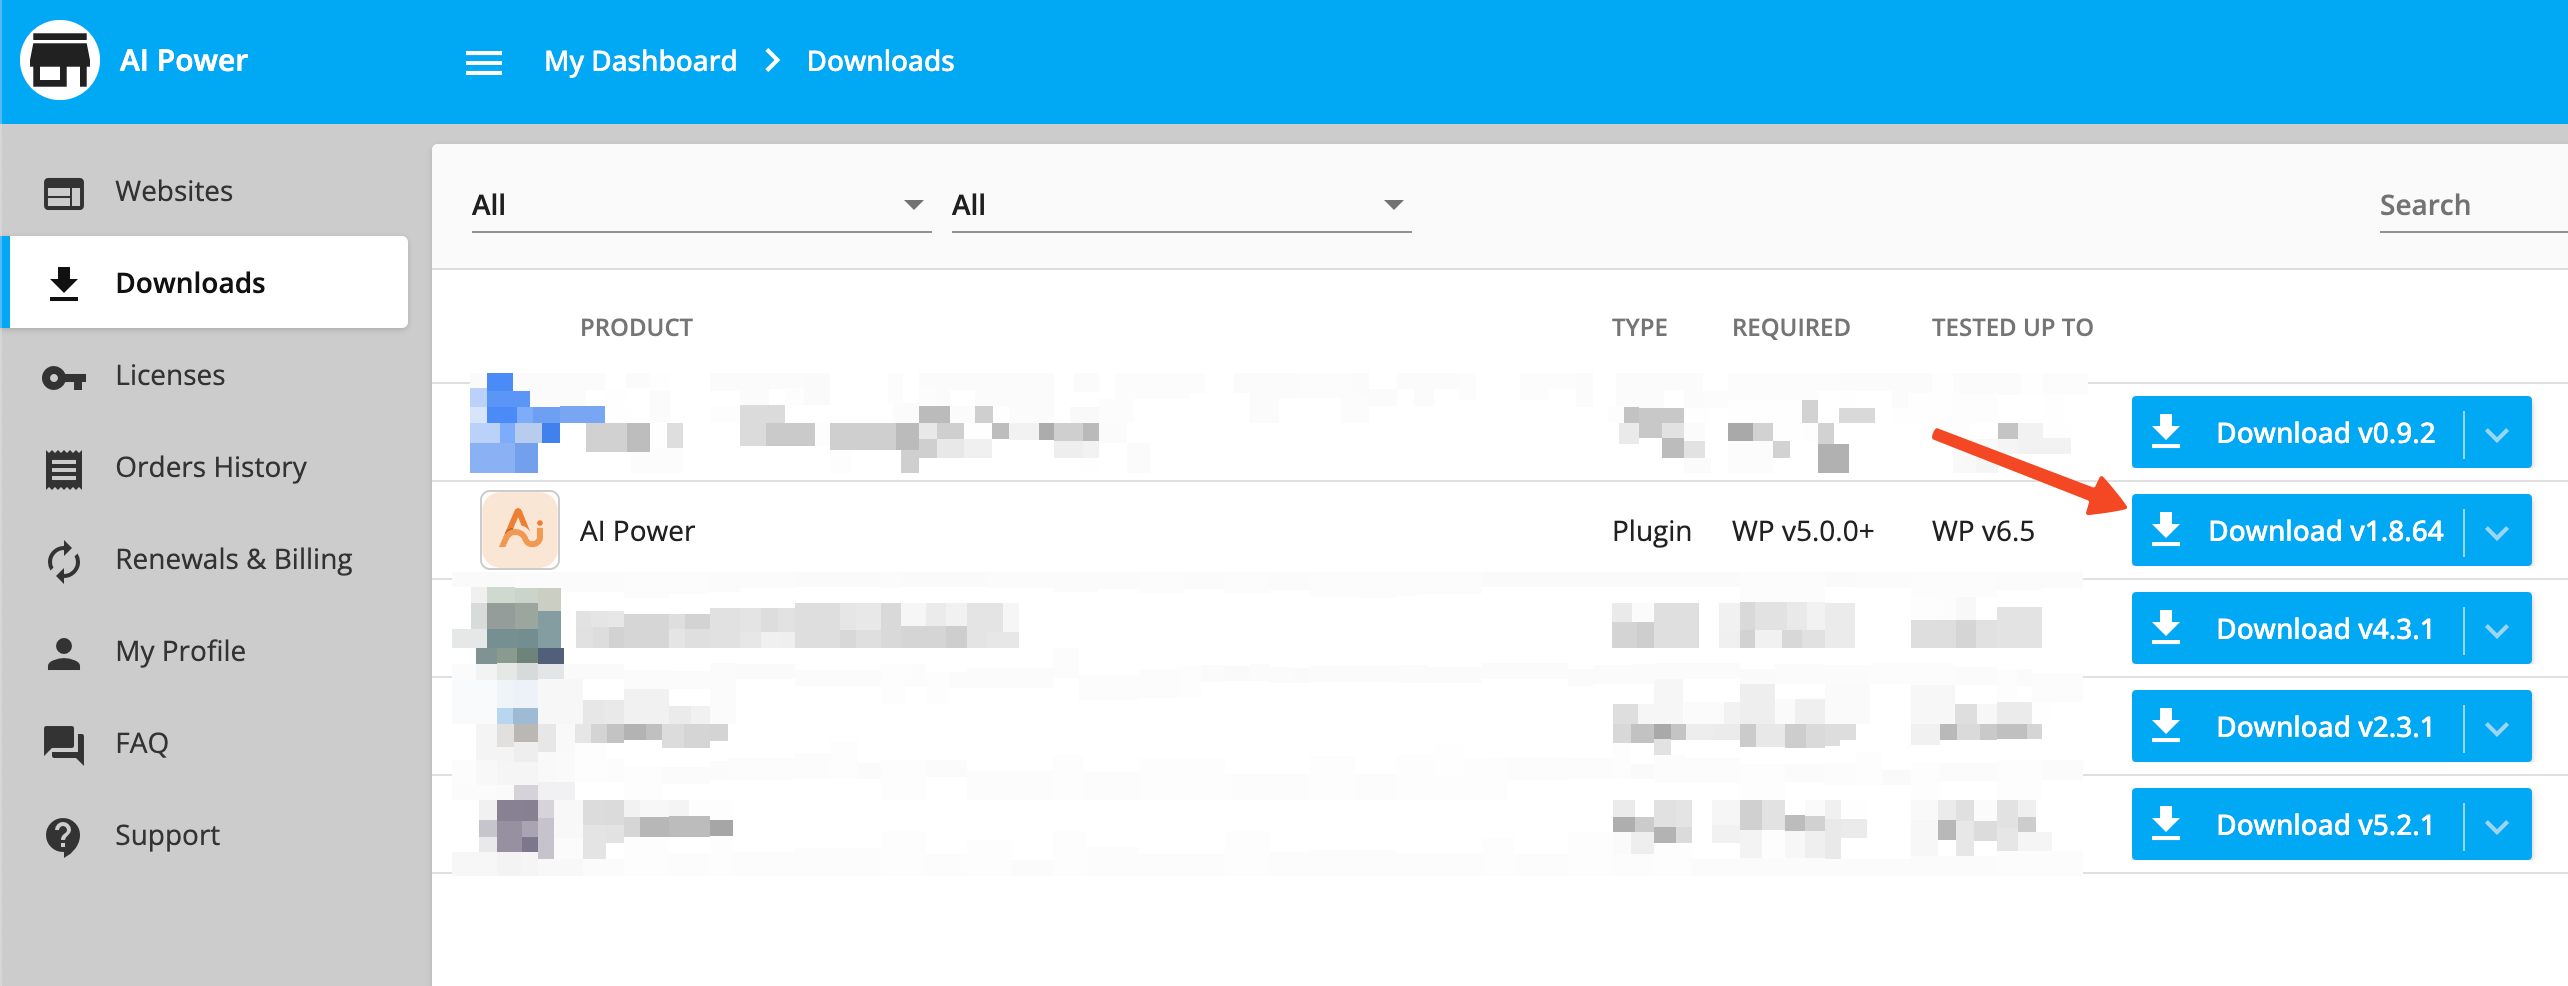
Click on the version you want to download.
Downloading the latest beta version of the plugin
Go to the Downloads section and look for the Download text. Click on the arrow icon beside it. It will open a menu with previous versions of a product.
Now, look for the Beta label and click on the required beta version to download it.
Updating your plugin
Plugin updates will become available automatically through your WordPress admin dashboard. When one is available, simply click Update. As long as you have an active license, it will update to the latest version.
License Management
Manage your licenses, activate, deactivate, or check the status of your licenses from the following link: Manage Licenses
Upgrading from a single site license to an N-sites license
- Go to the subscriptions section by clicking on the Renewals & Billing menu item.
- Locate the subscription that you'd like to upgrade its license's sites limit and select it by clicking on its row. This will open the subscription’s advanced panel.
- Then, next to the plan, click on the Upgrade to... dropdown list and choose the plan and license you'd like to upgrade to.
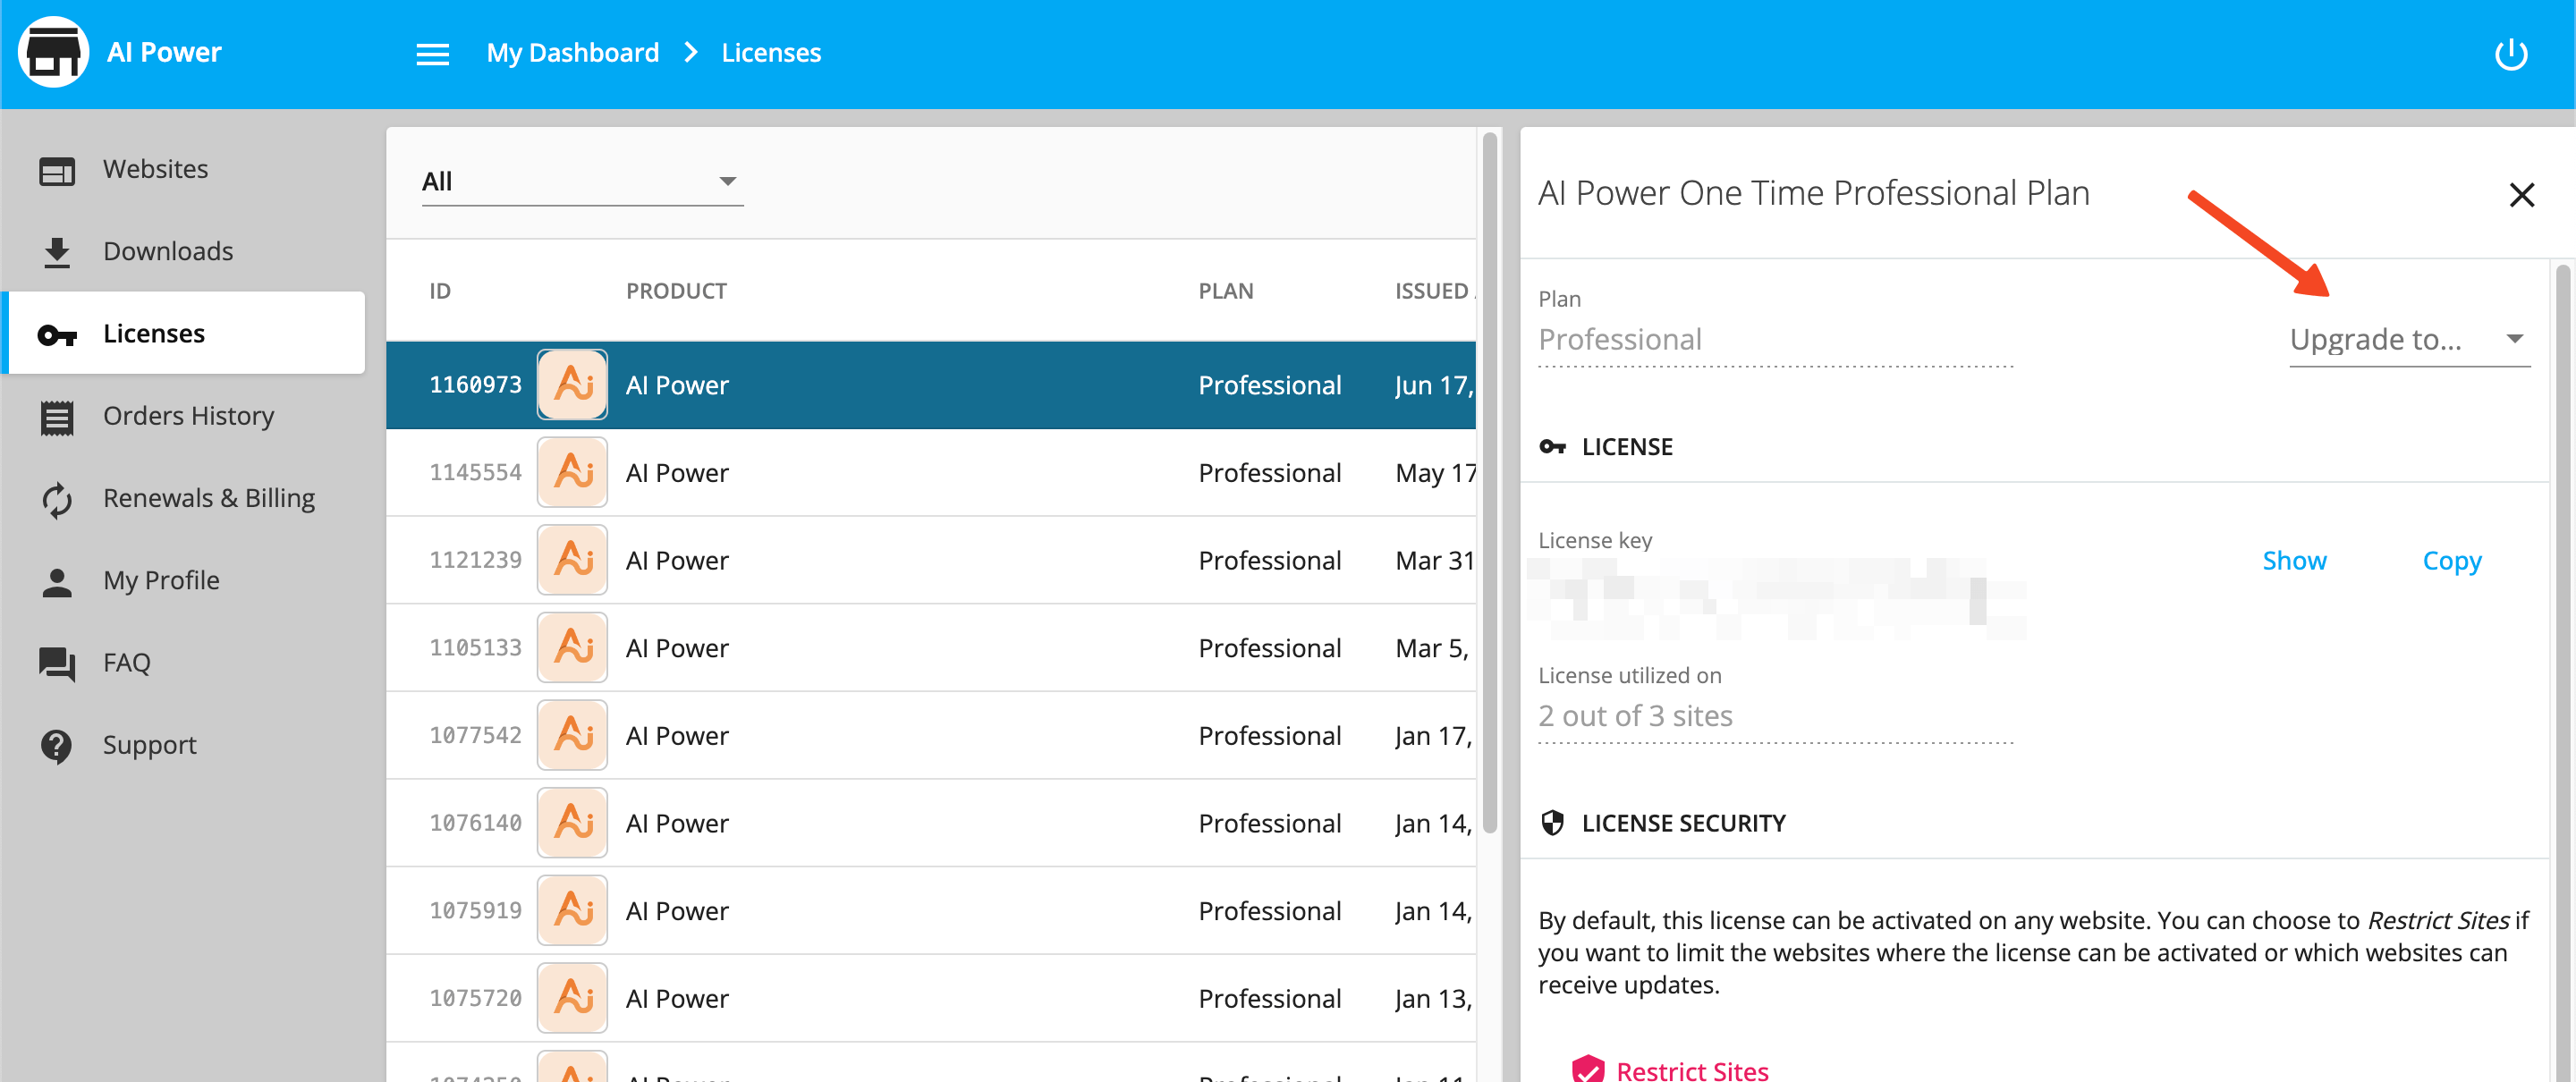
The initial payment will be automatically prorated.
Payments
Track your payment history, view past invoices, or update your payment details at this link: Payments
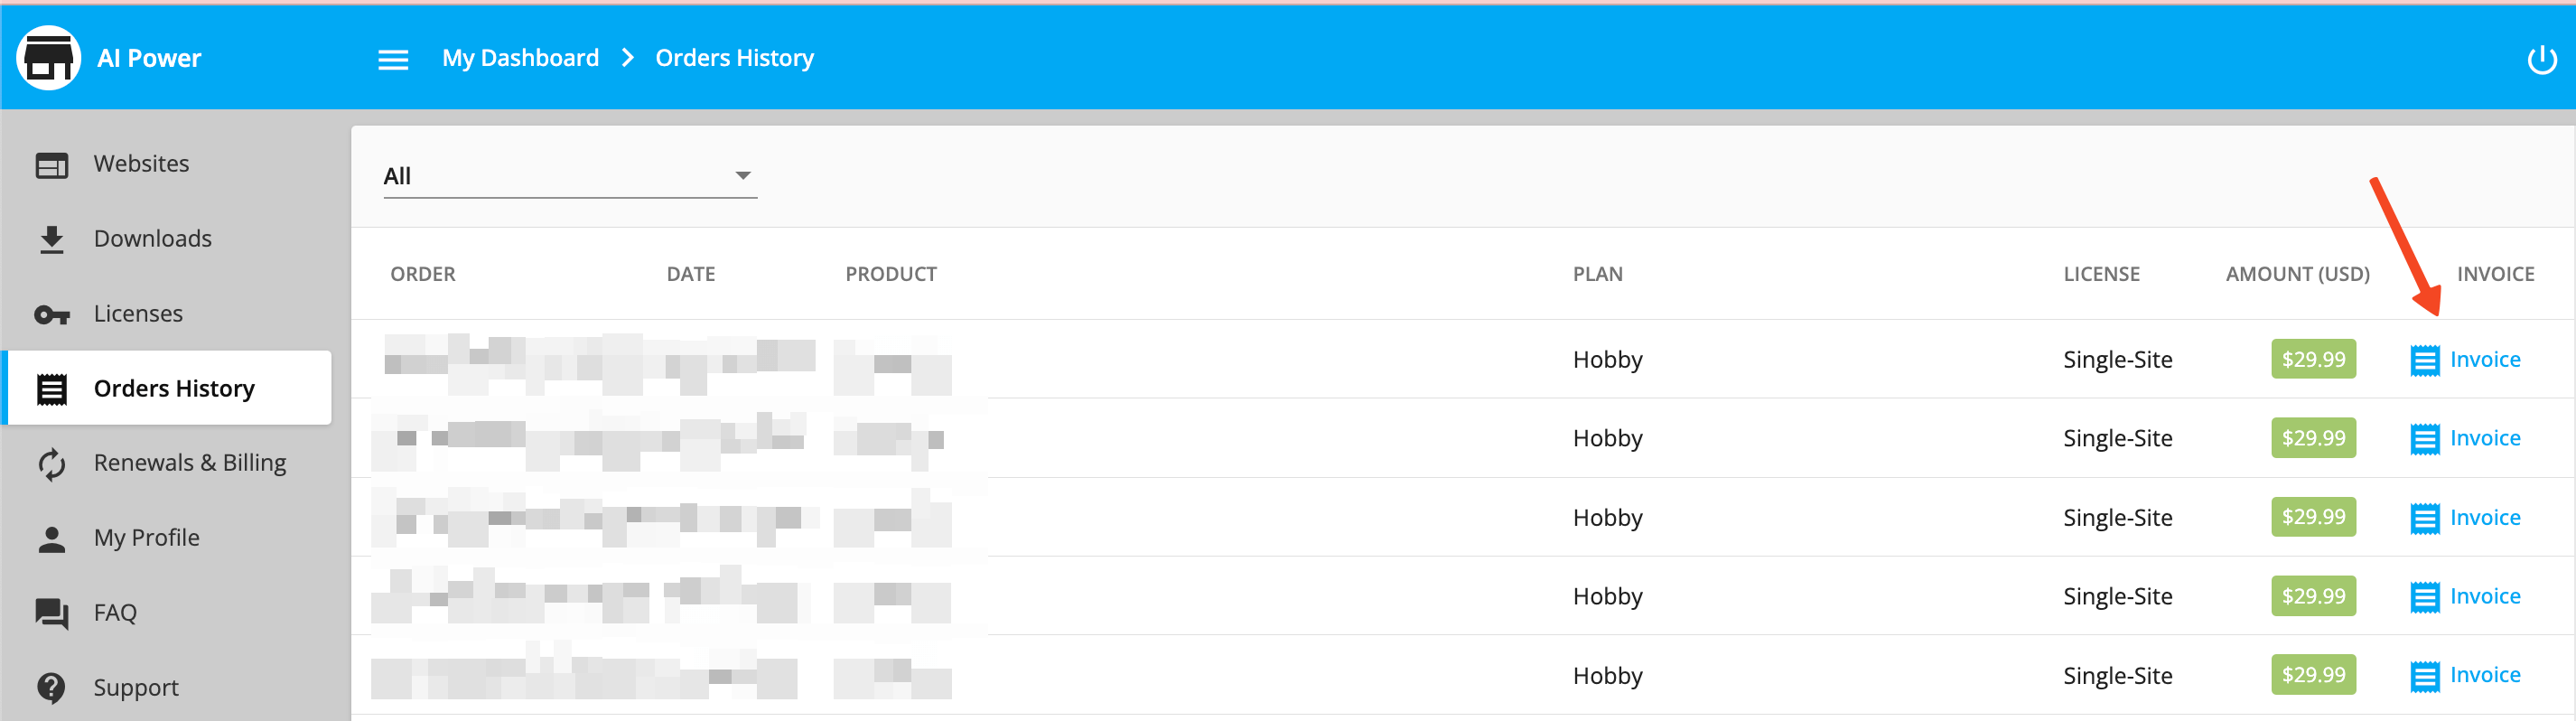
Obtaining a PDF invoice for your payments
You can access all of your payments in the Orders History section. To get a PDF invoice of a payment, just click Invoice button of the payment’s record.
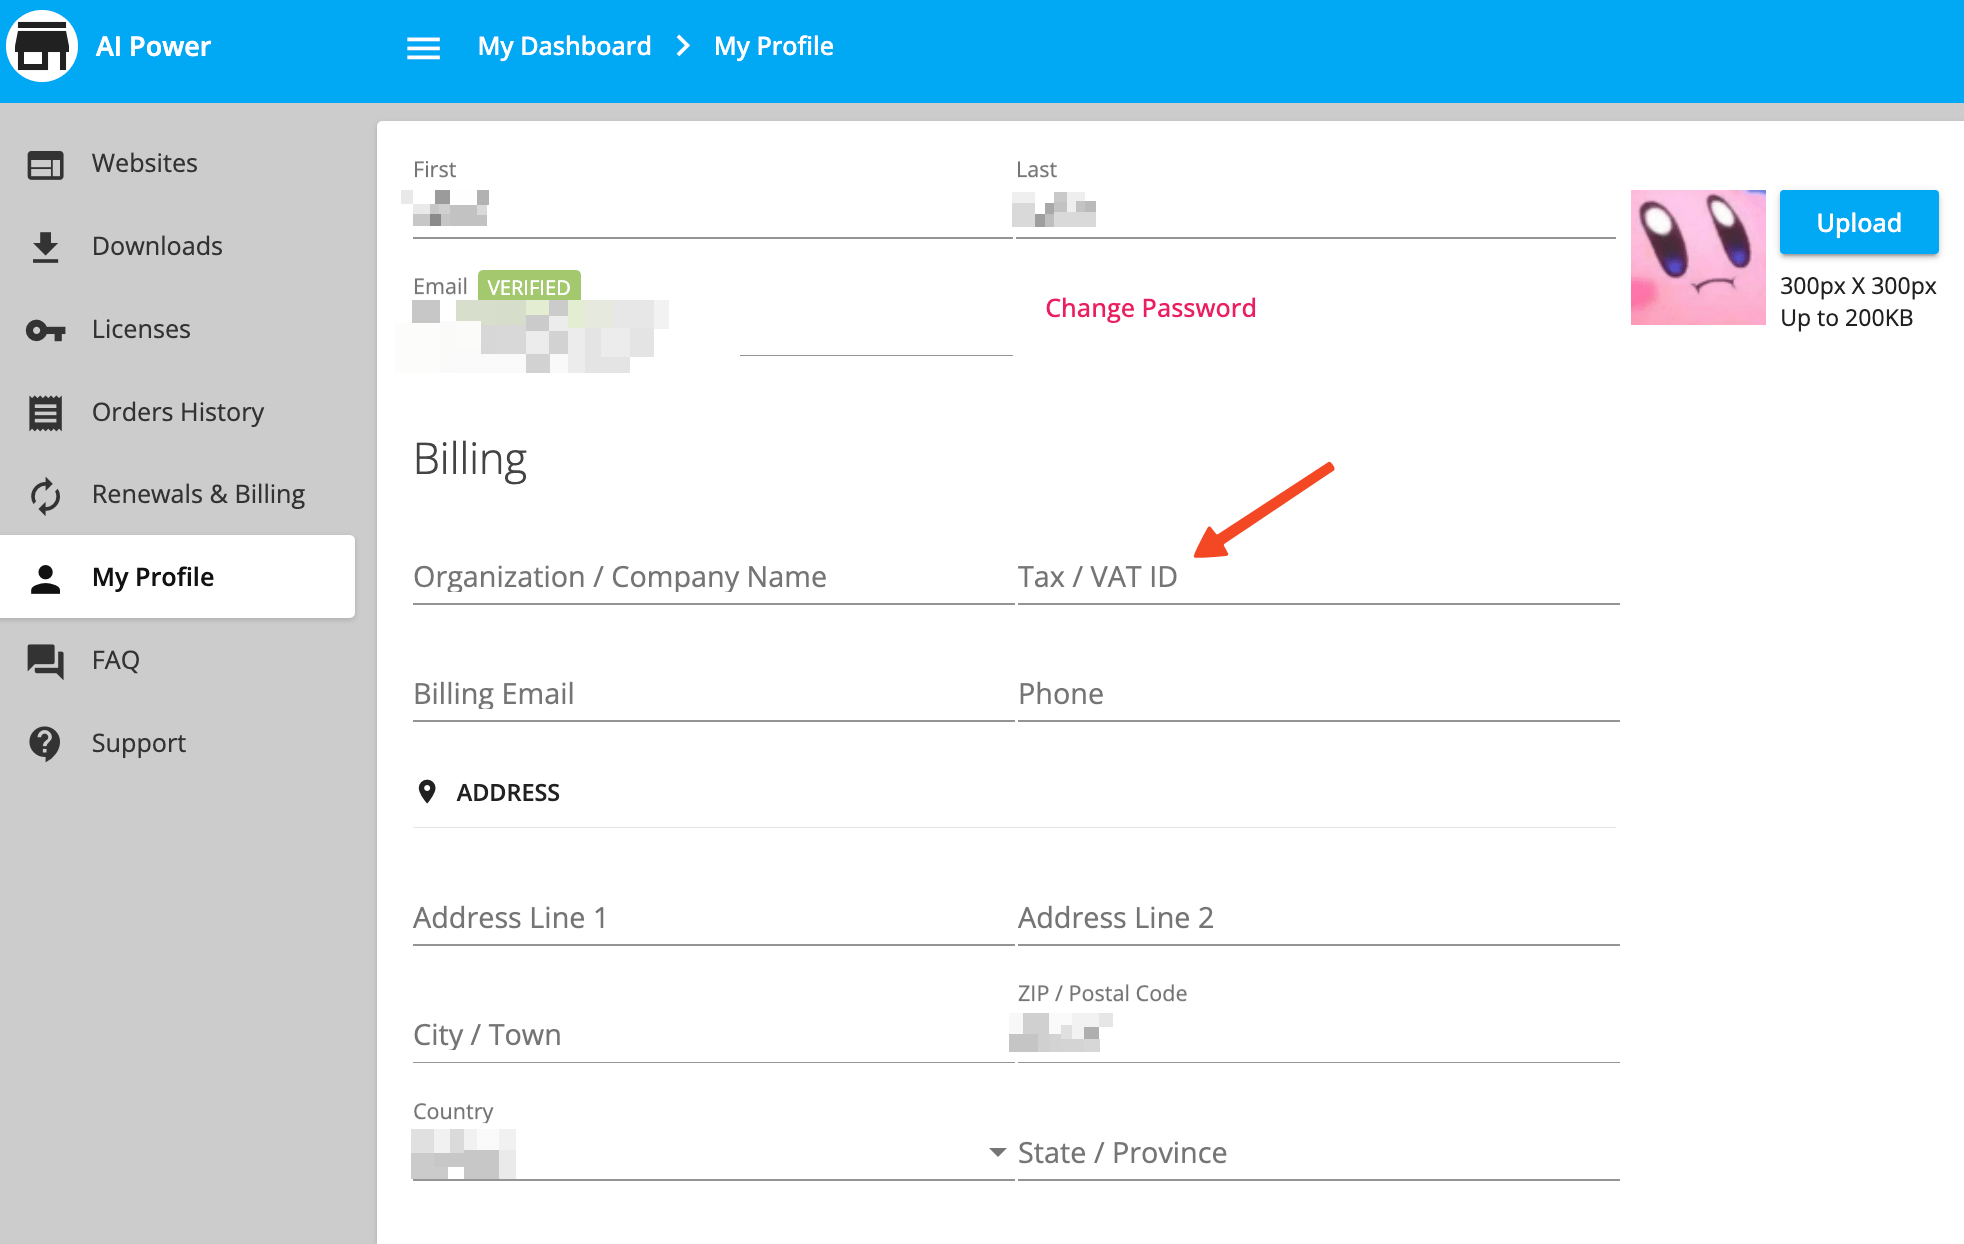
Adding a Tax/VAT ID and business details to your invoices
If you didn't enter a Tax/VAT ID during checkout, then it's entirely possible to do it afterward. It is often important to have this identifier displayed on invoices you receive after a purchase.
Go to My Profile and simply update the billing information. Now, if you go to the Orders History, the invoices will include your Tax/VAT ID.
Updating your payment method, credit card, or PayPal
- Go to the subscriptions section by clicking on the Renewals & Billing menu item.
- Locate the subscription that you'd like to update its payment method and select it by clicking on its row. This will open the subscription’s advanced panel.
- Then, click on the Update button next to the payment method, and checkout with your new payment method.

The initial payment will be automatically prorated based on the next renewal date.
Subscriptions
You can manage your subscriptions from the portal. Upgrade, downgrade, or cancel your subscriptions at any time from this link: Manage Subscriptions
Canceling your recurring subscription
You can access all your active subscriptions via the Renewals & Billing section. Active subscriptions will have a green label on the STATUS column and will start with AUTO RENEW ON. Simply click the row of the subscription that you’d like to cancel to access the subscription’s advanced panel, and then click the Cancel Auto-Renew button.
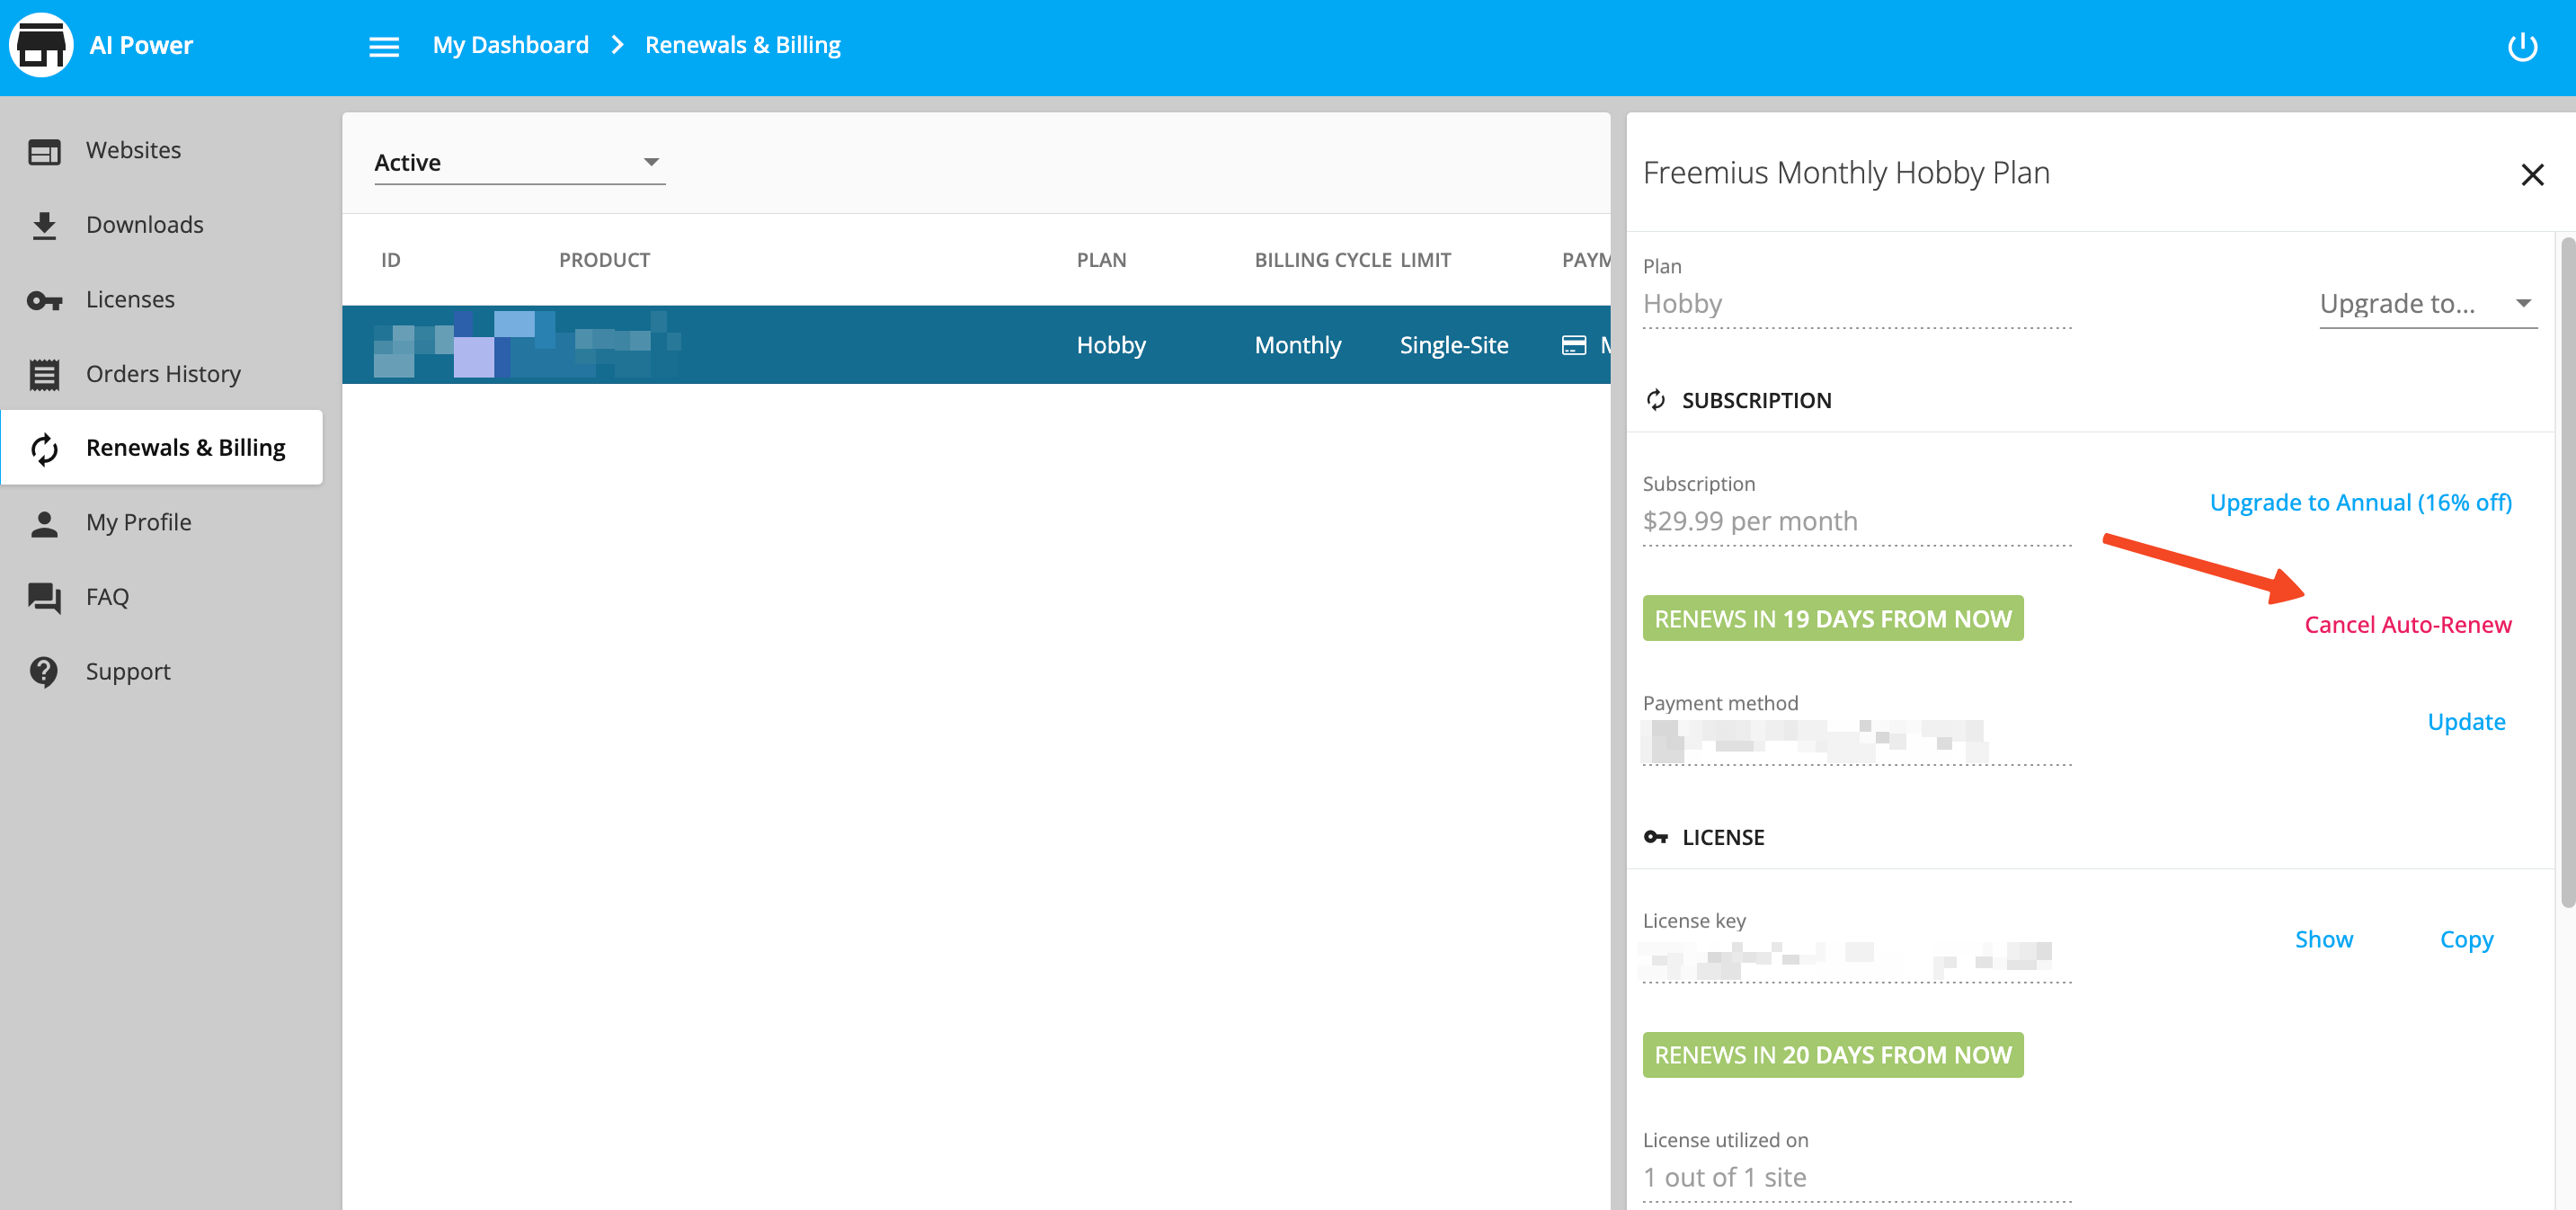
You’ll be prompted with a confirmation dialog, giving you the option to set up an email reminder instead of canceling right away. If you do proceed with the cancellation you’ll get a short feedback form where you can let us know why you are canceling the subscription. Your feedback is appreciated and will help us improve our offering. That said, the feedback is optional, so whether you provide it or not, hit the Send & Cancel renewals button to complete the subscription cancellation.
Profile Updates
Change your email, update your profile information, or add your Tax/VAT details from the following link: Profile Settings
Adding a Tax/VAT ID and business details to your invoices
If you didn't enter a Tax / VAT ID during checkout, then it's entirely possible to do it afterward. It is often important to have this identifier displayed on invoices you receive after a purchase.
Go to My Profile and simply update the billing information. Now, if you go to the Orders History, the invoices will include your Tax / VAT ID.
Priority Support
If you need assistance, access priority support at here.