wp_ai_client_prompt() to send AI requests through connectors configured in WordPress.
AI Puffer can manage those connectors. When management is enabled, WordPress AI Client requests route through AI Puffer provider settings, model defaults, logs, credits, and pricing rules.
This feature is available only on WordPress versions that include the WordPress AI Client and Connectors API.
Enable
Let AI Puffer manage WordPress AI connectors.
Routing
Understand providers, defaults, and model selection.
Usage
Use existing logs, credits, and pricing rules.
Approvals
Work with WordPress connector approval checks.
Requirements
You need:- WordPress 7.0 or later with AI support enabled.
- AI Puffer installed and active.
- At least one provider configured in AI Puffer > Settings > AI.
Enable Management
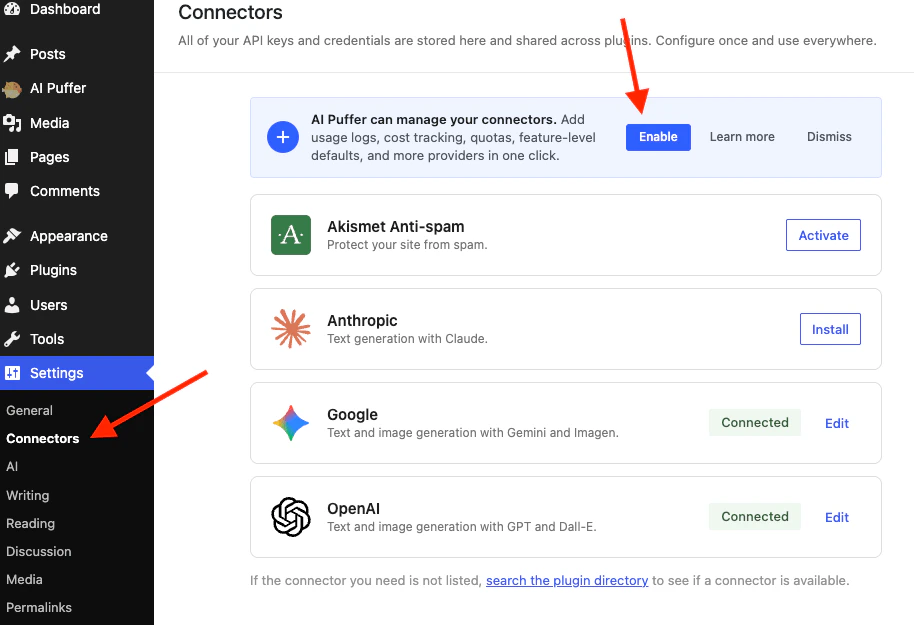
You can enable management from the WordPress connector screen:- Open WordPress Admin > Settings > Connectors.
- Find the AI Puffer banner.
- Click Enable.
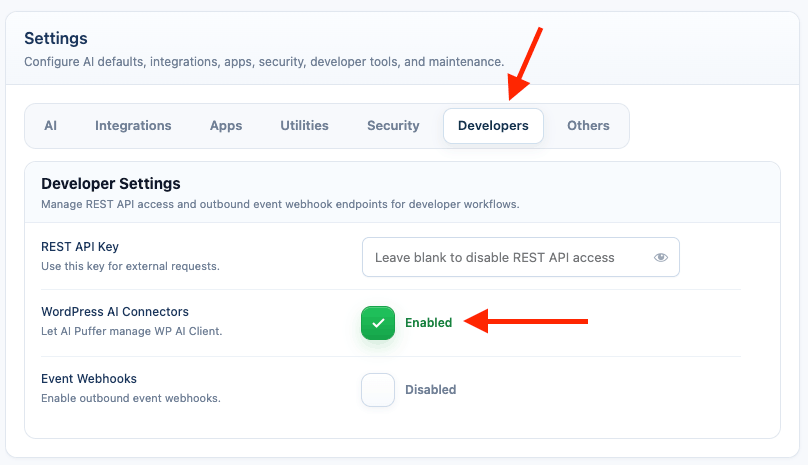
- Open AI Puffer > Settings > Developers.
- Find WordPress AI Connectors.
- Turn it on.
Stop Management
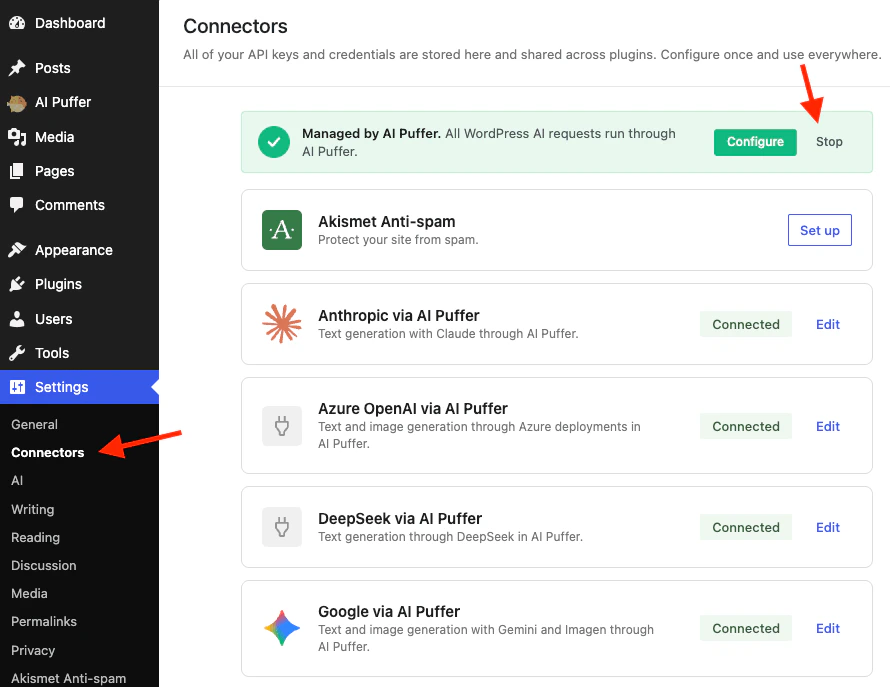
To stop AI Puffer from managing WordPress AI connectors:- Open WordPress Admin > Settings > Connectors.
- Find the Managed by AI Puffer banner.
- Click Stop.
How Routing Works
When management is enabled, AI Puffer registers these providers for the WordPress AI Client:
AI Puffer also exposes default route models for WordPress AI features:
AI Puffer infers these routes from your existing provider settings. You do not need to configure a separate WordPress AI Client model list.
Usage Logs, Credits, and Pricing
AI Puffer logs WordPress AI Client requests separately from AI Puffer module requests.
Chatbot, AI Forms, and Images quotas are not used for WordPress AI Client requests. Those quotas belong to specific AI Puffer modules, while a generic
wp_ai_client_prompt() request is not tied to a chatbot, form, or image-generator request.
Generated requests are logged with the module label WP AI Client. In conversation details, you can see the provider, model, usage, request type, and response data when available.
If you use credits or pricing rules, AI Puffer records the final usage after the response returns. Module quotas are not enforced for these requests.
Connector Approvals
The WordPress AI plugin includes an experimental Connector Approvals screen. If that feature is enabled, WordPress can block AI connector requests until an administrator approves the caller. When AI Puffer manages connectors, approvals can involve two layers:
If a request is blocked, open WordPress Admin > Tools > Connector Approvals and review the pending request. Approve only the plugins, themes, and connectors you want to allow.
For Developers
Use the standard WordPress AI Client API. You do not need to call AI Puffer-specific PHP functions for WordPress AI Client compatibility.Troubleshooting
A connector approval error appears
A connector approval error appears
Open WordPress Admin > Tools > Connector Approvals.Approve AI Puffer for the connector first. If the request came from another plugin or theme, approve that caller too.
A request uses the wrong provider or model
A request uses the wrong provider or model
Check the provider settings used by AI Puffer:
- Open AI Puffer > Settings > AI.
- Confirm the selected provider and default model.
- Sync models if the model list is stale.
- For image generation, check AI Puffer > Images settings.
The provider says credits or billing are missing
The provider says credits or billing are missing
The provider account is out of credits, blocked by billing settings, or using a key from the wrong account.Open the provider dashboard and check billing, spend limits, and API key access.