Content Creation
The Create New Content category allows you to generate complete articles automatically based on various inputs, from a simple list of topics to an RSS feed or Google Sheet.
When you create a content writing task, you will be guided through a multi-step wizard to configure every aspect of the generated posts. Instead of generating content instantly, this module creates an automated task that runs in the background according to your schedule.
Creating a Content Writing Task
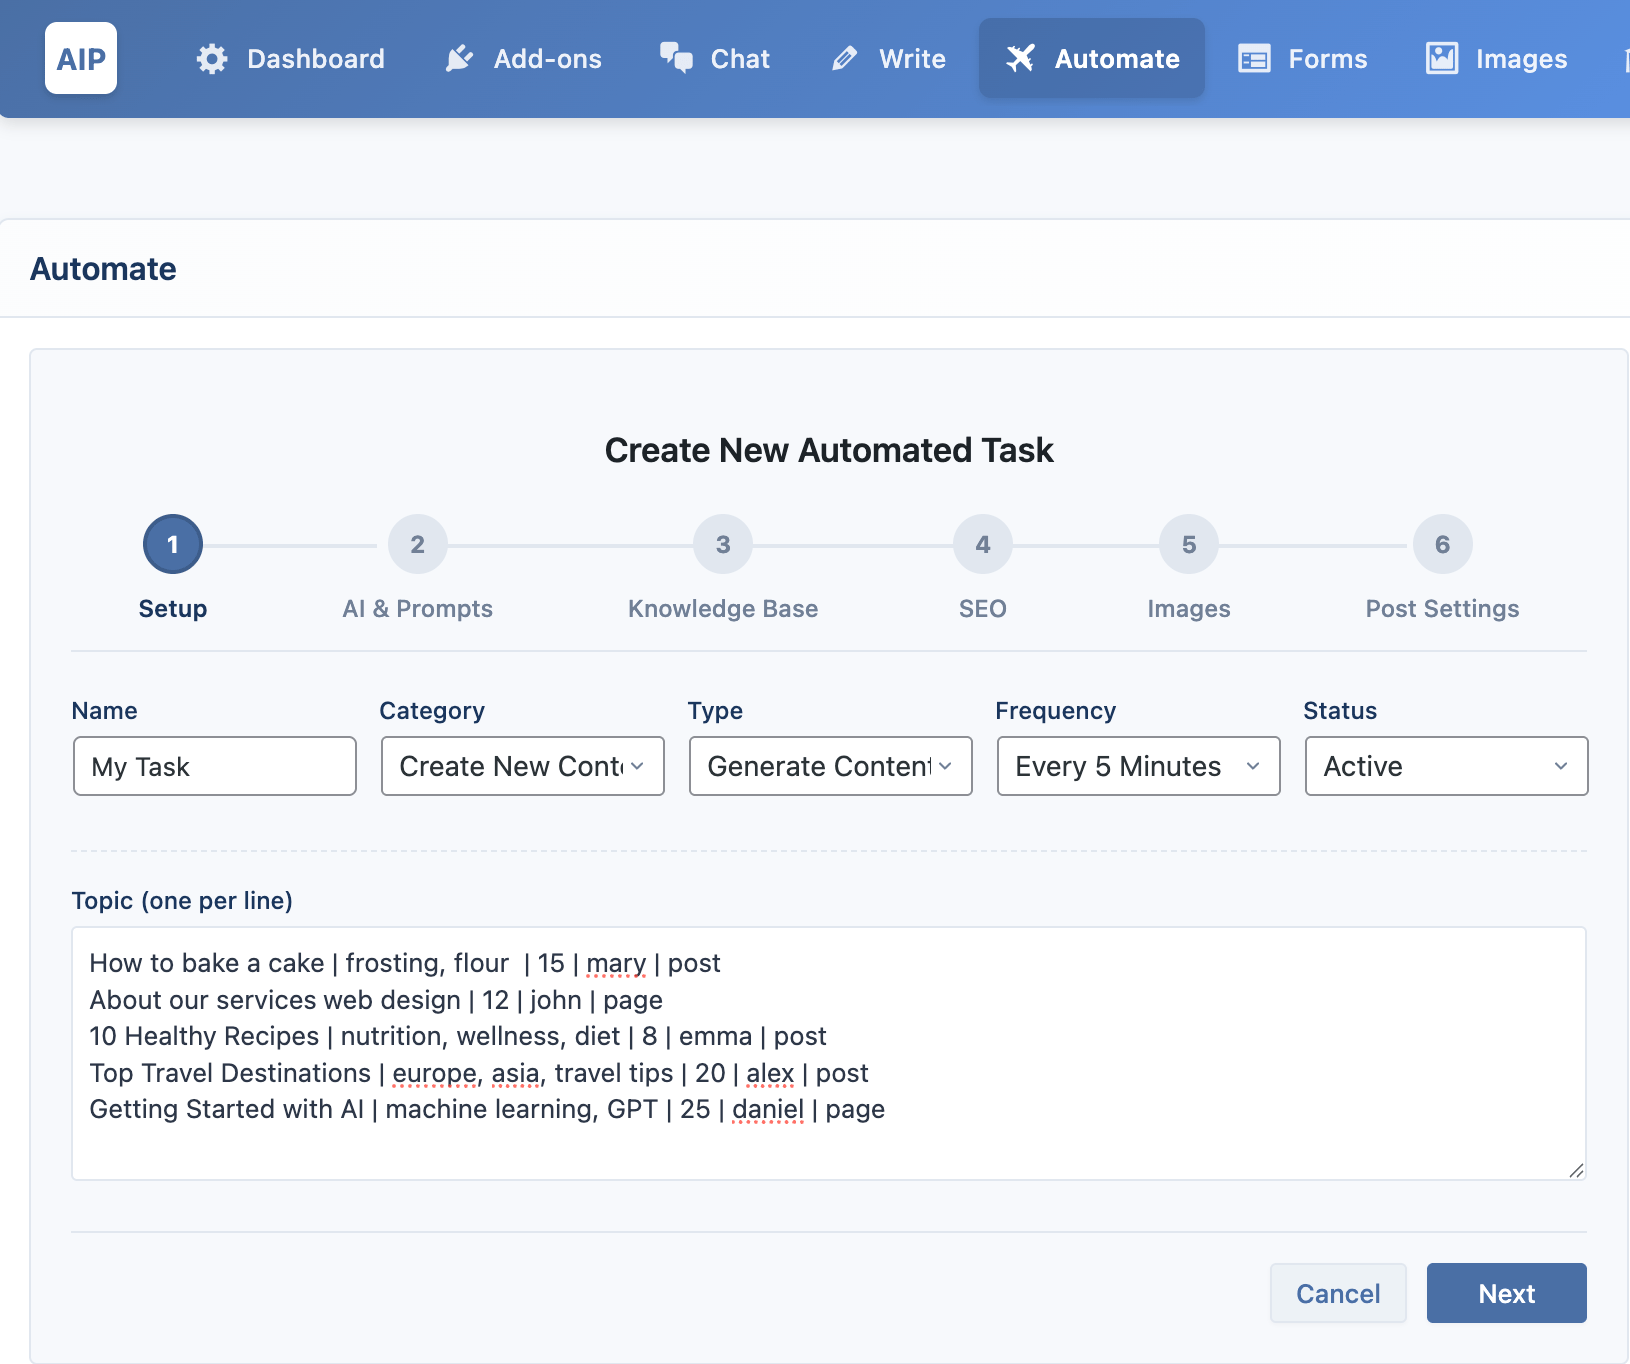
- Navigate to AIP > Automate and click Add New Task.
- Give your task a descriptive Name.
- From the Category dropdown, select Create New Content.
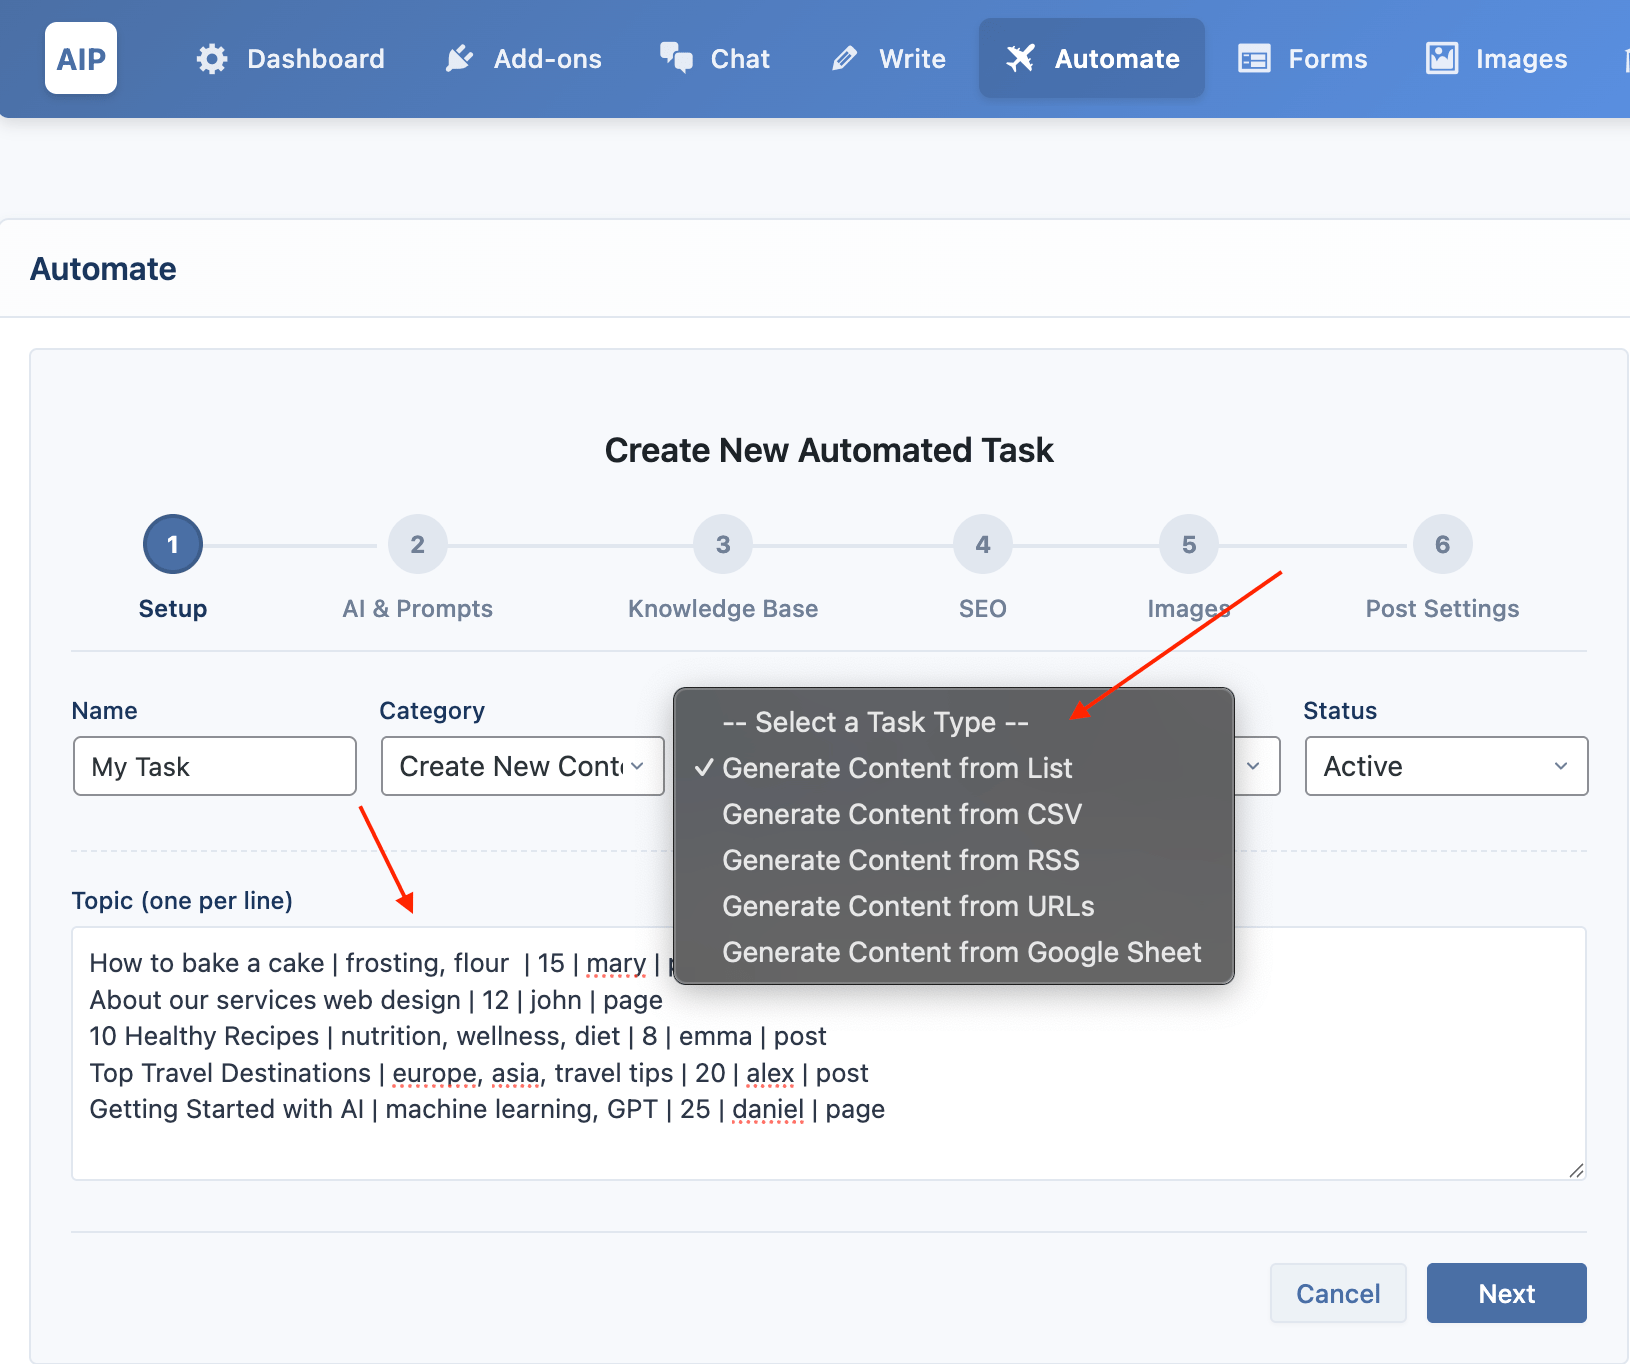
- Choose the Type of content source you want to use (e.g., From List, From CSV, From RSS).
- Set your desired Frequency and ensure the Status is Active. You can choose One-time to run the task once and have it pause automatically upon completion.
Content Source
The first step of the wizard is Setup, where you define your content source.
List
This mode allows you to enter a list of topics directly.
- Format: Enter one topic per line. You can also include keywords, a category ID, an author username, a post type slug, and a schedule date, separated by
|. - Example:
How to bake a cake | frosting, flour | 15 | mary | post
About our services | web design | 12 | john | page | 2025-12-25 14:30
The future of AI in marketing
CSV
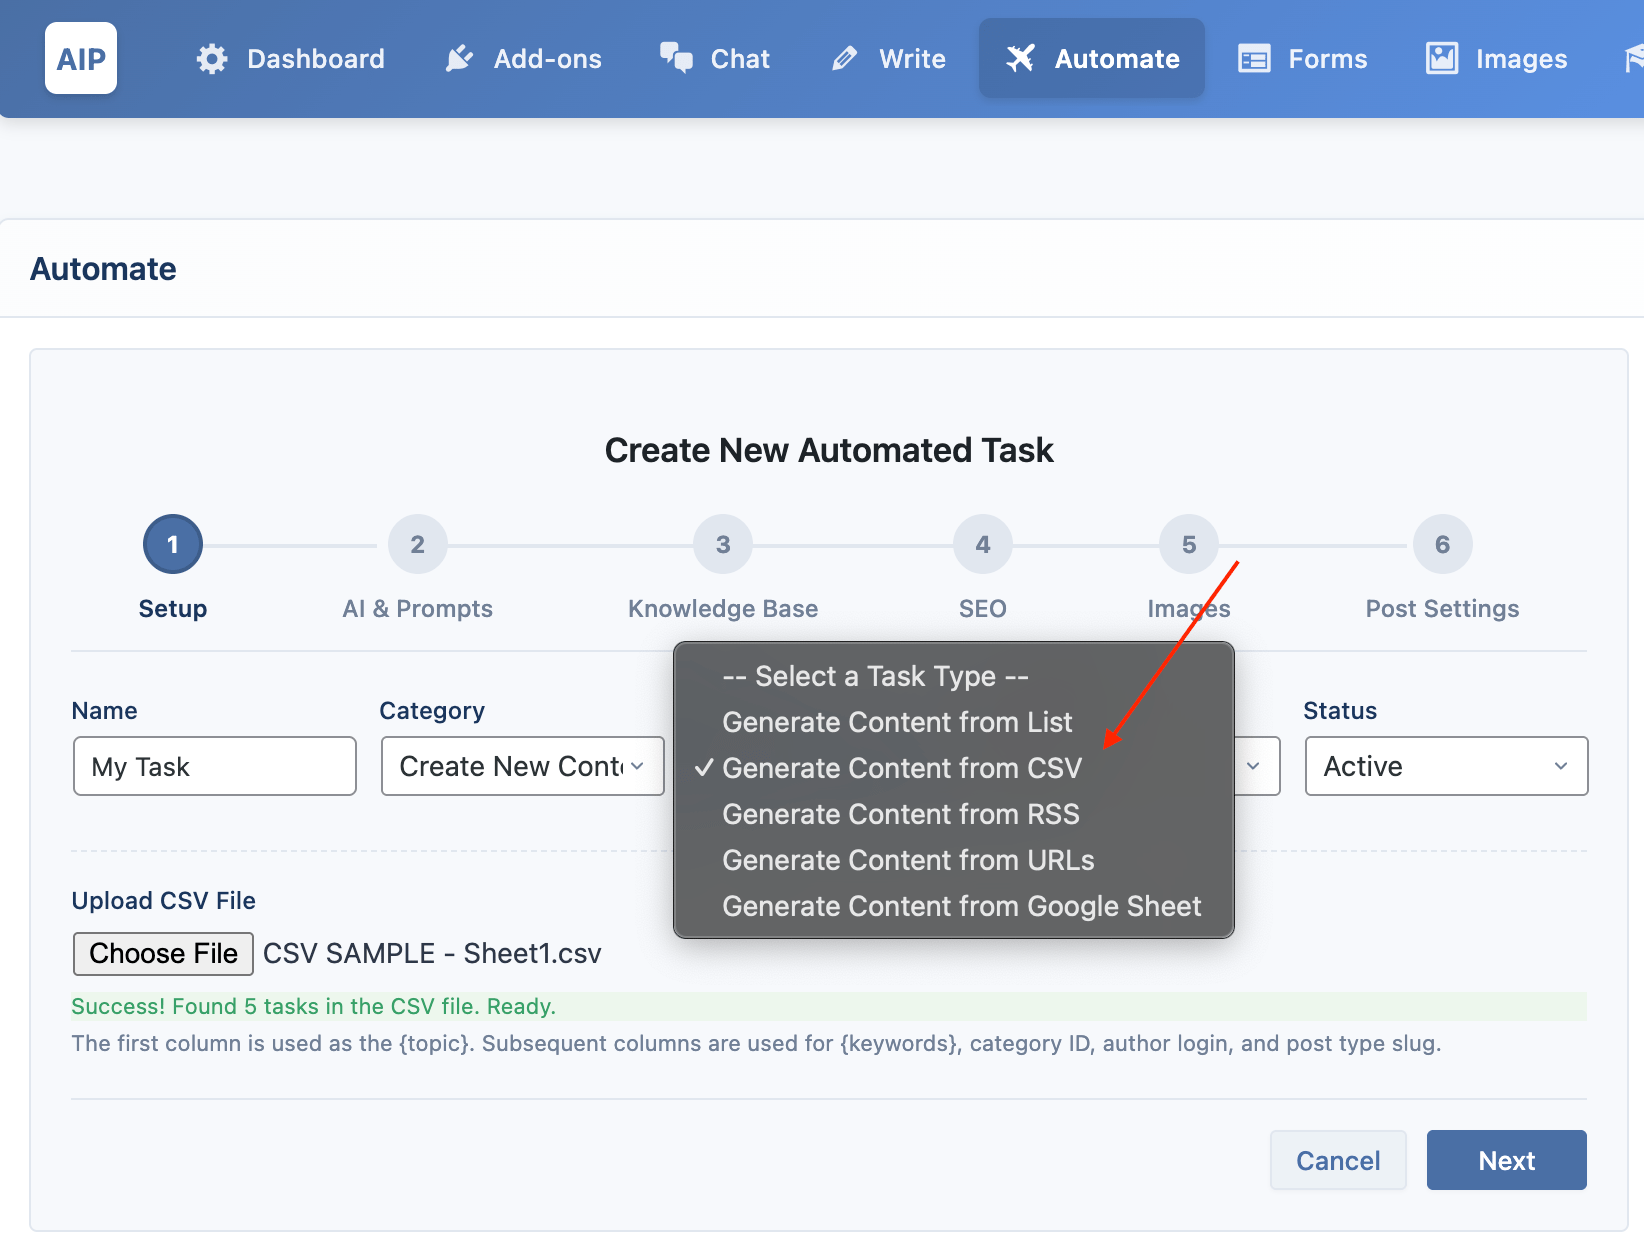
This mode lets you generate articles by importing topics from a CSV file.
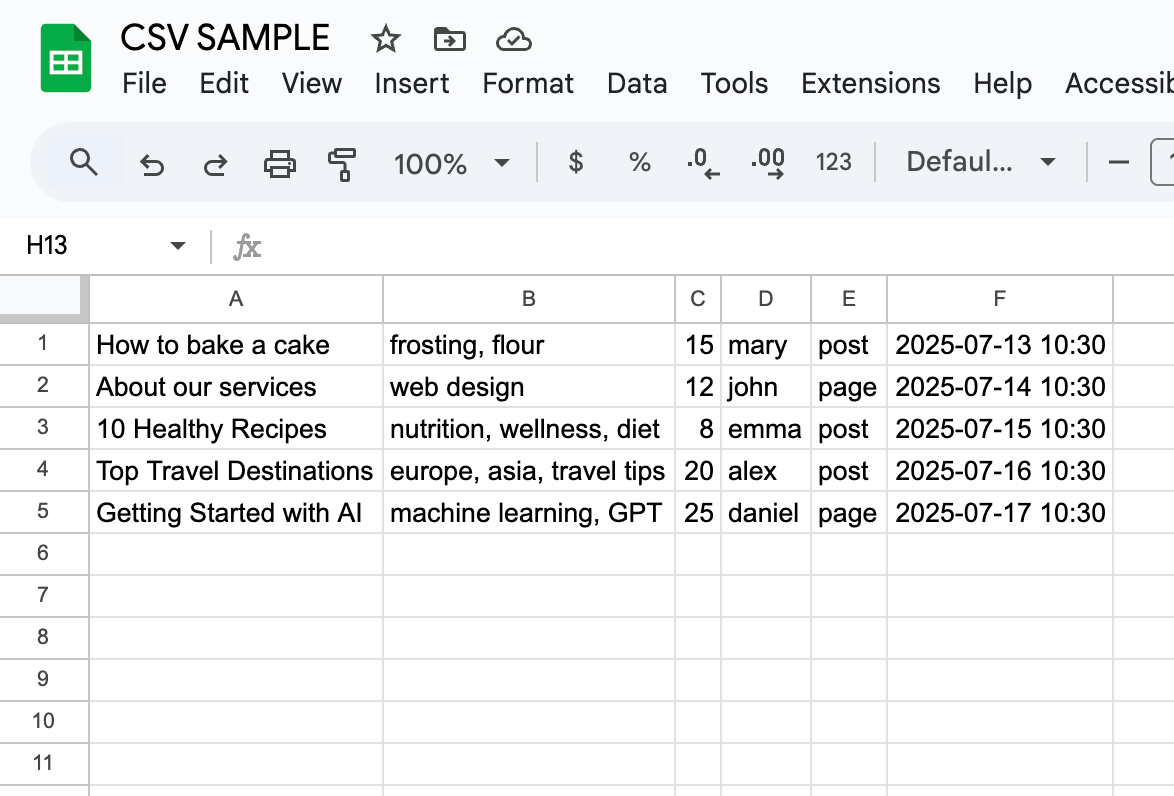
- Format: The columns in your CSV file must be in the order:
Topic,Keywords,Category ID,Author Username,Post Type Slug,Schedule Date (YYYY-MM-DD HH:MM). - Usage: Click "Choose File" to upload your CSV. The system will parse the file and prepare the topics for the task.
To ensure you have the correct format, you can download a sample CSV file here.
RSS
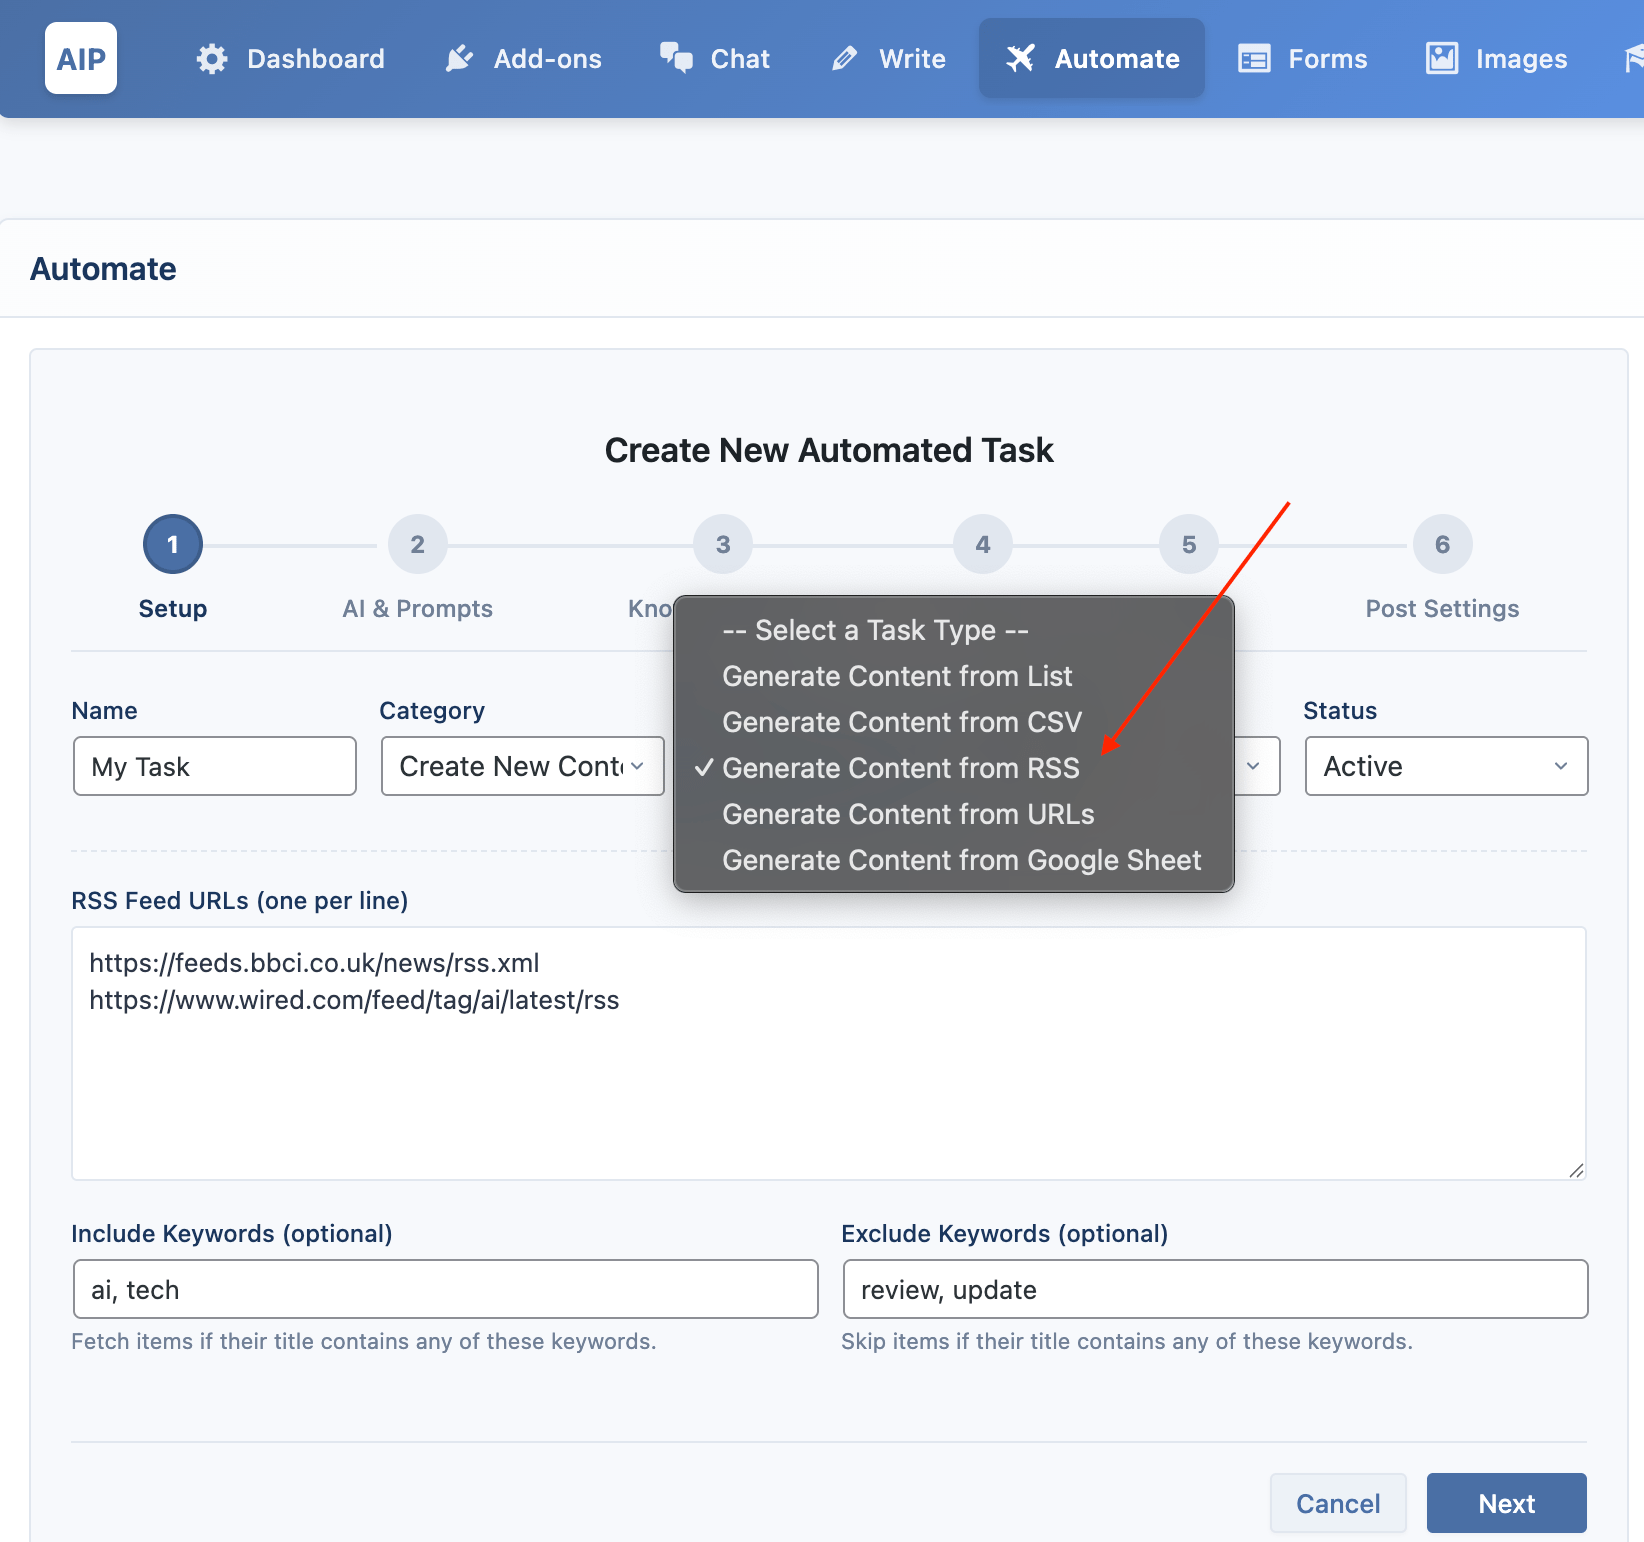
This mode automatically creates articles from new items in one or more RSS feeds.
- Format: Enter one RSS feed URL per line in the provided text area.
- Filtering: You can use the Include Keywords and Exclude Keywords fields to control which feed items are used to generate content.
- Prompting: Use the
{description}and{source_url}placeholders in your prompt to include the item's description and URL from the RSS feed as context.
URL
This mode generates articles by fetching content from a list of URLs. This is useful for summarizing or rewriting existing web pages.
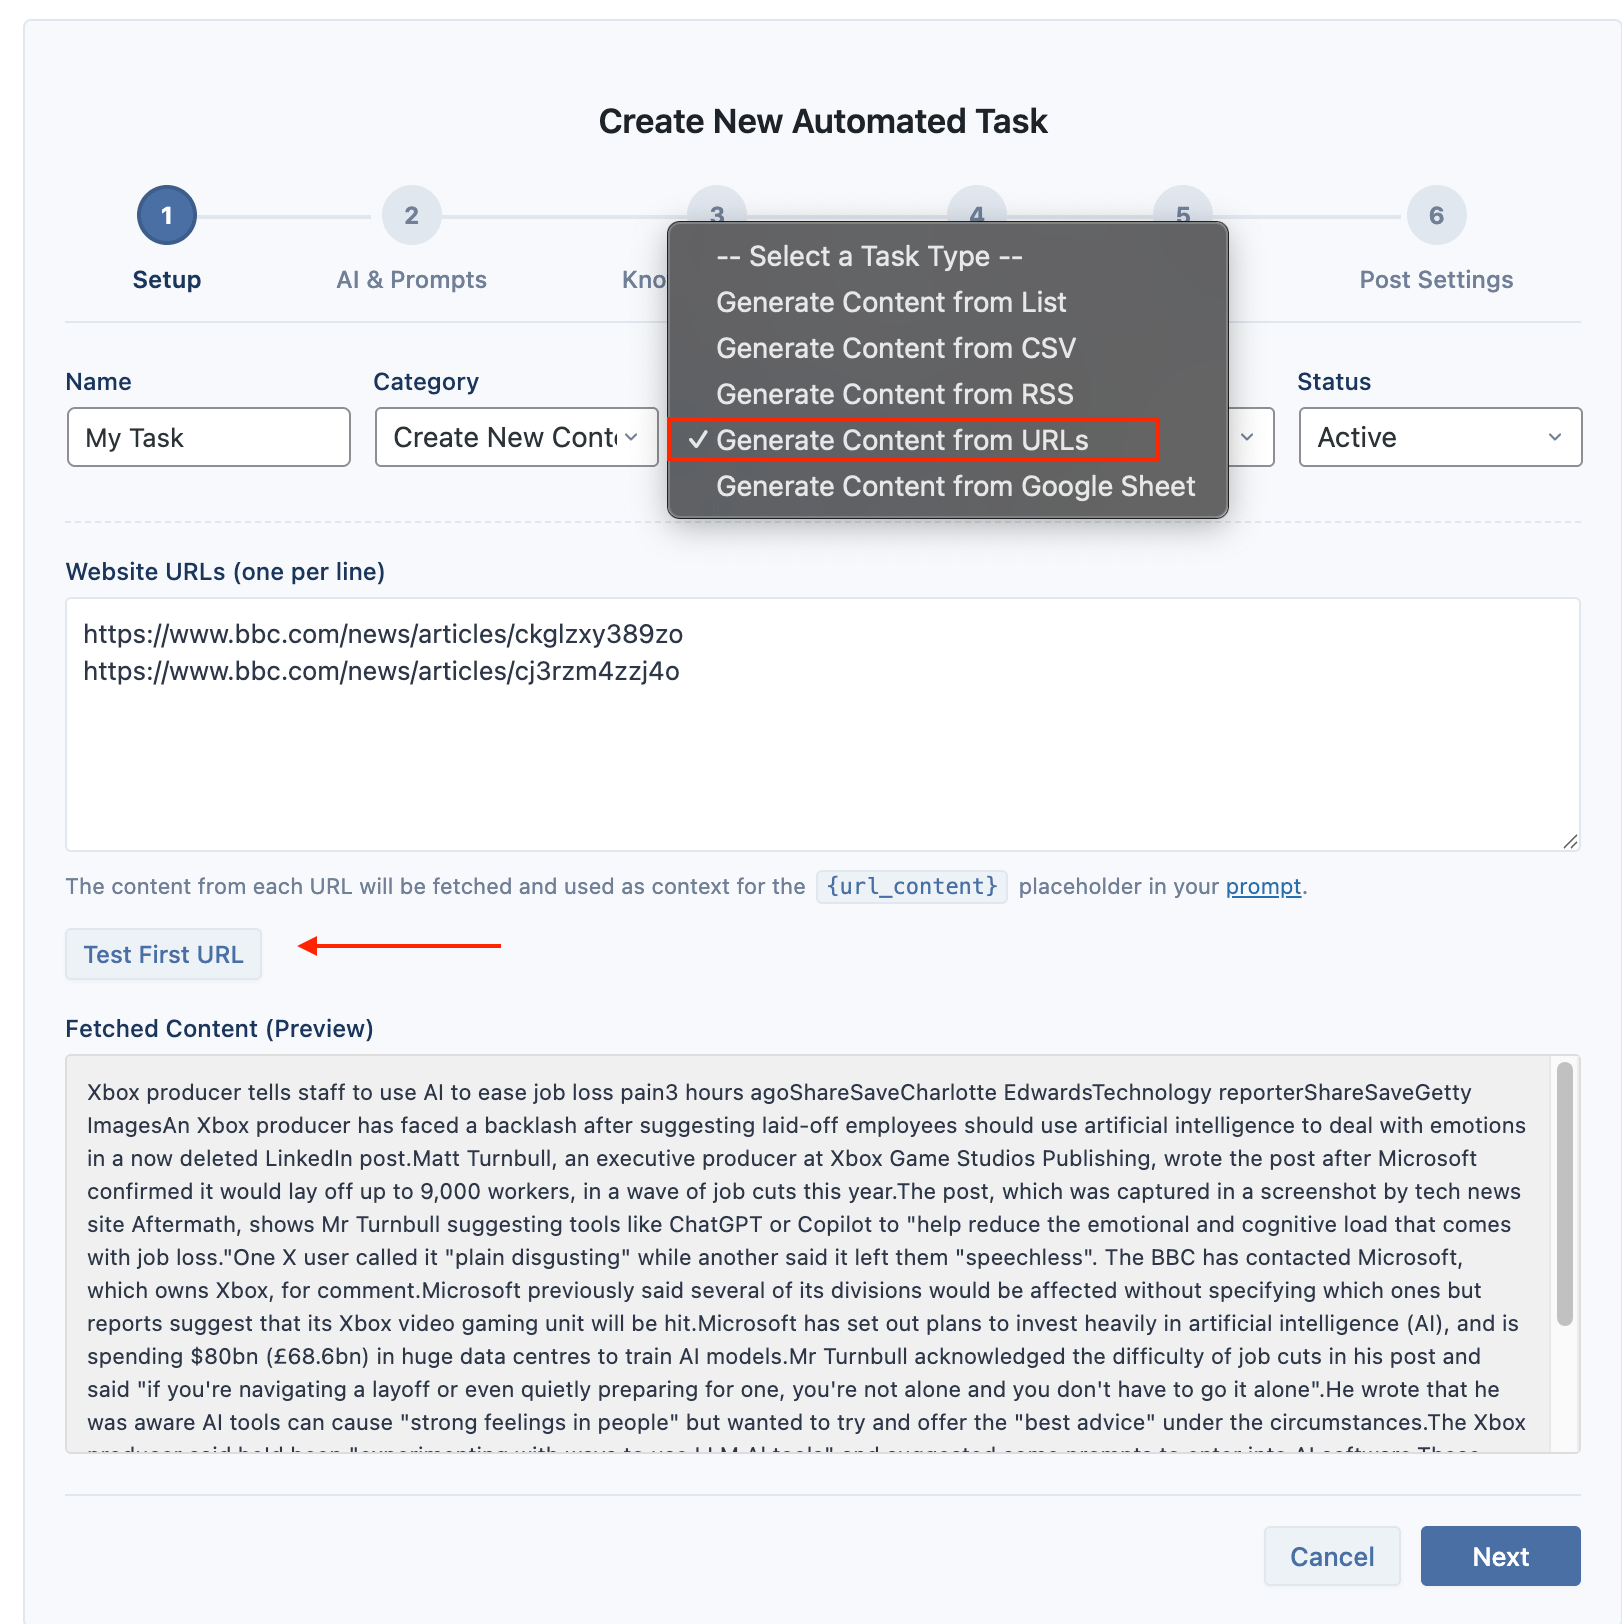
- Format: Enter one website URL per line.
- Prompting: The content from each URL will be fetched and made available in your prompt using the
{url_content}placeholder.
Google Sheets
Connect a Google Sheet to manage a large content calendar. The task will generate articles from the topics listed in your sheet.
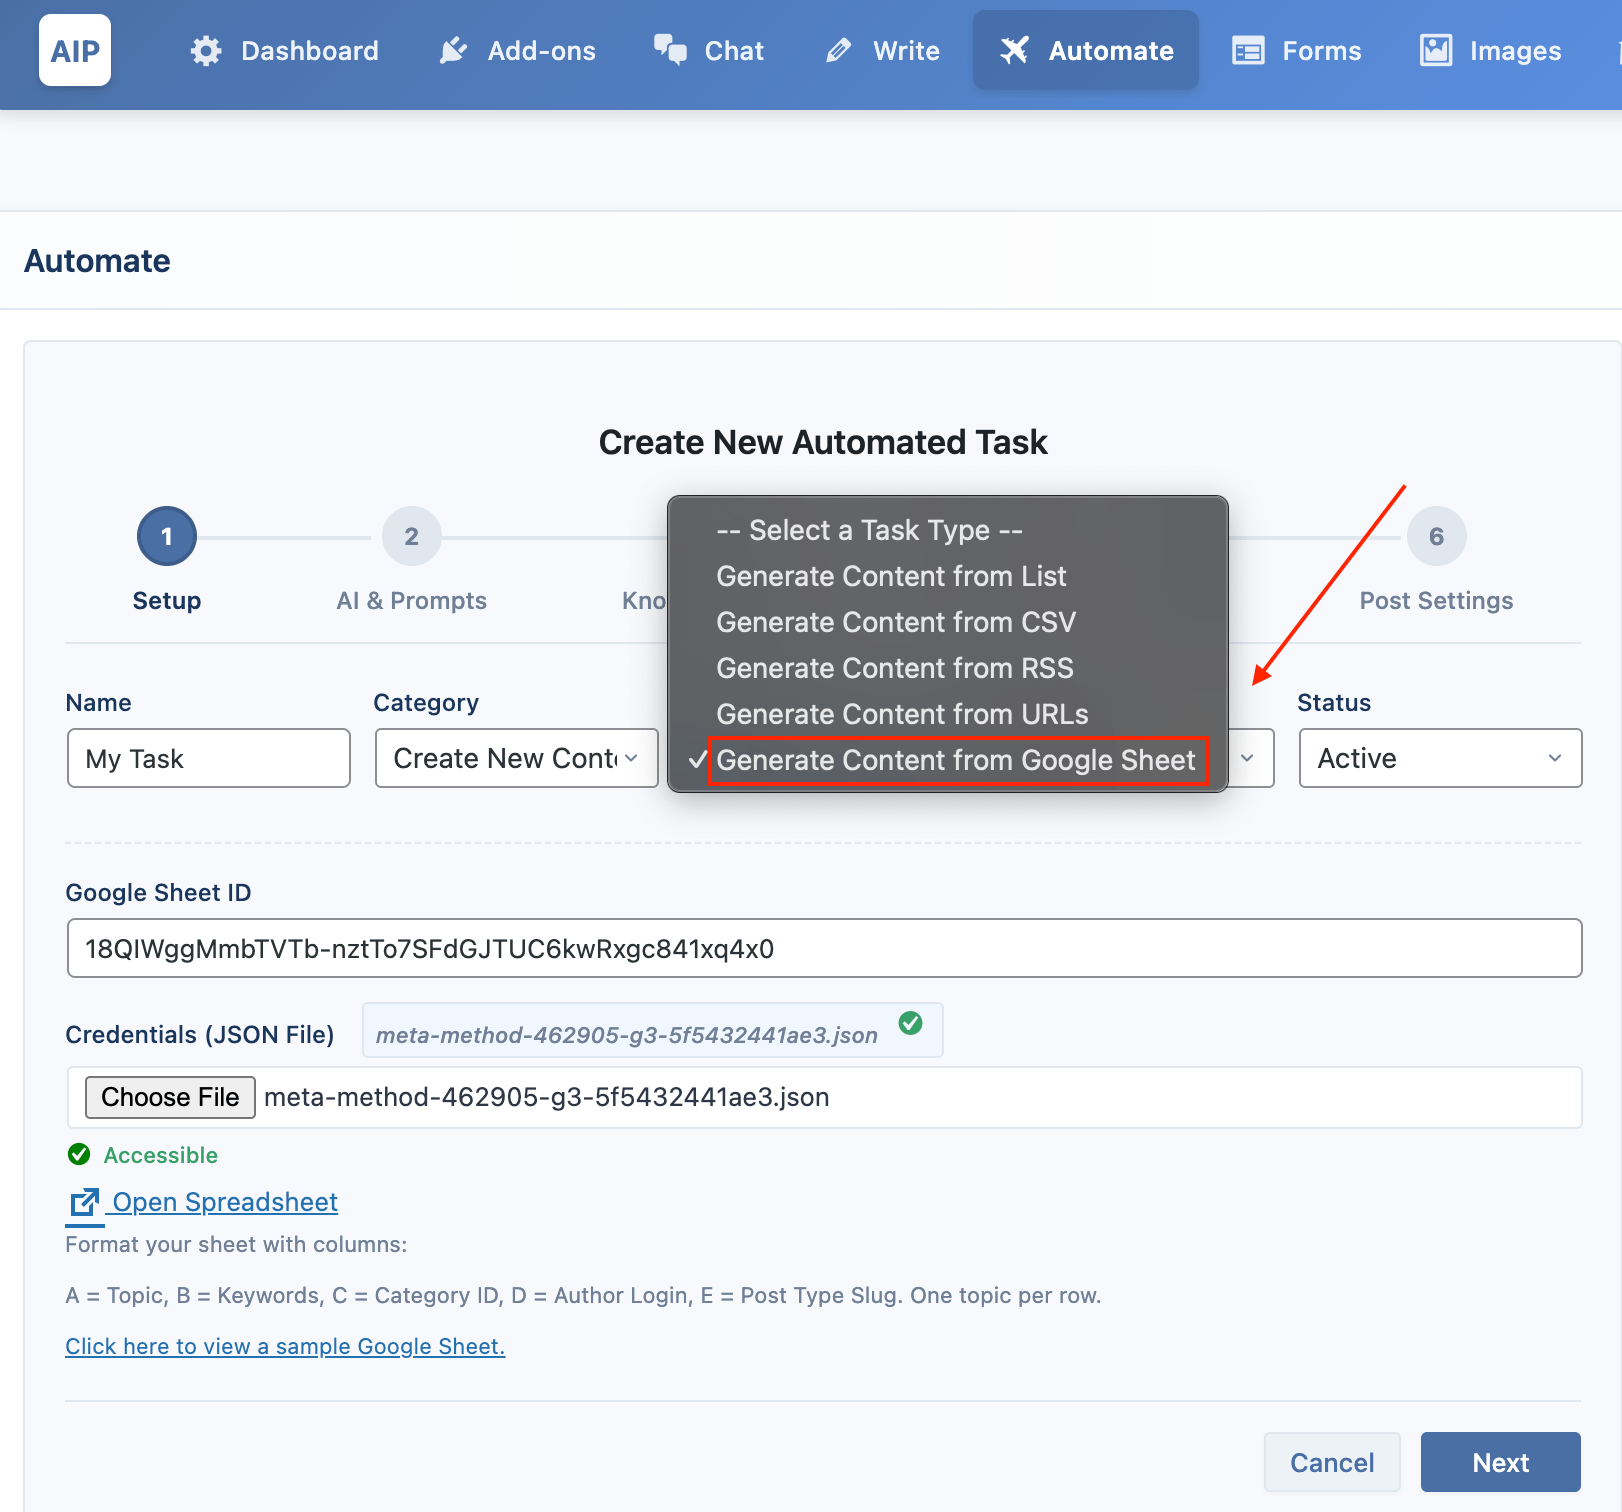
- Format: Your sheet must have columns in the order:
Topic,Keywords,Category ID,Author,Post Type,Schedule Date (YYYY-MM-DD HH:MM). A seventh column,Status, will be automatically updated by the plugin to "Processed" after an article is generated, preventing duplicates on future runs. - Authentication: You will need to provide your Google Sheet ID and Service Account credentials.
For a detailed, step-by-step guide on creating a service account and setting up your Google Sheet, please see the Write > Generation Modes > Google Sheets documentation. The setup process is identical.
After the Setup step, the following configuration steps are the same for all content creation tasks. These settings control how the AI generates the content and how the final article is saved.
AI & Prompts
This section controls the "brain" of the Content Writer—the AI engine it uses and the core instructions it receives for generating content.
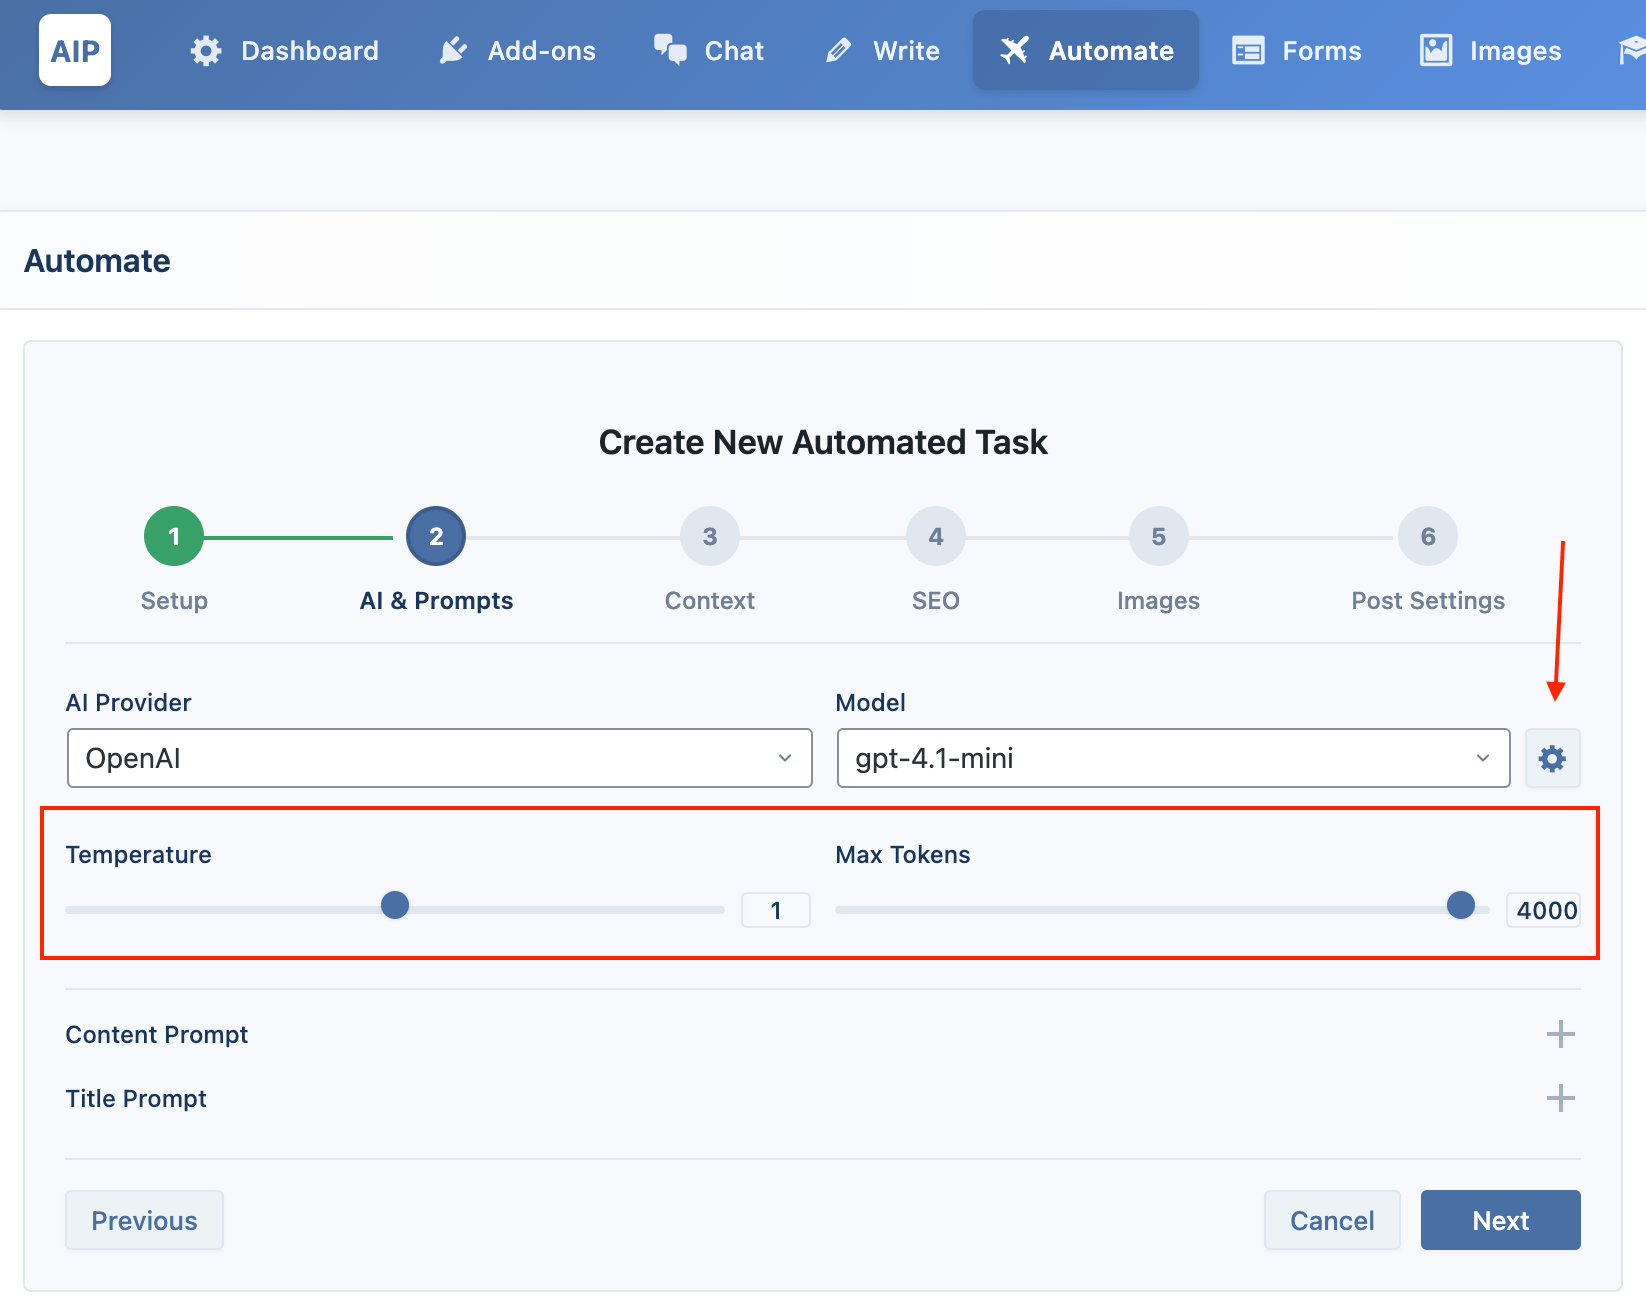
- Provider & Model: Choose the AI service you want to use (e.g., OpenAI, Google, OpenRouter) and the specific model from that provider (e.g.,
gpt-4o-mini,gemini-1.5-flash). This list is populated based on the models you have synced in the main Dashboard.

- AI Parameters: Click the gear icon to reveal advanced parameters like Temperature (creativity) and Max Tokens (length).
- Content Prompt: This is the primary instruction for generating the body of the article. You can use placeholders like
{topic}and{keywords}.
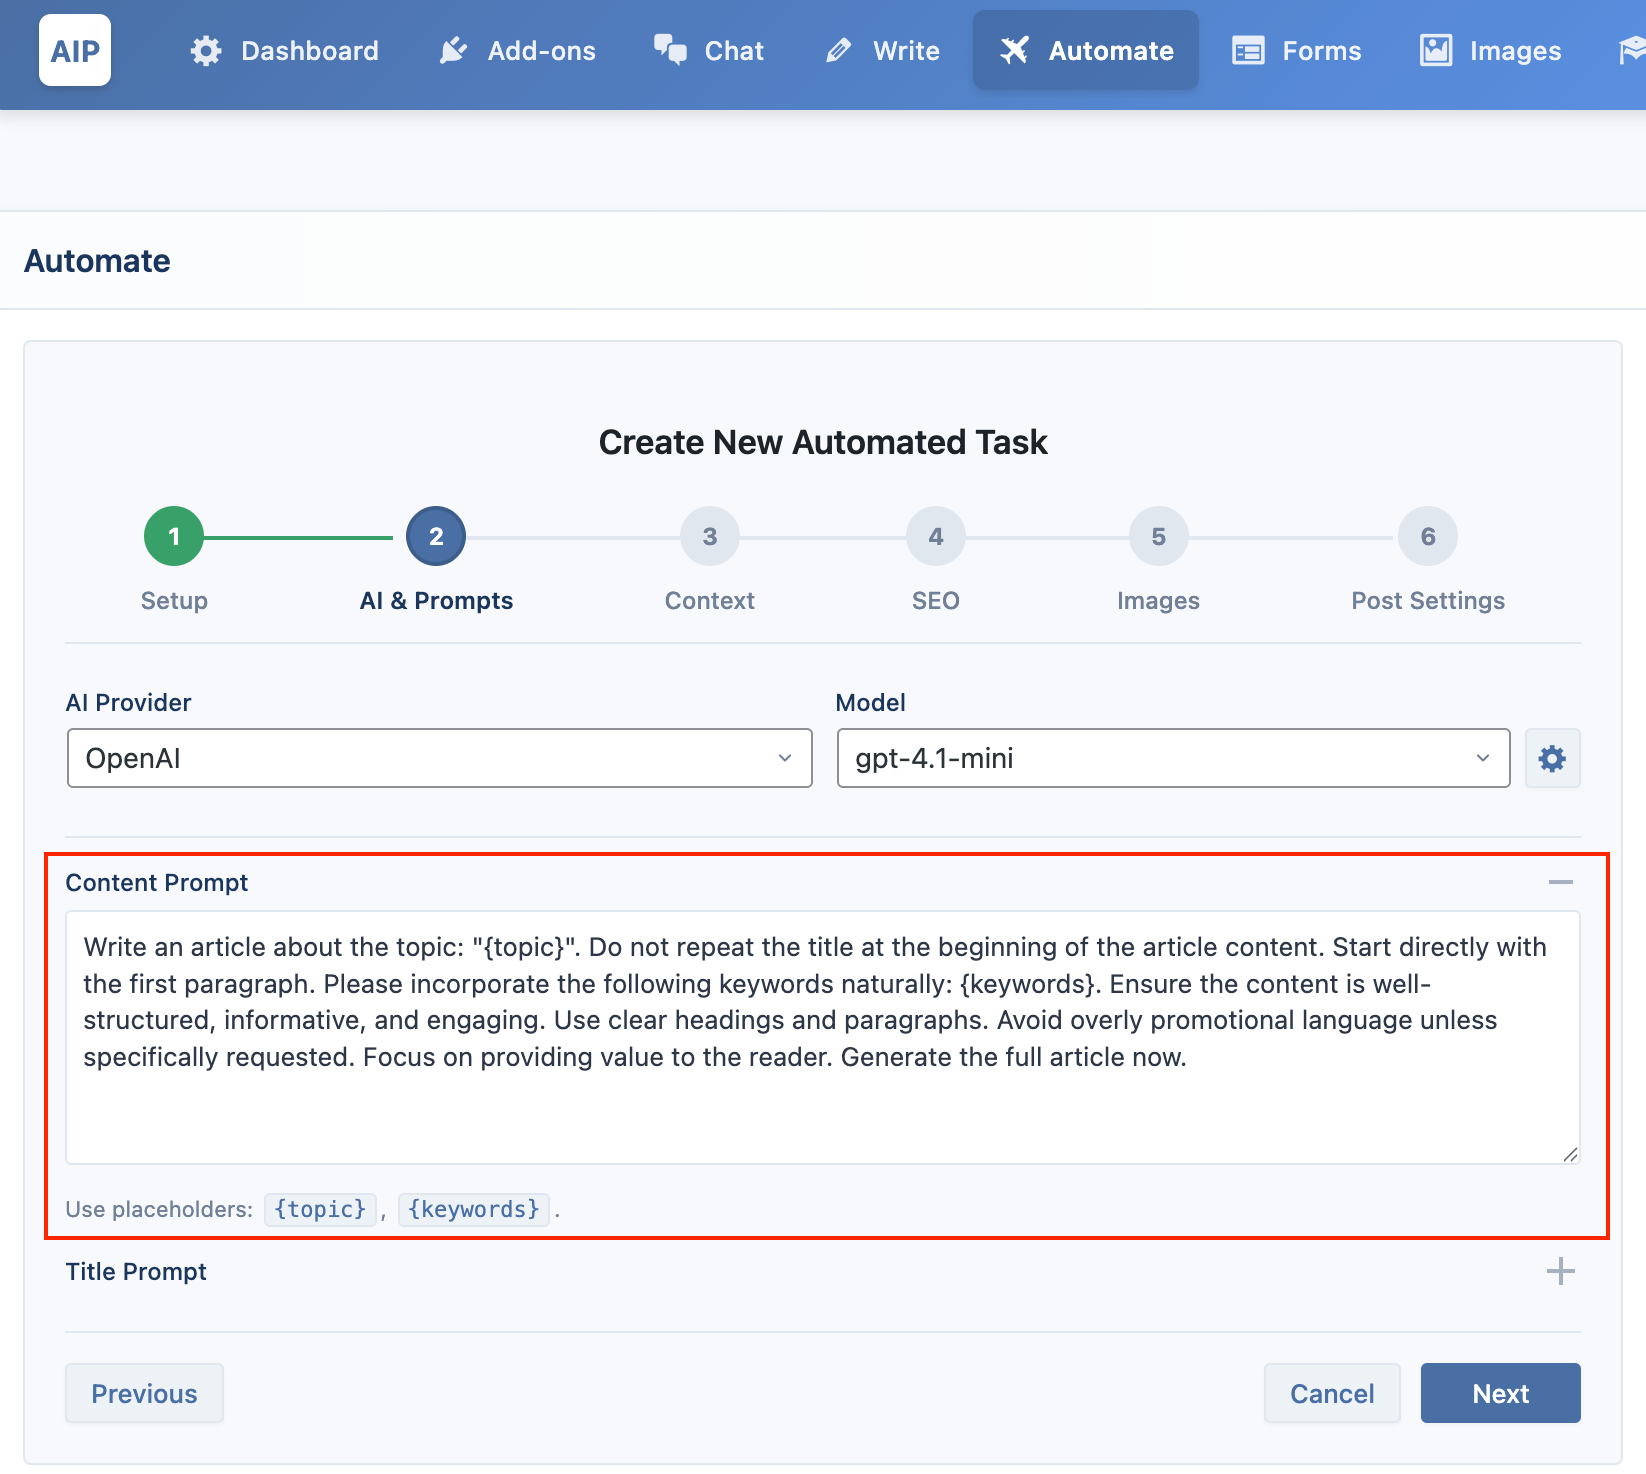
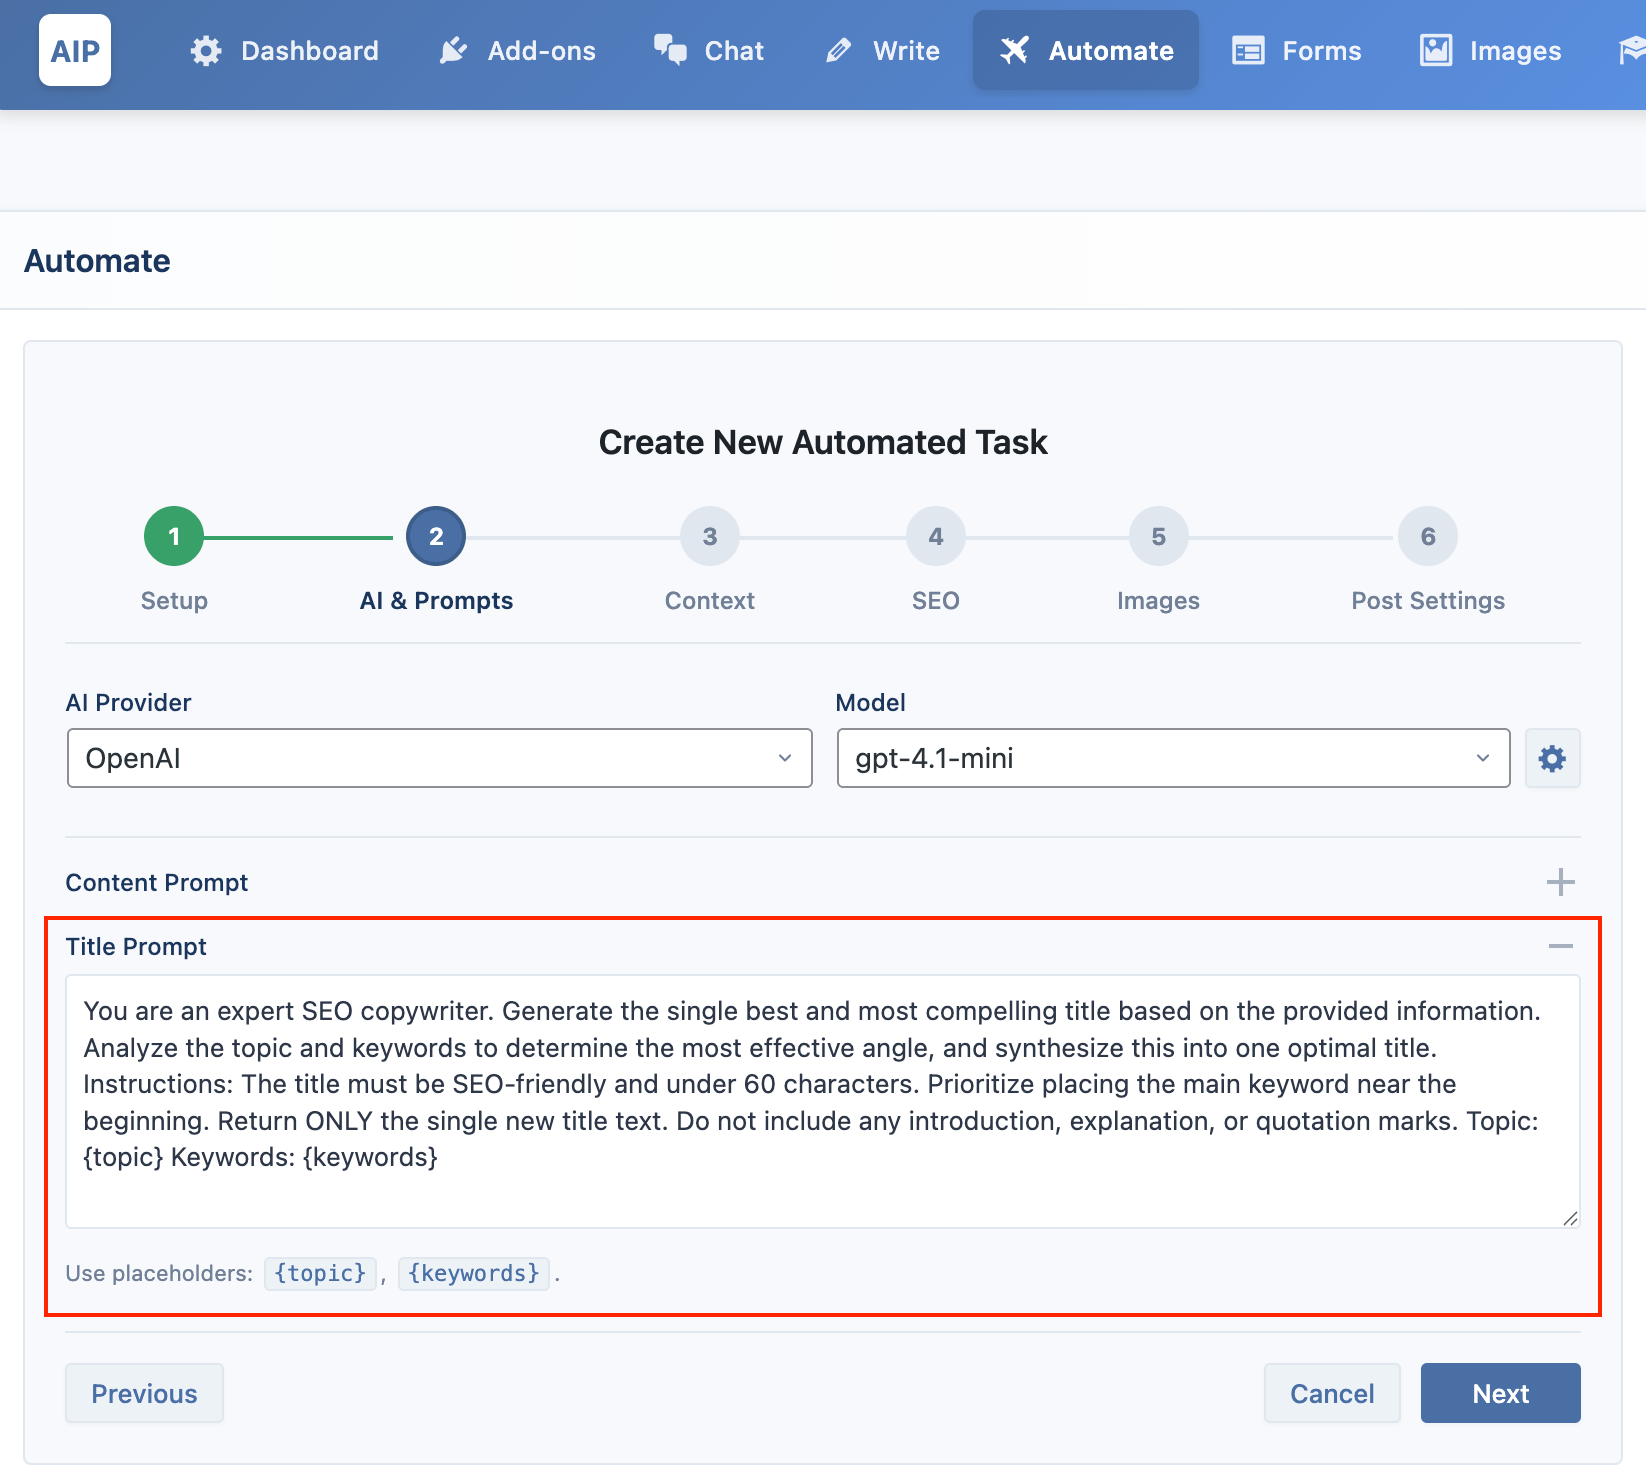
- Title Prompt: This prompt is used to generate the post title. If you leave it blank, the topic you entered in Step 1 will be used as the title.
Context
This feature allows the AI to access specific information from a knowledge base you have created in the Train module.
- Enable Vector Store: Check this box to activate the feature.
- Vector Provider: Select the service where your knowledge base is stored (OpenAI, Pinecone, or Qdrant).
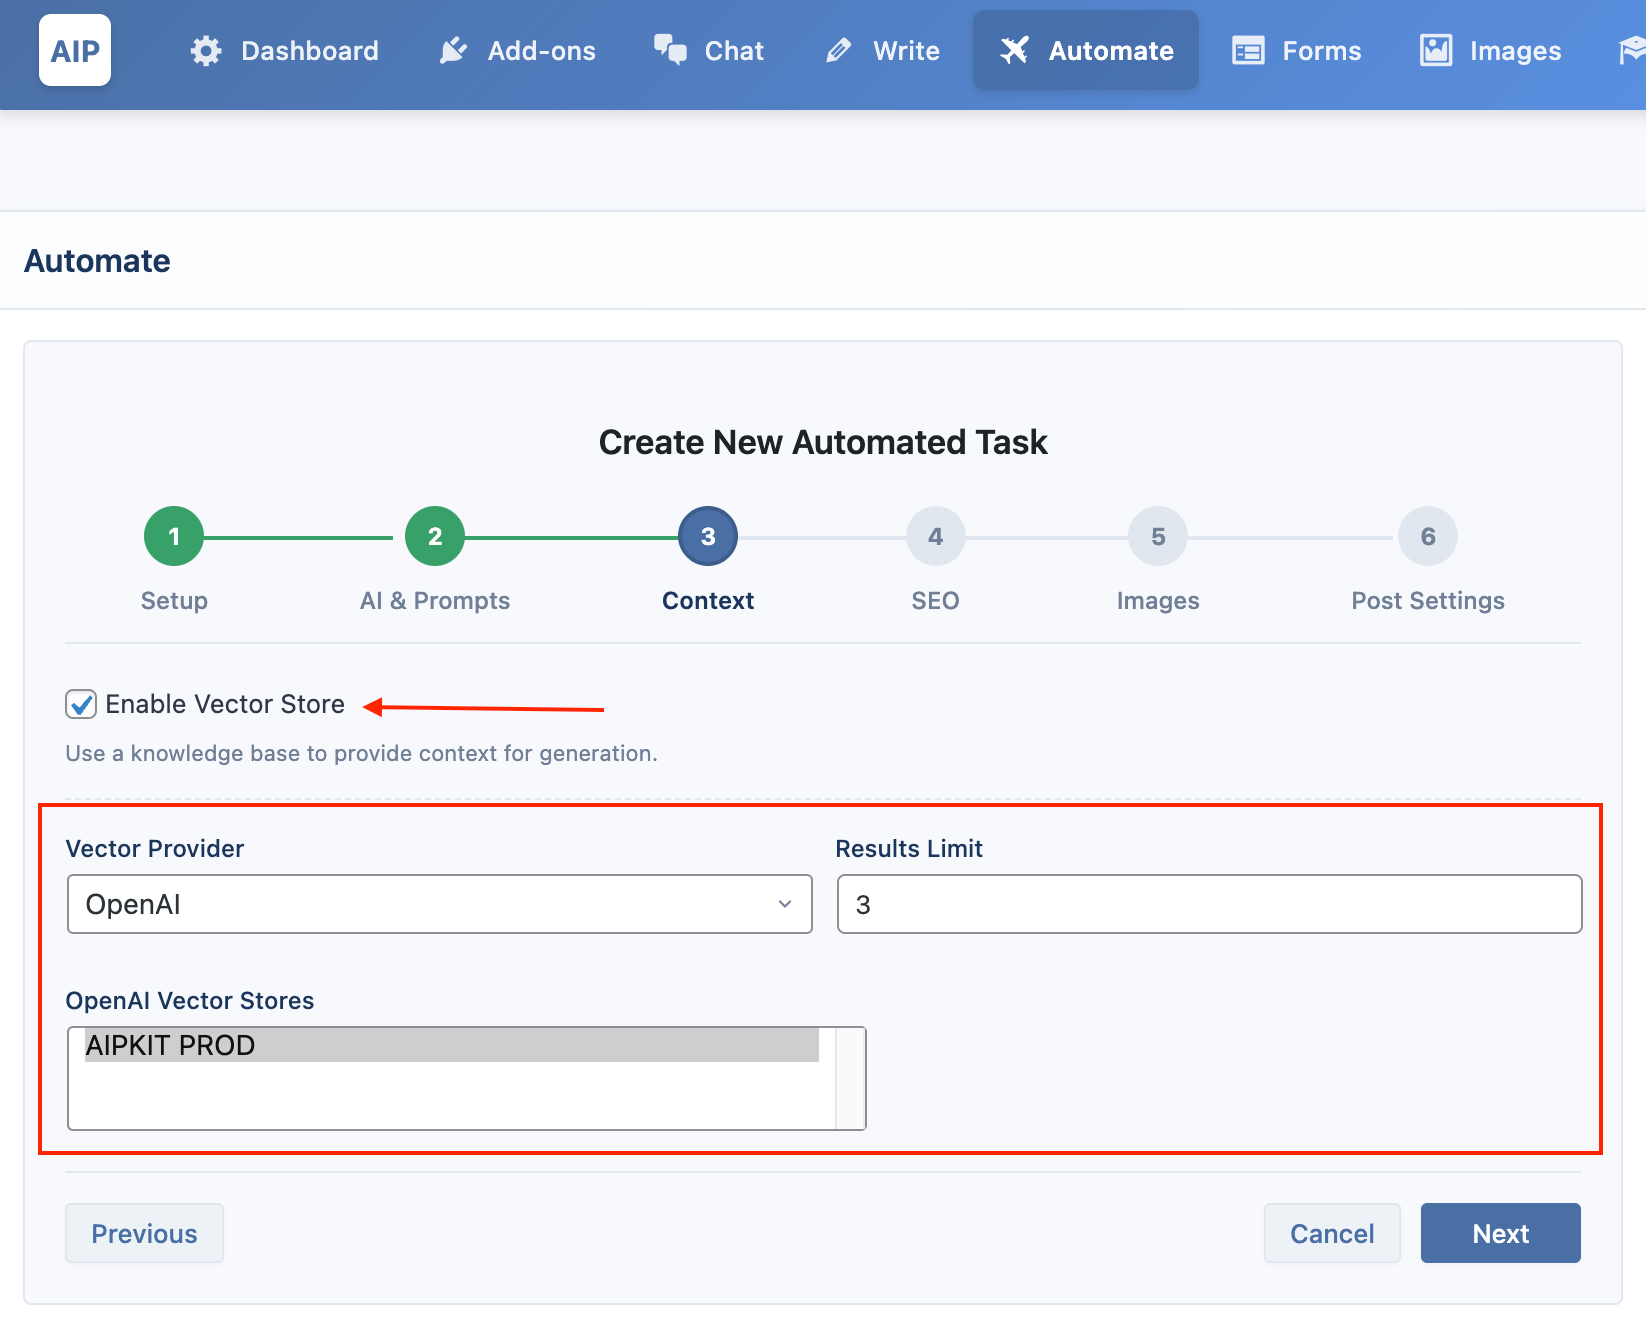
- Store / Index / Collection:
- For OpenAI, you can select one or more Vector Stores to use.
- For Pinecone, select a specific Index.
- For Qdrant, select a specific Collection.
- Embedding Provider & Model: If using Pinecone or Qdrant, you must select the same embedding provider and model that you used when creating the knowledge base.
- Results Limit: This sets the maximum number of relevant documents the AI will fetch from your knowledge base to use as context.
SEO
Optimize your content for search engines by automatically generating SEO elements.
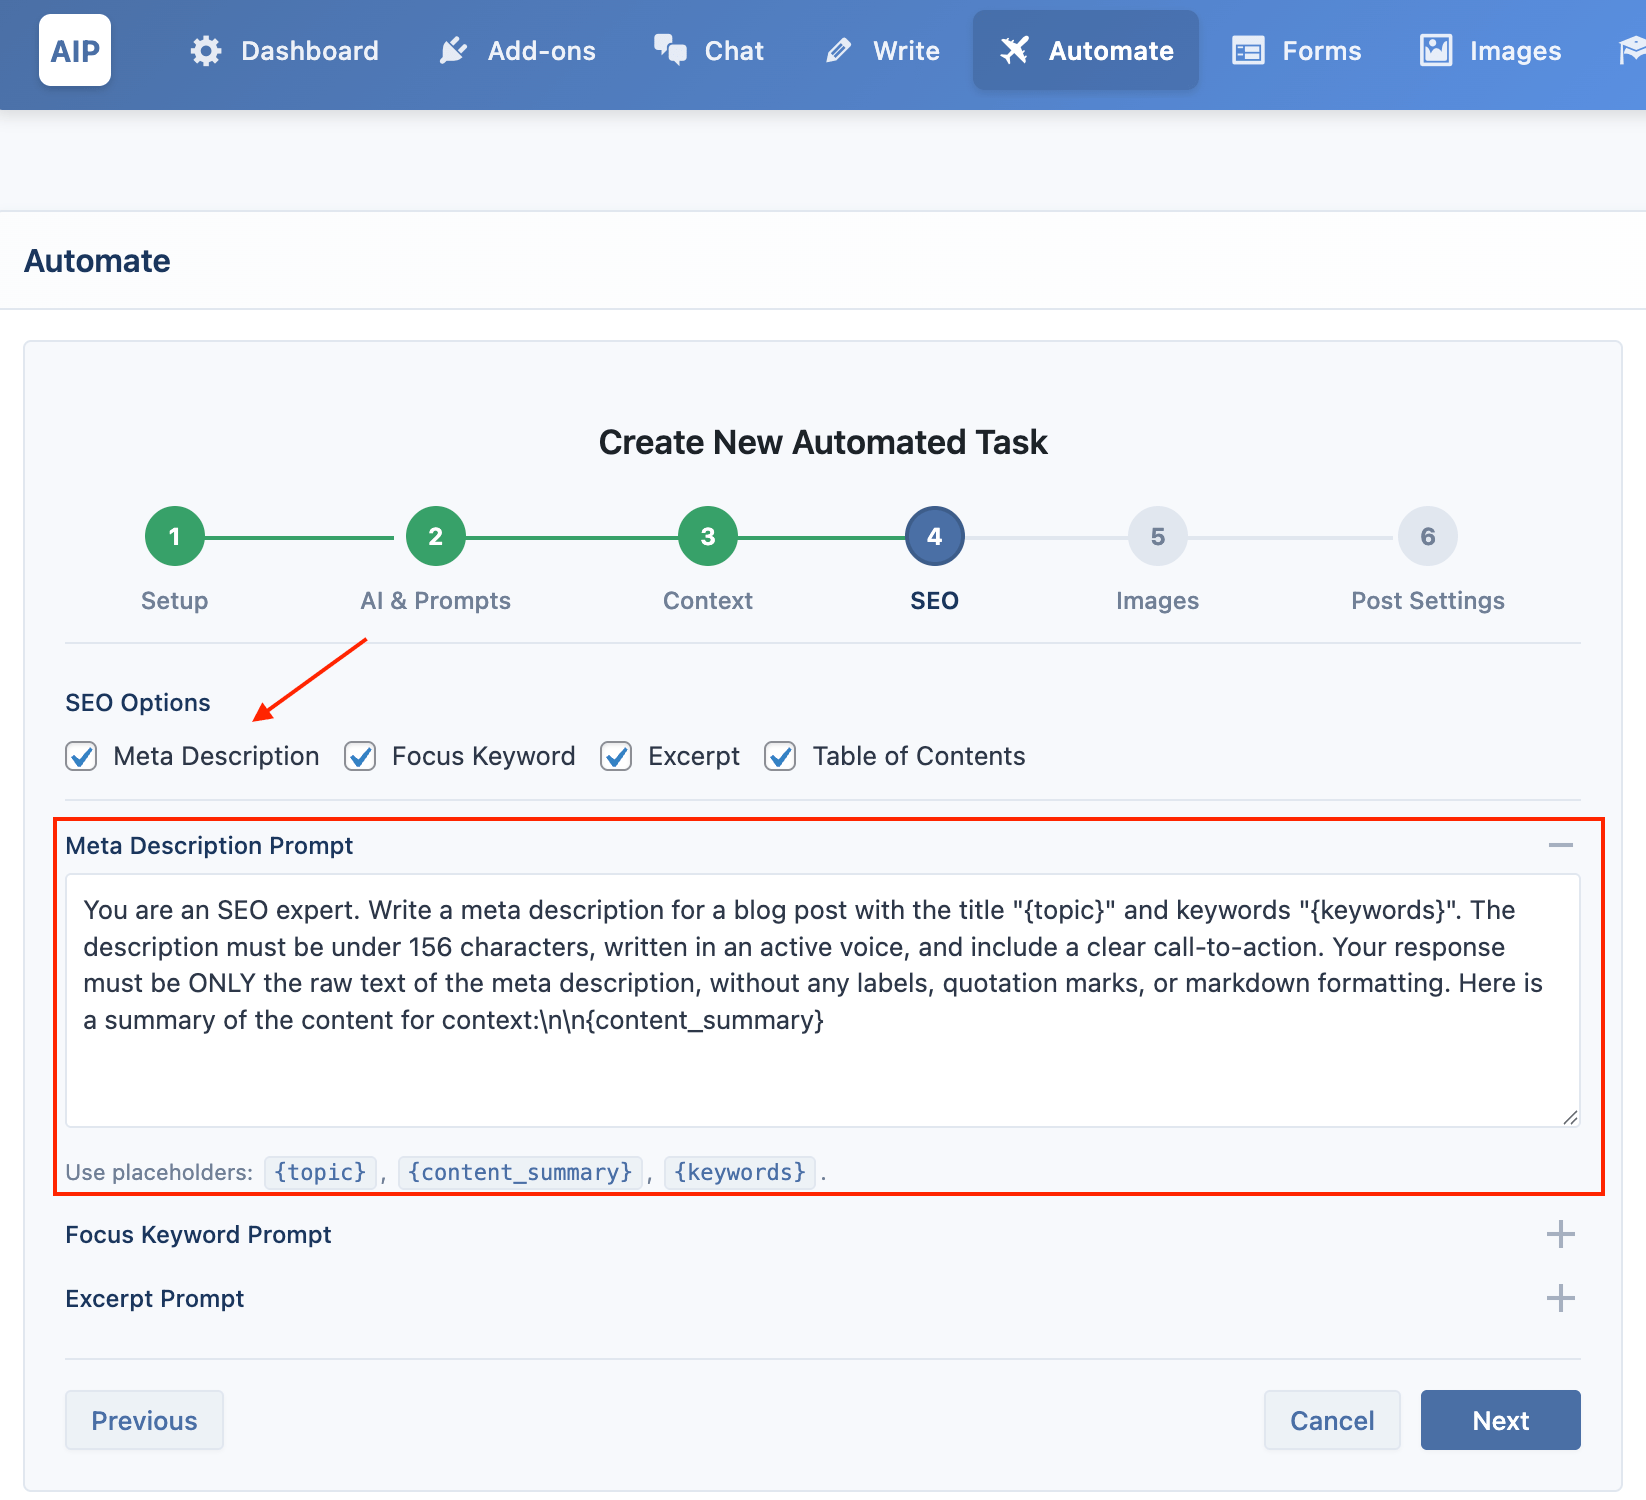
- Meta Description: When checked, the AI generates a meta description for your article. You can provide a custom prompt using placeholders like
{topic},{keywords}, and{content_summary}.
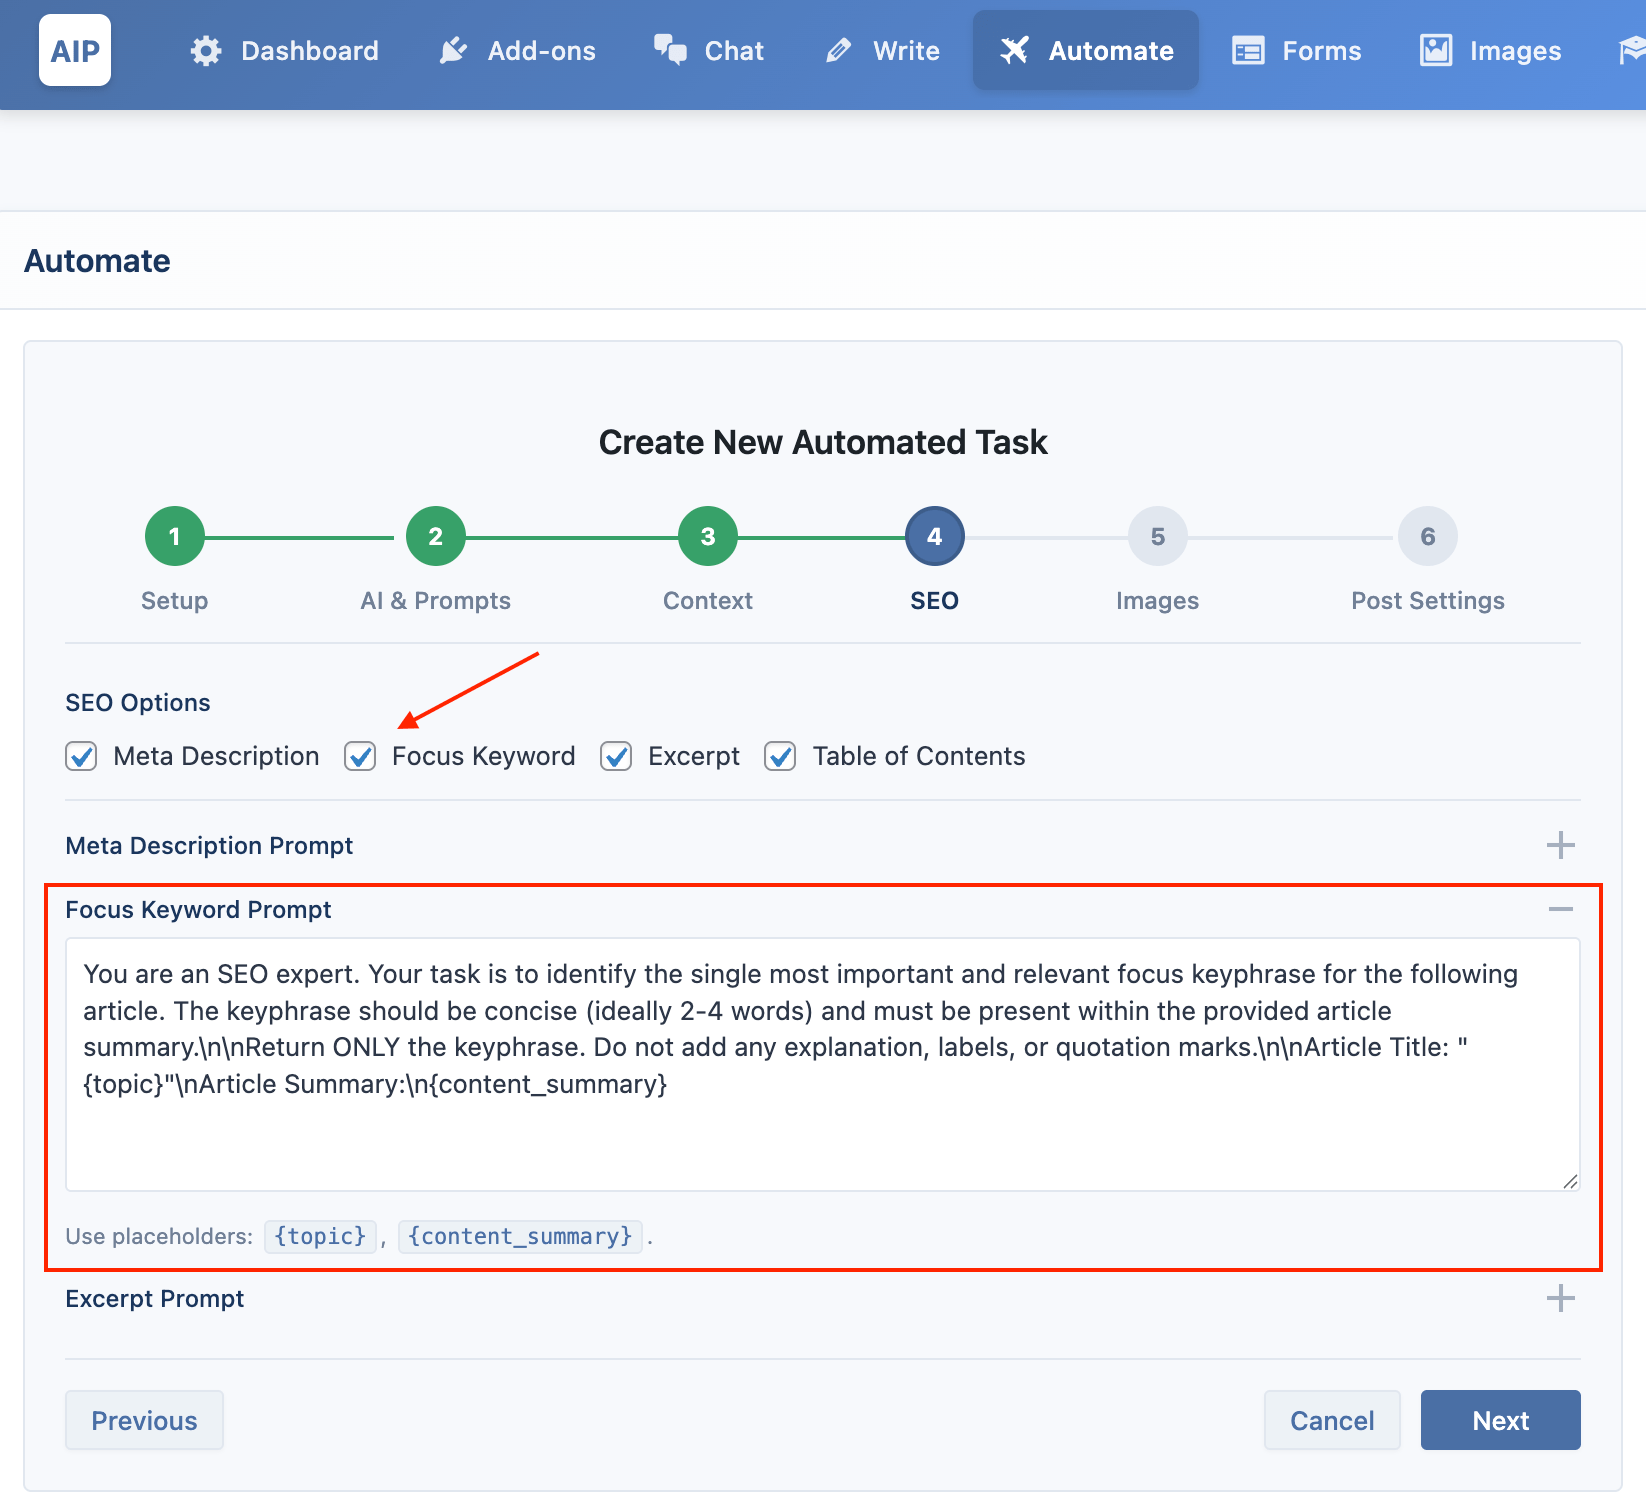
- Focus Keyword: If you provide keywords in your input (e.g.,
Topic | keyword1, keyword2), the first keyword will be used automatically. Otherwise, the AI will generate one based on its analysis of the content.
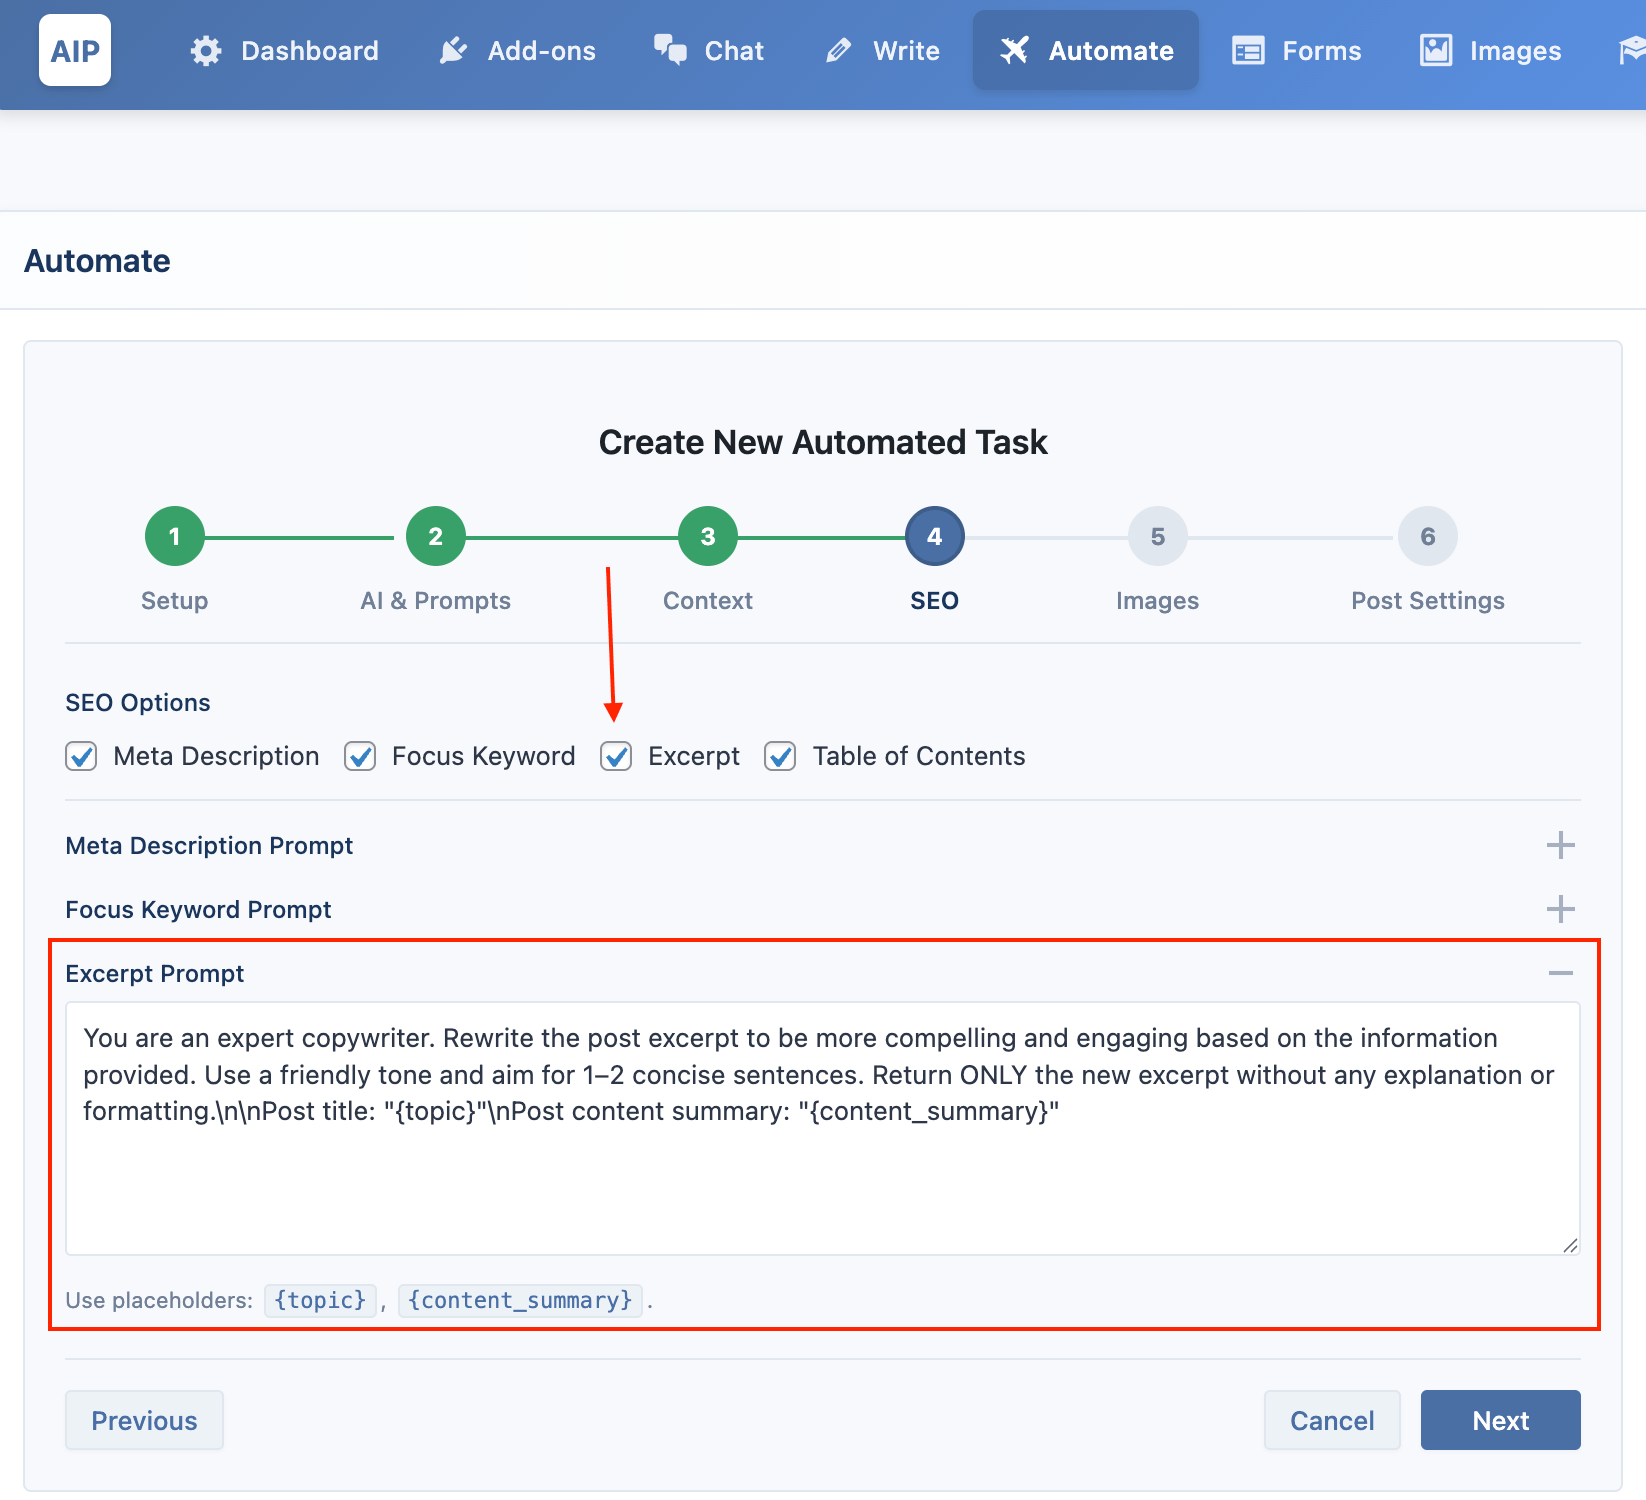
- Excerpt: Generates a custom post excerpt, which is used by your WordPress theme on archive pages or blog rolls.
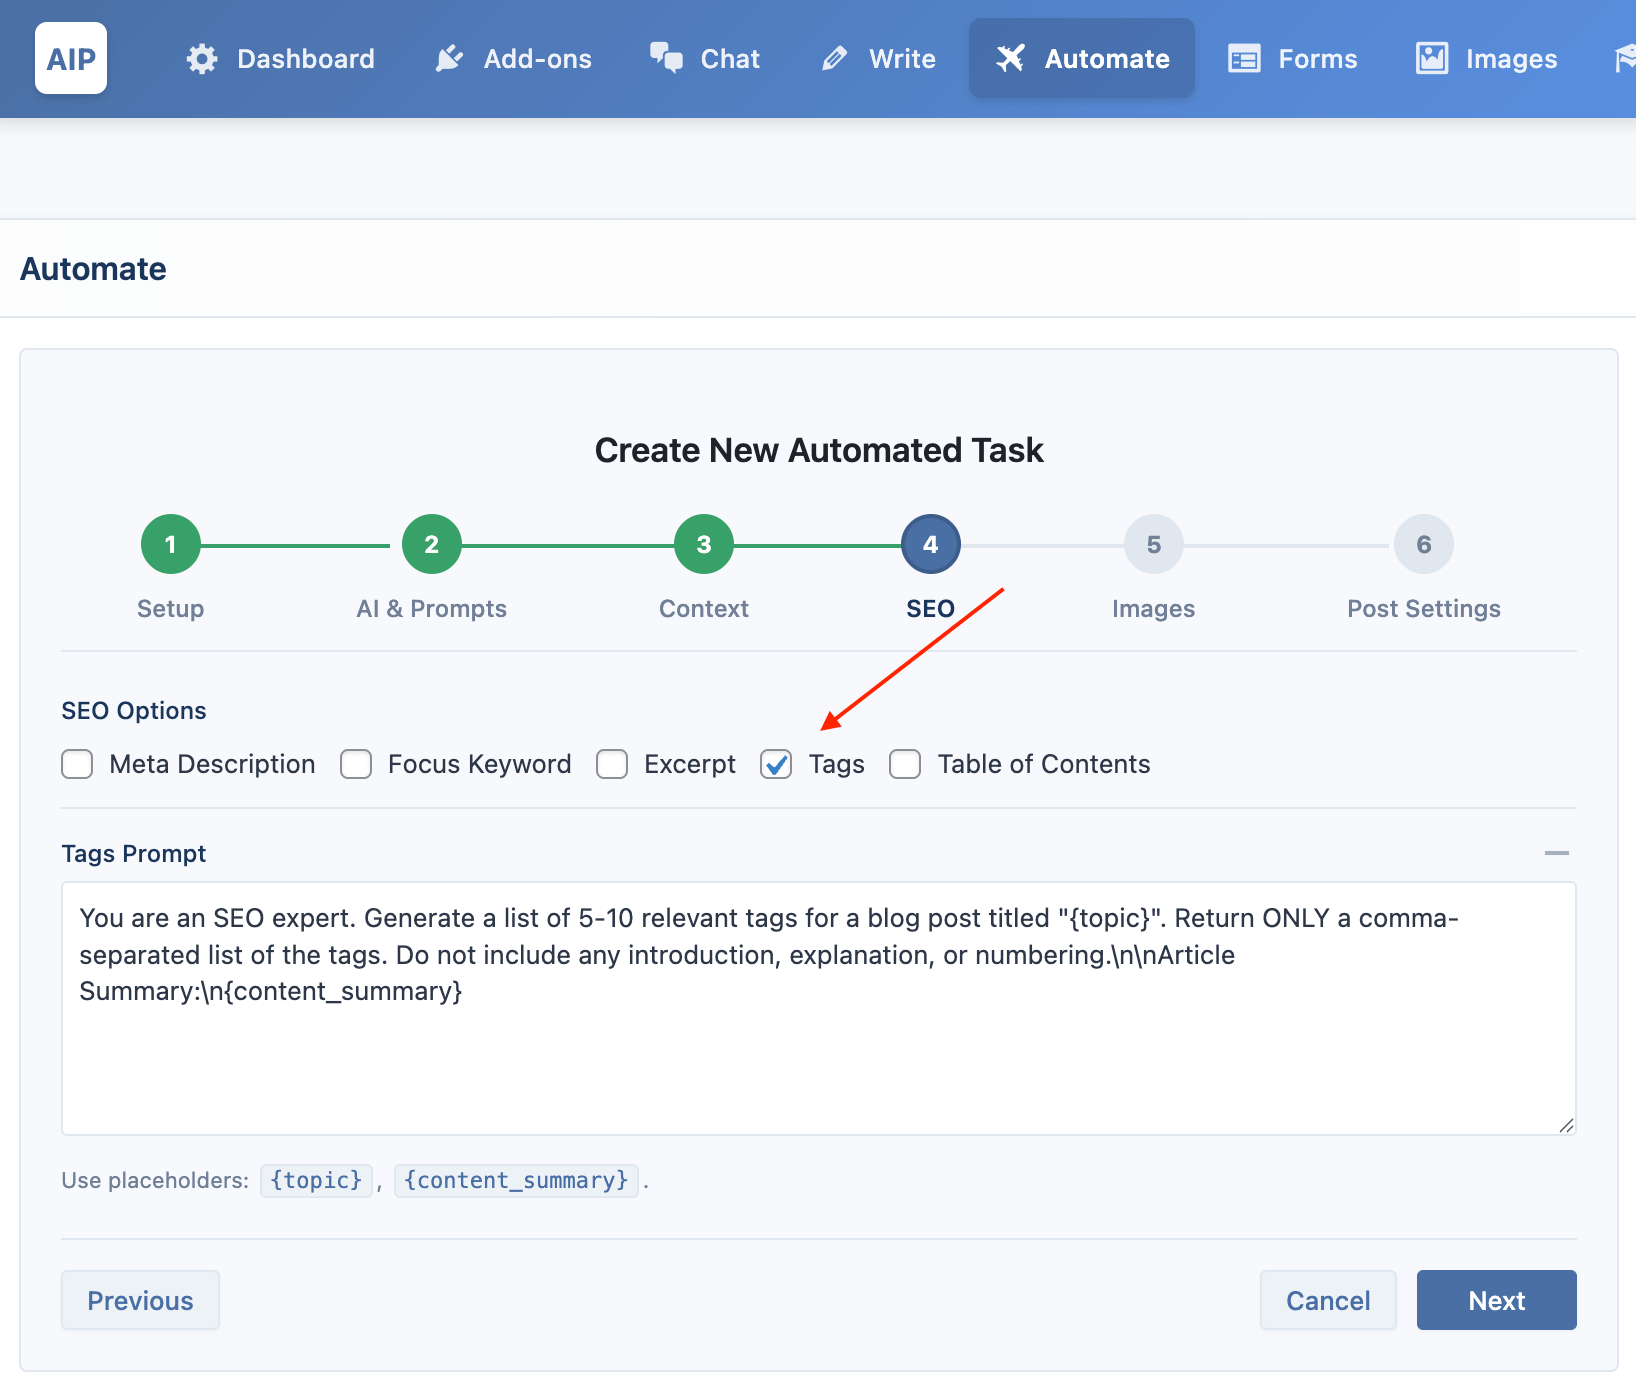
- Tags: Generates a comma-separated list of relevant tags for your post.
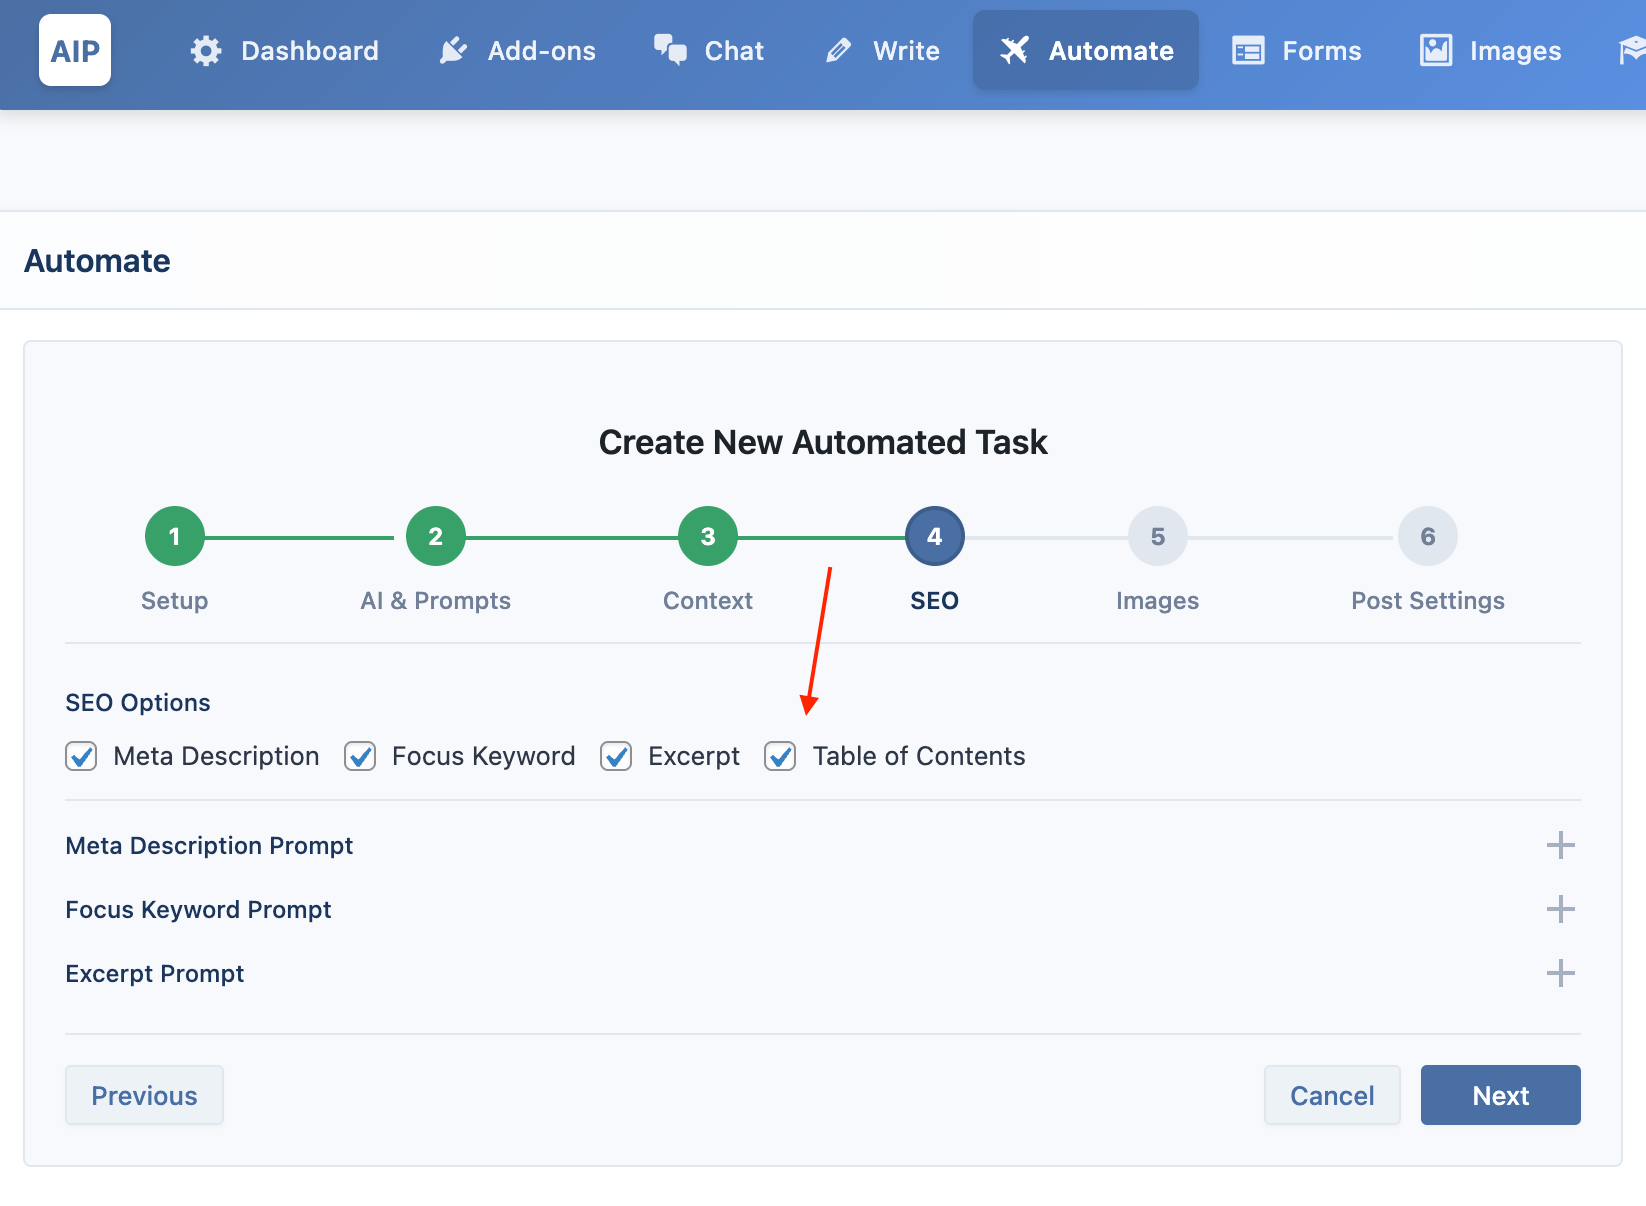
- Table of Contents: When checked, a Table of Contents block will be automatically inserted at the beginning of your article based on the
<h2>and<h3>headings.
Images
Automatically find or generate relevant images and insert them into your articles.
You can enable image generation for both In-Content Images and the Featured Image.
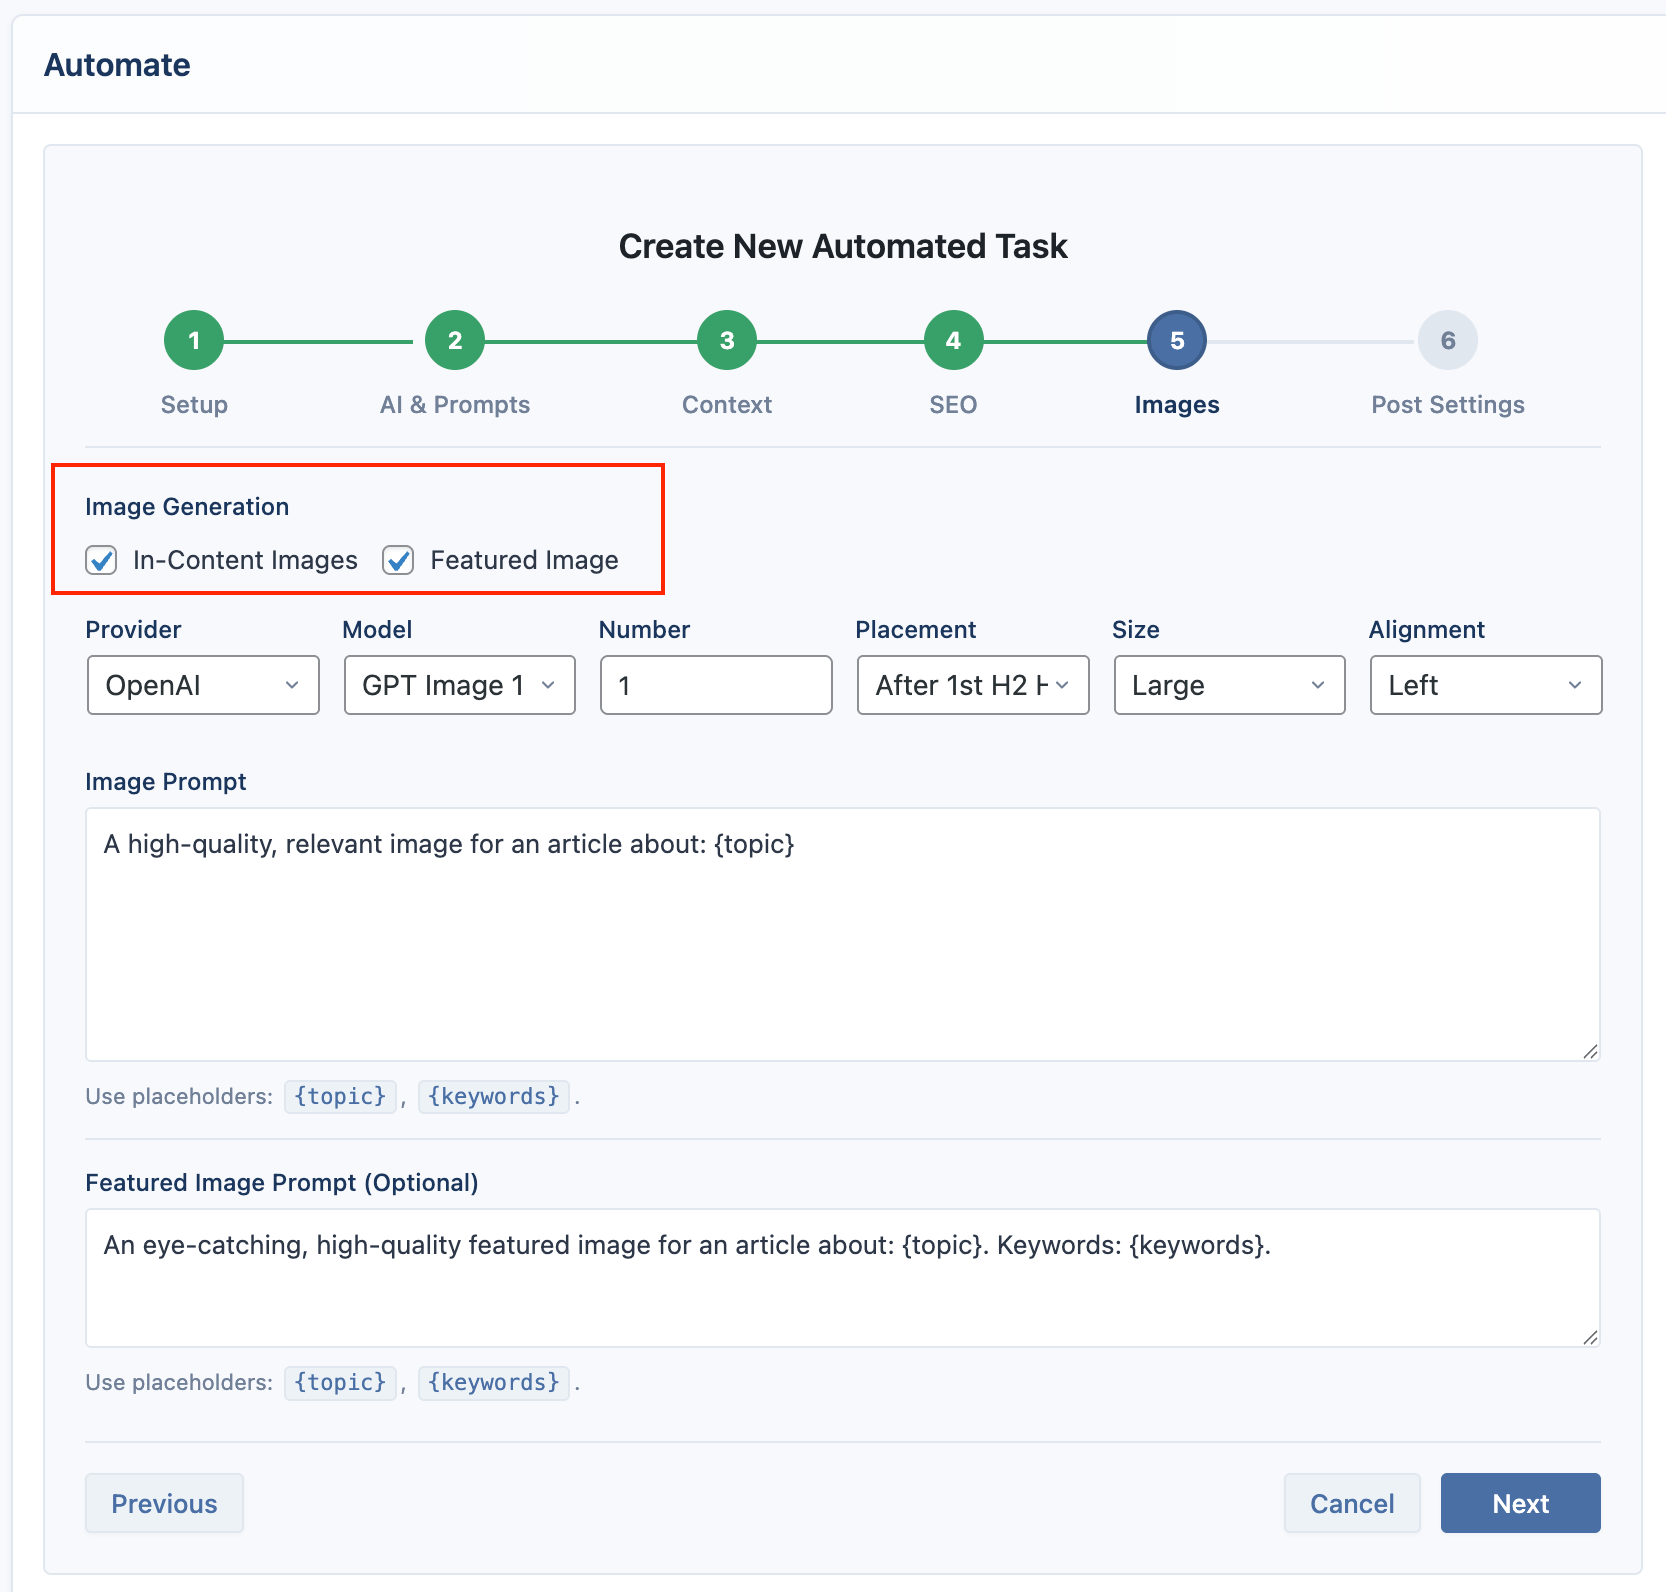
You can choose between generating new, unique images with an AI or searching for free stock photos.
OpenAI
OpenAI offers high-quality image generation with models like DALL-E 3 and GPT-4o.
- Setup: To use OpenAI, simply enter your API key in the main dashboard under AIP > Dashboard > Providers > OpenAI.
- Usage: Select OpenAI as the provider and choose your desired model (e.g.,
dall-e-3).
Google
Google's models offer high-quality image generation.
- Setup: To use Google, enter your API key in the main dashboard under AIP > Dashboard > Providers > Google.
- Usage: Select Google as the provider and choose a model (e.g.,
imagen-3.0-generate-002,imagen-4.0-ultra-generate-preview-06-06).
Azure
Use your deployed DALL-E 2 and DALL-E 3 models from your Azure OpenAI service.
- Setup: Configure your Azure API Key and Endpoint in the main dashboard under AIP > Dashboard > Providers > Azure.
- Usage: Sync your deployments, then select Azure as the provider. Your available DALL-E deployments will appear in the Model dropdown.
Replicate
Replicate provides access to a wide variety of open-source models, including Stable Diffusion and more.
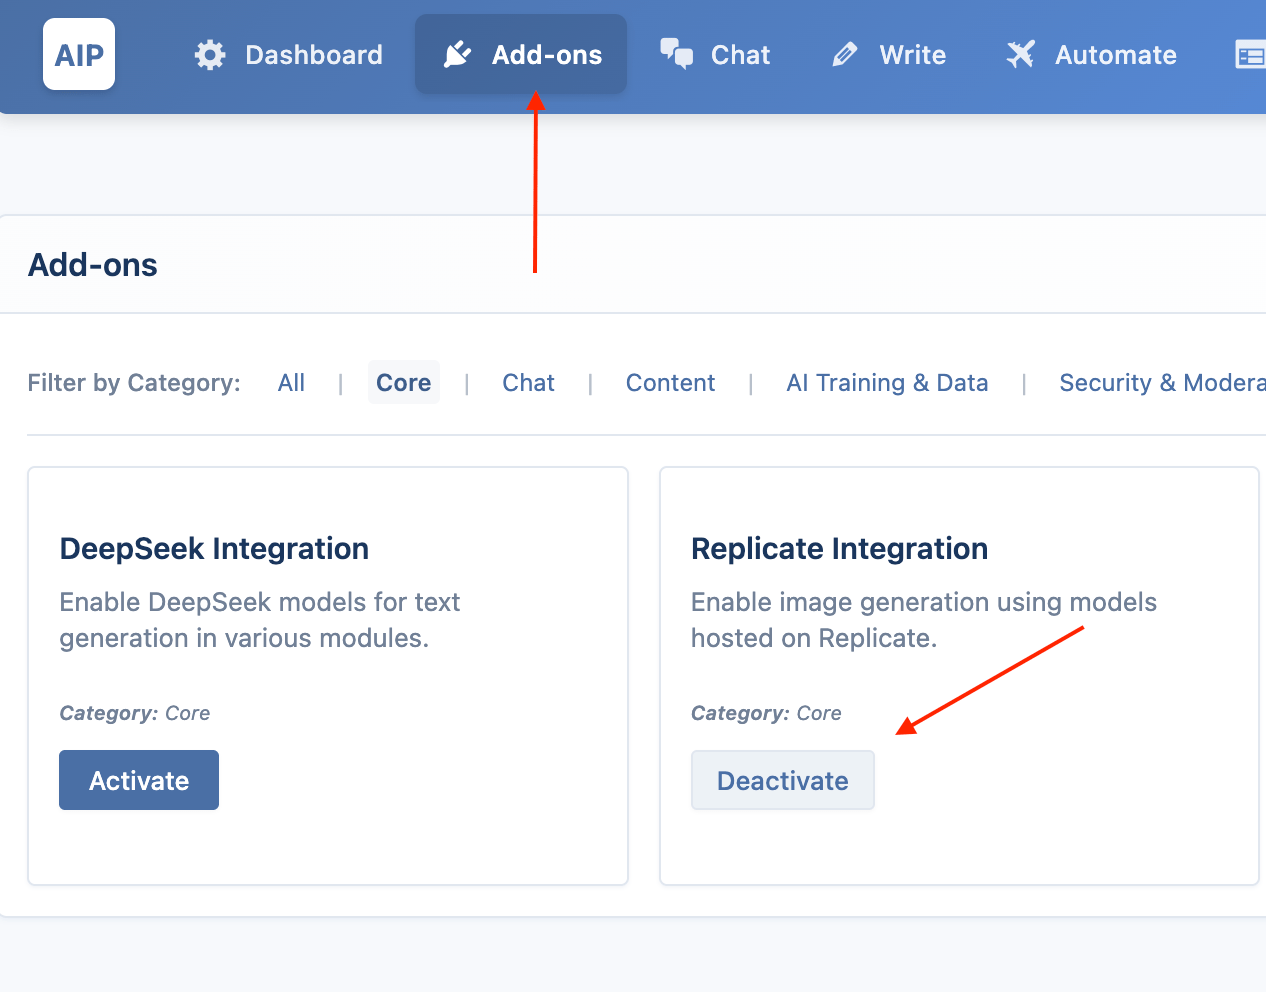
- Go to AIP > Add-ons and enable the Replicate addon.
- Go to AIP > Dashboard > Integrations and enter your Replicate API key.
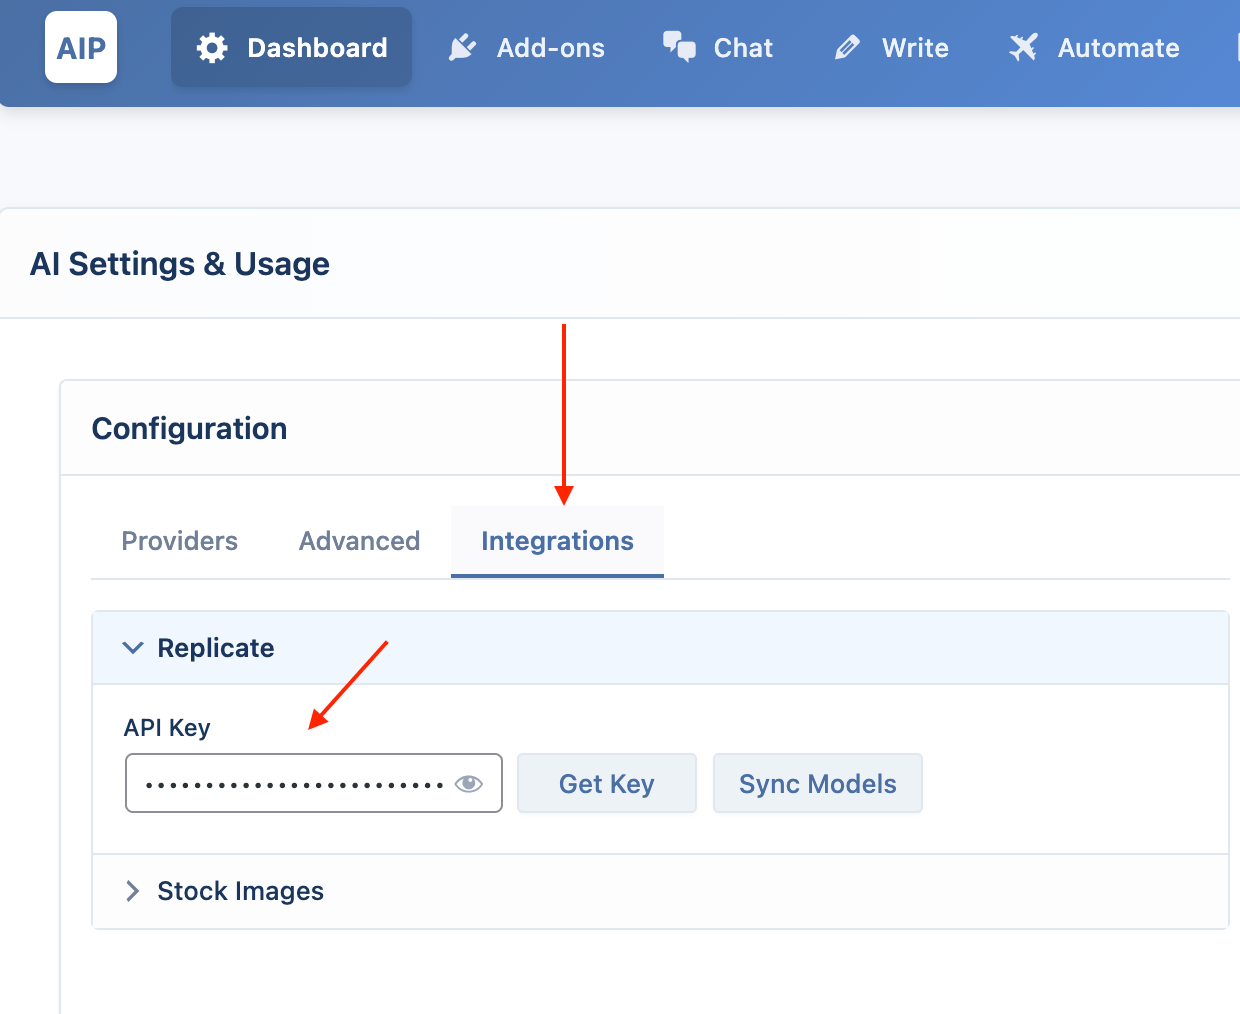
- Click Sync Models to fetch the latest list of available models.
Select Replicate as the provider. The Model dropdown will now be populated with all the text-to-image models from your Replicate account.
Pexels
Pexels allows you to automatically search and insert high-quality, free stock photos into your content.
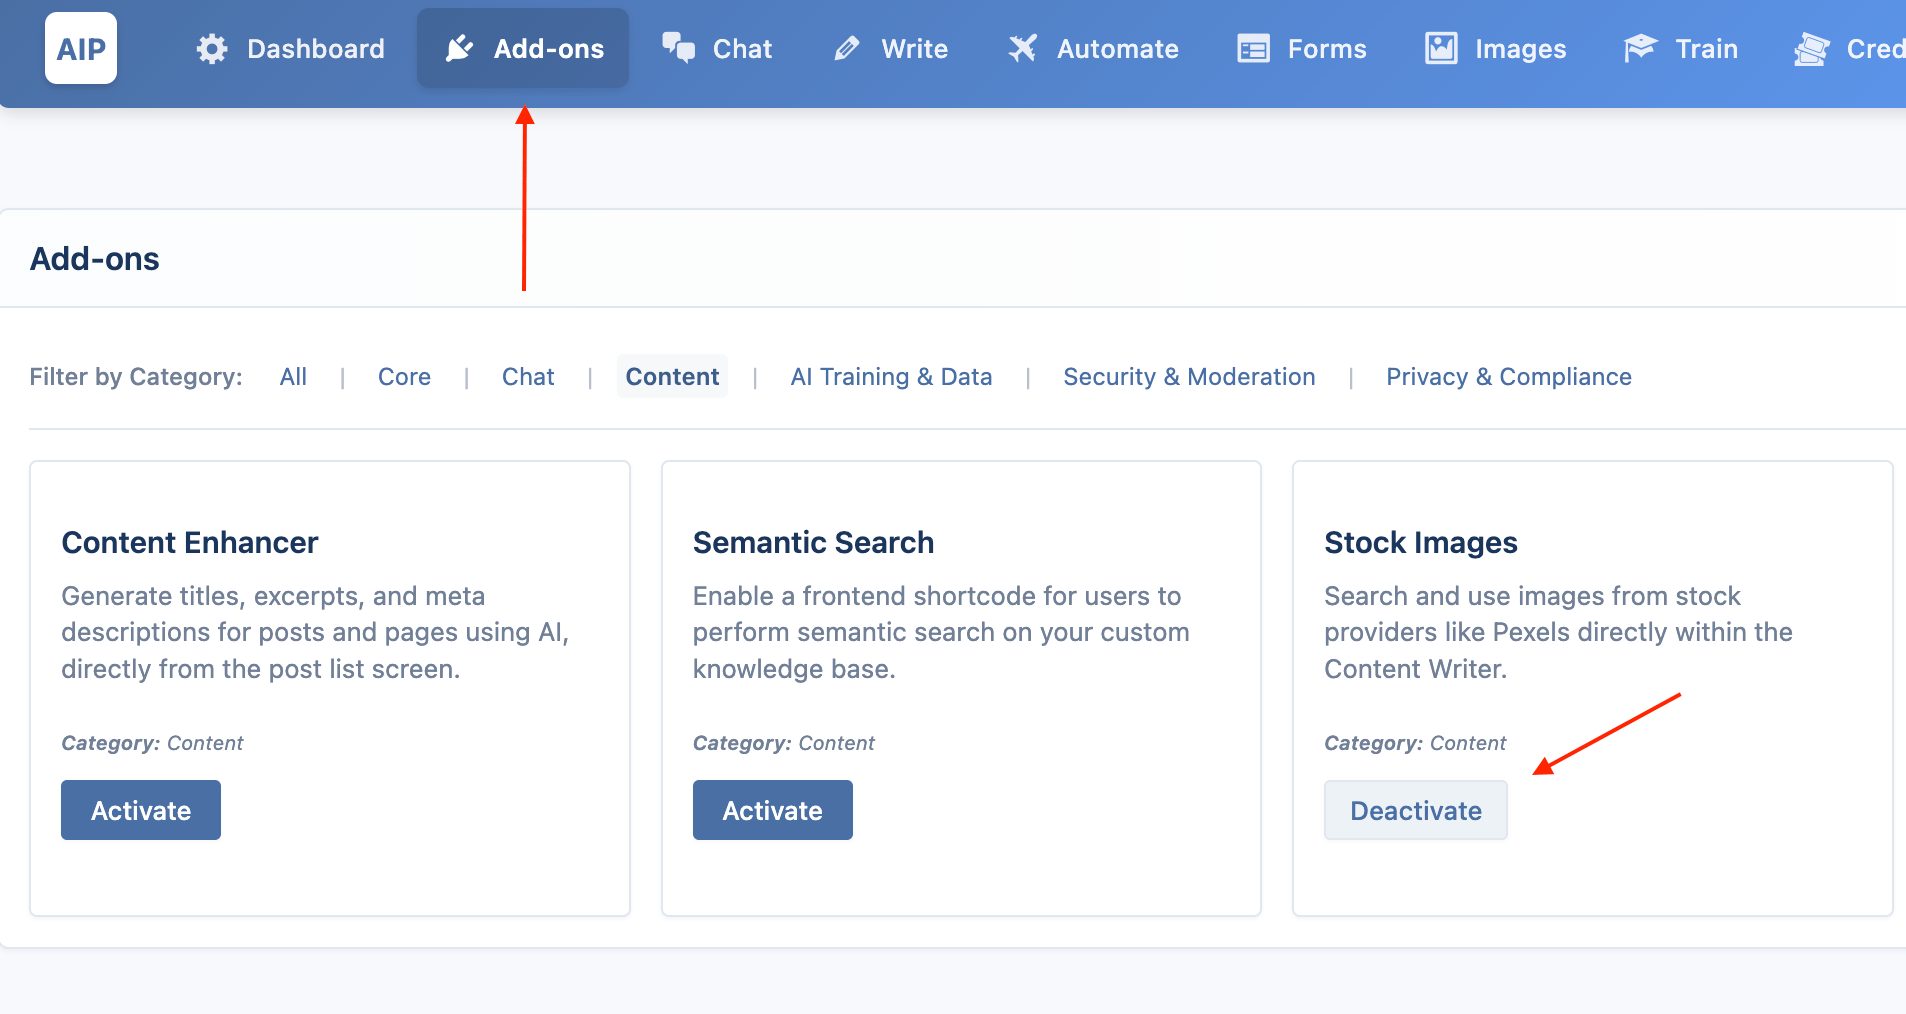
- Go to AIP > Add-ons and enable the Stock Images addon.
- Go to AIP > Dashboard > Integrations and enter your Pexels API key.
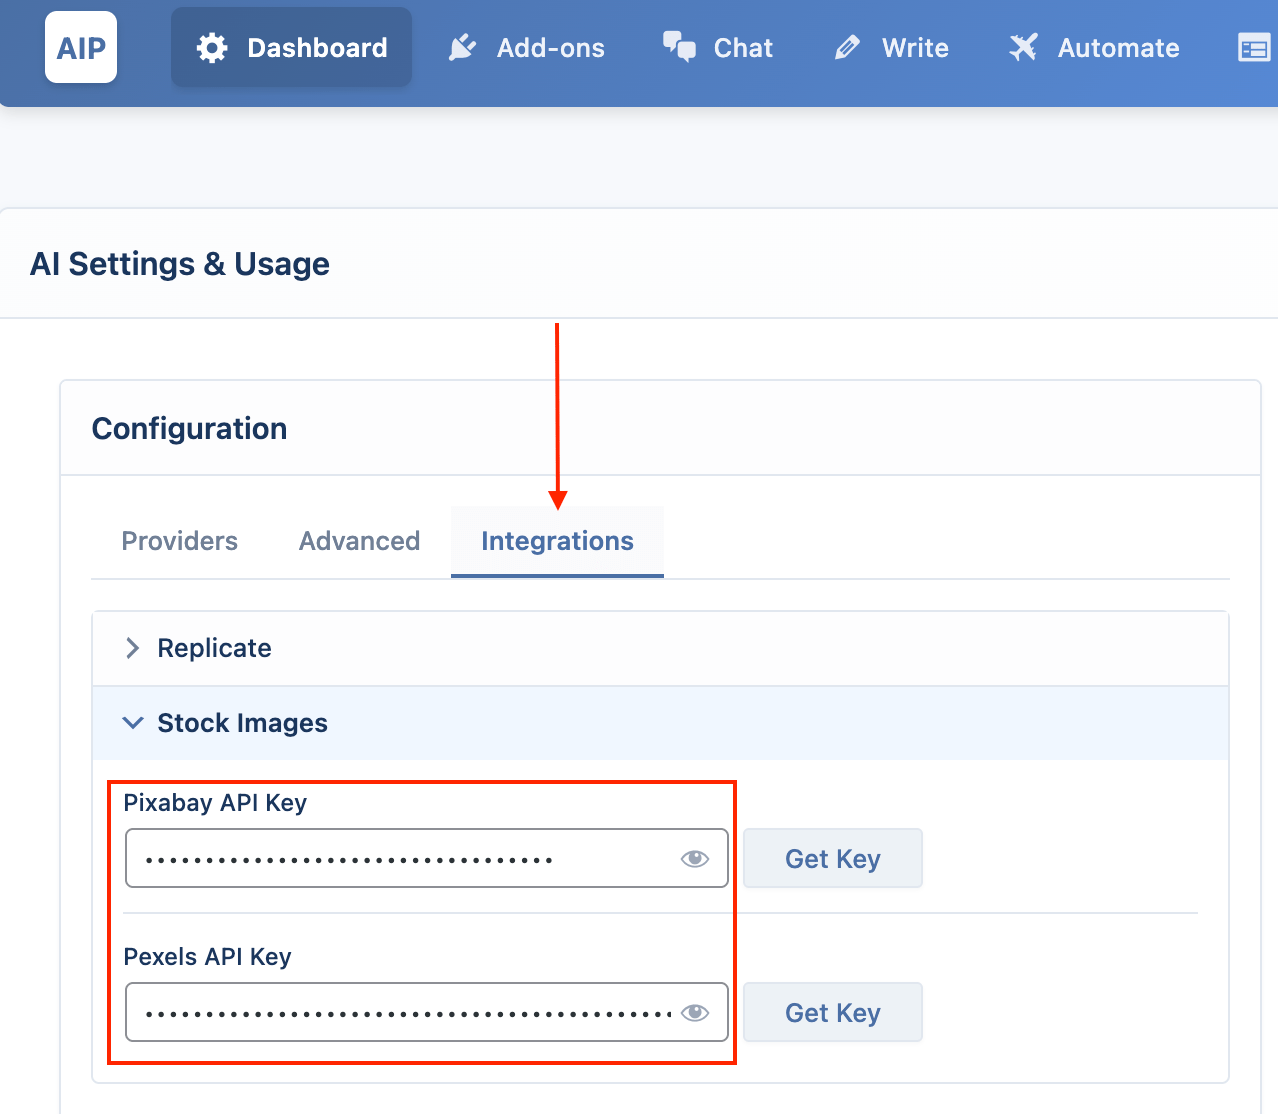
When you select Pexels as the provider, a new set of options appears:
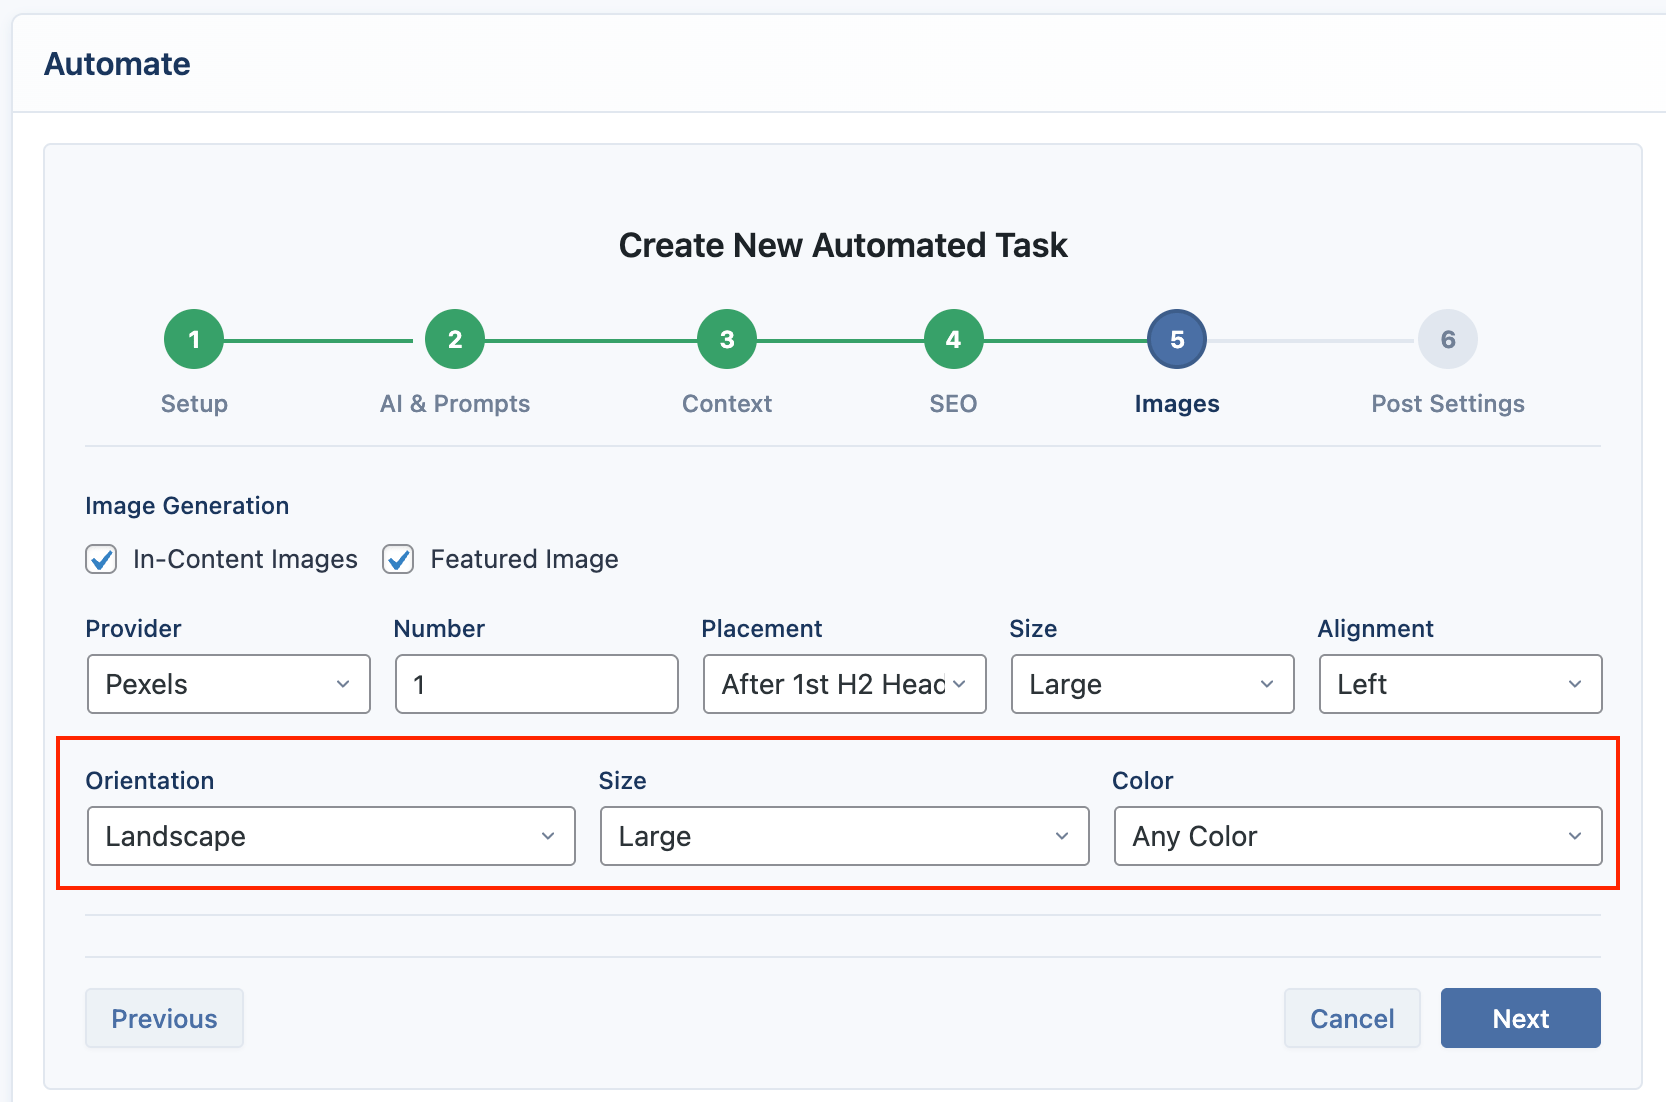
- Orientation: Filter images by layout (Landscape, Portrait, Square).
- Size: Filter images by general size (Large, Medium, Small).
- Color: Select a dominant color to filter the search results.
Pixabay
Pixabay is another excellent source for free stock photos that can be integrated directly into your workflow.
- Go to AIP > Add-ons and enable the Stock Images addon (if not already enabled).

- Go to AIP > Dashboard > Integrations and enter your Pixabay API key.

When you select Pixabay as the provider, you can use the following filters:
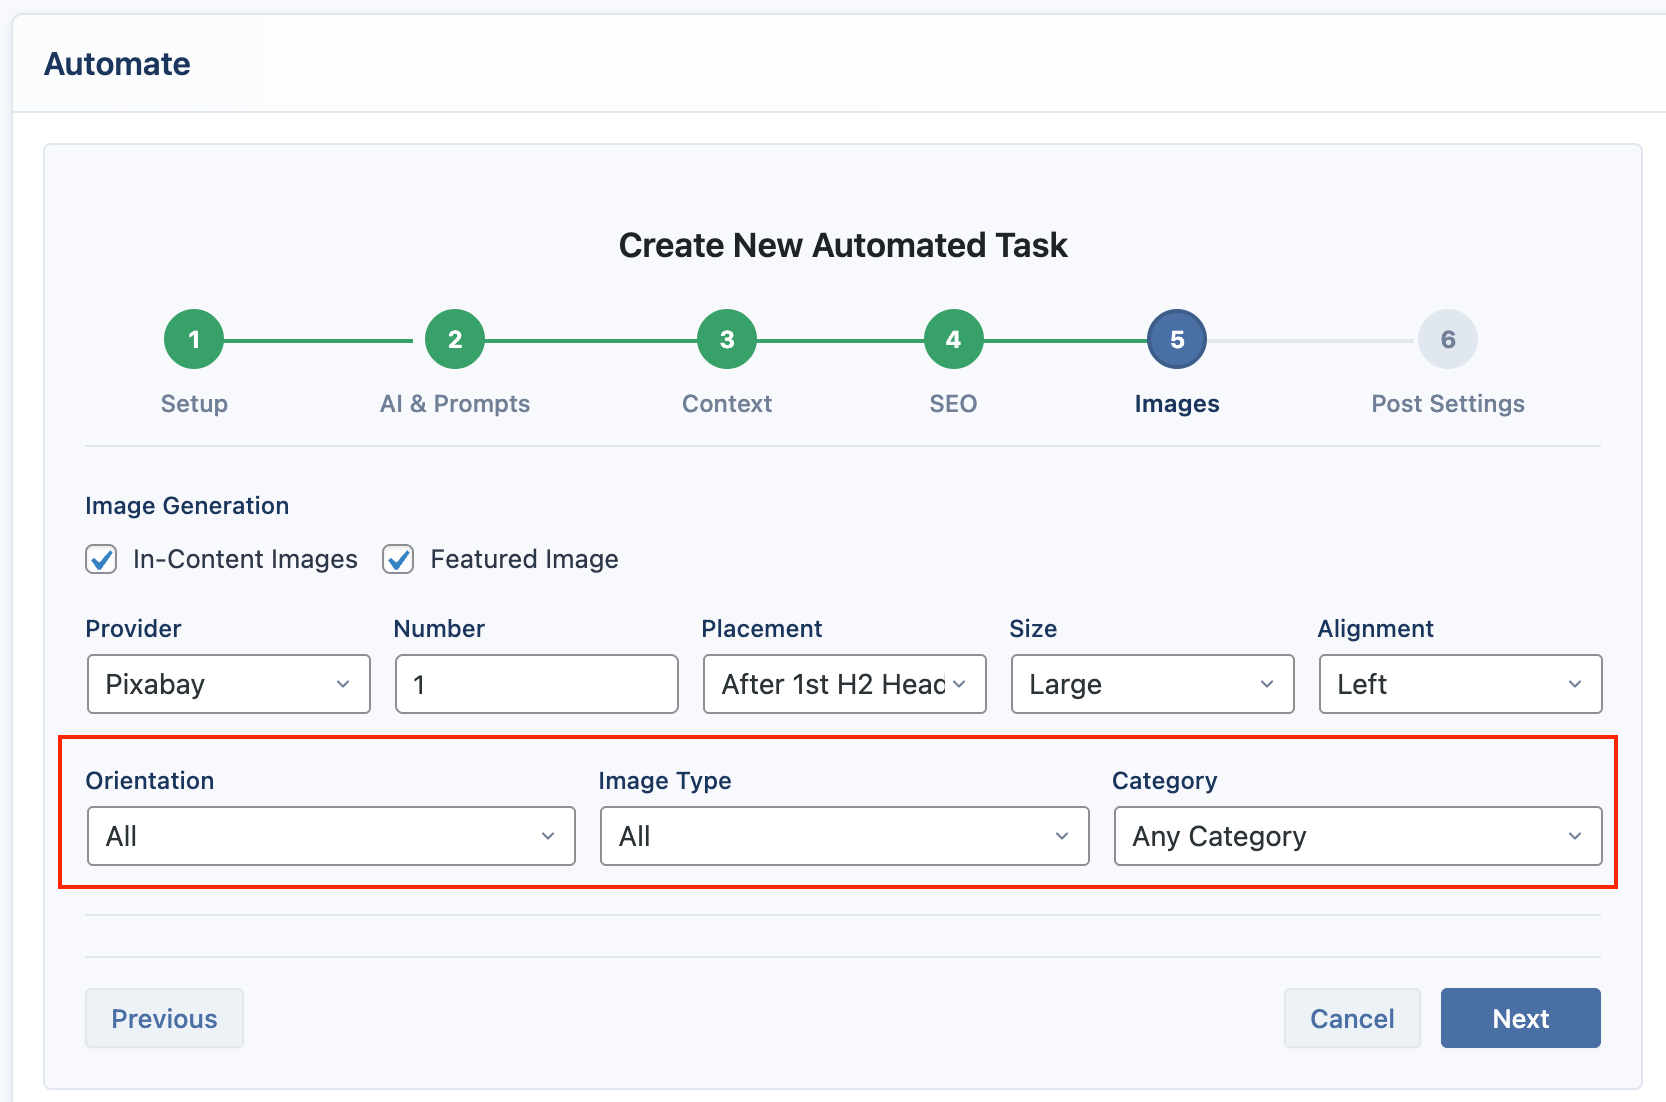
- Orientation: Choose between
horizontalorverticallayouts. - Image Type: Filter by
photo,illustration, orvector. - Category: Narrow your search to a specific category, such as
nature,business, ortravel.
Image Prompts
- Prompts: Provide an Image Prompt for in-content images and an optional, separate Featured Image Prompt. You can use
{topic}and{keywords}placeholders.
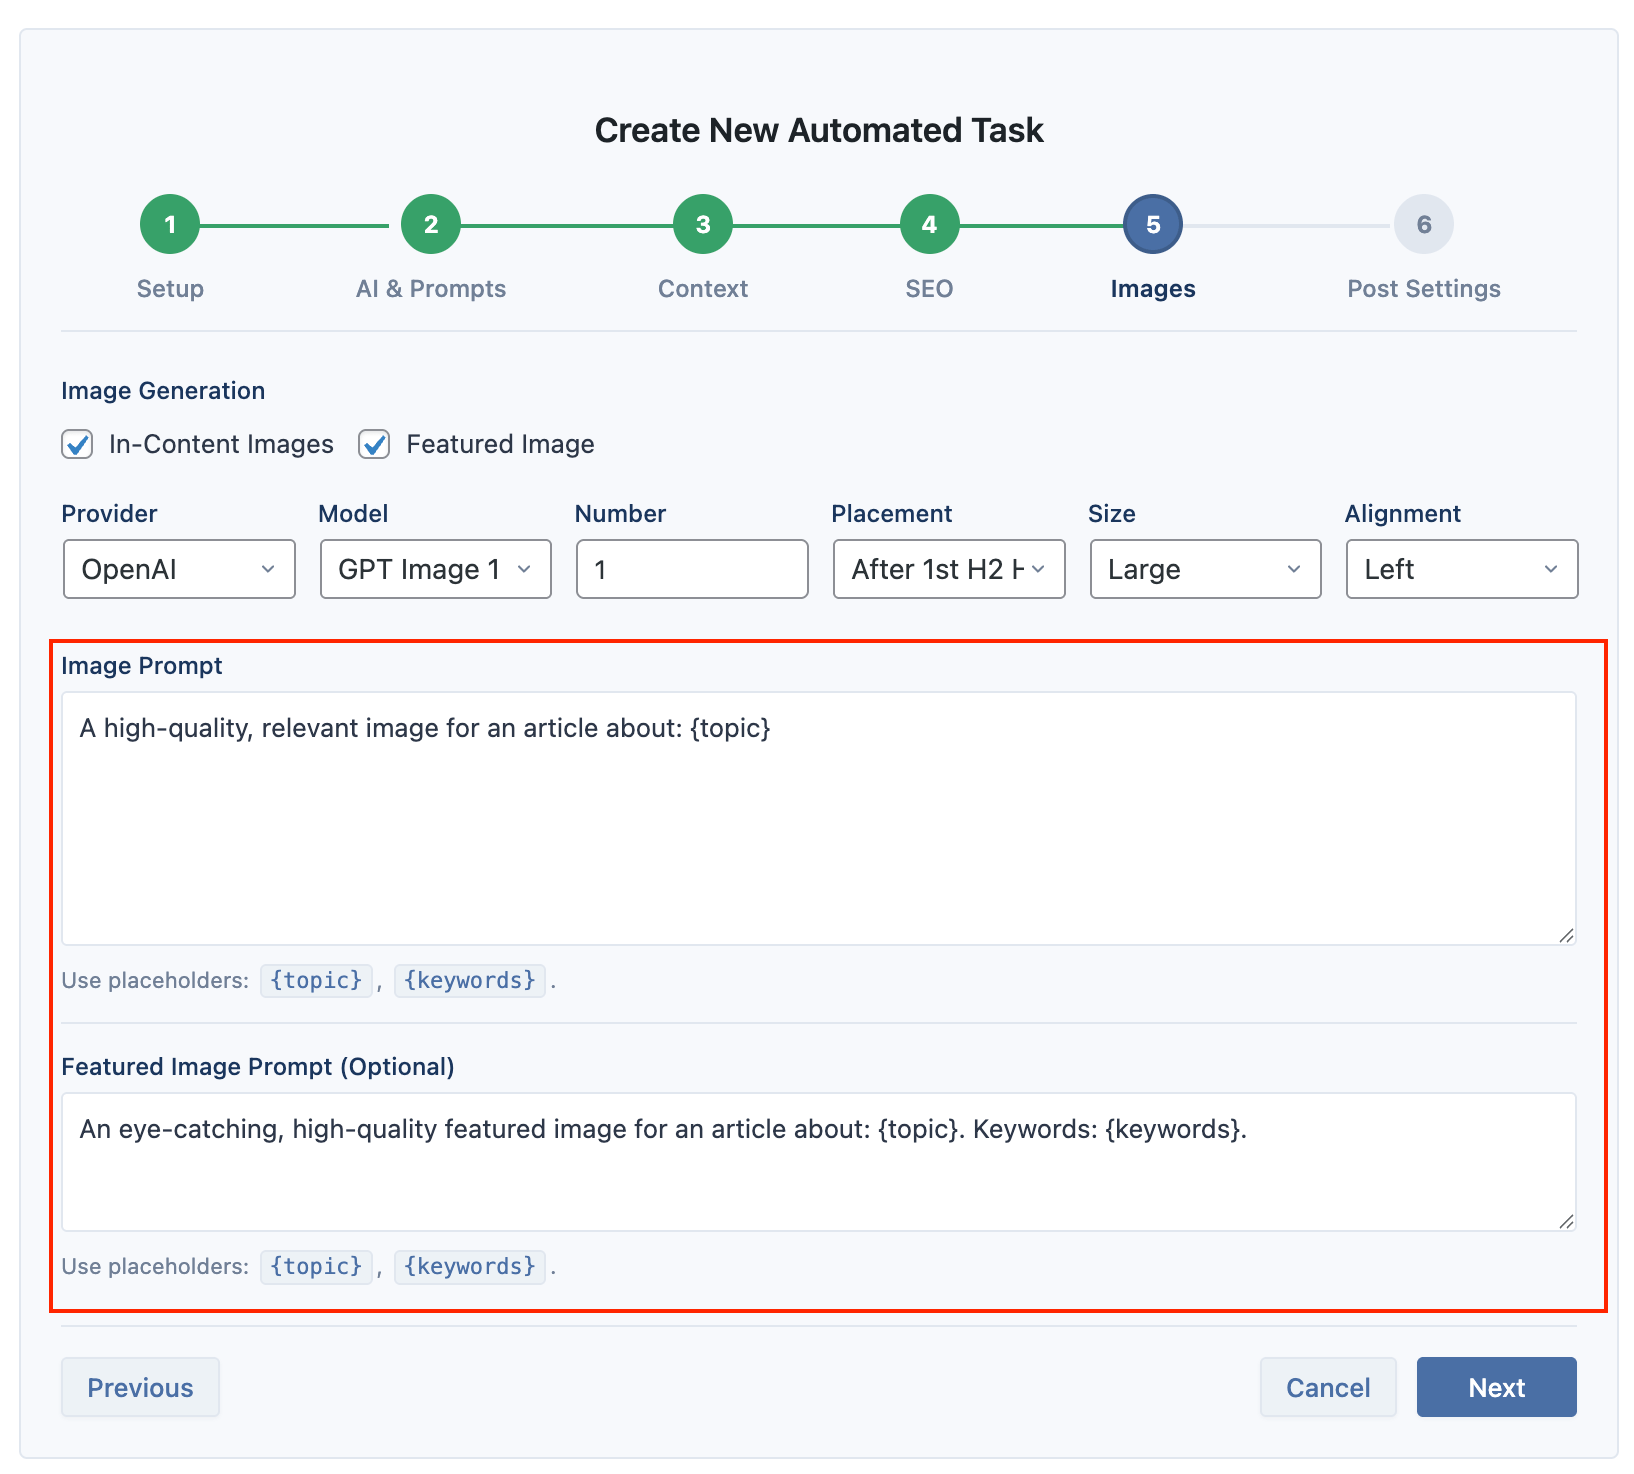
- Settings: Control the number of images, their placement within the content (e.g., after the first H2 heading), size, and alignment.
Post Settings
These settings control how the generated content is saved in your WordPress site.
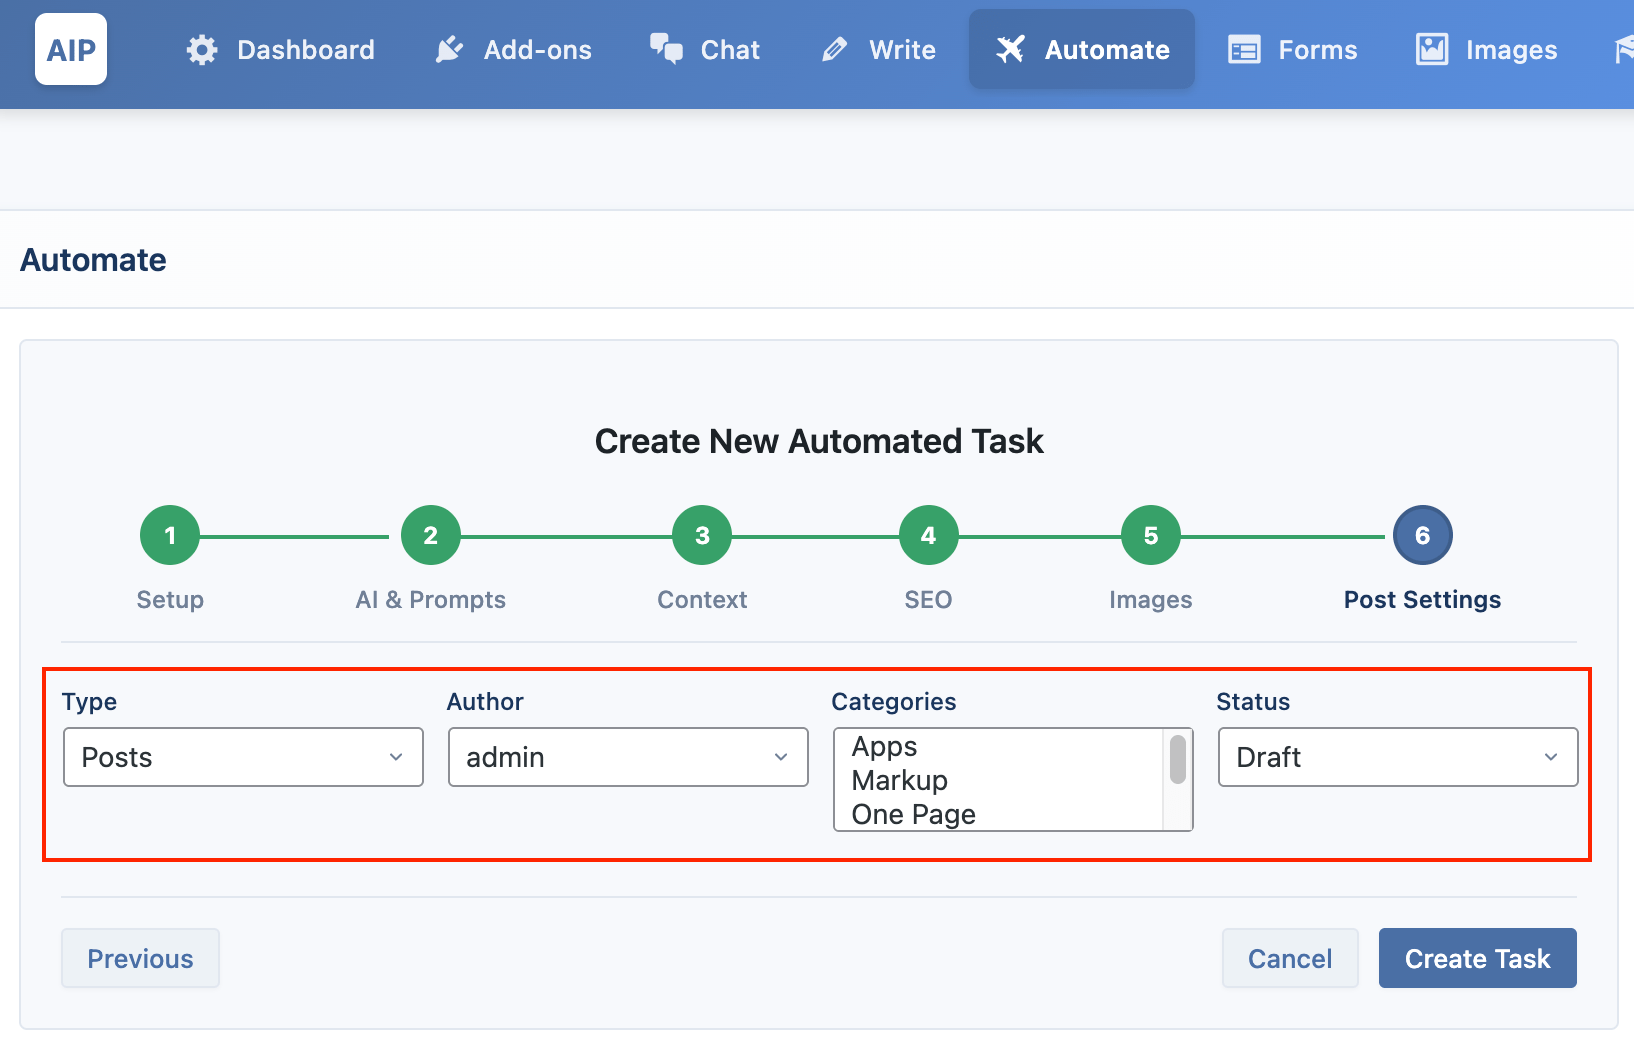
- Type: Choose whether to save the content as a
Post,Page, or other custom post type. - Author: Select the WordPress user who will be assigned as the author.
- Categories: Assign one or more categories to the post.
- Status & Publishing Schedule:
- Set the post status (
Draft,Publish,Pending,Private). - If you select
Publish, you can choose a scheduling strategy:
- Set the post status (
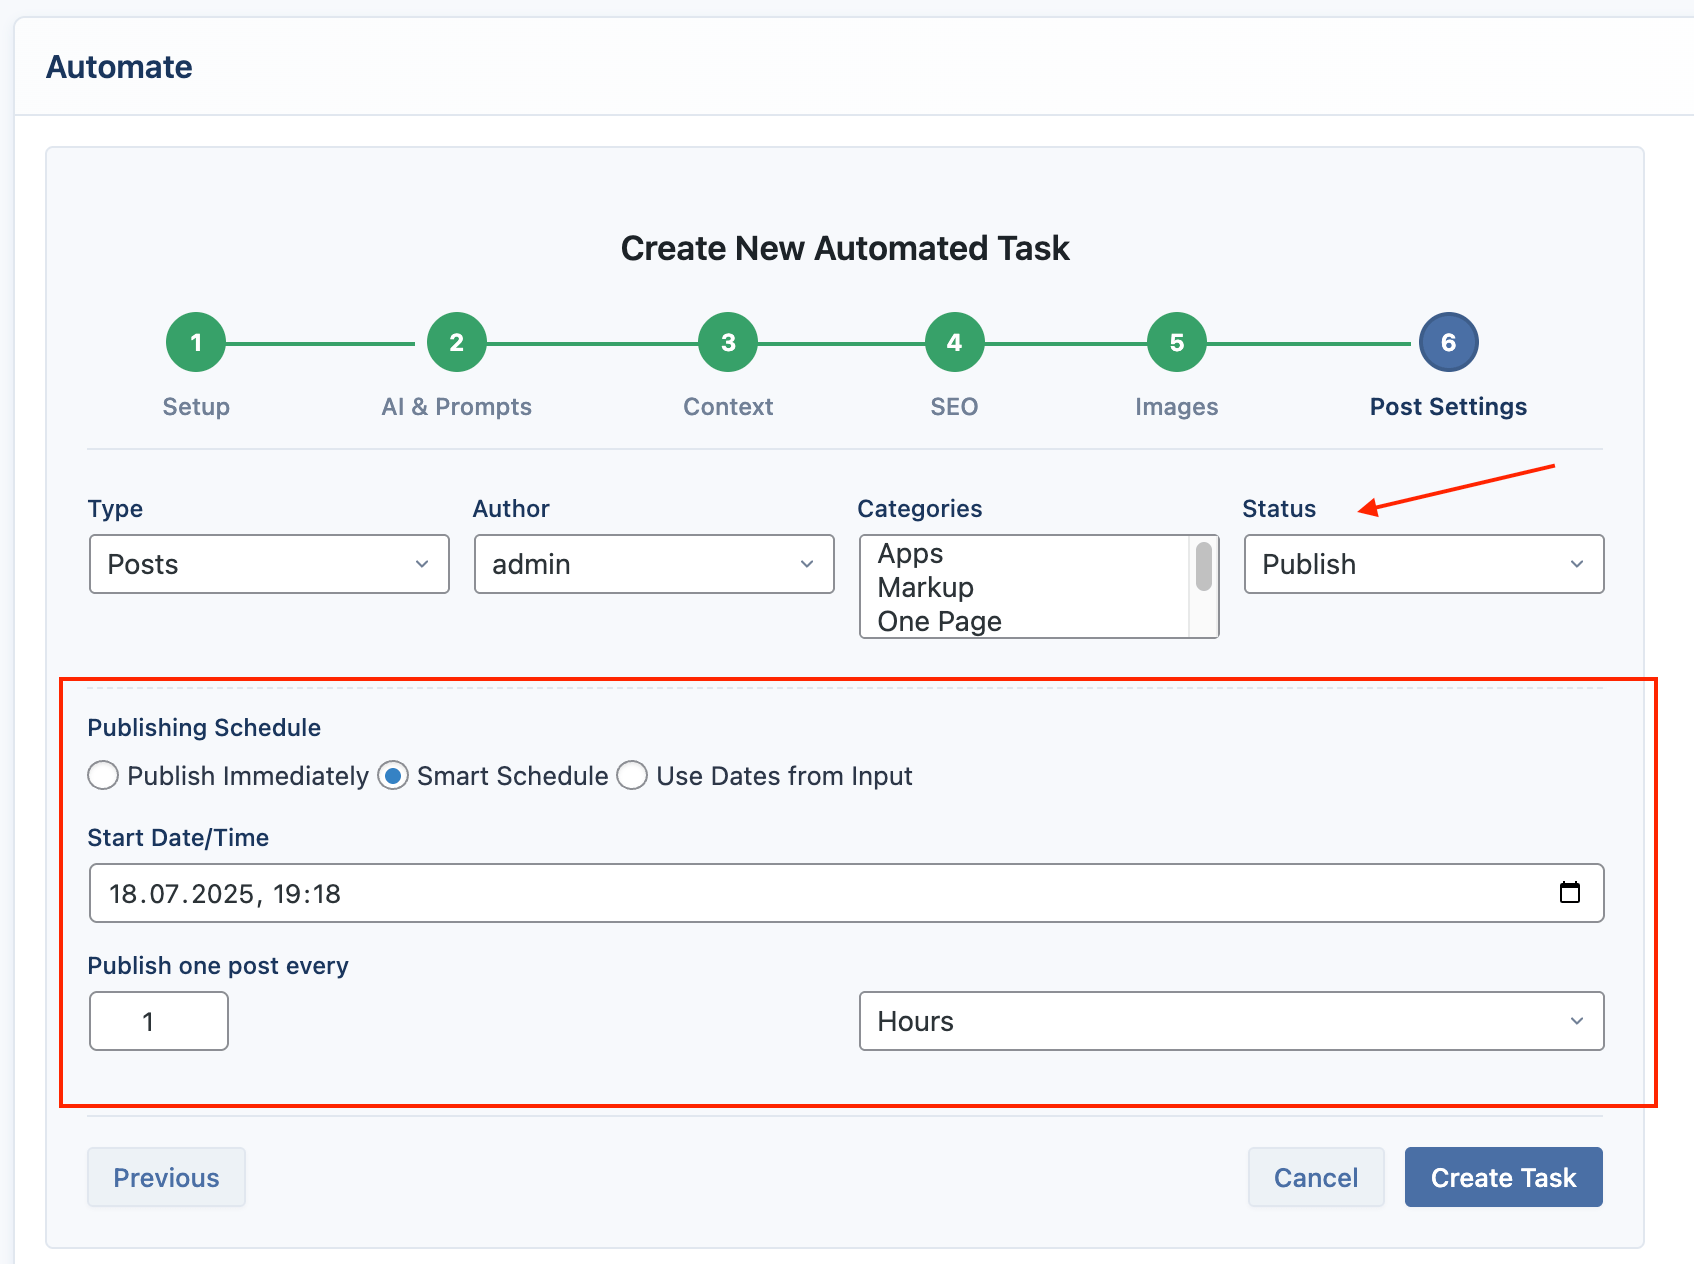
- Publish Immediately: The default behavior. Posts will be published as soon as they are generated.
- Smart Schedule: Automatically stagger the publication of generated posts. Set a Start Date/Time and an Interval (e.g., publish one post every 2 hours). This is ideal for maintaining a consistent content flow.
- Use Dates from Input: Use a specific date and time from your input source (List, CSV, or Google Sheets). This allows for precise scheduling of each individual article.
Once you have configured all the steps, click Create Task. The system will add your topics to the queue and begin generating content according to your schedule.