Create / Edit Bot
You can deploy chatbots either as a shortcode or as a widget.
Follow the steps below to create or edit a bot.
Creating a Shortcode
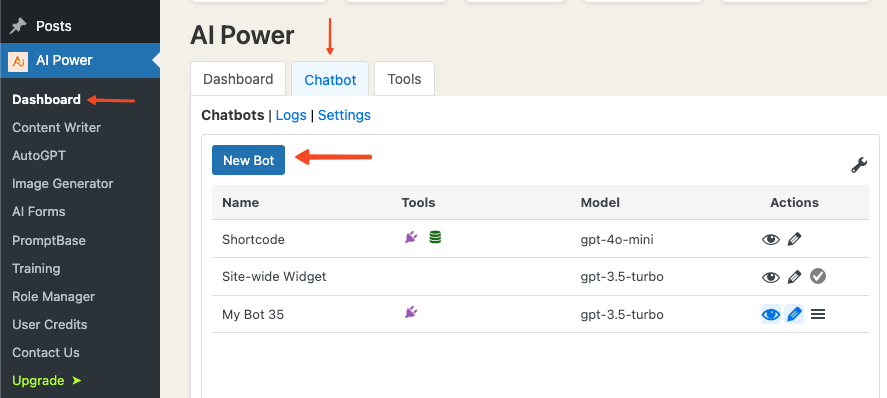
- Go to the Dashboard - Chatbot tab.
- Click the Create New Bot button.
- A shortcode will be automatically generated at the top of the page.
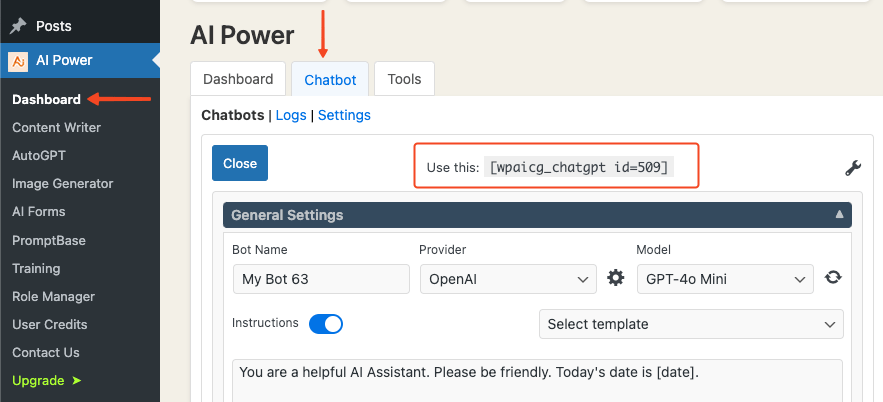
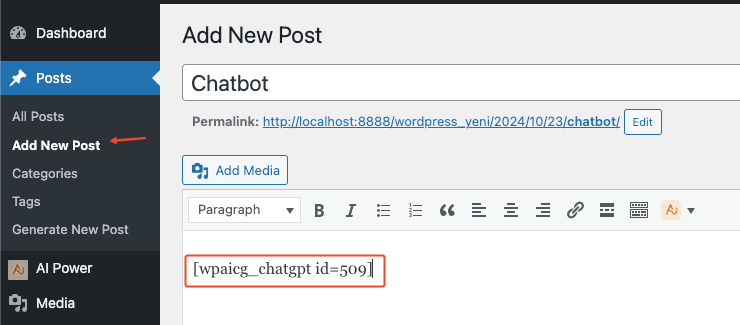
- Copy the shortcode and insert it into your desired pages.
Creating a Widget
Site-wide Widget
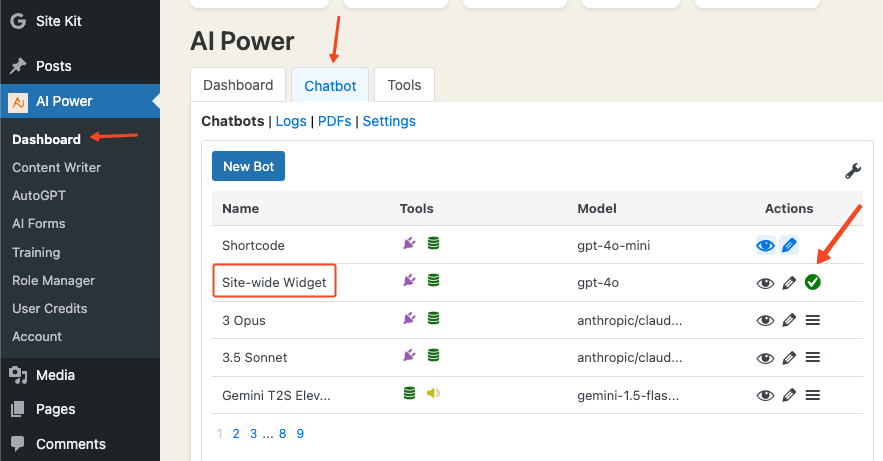
- Go to the Dashboard - Chatbot tab.
- You will see a Site-wide Widget option with a toggle next to the Edit button.
- Toggle the switch to activate or deactivate the widget across the entire site.
Page-Specific Widget
To create a widget for specific pages:
- Turn off the Site-Wide Widget.
- Click the Create New Bot button.

- Under General Settings, find the Bot Type radio group.
- Change the bot type from Shortcode to Widget.
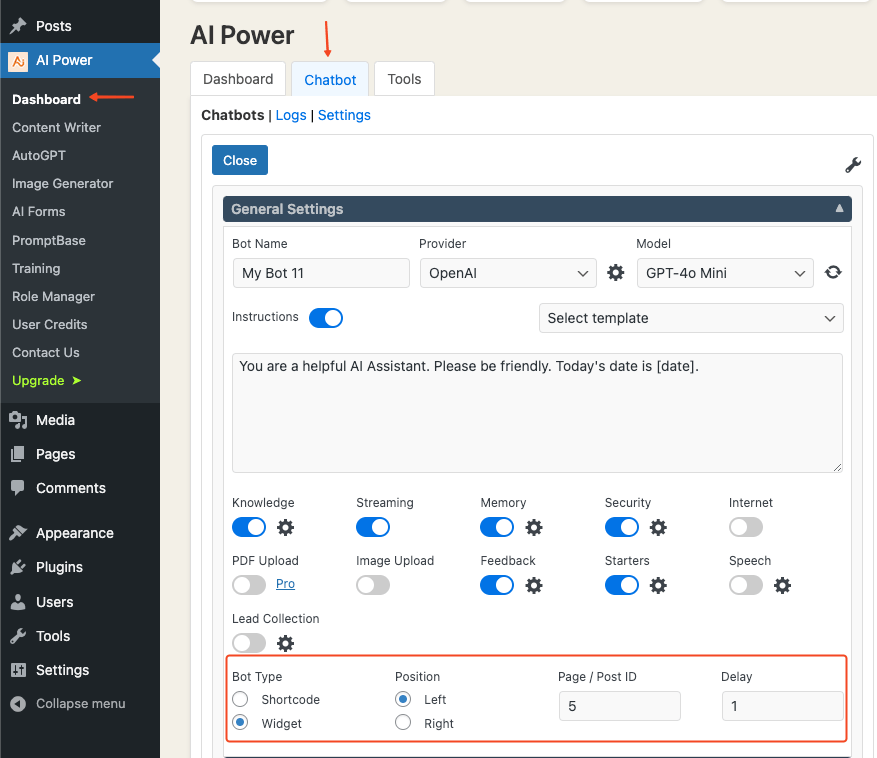
- Three additional fields will appear:
- Position: Choose whether the widget will appear on the bottom left or right of the screen.
- Page / Post ID: Enter the IDs of the pages or posts where you want the widget to appear, separated by commas.
- Delay: Set the delay time in seconds (e.g., enter "5" to automatically show the widget after 5 seconds).
Editing an Existing Bot
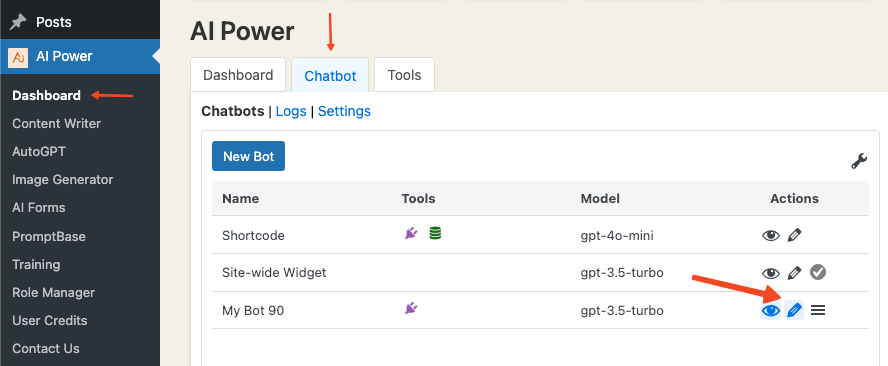
- Go to the Dashboard - Chatbot tab.
- Find the bot you want to edit and click the Edit button to modify its settings.
Other Actions
In the Dashboard - Chatbot tab, you will find additional actions for managing your chatbots.
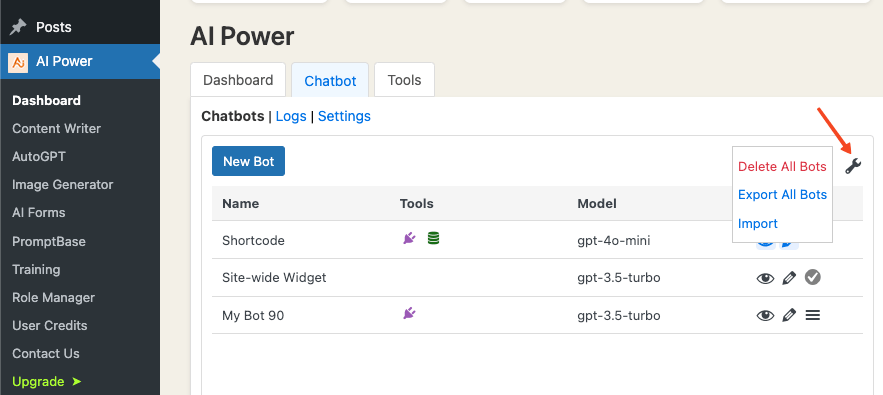
- Above the bot list, there are three options accessible by clicking the Settings icon on the right:
- Delete All Bots: Remove all chatbots in one action.
- Export All Bots: Download a file containing all your chatbot configurations.
- Import: Upload a file to import chatbot configurations.
In the Actions column of the bot table, you have the following options for each bot:
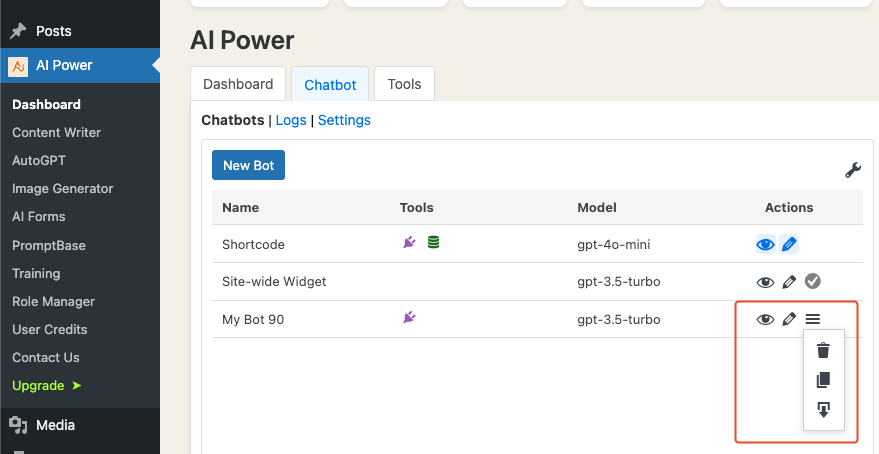
- Eye Icon: Preview the chatbot.
- Trash Icon: Delete that specific bot.
- Duplicate Icon: Clone the bot, creating a copy with the same settings.
- Export Icon: Export that specific bot's configuration.